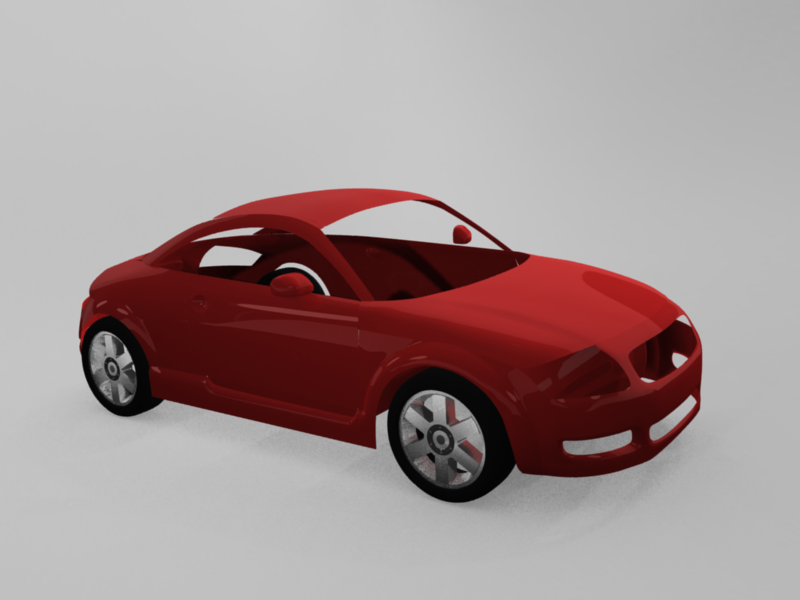
An Audi TT. What is the best way to make subsurfed corners sharp? Right now I am using edgeloops and dragging them over, but sometimes I end up with dark edges, sometimes light edges. Also, I need some advice on lighting. I am currently using 3 spot lamps.

Hey man, nice car. Now as for the sharp edges, yes use edje loops, but in order for them to be most effective you have to have the best topology possible. There was a car modeling workshop that just finished a couple of days ago, and there where some good wireframe screenshots/renders, you can probably learn something from there so check it out here: http://blenderartists.org/forum/showthread.php?t=201189
As for lighting and presentation, check these tutorials out.
Rendering an Infinite Ground Plane: http://vimeo.com/8107842
3PT Lighting Rig: http://vimeo.com/7171194
And maybe this one will help too…
Rendering Solid Wireframes in Blender: http://vimeo.com/5659666
Good luck mate!
I had been keeping an eye on the car modeling workshop since it started and started this to post there, but I had a lot of homework and got almost nothing done on it. When it ended on the 19th, I only had the front done. Thanks for the links though, I’ll check them out later.
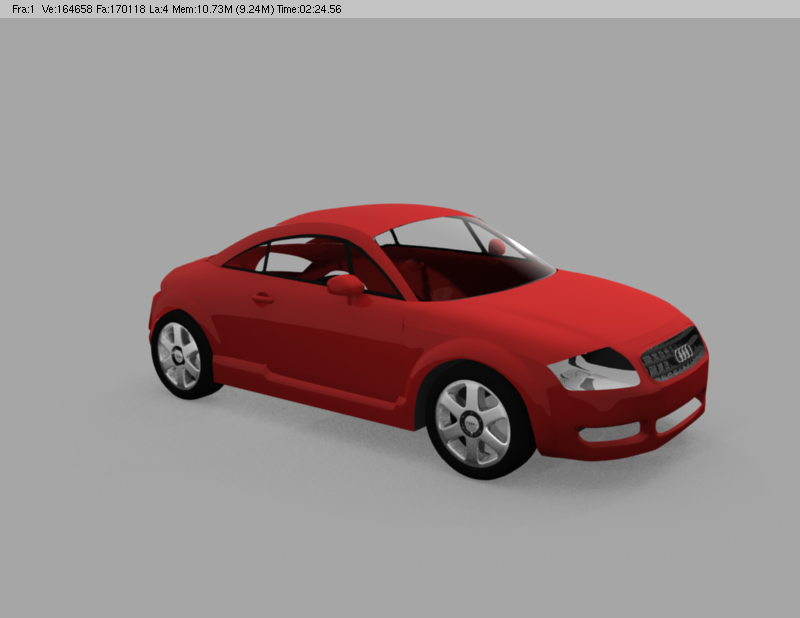
I changed my lighting setup and used the infinite ground plane and here are the results. The first one is just with no specular, second has a slight mirror material on it.
Attachments


Lighting looks much better, glad the tutorials helped 
Now for the details!!!
So I’ve been having this problem where blender will freeze Ubuntu completely and require me to hold the power button to restart, but it only happens when scaling or rotating. That has really made things difficult and so I haven’t really been working on this too much. The wheels alone required maybe 3 restarts! Anyways, here’s what I’ve got:
Attachments
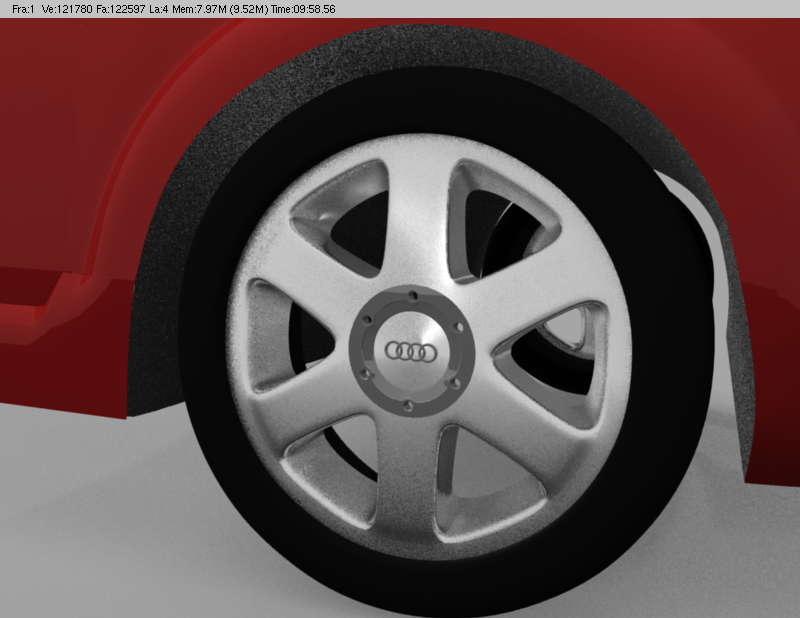
I’ve been having a small problem with Ubuntu recently. By small i mean it wouldn’t boot!  All is good now, (Full reinstall of 10.04), and luckily I had this model on my Vista partition. Anyways, here’s an updated wheel closeup. I fixed the gray circle in the middle of the hubcap. I still don’t know what it was…
  Anyways, here it is:
Attachments

Your wheel is made slightly wrong…
here is a reference image
http://img3.imageshack.us/img3/5655/aly58728u.jpg
The rounding is not that steep, and the rims are not that sharp in general…add some roundness and bevel…
I changed the wheel up a bit, I hope it’s better now. http://i578.photobucket.com/albums/ss229/tlehmann1996/AudiTTWheel2.png
(Couldn’t get attachments to work, BA is going slow.)

One way to have creases in subsurf corners is to go into edit mode, select the vertices where you want the crease, press “N” to bring up the side tool bar, near the top there is an option called “Mean Crease”. Set this to “1” or a high value and you’ll get a crease. Hope this helps
The crease size doesn’t really work… I looked at a few higher-res images and discovered that the grill was made incorrectly, so I fixed that up a bit (still needs some scaling and material changes.) How could I make the honeycomb style fog light fillers as shown here: http://auditts.org/wp-content/uploads/2009/11/audi-tt-coupe.jpg Also, I thought I’d post an image of the rear of the car.
Attachments

Nice progress so far.
I can’t get the ‘crease’ setting to work as well as two edge loops do… not sure if I’m doing something wrong or what, but the most reliable way I’ve found to get a good hard crease in SubSurf is edge loops.
I think a quick way to do the honeycomb would be to make one small section and array modify on the Z axis to get the height you need, then draw a path on the shape of the curve of the bumper and put a curve modifier on the single upright piece so it will array along the curve like making a tire.
That’s how I would attempt it at least, but I’m not an expert so let me know if it works… LOL
Later,
Joe
I cannot figure out how to use the array and curve modifiers to make this. This is what happens.
Attachments

You are on the right track, just add another array modifier and make it repeat in the z direction now. Not sure why you would need a curve…
Z offset doesn’t do anything for some reason. X and Y do, but Z doesn’t.
Here you go, i made it for ya, 2 ways…whatever suits you…i suggest making this on your own to fit the scale…
Attachments
HoneyComb.blend (133 KB)
Here’s what I was talking about. I used DDD’s honeycomb rather than making another but you should get the idea from here.
Later,
Joe

Attachments
Curved_honeycomb.blend (324 KB)
I took a look at the setting you both used to make my own, and here is a front view. I also added some interior “stuff” to the grills and fog light gaps. It’s the same material that is used in the wheel wells.
Attachments

That looks pretty good, I would fill in the outer row of honeycomb on the perimeter to match the real part and hide the view of the bumper on the inside.
Later,
Joe