Add to that, how to make a rigged character work with an asset management system? I seem to have had success but unsure what I may have deleted that was important. That is to say, all the stuff Kindi has noted, I just deleted.
What’s a better workflow?
For some reason the rig is not being exported for me to unity. I select the rig (although I don’t see the reference bones, only the generated control points) and use the autorig exporter.
The documents say:
Once the character is rigged and skinned, select its armature and go to File > Export > Auto-Rig Pro FBX
However if I only select the armature, nothing shows up inside Unity. If I select the mesh + armature (which looks like only the control bones, not reference bones) only the mesh imports into unity.
@Luka38 My guess is that the feet bones of the mocap skeleton are inverted (rest pose rotated upside down compared to animation pose), have you checked the bones axes? If this is the case, click Redefine Rest Pose and rotate upside down the feet bone.
If that doesn’t help, there may be something unexpected, please file a bug report:
http://lucky3d.fr/auto-rig-pro/doc/bug_report.html
@UnCommonGrafx Thanks for the feedback! Not sure what is exactly the problem with the twist bone, but you can adjust it with the controller in circled shapes arrows (near the shoulder). In next version, there will also be a twist tweak setting for both arm and thigh bones.
@Kevin_Cole Only plain Actions are exported to Fbx, the NLA features are not taken into account.
http://lucky3d.fr/auto-rig-pro/doc/ge_export_doc.html#animations
@kindi Pease see instructions here to link or append the rig collection:
http://lucky3d.fr/auto-rig-pro/doc/auto_rig.html#appending-linking-in-a-scene
@Gmih That is very surprising, unless something broke accidentally it sounds like a local issue, no other users reported such a problem so far. Please make sure to follow the documentation. If that doesn’t help, you can file a bug report:
http://lucky3d.fr/auto-rig-pro/doc/bug_report.html
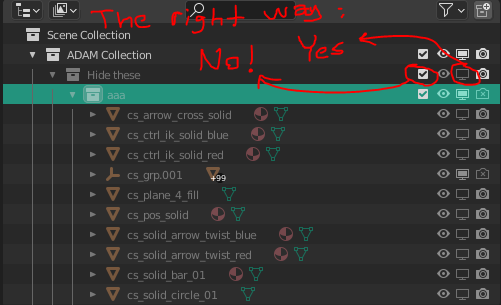
Ah! Thanks . I just understand why i was wrong. Because i was unchecking the box for hiding (view layer thing). But i should click “disable in viewports”. Now it’s ok. I want to try this in the new asset browser.
(And, My second question was, how can delete picker menu easily?)
Not sure the Quick-rig addon is discussed here but couldn’t find a separate topic for it.
Purchased the add-on and it’s a real timesaver, however there are issues with fingers bending totally bonkers ways when using the finger-grasp function and know i have used this before when rigging in ARP … I’m guessing it’s a bone rotation issue but it would be cool to be able to reset this prior to applying the setup.
@kindi Ah ok, I see. Indeed all these levels to hide items can be confusing at some point! Especially the eye (simple hide) and monitor icons (viewport hide) can get tricky to understand. As far as I know, viewport hiding is used to totally exclude objects from the scene evaluation. If it’s hidden with the eye icon, the object is hidden but still evaluated in the scene (in case of high poly meshes for exemple, the scene will still be laggy even if it’s hidden). And excluding from the view layer (only for collections) is useful when dealing with multiple view layers (mainly for rendering purposes?).
The picker can be deleted with the ‘X’ button next to ‘Add Picker’:
http://lucky3d.fr/auto-rig-pro/doc/auto_rig.html#remove
@HokusPokus
There are two possible reasons for this:
-
The hand and finger bones have different axes orientation in the source armature. While Quick Rig only deals with skeleton with hand and finger bones having same axes, it leads to this issue. In the “arm” settings of Quick Rig, check the “Hand and Fingers Up Axis” setting. By default, when adding the limb in the list, it will automatically try to set this axis according to the hand up axis. If you change it to be compliant with the fingers real up axis, it will fix the problem.
-
When thumb bones have non-physically based axes (after ‘PBR’ for physically based rendering, let’s create a new ‘PBA’ acronym
 ) For example, if the Z axis is pointing upward for each finger, it should point sideward for the thumb (at least for typical human fingers), since the thumb is twisted compared to other fingers. The Grasp setting only rotates bones along one axes for all fingers. Then this leads to this problem.
Thanks Lucas. I managed to edit reference bones and it was pretty easy to fix.
Feature request:
-
Looking at the finger grasp function: Would it be possible to add a “ratio-slider” or value that bends the 1’st phalanx on each finger ever so slightly while using the regular “Finger grasp” slider, to mimic how they bend in real life?
-
Button switches to turn on/off controllers from the viewport like in Rigify - I know i can hide them manually but it would be nice with a more readily available setting for it
Quick Rig problem:
I have a few new mixamo rigs that fails to re-map by the built-in mappings but i guess this is probably due to the namingscheme of the skeletons i have, but is there a default folder for the current schemes so i could save custom mappings into the same location? I mean the location for the default mappings in the drop-downlist?
If this is not possible: perhaps in the Add-on setup adding an option to set a save location filepath to find them easily.
Cheers
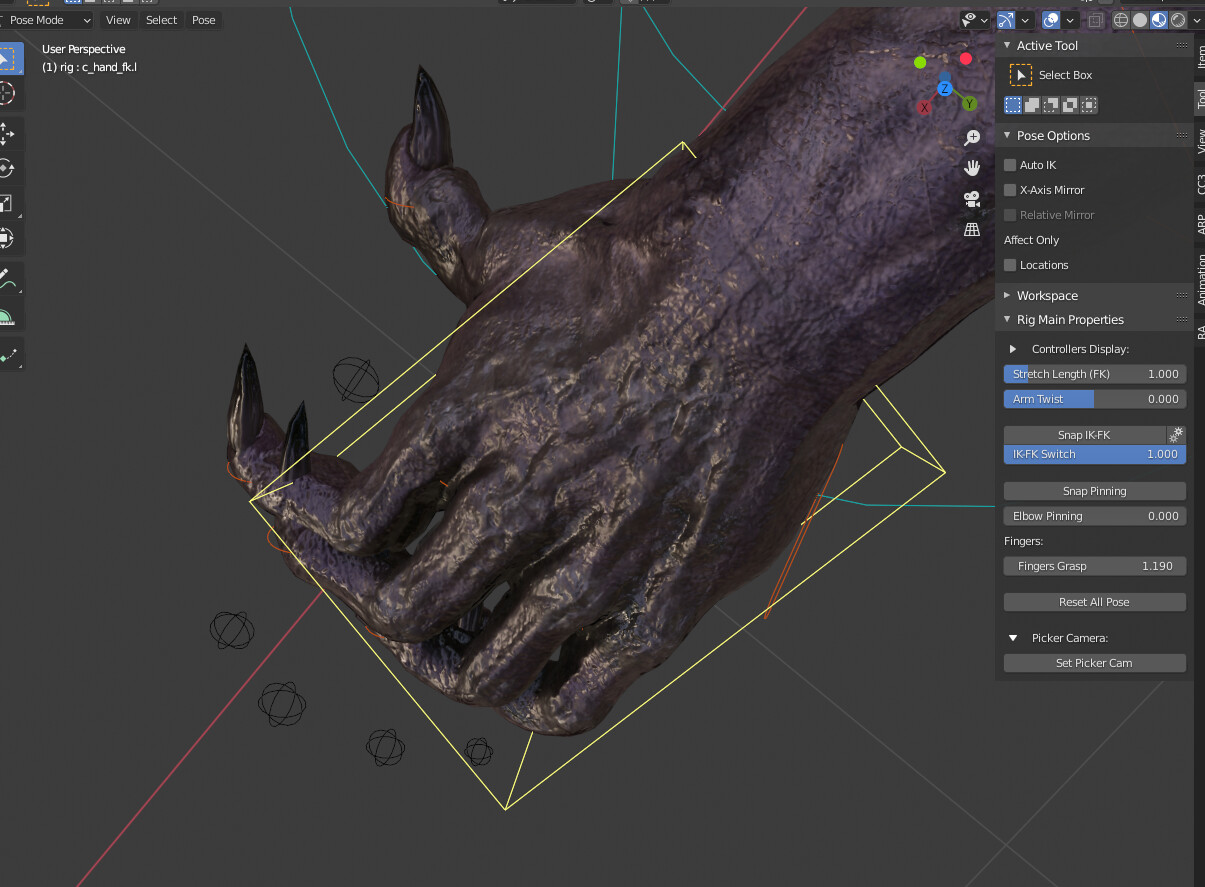
Sorry, Brand new to this add on, but after my Human rig is set up, are there/where would i find the option to switch from IK to FK on the legs and arms?
I don’t seem to see this in the documentation so i wasnt sure if that was an option or not.
Thanks
Press “N” to open the side bar and look for the tab “Tool”
1 Like
When exporting into unity, its calling the C_traj the hips, but isnt this the root bone on the ground? my animations are being distored when i lay my character on the ground, however only after exported to unity. What could cause this?
Wow! That was Wildly simple!
I had a weird assumption that everything to do with the rig would be listed under the ARP tab
@HokusPokus Thanks for the feedback!
-
That’s interesting but I’m not sure adding more settings would really add value, for this kind of small tweaks. From my experience, generally such automatism are disabled by animators because they prefer to have full control over the pose manually, automatic features tend to confuse them when they need to correct poses, edit keyframes… But if you have solid arguments to support this, I’d be glad to hear your point of view.
-
I’m glad to mention this is currently in development! The new Rig Layer feature is an open tool made to easily control the visibility of the rig and objects elements (clothes, props…).
For now the layers include armature layers, objects and collection, but adding individual bones could be added as well. -
For now unfortunately it’s not possible to customize the built-in presets list easily, they are located in the addon folder but the list won’t update if new presets are added manually. This is on the Todo list.
1 Like
@Razc
By default, the rig settings used by animators/end users are not in the same “ARP” panel, because this panel is primarily dedicated to rigging/building tools only (ideally, all rig settings used by animators should be in the same panel, regardless of the rigging addon used (Rigify, Auto-Rig Pro, Blenrig).
However this can be freely modified, in the User Preferences window, go to the Addons tab, look for Auto-Rig Pro, and in the Preferences section, change “Tool Interface Tab” to any other tab name.
@Kevin_Cole
The root node of the skeleton should be named “root” actually.
There may be various reasons for this problem, for dedicated support please see here:
http://lucky3d.fr/auto-rig-pro/doc/bug_report.html