Oh. I forgot to mention that resizing the mapped planes is much friendlier than adjusting the numbers in the background properties pannel.
Hi, would you mind detailing the steps you go through doing this ? I think I stumbled across this on another thread, but became a bit frustrated with it. While the background image method has problems, or if you like, an alternative interpretation ( ! ), it at least does display the pixel dimensions of your image. With your proposed method, I image you would need to view the image in another app, or use the background image initially, to get the relative dimensions of the image for sizing the plane, and of course the absolute size if you plan on using more than one image. I think it would be useful for anyone else coming across this thread if there was an easy instruction set here !
I think you are right in that this is the best way to go - it would also allow you to have isometric views with all three planes displayed.
cheers, Wolf
The Blender devs should have this thread shown to them. Maybe they could answer some of our questions.
I don’t understand what you are refering to here. I cannot see the pixel dimensions in the background image anymore than in the textured plane.
I will ty to describe my method.
The first thing I do when using rotoscope references is to use a paint application and make sure all the reference images are well aligned and on the same scale. That means possibly rotating the images to make sure all features are well aligned. I also make sure all images are of the same relative sizes. For instance, the front and side views images are both of the same height in pixels and all the features are at the same relative height in those images. The front and top view have the same width, etc. This first step makes aligning the rotoscopes much easier in the 3D application. It is a good idea to crop or extend the image widths and heights such that their corresponding world size correspond to round units. For instance. for a car front rotoscope. crop or extend the image so its total height and width correspond to 2 meters. So suppose the car width is 1.4 meter and the car width is 430 pixels on the rotoscope. The rotoscope canvas width should be cropped or extended to 430 / 1.4 * 2 = 614 pixels.
So now, the rotoscope images are all well prepared. In Blender, add a new plane mesh. Leave it at its default size for now. Open a UV Edit window and project the plane from the current view with a view that faces the plane. Rescale the mesh in the UV editor so it matches the border of the UV projection. Load the rotoscope in the UV Editor. Turn the render mode to “Textured” to see the result on the plane. Now, you know that the rotoscope was croped or extended to 2 meters by 2 meters so scale the plane to 2BU by 2BU. If the rotoscope was designed to be 2 meter by 3 meters, then you need to scale the plane to 2 BU by 3 BU (or any relative BU you elected). Once you did that to all your rotoscopes and have positioned them and oriented them, you automatically get precisely positioned references relative to one another. It would work just as well if you knew that your rotoscope image width corresponds to, say 1.753 meter and you rescaled the plane by 1.753 on X but I find round numbers much easier to position and align.
If you wanted to match the rotoscope to an already existing model, then after resizing all the rotoscoped planes to match their actual pixel width and height, once you rescaled one of the plane to match the rotoscope with the model, you take note of the scaling and apply the same scaling to the other rotoscoped planes.
I hope this explanation helps. This is much easier to match the rotoscopes this way than to adjust the background image scale and position properties especially when the scaling and position precisions falls in the 3rd decimal digits, which is often the case for my models. IMO, positioning and scaling the background image should be as simple as for any other objects in Blender. But even if it was, I find it extremely cumbersome to have all those windows open at all time just so I don’t loose the tedious positioning and scaling to the rotoscopes.
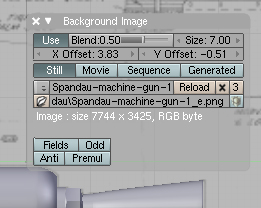
Thanks. I think that will be helpful to anyone who wants to try this method. I have attached a screenshot of what you see when you select view - background image. As you can see, towards the bottom of the panel it displays the image pixel dimensions. Regards,
Wolf
Attachments
OK. I see what you mean. I never really thought much about the pixel size information there. I don’t really care about the pixel size. What I’m really interested in is the World scale of the rotoscope. It could be 512 pixels wide or 12345 pixels wide for that matter but what I really need is to know that this represents, say, 10 meters wide in real world.
Yes, and I think that is because you dealing with the issue earlier on when you prepare your images, and having a real-world scaling factor decided at that time.
I’m not sure how you go about doing this, and I suspect that you will encounter more of “it’s working fine”. In some ways it is - I don’t like the way it works, but I can understand the alternative viewpoint. With what we’ve seen in this thread I think I have enough tools to work around the issue to my satisfaction though
Many of the Blender devs frequent this forum. But they don’t owe us any obligations or responsibilities. You have to take into account that Blender devs are doing their work on a voluntary basis. They do not get paid for doing their work and so their incentive for working on a feature instead of another is based on their own personal interests and nobody can blame them for that. They work on features that are challenging, cool, glamour, intriguing, bleeding edge technology or otherwise gratifying. Development takes a lot of time, effort and dedication so like everybody else here, they decide what they want to put all this effort on and it better be absorbingly interesting otherwise the project never gets finished.
I would not expect that you would accept to spend hours and hours modeling, texturing and lighting a scene that I find important if you did not think it important by yourself. However, if I offered to pay you for doing that, then you would probably consider it. The same idea apply to development effort. The rotoscope system have none of the above glamour attributes. So the only sure way to get a dev to work and improve the rotoscopes that you feel is important would be that you hire a dev on a contract basis and pay for the development. For like 15 years that I’m in that field, I never saw that happen.
Yes and no. I could just as well map whatever image I have on a plane and scale the plane so my the dimensions in the rotoscope match some BU measurements on screen. I don’t need to know the pixel size for that.
Imagine that I have a house plan with all the dimensions in meter on it. I could easily layout a plane and scale it to the indicated outside dimensions and then scale and position the rotoscope plane so the outside walls match perfectly with the reference plane outline. I don’t need to know the image pixel size for that.
I like to prepare the images first because I want to get everything in line before I project the rotoscope. This is just an additional insurance that everything will fit nicely. It makes it much easier, once I found a scaling factor and an offset position for one rotoscope, to apply exactly the same scaling factor and offsets to all the other rotoscopes.
Yeah, I know what you’re saying. But still, the background image feature is very well publicized, and is featured in every tutorial I’ve ever read. Now Blender is known for being frustrating for beginners. Personally I’ve never had much problem with it. It’s very easy to get the hang of. But when features are inherently confusing, somethings amiss. Of course Blender devs have every right to work on whatever they feel like working on. It’s their time, and I respect that. But I think this issue should be better scrutinized. That’s my opinion.
I’m happy to see these great responses though. Thanks for the tips and techniques, everyone. ![]()
Your welcome ! It made me finally sit down and work out how it works, and I have a new technique now thanks to ypoissant, so I am smiling. Happy blendering