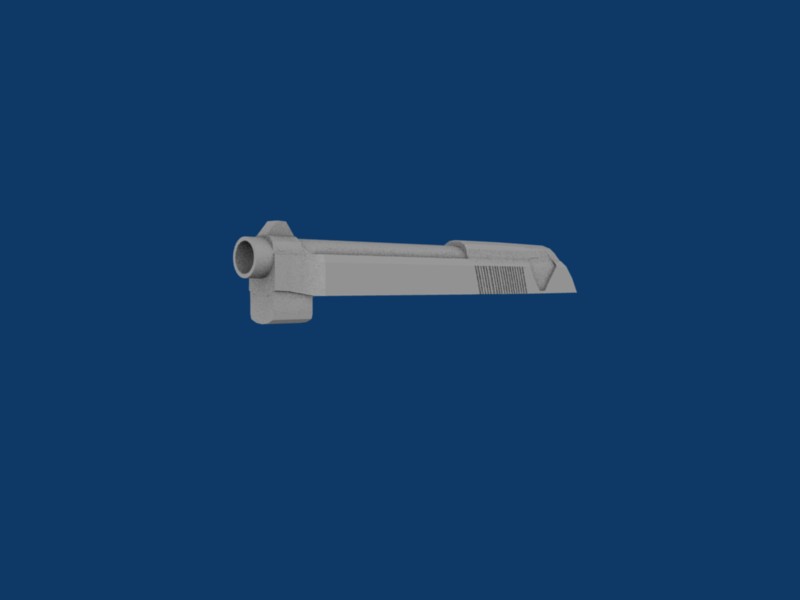
:Dok, i´m gonna use the same tecknique as in my tutorial in here. if you ask me, it´s a pretty good start. basicly,´the 9mm beretta handgun used by the US. army.
any crit welcome,
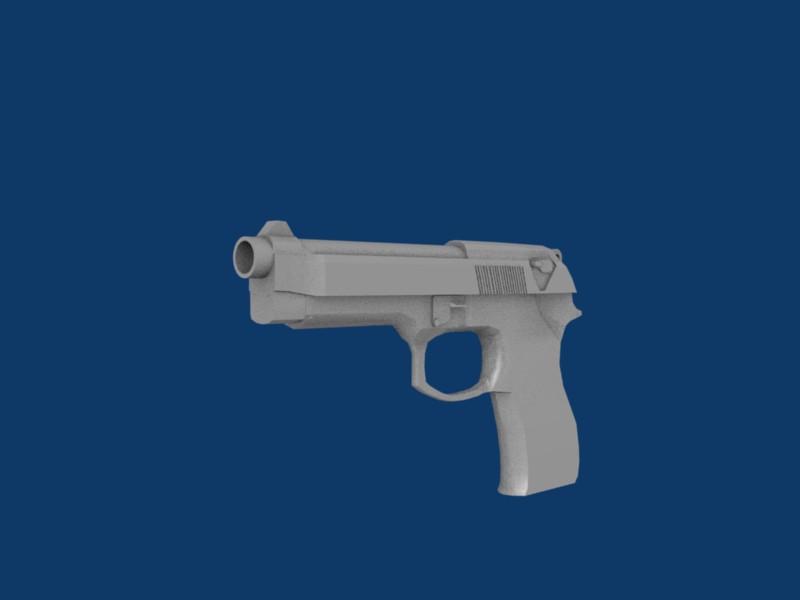
Looks pretty good. The trigger guard could use a little work though, its a little jagged.
hmm. acording to the blueprints, it´s right on, i´ll see what i cen do.


that’s awesome  I don’t find it jagged. I love how the pictures track the development of it to.

c´mon. no reply´s? what can i do better?
Can you give us
- a wire
- a better lighted render
That would help…
you got it:yes:.
anyone got an idea for a les… boring scene
like to my tutorial http://blenderartists.org/forum/showthread.php?t=119414
Attachments


Well the model looks spot on to me. For a scene, dirty up the gun, show it laying on the ground (maybe sand or mud) with several spent rounds laying around it. May be even show the model with the slide locked open. Sort of like it was dropped in the heat of battle.
good idea, i´ll get right to it.

D@mn that was fast. So far so good. The spent casing shouldn’t have any crimp on the open end. Once the actual bullet leaves the casing the opening of the straightens out (expands to the diameter of the breach). The stones look too bumping IMHO. All that is left is some tweaking and lots of dirt and scratches. IF you get real in to it, maybe add some particle smoke coming from the barrel and the ejecting slot in the slide.
ok. i´l fix that
ok, this should be better, bulletcasing materials stil stink, but i made sure for them to be on the right side of the gun.
Attachments

May be one of my last statements wasn’t very clear. I didn’t see any problem with the location of the casings on the ground (they will spread all over when you a firing). The only problem was the crimp in end of each casing. You resolved that, so feel free to drop the casings anywhere. Tight now one of the casings at the top of the image has the ground poking through it.
i understood you, but in real life ,the casings go out on the right side, because i they went out in the left side, they´d hit your face, and that wouldn´t be very cool.
No problem man. I was just thinking with the gun held four feet from the ground, the casings are going to hit the ground and bounce. So basically, put them where you feel they look the best for your composition. One thing I noticed when looking at this again is the rock texture. I assume this is a displacement, right now it looks kind of jagged in some spots. I wonder if some sub-surf would look good on it.