I thought it will just make straight spline form first selected vert to second. I wanted to avoid creating aligned spline (which is tangential to surface, so it is usually bent/twisted) , then tabing to unbind, then selecting spline verts, then V -> Aligned (to straighten the spline), then tab to bind (lots of steps to get straight spline). Too bad straight spline dosent do that with one click. That would be my feature request - to gest straight spline from 2 points if possible.
1 Like
Ok, got it.
Try version 0.9.3, I submitted an update email.
You can get this new “aligned” action by using that secondary menu item of the Vertices menu (see the new “Secondary Menu” option on the add-on preferences, you need to change it from the default “snap straight” action to this new aligned action).
You can also change any keymaps you have of BMS to use this, in the keymap box you can find the startup option to set it up.
More updates on the way.
12 Likes
Thx, update this works great.
1 Like
Hi, I’m new to this addon. Can you explain what you did after you have bent the shape. You selected the end vertex, then did something that like scaled the end of the object thinner.
Still learning the tool after seeing MX use it in a video. Many thanks.
1 Like
@K1W1 hi, of course. The curve that you manipulate is a standard Bézier curve from Blender, so besides manipulating the control points to change the shape of the curve, there are a couple of built-in operations that you can do with those points:
-
To grow or shrink the mesh like that, you need to use the Shrink/Fatten operator on one of the control points.
The default hotkey for Shrink/Fatten is Alt + S. This changes the ‘radius’ of the selected point, which you can consult later on in the Properties region (N). -
The other operator is Tilt (Ctrl + T to adjust it, and Alt + T to clear it), also done on a control point. This rolls the mesh around the curve, useful for things like hair cards (example).
You can change the default keymaps of both Shrink/Fatten and Tilt in your input preferences if you have to, they’re in the 3D View -> Curve category.
Really appreciate the help. Been doing a few courses to learn Blender - lots of meshes, but very little with curves.
This morning, I could make my shape look like yours bent like a banana, but this afternoon the shape is skewed weirdly. Very odd.
I also still cannot get the shape to scale down like in your animated gif. Should I be using any particular settings? I have assumed the defaults (not sure what those are), but it’s not really working for me. User error for sure!! I’ll give it another go tomorrow.
1 Like
Thanks for update! New align to smoothed curve with proportional distribution is great ![]()
However in 2.79 version some things seems to have problems:
- Curve grab (Ctrl key) do nothing
- If i start BMS without any ver selected, i can put first point, but on second point always get python error (see screenshot)

1 Like
That’s okay. The usual workflow is: you start it up, change the curve a bit and adjust the settings to get the response you want from the deformation, and only then you shape the curve to what you really want.
The tool settings can be accessed in a popup menu (default keymap W, customizable in the add-on preferences).
Remember that you can undo and redo changes to the curve (default keymaps Ctrl+Z and Ctrl+Shift+Z, respectively). This lets you safely backtrack if needed.
Here’s a longer GIF that should be clearer, pretending that the settings are the default (as if it was a fresh install):
Things you can notice from there:
- I held Ctrl and clicked on the curve to use the grab mode (sometimes it’s easier than manipulating points).
- The default falloff shape (Smooth) wasn’t giving the result I wanted, so I changed it to Constant which is better for deforming things from within.
- When shrink/fattening (Alt + S) a control point, which alters its radius, notice how the value changes in the info sidebar (N) as well.
1 Like
@IPv6 Nice to see someone else still rocking the .79! It’s my favourite version too.
Curve grab (Ctrl key) do nothing
I couldn’t reproduce this one, grab mode is working here. Things you can try: see if you have “Release Confirms” activated in User Preferences > Editing tab, when you need to hold the click and move.
Also, see if the cursor changes to that cross cursor, so then at least the Ctrl press is being felt.
If i start BMS without any ver selected, i can put first point, but on second point always get python error (see screenshot)
This was a nice catch. It turns out it’s a tiny API difference between 2.79b (the last official release) and 2.79.7 (the last nightly build of this series).
Since this is a minor change, I’m sending you a patched copy of the script and officially include it in a future update. If anyone else comes across this problem I’ll do the same with them.
1 Like
HI RNavega,
Really appreciate the effort you have gone to with the animated gif etc to help me out. It is now much more clear to me. I figured that “smooth” was the default setting. I have the menu set to ctrl-w.
Does the program reset to defaults after closing down and reopening??
You won’t believe it, but I opened up Blender this morning and it worked first time. It just doesn’t figure!! I’m sure there are gremlins or ghosts in the machine  Definitely user error for sure.
I’m going to spend more time with it so it becomes 2nd nature - well that’s the plan. Need to experiment with the settings more.
Once again, many thanks.
1 Like
By the way, want to share little trick possible with BMS and curves editing helper plugin from here (its a little overbloated, but whatever): https://github.com/IPv6/kristallum/blob/master/blender/addon_279/curveTools_v05.py
Basically, BMS can be used to place curved features on different surfaces right inside edit mode, maybe someone find this useful
10 Likes
@K1W1 the add-on preferences are saved whenever you save your user preferences (this is done manually on Blender 2.79. On 2.8x it’s saved automatically by default, whenever you change a preference).
Now, the tool settings (things like falloff size, mode etc.) are stored in the scene data, so while you’re working on the same scene it will remember you last choices, but if you create a new file (or open another file w/ a scene with its own settings) then those tool settings should change.
@IPv6 That is awesome, what a useful trick! Thanks a lot for recording it.
1 Like
I have a question - can a curve include more than 2 points. In Mira tools you can specify the number of points to deform.
1 Like
@radionix2d
as soon as BMS is started, press the ‘w’ hotkey to open the BMS menu, there is a function to split the curve as you like
@IPv6
the curvetool script looks really exciting, i failed to update the script to 2.8 with my limited python skills - maybe you want to update the script in the long run, i can imagine that some people would be very grateful - me too 
1 Like
The way that @cyso explained is how you can do it after you’re already deforming the mesh with the curve.
Another way is to indirectly make knots by selecting separate vertices, and the starting the tool. The curve will follow the shortest path between the selected vertices, and each selected vertex will get its own knot.
If you select connected vertices without leaving a gap between them, the curve will specifically follow the path formed by those selected vertices.
Additionally, because of some usecases, I’m thinking it would be better to add the option of starting the tool using a preexisting curve, like one that you made by hand using curve design tools. This way you could subdivide your curve in any special way and only then use it to deform the mesh.
maybe you want to update the script in the long run
eventually yes, but hard to say when // currently still using 2.79, waiting for 2.8 to get rid of some problems to move on
@RNavega I’m thinking it would be better to add the option of starting the tool using a preexisting curve, like one that you made by hand using curve design tools. This way you could subdivide your curve in any special way and only then use it to deform the mesh.
May be better to allow to “snap” to preexisting curve? That way user may prepare curve from any surface and then “snap” BMS-controlled mesh to curve right from inside BMS session. snapping means in terms of positions and/or points (count/proprotional position)
That way no additional addons will be needed for the trick from video (its easy to prepare curve from selected edge in some object, for example)
1 Like
Hi I love your add-on but I just tried the 2.9 build and its not working for me sadly.
1 Like
@PolyGreen hi, thanks a lot for reporting.
I had sent out emails from Gumroad and BlenderMarket with an update that supports 2.90. You need to install the add-on with the archive labeled “2.80”.
If you need any help I’ll be here.
1 Like
Looks like in 0.9.5 versioning is wrong 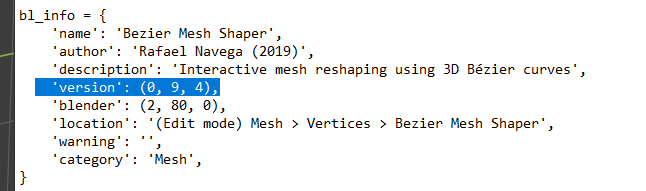
1 Like
@ostapblender I can’t believe I missed that. Thanks for reporting, and I apologize for the confusion.
I’ll send an update right away to fix that.
3 Likes