Biomass Raiders

“From their lifeless world, on the verge of extinction, Biomass Raiders travel through portals to harvest plants and life forms…”

Hey everyone ! :raised_hand:
Finally finished this personal project… that was working on here and there, little by little.
Almost entirely made from scratch, with the intention to re-use some parts in other projects !

Thinking about writing a breakdown for this project…

Anyway, i used some home-made nature photoscans too, Speedtree to get some leaves and twigs from them… and Graswald for most of the plants “inside the portal”. All the hard surface parts workflow is pretty straightforward, no UV unwrapping : just… trimsheeting all the way through. (with 3-4 trimsheets + variations : so pretty VRAM friendly ! )

Post processing done in Blender : like bloom, noise, chromatic aberration… a little of this and that. and that’s it !

AO pass :

(almost all) the assets i made for this scene. modular/kitbashy as much as i could !

trees and a few rocks from my own 3D scans + Speedtree

Also on Arstation here :
https://www.artstation.com/artwork/aGK6D8

102 Likes

This is truly amazing ! Well done !

I was also blown away by your professional work. Do you have pointers on where to learn more about working in a modular fashion like you do ? While I totally get the idea I think it’s still a bit blurry in my mind. I think I need to get back to basics with that :smiley:

Thanks in advance and congrats again for these beautiful artworks !

4 Likes

Just saw it on Artstation… Great work.

2 Likes

Hey ! Thank you !!!
I’ll try to give you a few hints… about “modularity”, and re-using stuff / save time / adding details faster.

  1. modifiers : using the power of modifiers like array, curves… and so on. Actually the portal itself is “basically” made with this single segment :

Then i have an array modifier and a curve modifier to make it circular.
Then i added more elements using the same curve modifiers… but i offset them, so you “do not feel the repetitions”.

Another example : the stairs :

3 modifiers : - mirror - array and then - simple deform (bend, 45°)

so… if you think about it , i could make more stairs in seconds… or instead of making a “circular” portal i could use those pieces to make… i don’t know , some stuff… which can be circular or not.

Actually most of the stuff you see on my final renders are still all with modifiers ON !
Trying to keep your modifier stack is great. I will only apply modifiers when i have no other choices.

  1. linked copies / instance collection

Man i love those… almost everything you see on the renders are “instanced collections”, or linked copies.
First, it saves a LOT of hardware resources !! and second it allow you to keep control on many objects !

Then you can have instanced collection within instanced collections… and linked objects within instanced collection. Such as bolts… connectors,… small details basically.

In SF stuff it’s gold to use the power of those linked objects. Also this make the whole “assets management” simpler. (importing them or using Blender asset manager)

It’s a bit hard to explain those things without showing more screencaptures ; but yeah basically my view layer looks like this :

so collections… and link copies (ALT+D) as much as i can.

and yeah… naming convention, keep things organized… helps a lot too.

I guess i will illustrate the power of all this in a breakdown of that scene.
I love the way Blender works, and the whole “data block” concept is great.
also it takes no time to replace one datablock by another , for instance with instanced collections, with that:

image

so i could change this beam_02 with beam_03 in second… so you can easily makes variations of your assets and place them.

and so on, and so on… :smile:

14 Likes

Awesome ! Thanks a lot for the insights, it’s super interesting !
I’m also very curious about basic theory / workflow .

Like , how do you organize your work from the beginning ? Are you so used to that workflow that every piece you make can be easily mirrored , arrayed … And in the end you can model as you go without thinking too much ?
Or you first model a kitbash and build the scene from there ? How do you know what’s needed ?
Do you have a concept and you deconstruct it in several modules before doing the actual work, how does it works, what are the basic good practices ?
Of course, I’m pretty sure there isn’t short answers to that, so maybe you know some learning material that can help me get started, but everything can help at this stage.

I’m super interested in procedural modeling for environment, especially since geo-node is there, but it’s also quite new to me. Now I’m getting the feeling that I’m totally missing some fundamental part of the puzzle.

2 Likes

Okay i see what you mean . Indeed good questions ! i will try to answer.

  • well first, my scene is not “'so modular”, i’m trying to stay modular when i can but you know, it is not as modular as those video games stuff, like in UE or so, with wall panels 2m wide, and everything can fit on a grid.

Like , how do you organize your work from the beginning ? Are you so used to that workflow that every piece you make can be easily mirrored , arrayed … And in the end you can model as you go without thinking too much ?

Not always no ! ! sometimes i’m not so organized l ! and have to “fix” it later, … sometimes i will just design stuff (modeling only) and realize “oh ! i already did some bolts/screws for the other piece ! i forgot ! let’s re-use them !” … and sometimes i just make quick copies and realize i could use an array (or two). When i design stuff i try to think about the shapes, not really optimization. But i will fix it,later… and usually it helps a lot. Same remark for naming stuff… i don’t think about naming stuff when i model them. but i will later figure some names, or organize things in hierarchy. At some point with enough practice i think you can design and be organized at the same time. but i think the most important part is “how cool is the design”, before any other concerns

Or you first model a kitbash and build the scene from there ? How do you know what’s needed ?
Do you have a concept and you deconstruct it in several modules before doing the actual work, how does it works, what are the basic good practices ?

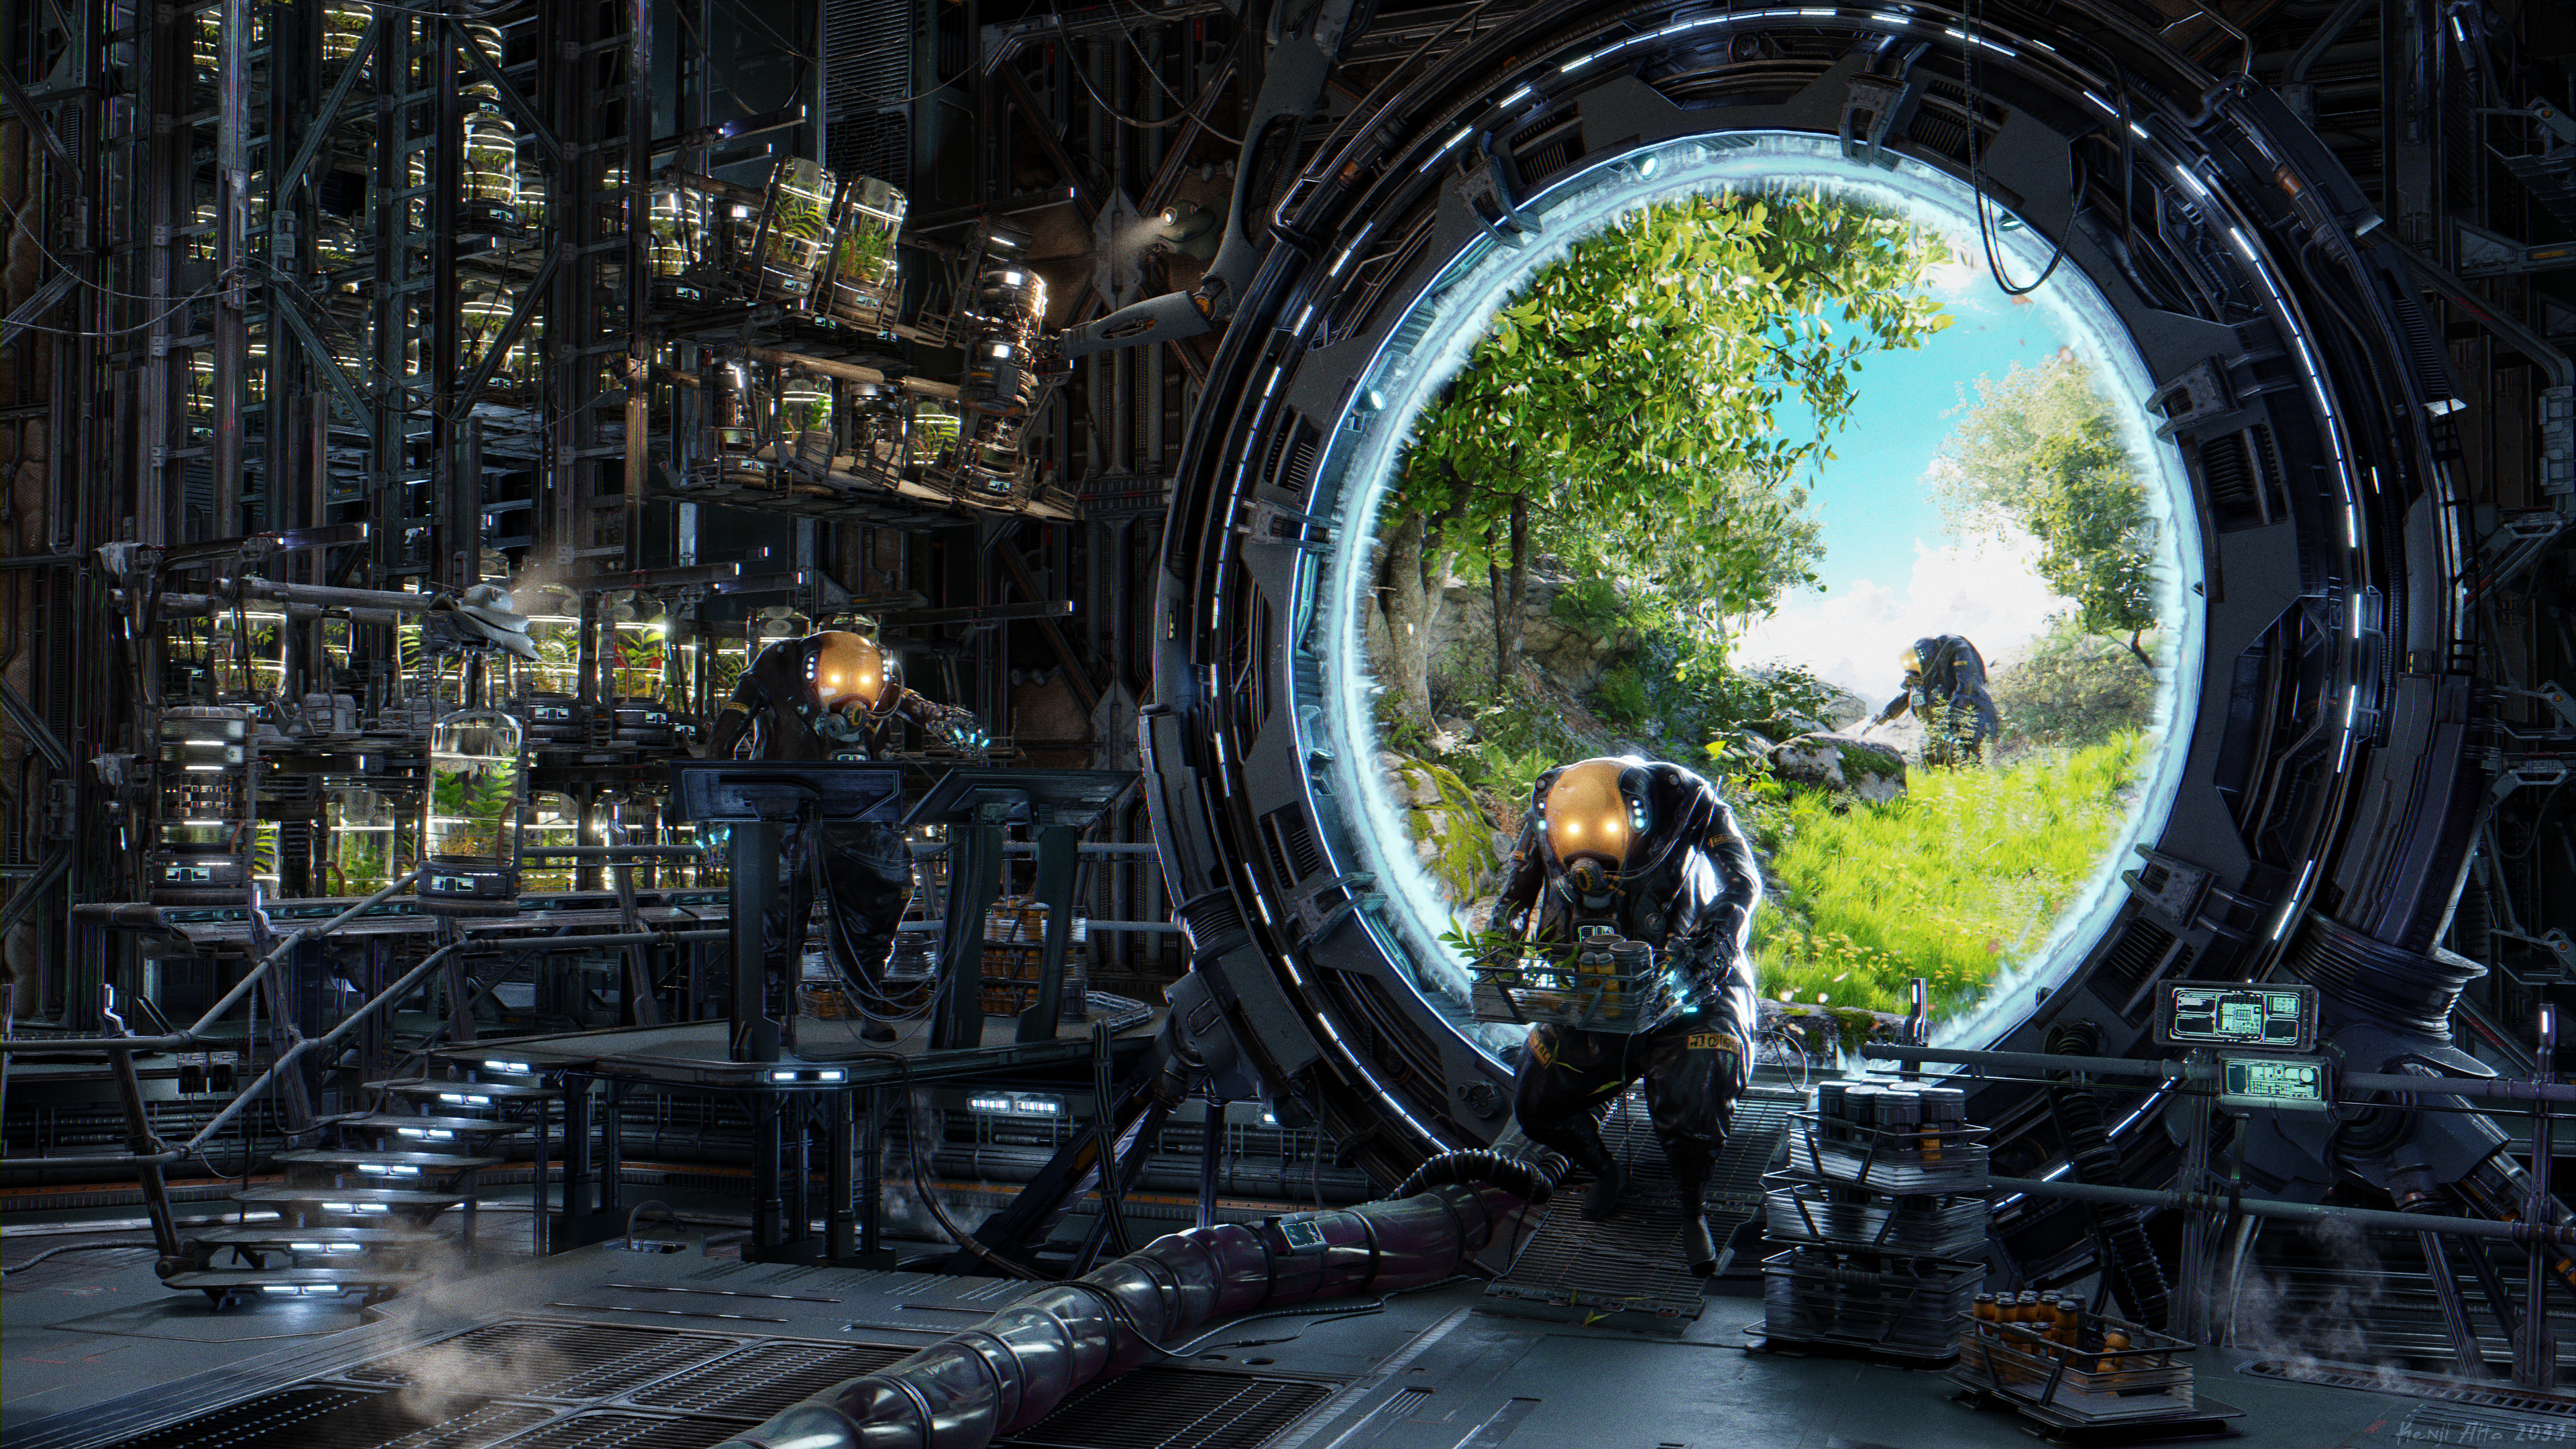
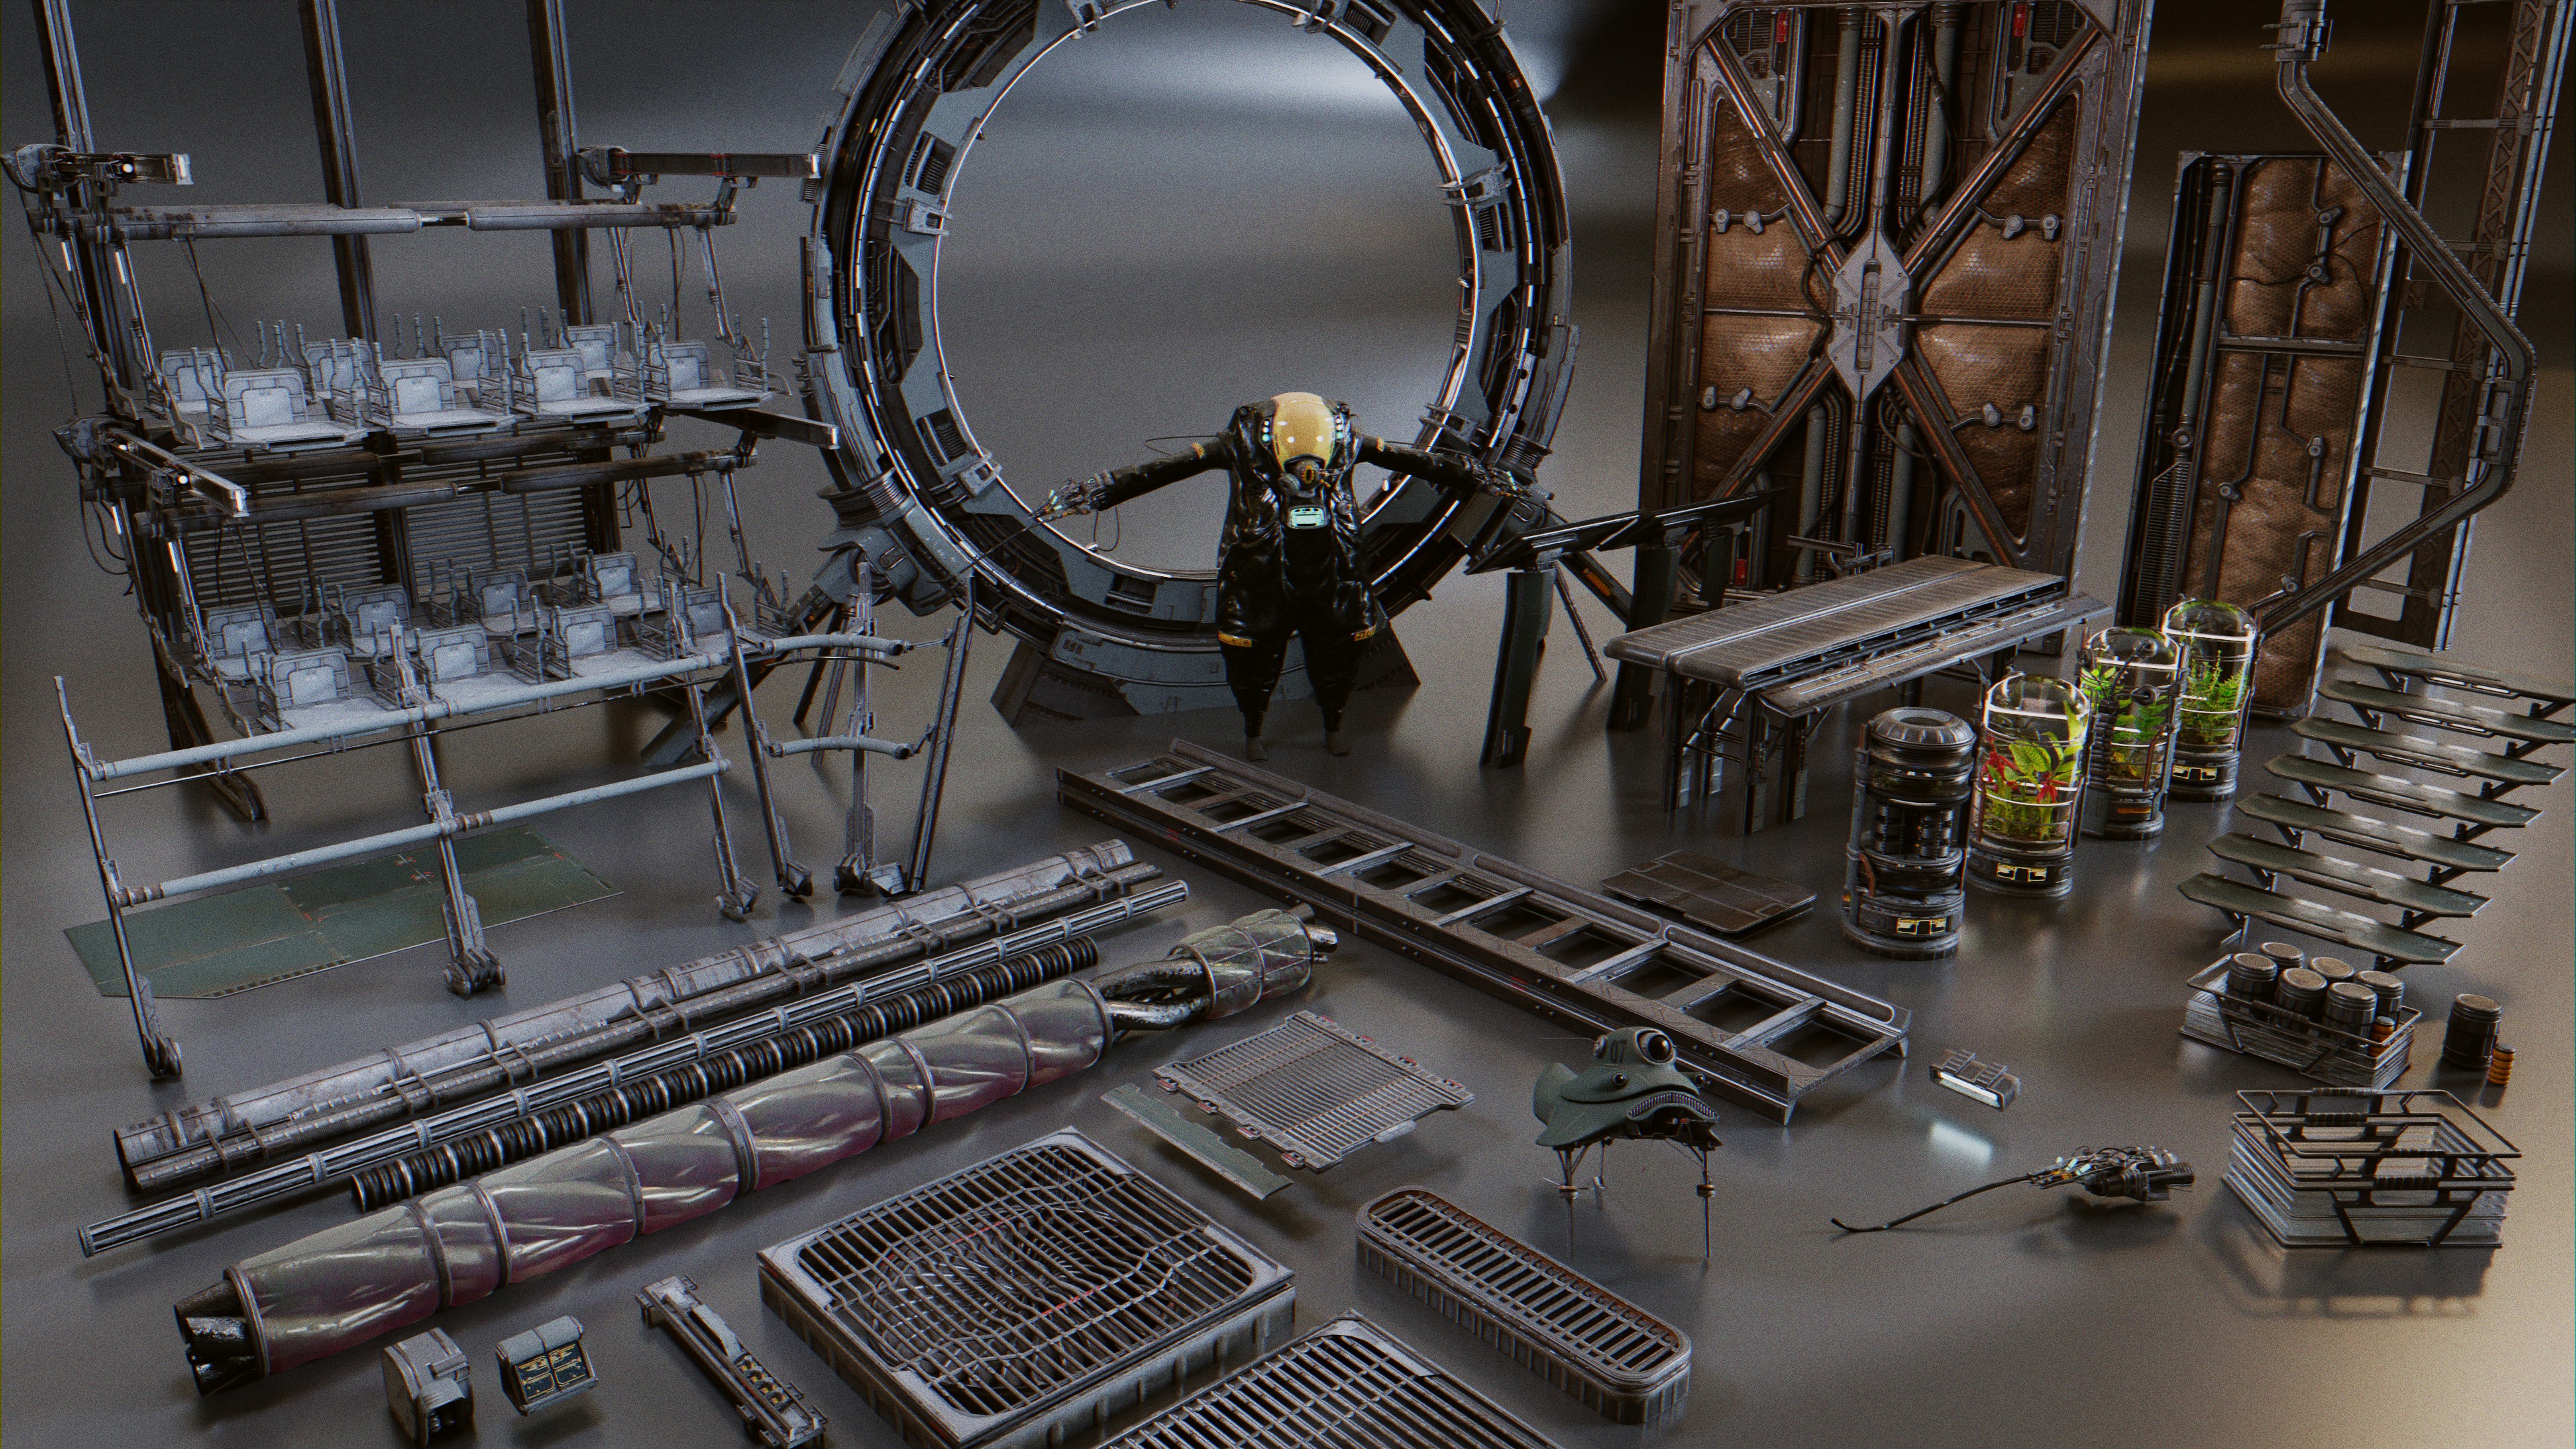
The whole stuff is a personal concept and i did not draw anything. It started from that (more or less, probably less lol ) :smile:

Of course it looks pretty “blocky” …
but the shot framing is already there… the “architectural features”, organizing the space, working on the perspective (create depth, etc. )

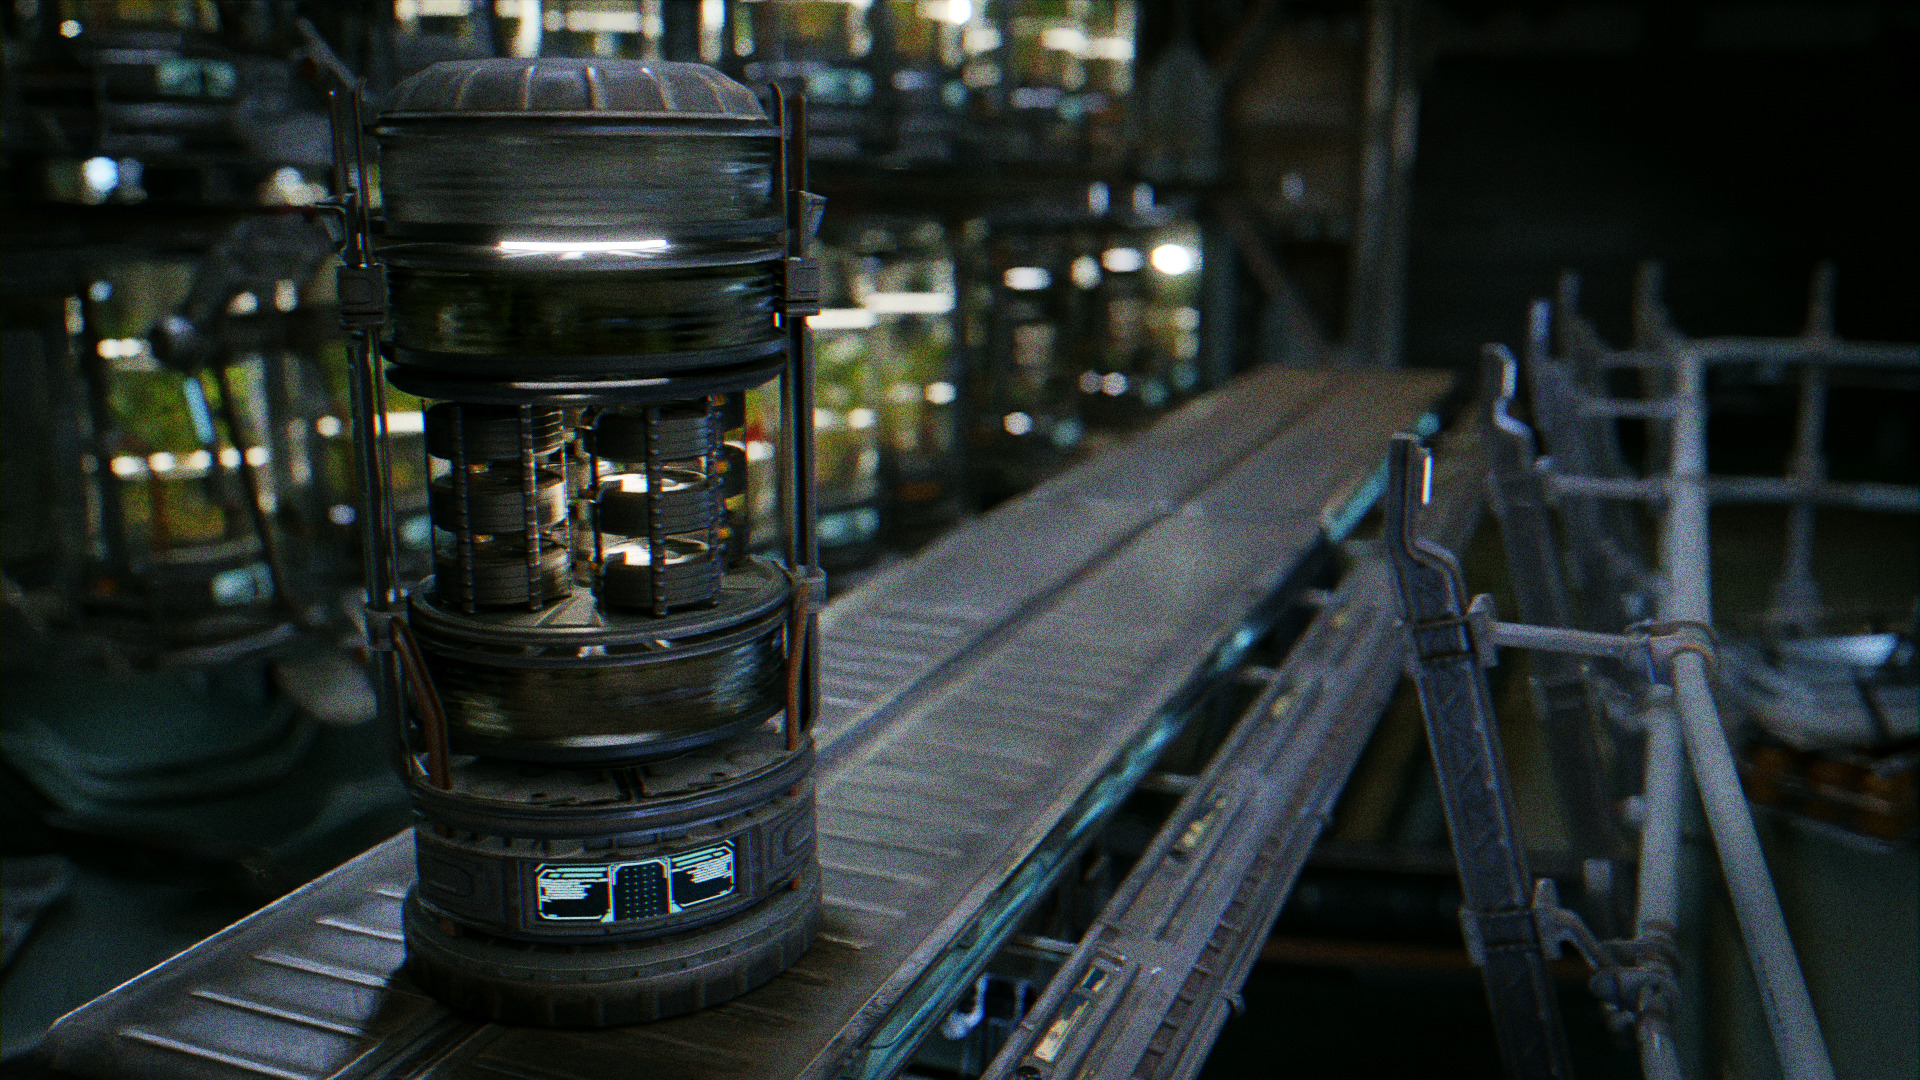
Therefore to answer your question : i first draft the environment, and add cubes/primitives or very simple geometry to “block out the volumes”. It’s just placeholders… how big things will have to be and what they will be (like crates, ramps, stairs, portal, plant containers) … and /or where characters will be.

So basically it’s in your head lol ! making a list of what you need, block them out quickly and see how they fit in front of your camera. Spending some time on this is critical in my opinion. It is a great mental training. Also you might find more idea on the way by looking at references found on internet or stuff from the real world as you walk the dog outside…etc !

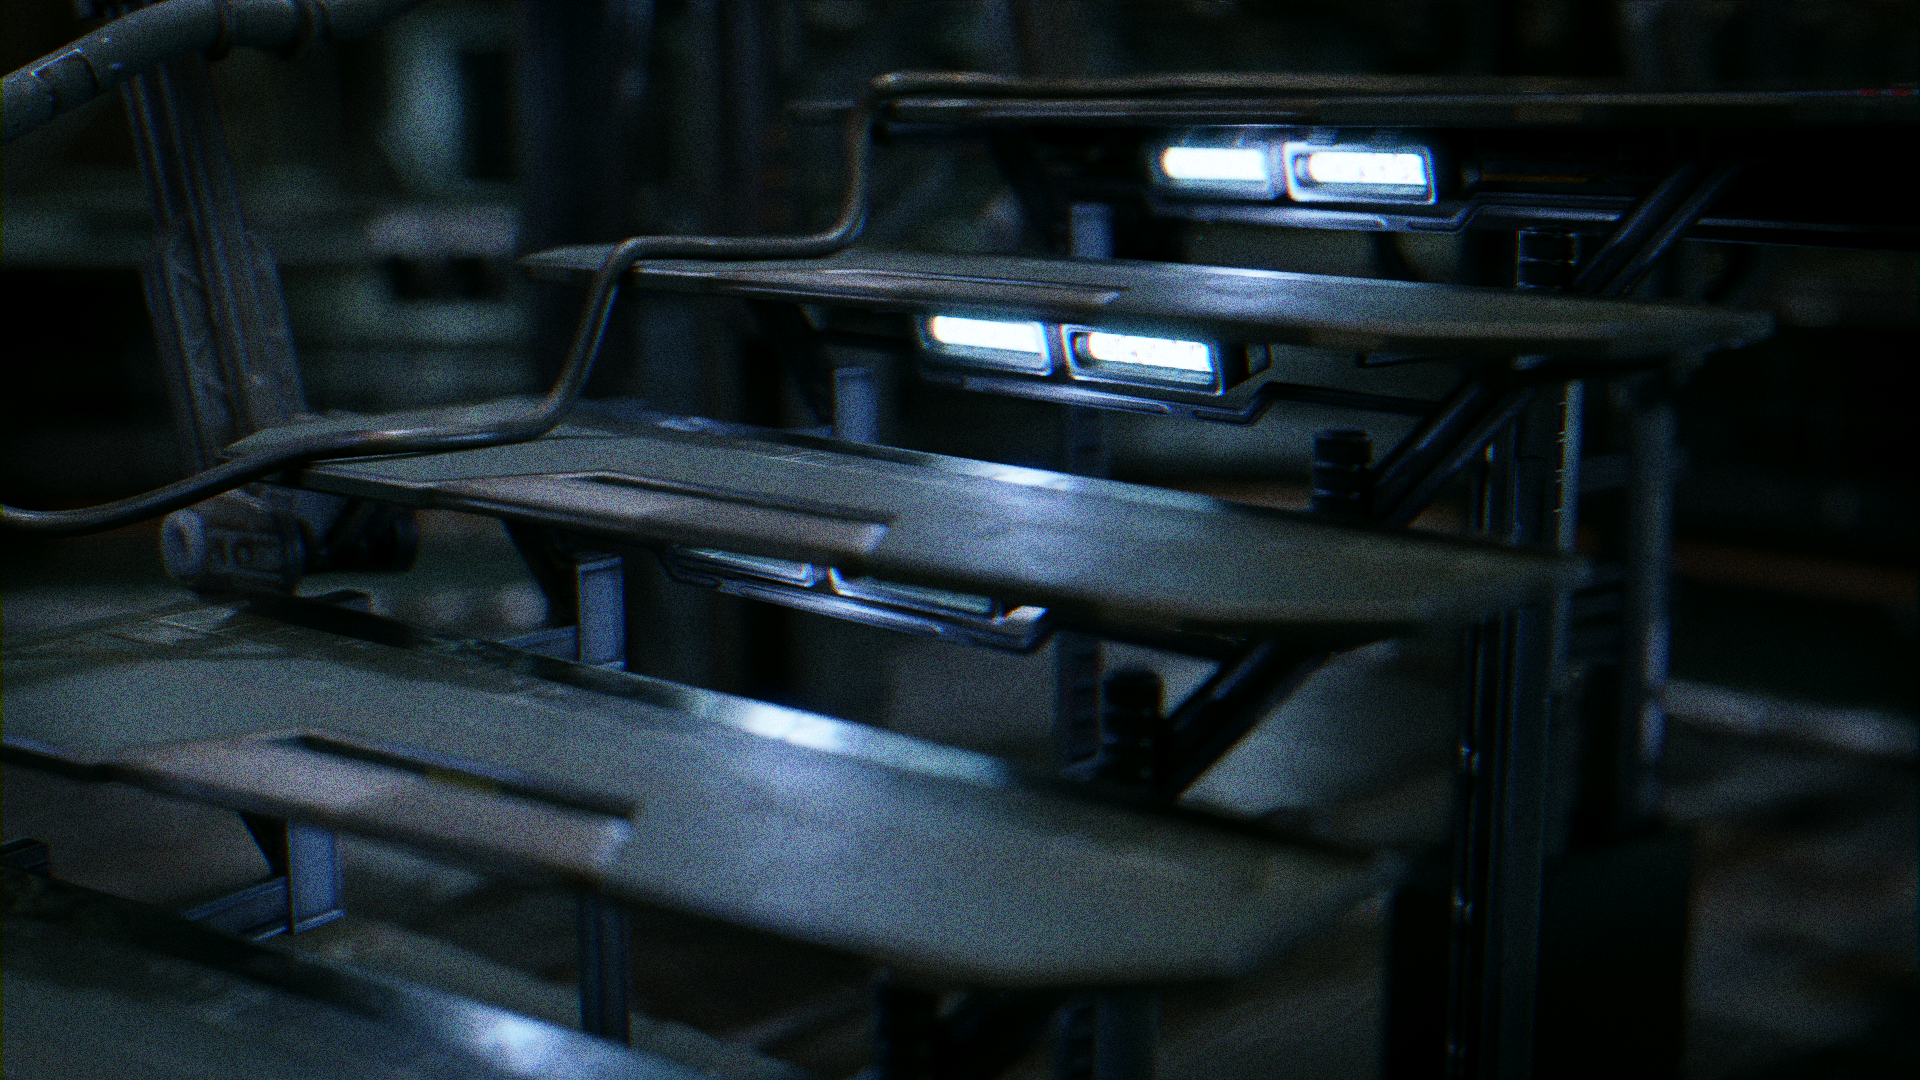
But yeah, modularity helps. It is not "everything " but it helps.
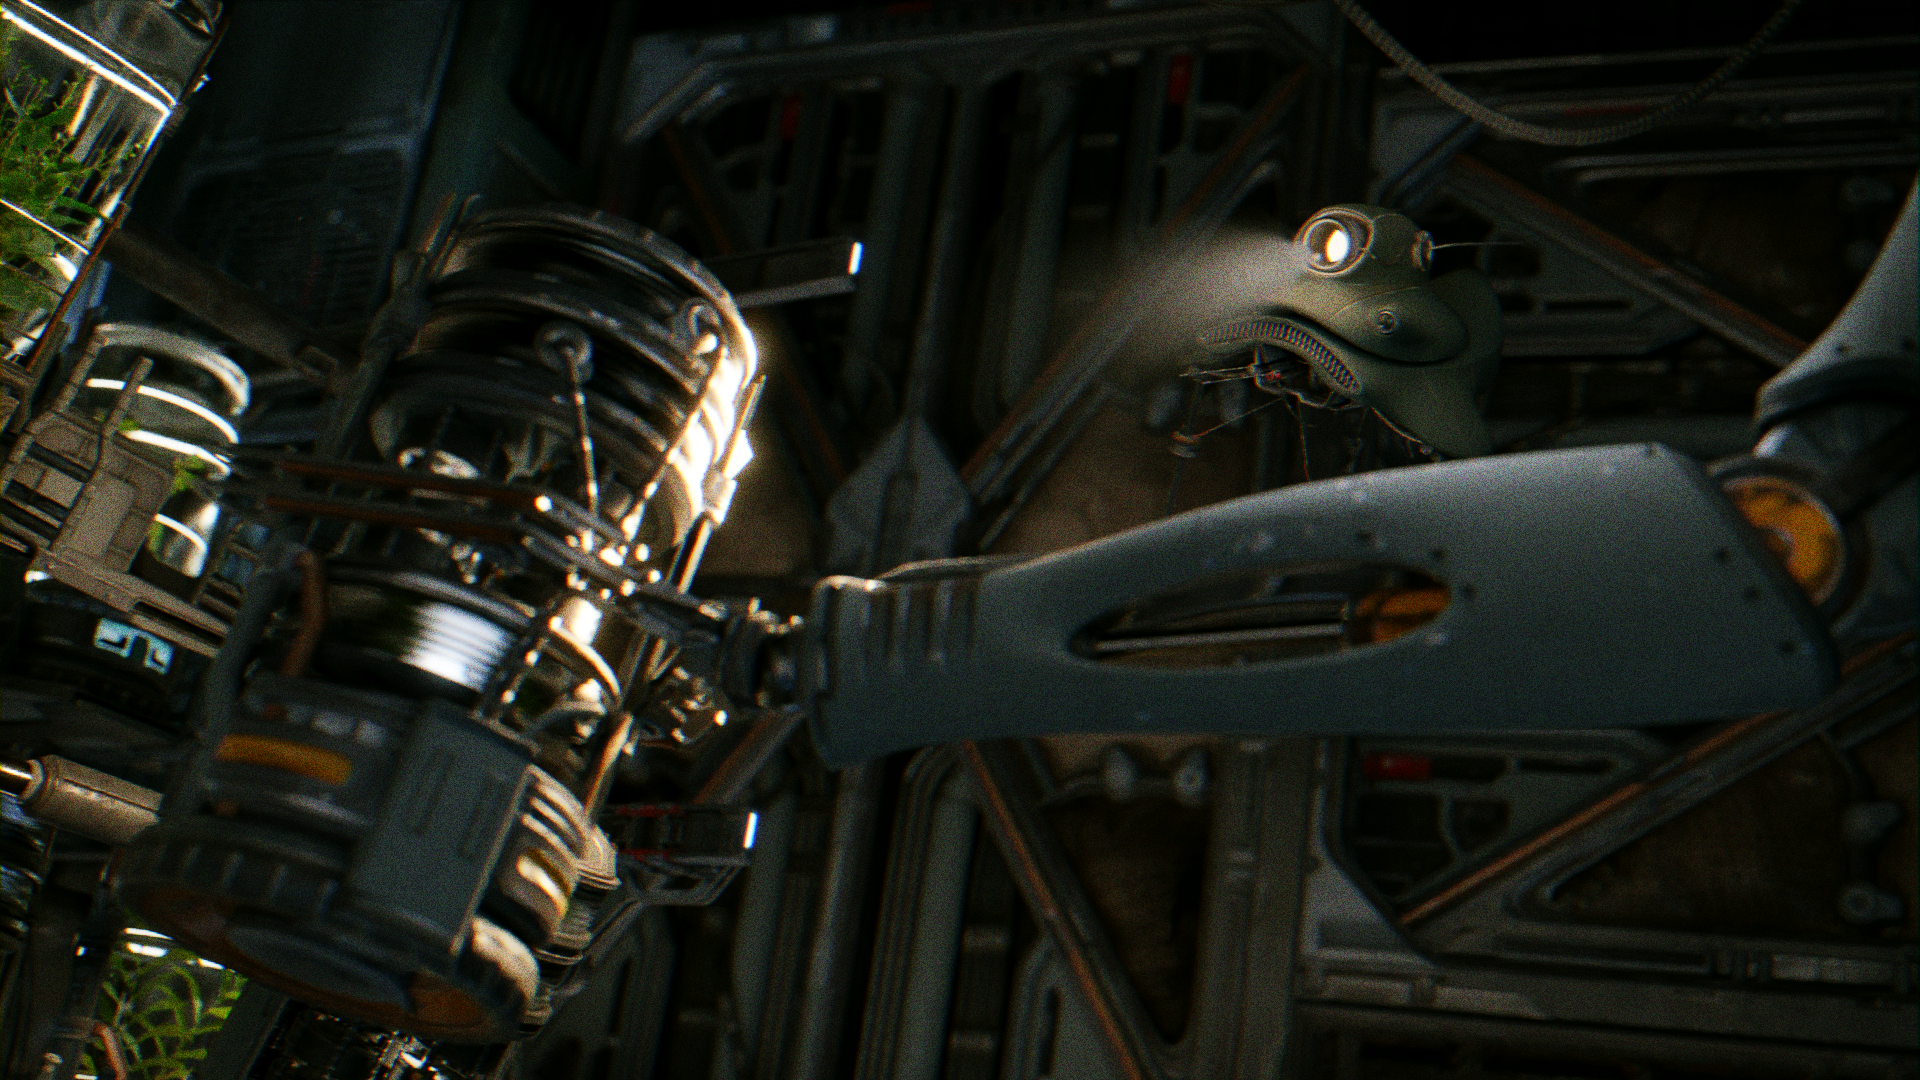
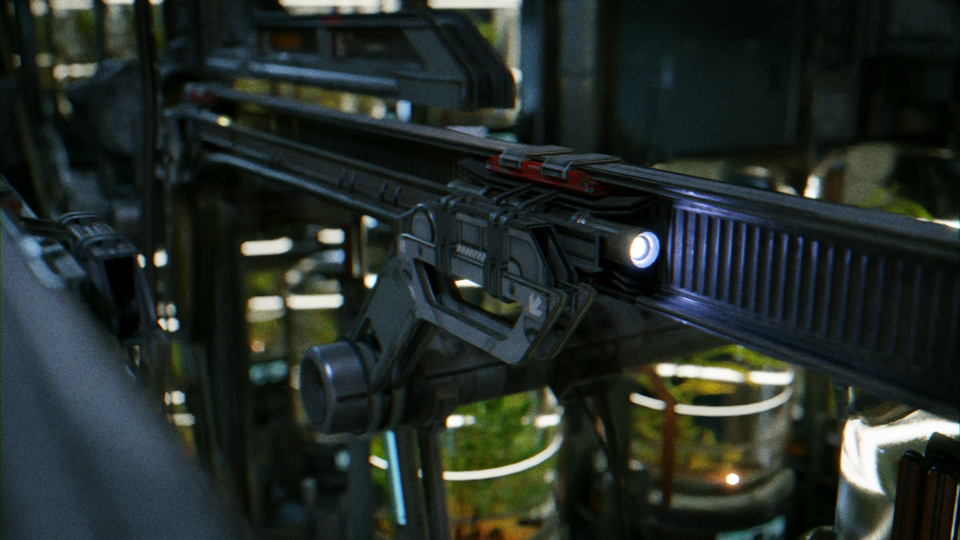
The downside is probably that is modularity shows in your art, the audience might find it boring (too much repetitions), so they are tricks to break repetitive elements. on the portal i added some extra cables/wires at specific places to hide the repetitions even more (and also add more details, etc)

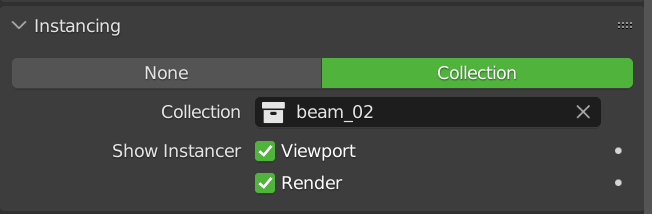
Also a little practical trick : lets say you create some kind of weird hitech greeblish part ! just add a mirror modifier with Bisect, and maybe change the mirror object with an empty… flip axis, etc. you’ll simply get pretty different objects just like that !!! very powerful modifier the Mirror Modifier is !
What you 'll get does not always makes sense, but can be uses in darker area or to create details at some point. etc. But it takes a few seconds to set !

12 Likes

Thanks a lot for taking the time to answer !
Everything makes a lot of sense. It’s also super interesting to see the early blocking and these little hints on your process.
Probably I should just practice more.
Thanks again and I’m looking forward to even more breakdowns if you have time !

2 Likes

It looks great.

1 Like

You’re on the #featured row! :+1:

1 Like

Oh yeah ! thanks Bart !

1 Like

I featured you on BlenderNation, have a great weekend!

Nice work! Really impressive level of details. Also like the setting :slightly_smiling_face:

1 Like

I love this, the idea is super creative combined with story.

Although I would go easy with that RGB noise and chromatic aberration, I liked the blender screenshot image more because it didn’t have those things, it was more clear.

Your image is very professional looking, and I like zooming into certain details to see them more clearly :slight_smile:

1 Like

Great job! I’m slightly confused regarding what you mean by trimsheeting. I’ve looked up explanation about trim sheets but the workflow is still fuzzy to me. From what I gather it still needs the geometry to be unwrapped or am I wrong? Could you please elaborate and possibly even show some examples of this workflow?

2 Likes

Amazing work

1 Like

Hey there ! Thank you for your comment !
Ah yes ,it is interesting indeed because noise/chromatic aberration is… a sensitive matter of sort. Some people even 'do not like like" it !
I will think about it. I thought i am not pushing it too much but on some shots i did more than other. “hiding stuff”

1 Like

Hey Meshmonkey !
“trimsheeting”… “phototexturing”… i am not sure those are the official terms to be honest !
well but ; by trimsheeting i mean that i am using a trim sheet texture, so it has trims inside (usually with some repeatable patterns on the horizontal axis of the texture)…
So you basically need to unwrap the UV of your geometry along the trims. For instance when you have a bevel on the geometry, you unwrap it (usually easy if is all quads) and align it with the texture trim.

I will work on a article/breakdown/behind the scene soon and i will have some decent screenshots.

but basically yeah , it is very fast and you do not need to unwrap everything carefully. you go can dirty and fast. which is great.
There are different technic, not only just unwrapping along the trims.
you can also create geometry from the texture one unwrap on a surface. i did that for the floor ( a little). using the knife tool to create some actual cavities/holes matching the texture.
That is pretty cool too, and easy.
Having a big flat surface being… pretty uncool sometimes .

2 Likes

If you want a good example on how to use trims you can look here : https://youtu.be/TkTQhmNFRnY?t=474

@aito_kenji could be super cool to see how you used them in your breakdown, since you’ve done a great job it’s hard to figure out what is texture and what is geo !

2 Likes

Woo nice one sozap !

So yep, i will spend some time/screenshot showing what i did.

Like @sozap said, matching the texture and the geo as much as you can is key. Sometimes i do create some extra geo to get a better matching when i am not satisfy. that also works.
And there are some UV folding tricks to create symetrical pattern and so on.

I use trimsheets at my work … everyday… in the video game industry this is very very common. Because with a few set of textures you can cover a lot of assets . It use less VRAM etc.

2 Likes

Awesome, thanks for your explanations @aito_kenji and @sozap , I’ll keep my eye on this topic for the screenshots you’re planning and more cool tricks.

2 Likes