I need to blend 2 materials based on geometry proximity and looking for the best/easiest way to do so. Essentially it’s 2 meshes that are intersecting here and there, and I want to make a fade of some sorts in the materials to make the cut appear less harsh.
I tried to utilize the vertex weight proximity and convert that somehow without much luck, dynamic paint didn’t seem to do anything and the geo nodes tutorial I could find to convert vertex weights was outdated.
Hum, material assignment is a boolean like, meaning it won’t fade out. some faces will get material A , other material B. You can change them dynamically but can’t blend two materials.
If you really want a fade effect, the best would be to use only one material and fade color/textures ect… based on a custom attribute.
How to do that ? well it’s a bit late for me to go into some detailed explanations, maybe tomorrow if nobody helped you with that. In short, it’s rather simple , it’s just a matter of remapping (with a map range node/coloramp) the distance from the proximity between 0 and 1 (to create the fade range) and export an attribute to your material. And use mix rgb for the fade or mix shader if you want to do that the lazy way…
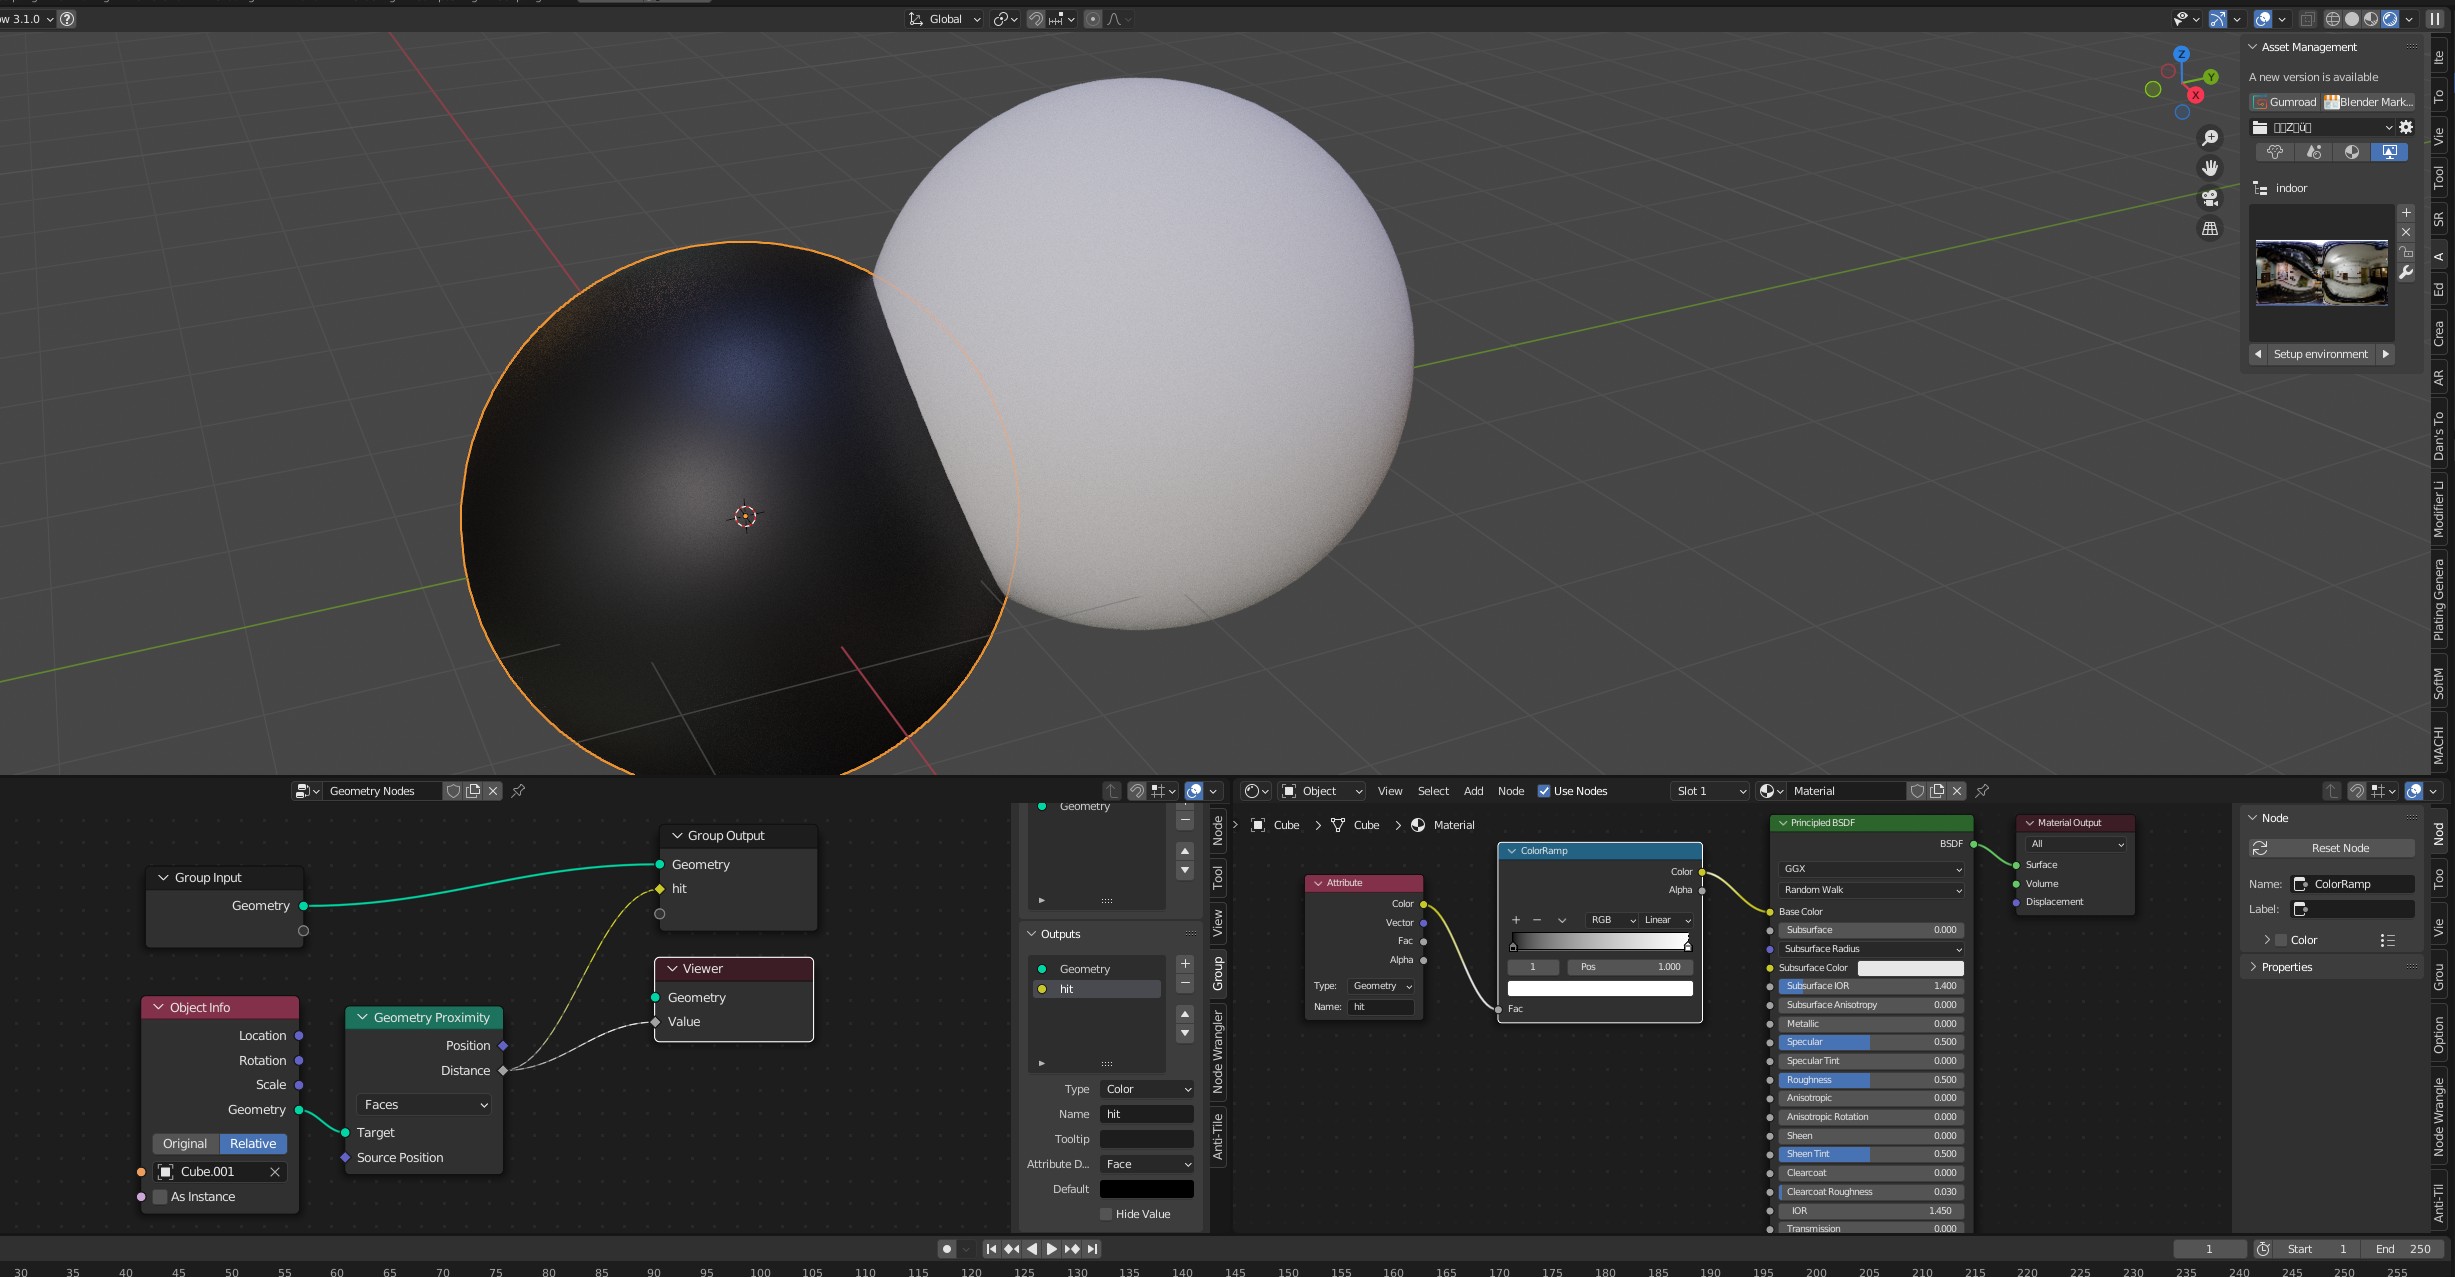
Yes, the outputting to an attribute (geo proximity in this case) and re-using that would be the part I’m struggling with. Using it as a factor in a ramp I can deal with.
Are you trying to calculate proximity between object centers? If so you can use the vector math node with the distance function, then pass that to an outgoing attribute. You should be able to use that named attribute in the material to mix the shaders.
You can use the vertex weight proximity modifier with the geometry nodes setup to convert the vgroups to vcols. This is doable because I did it in the past. I think the trick was to use “float” type in the attribute.
The geonodes path has couple options like the one you mentioned above. The raycast node outputs a distance value which you can cast as an outgoing attribute for Cycles.
You can also try the Data Transfer modifier to transfer colors which can be used as a mix value in a material.
Yes, I saw an older topic with attributes and whatnot, however, I can’t find those nodes anywhere in the current 3.1.
The data transfer could work but I don’t have vertex colors on either object. Might need to paint some, but they are quite heavy (50 mill+) so I was not looking forward to do that.
Go to the vcol paint mode while the source object is selected and select red color then press “shift-k” which will fill the object with red. For the target fill it with black like I did in my example.
See the right side, that is the shader part. You can do whatever you want with the Col" attribute at that point. It has been converted to a vertex color. Just make sure that your object at least has a vcol called “Col”, you do not have to paint anything in it.
Ye, but I don’t have a vertex color channel on my huge object cause of blender freezing, hence the need for an attribute rather than a vertex color.
If using vertex colors is the only way I may have to skip this one, it’s just way to slow and unstable to work with at the moment. (a blender session I tried the fill object thing on is still unresponsive/frozen, that was 45 minutes ago)
 Using it as a factor in a ramp I can deal with.