Just turn those sliders to 0 and snapping should be ok.
About the head, yeah, I don’t know why that happens, but I would really encourage you not to use IK for the head or the body. They are great for posing, but not great for animation.
I will be refactoring snapping in a future release anyway.
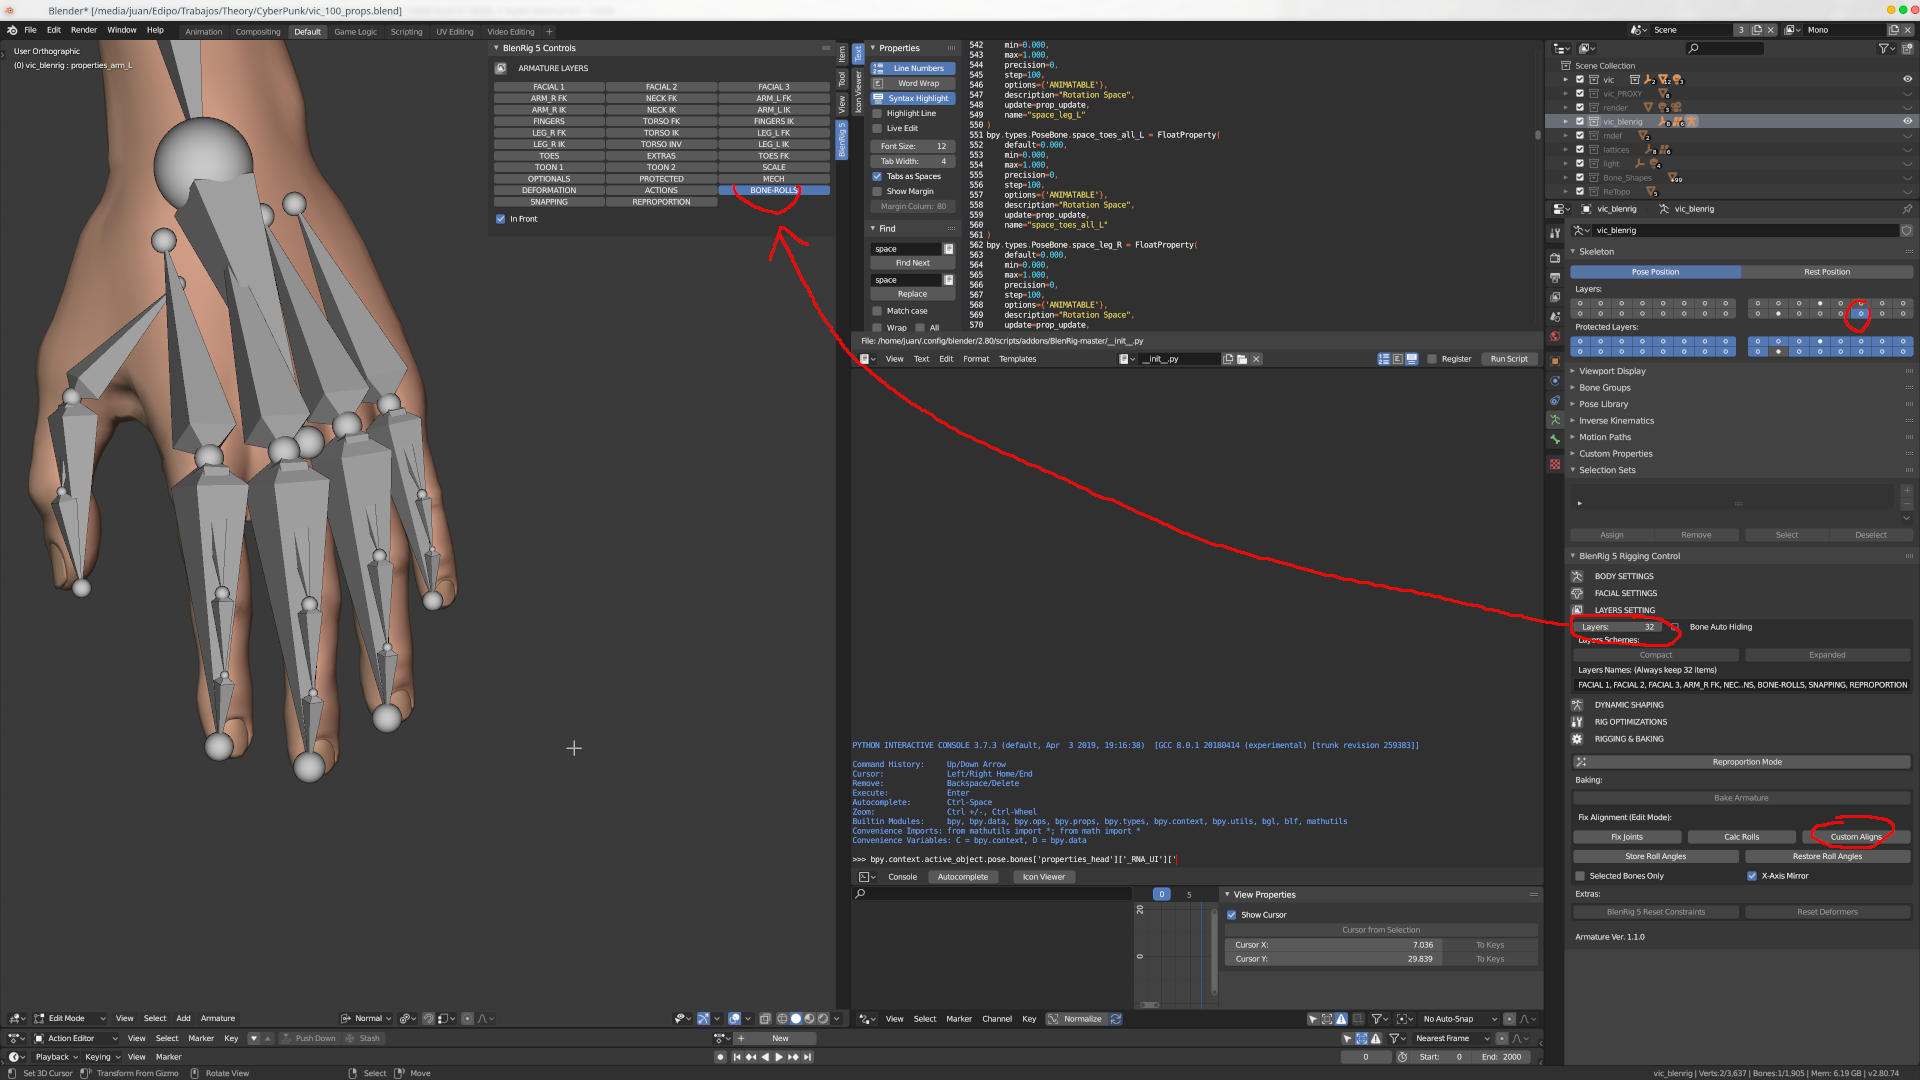
You have to go to the Bone Rolls layer and adjust the rolls on the fingers in Edit Mode. You can see the Bone Roll layers if you enable all the layers in the BlenRig gui, or just go to the normal armature tab and select layer 29.
Once you’re done, press the Custom Aligns button in the rigging panel and all rolls will match and fingers should curl as expected.
Hi Juan Pablo! Thanks for your answer. I followed your advise and now snapping work more correctly. IK to FK switching is ideal but when I switch FK to IK there is a little jerking occurs yet. I think elbow is the reason so I have to tweak it. I tried to test Agent 327 and Spring characters and everything worked correct.
@jpbouza I have a question on IK/FK switching. There seems to be a ‘jump’ when switching. For example, here I used just a default Blenrig armature added to a scene, with no adjustments made to any of the bones. I posed it as if it’s pushing against a wall, but when I switch it from IK to FK, the shoulder snaps into a different position.
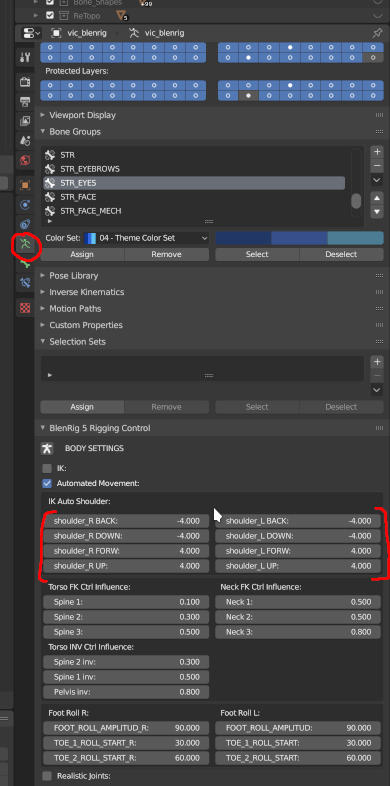
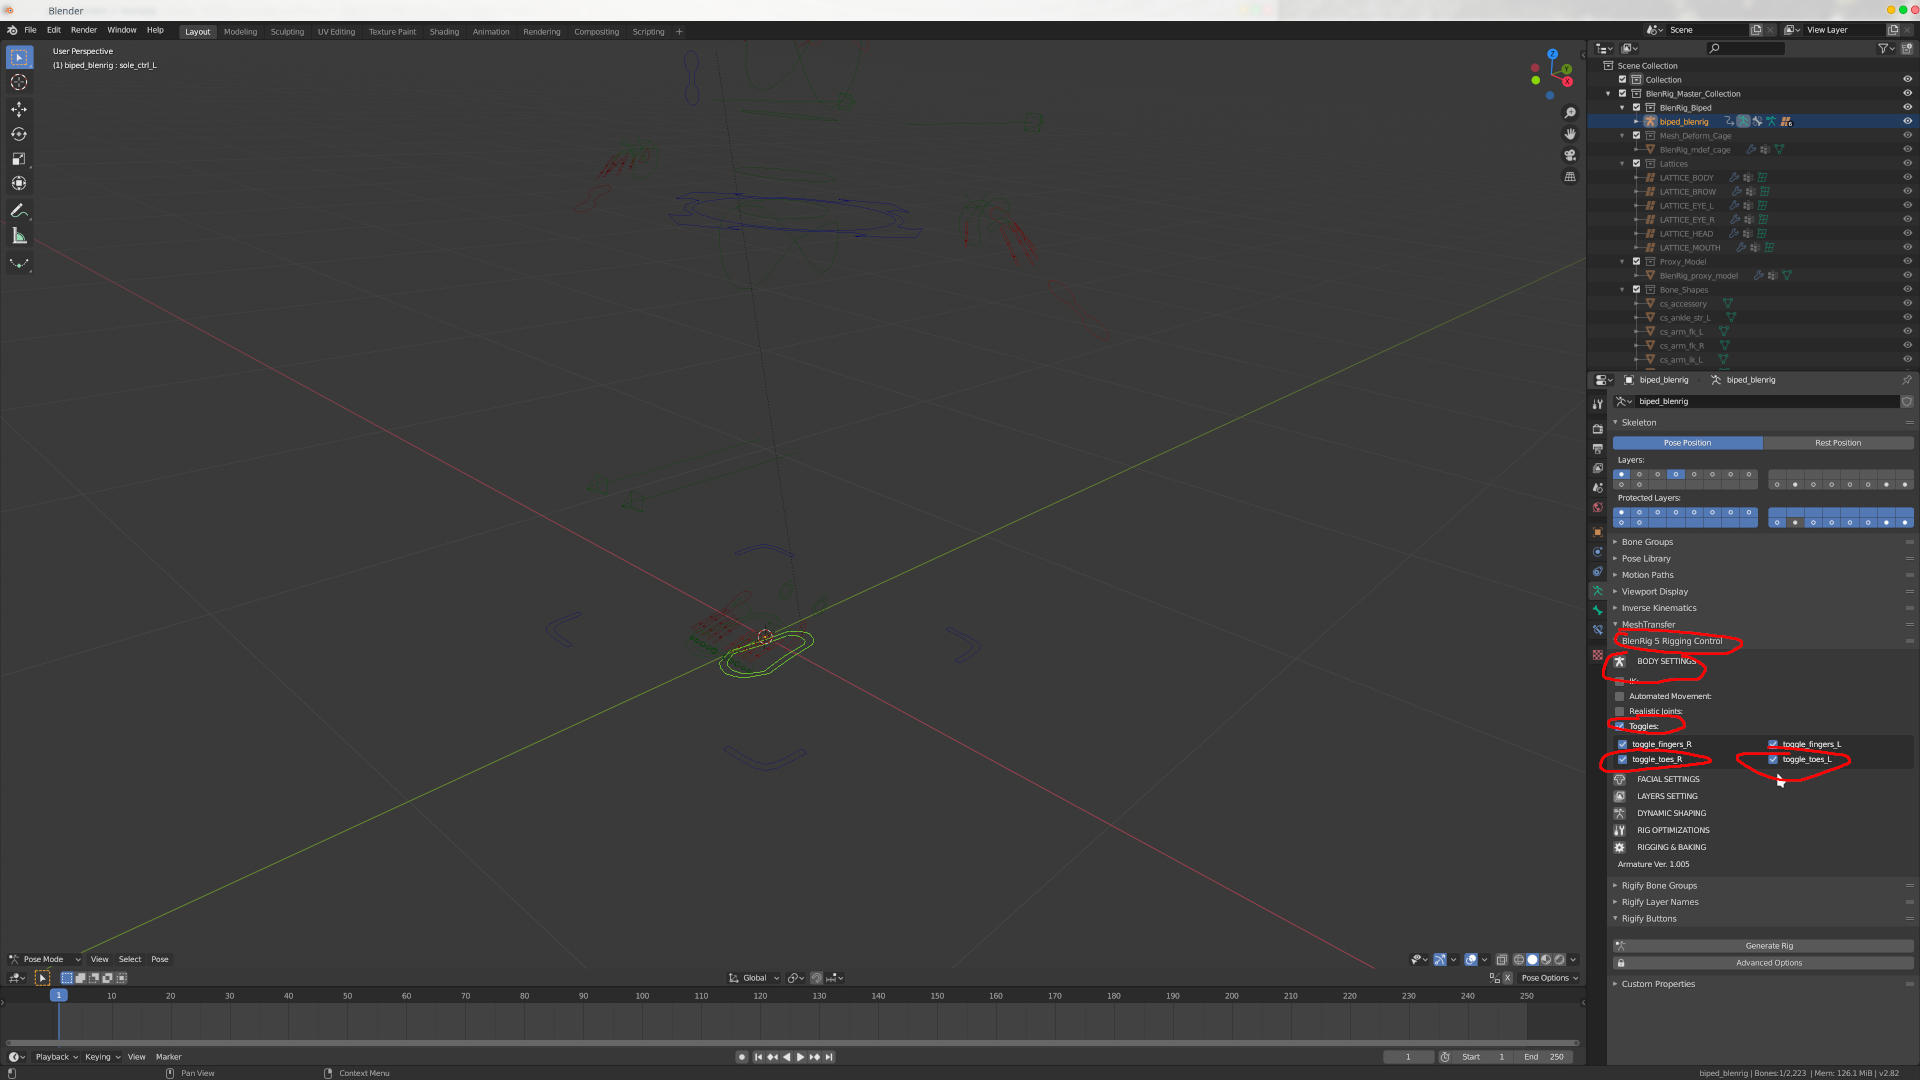
Hi @3Dmaven! Yes, that’s the same thing I told Vicpotter. It is caused by the automatic movement of the shoulder in IK. Therefore, you can either manually adjust the shoulder in FK or turn the automatic shoulder movment for IK to 0 in the rigging panel. Check the reply that’s above yours and you’ll see a picture of the panel and the sliders you need to touch.
@jpbouza Hello, thanks for Blenrig is amazing!
I’m new in Blender and I begin in v2.8
I’ve followed the BlenRig Tuts that are available on Blender Cloud to try rig a character. Everything goes well until Chapter07, because I’ve got confused about trying to select “hand_def_L” bone. When I press CTRL+Left Click I can only select “hand_ik_pivot_point_L” It’s not the one needed to weight paint the hand. It’s like the Def bones would be blocked or something like that, because I tried entering just in pose mode to select one of them and I’m not be able to do it. Any thought what I’m doing wrong?. Thank you so much for any help.
So I assume you are seeing the deformation bones in the viewport, right?
There shouldn’t be anything stopping you from selecting those bones. If you are seeing them, you should be able to select the hand_def bone by clicking several times in case the bone is overlapped with some other bone.
The other way to select bones would be through the outliner window. You type the name of the bone in the search field and it will get listed, then you’ll be able to select it from there.
Anyway, you should be able to select it from the viewport as with any other object.
Yes, I can see the deformation bones in the viewport.
I figured out that I got to have both the BlenRig and the mesh selected at the same time to paint those hands and head weights.
It’s awkward for me the solution was so simple haha.
Thank you so much for your help!
Hi @jpbouza. I’m learning about rigging and I chose your solution because I think it’s probably the best.
Anyway, it’s free but I’d really give something (BlenderCloud I suppose?), and I’d pay without problem for a request I have : Animate/rig the toes like the fingers. I think that since Moana, toes are an important thing in animation. ^^
For me it’s the only feature that lacks in your great tool.
Lol, no I don’t get anything from the Blender Cloud. The Blender Foundation payed me years ago to the tutorials, but that was it.
What exactly are you talking about? Cause the toes can be animated in the same way as the finfers, you might just have to set the toes to FK instead of IK?
Thanks for your reply. ^^
I’m learning Blenrig (and rigging in general) and I don’t know what exactly means IK and FK (but I do know that it’s all about articulations, I see roughly what it’s about) for now, but I’ll learn asap. ^^ Edit : OK; got it, Inverse Kinematics & Forward Kinematics.
I’m talking about animating the toes of the feet individually. We can do that for fingers, but it seems that for toes you can only animate the 5 toes together (2 articulations by foot). Like, your character always wears shoes. Am I wrong ?
Oh, thanks a lot, I clearly understood, thank you so much for your patience !
Last question, sorry, I promise, I don’t bother you after that. ^^
I’m using Makehuman for the base of the body. And I think that you already know my question.
With MH you produce a body that has various proportions, but always with the same vertexes names. It’s always the same body structure (names, number of faces, and so on) with different proportions. We can also export a “basic” skeleton. It would be great to use Blenrig one time, the first time, spend hours to make the perfect rigging, and after that Blenrig could adjust the rigging to new bodies that share the same body structure. Is that already possible ? Or will it be possible a day ?
@jpbouza Hello again, Juan Pablo. I have a question about the toon eyes controls. In the Posing Vincent video, Hjalti uses the toon eyes controllers and they work correctly. But they don’t do anything in my rigs. I don’t remember anything in your tutorials about toon eyes… Is there a missing step? How do I get them working? Do I have to weight paint to those bones?
That is a very fast way to get secondary characters going.
If you need more control, you can also rig a character, then go to the reproportion mode, change proportions, bake the character mesh, the mesh deform cage and lastly the armature and you will get a newly baked character with different proportions.
More or less what I do here:
Finally, a third option would be to get all the different mesh from MH, transfer the weights from the character you had rigged and then re-proprotion the armature and mdef cage to fit your new meshes.
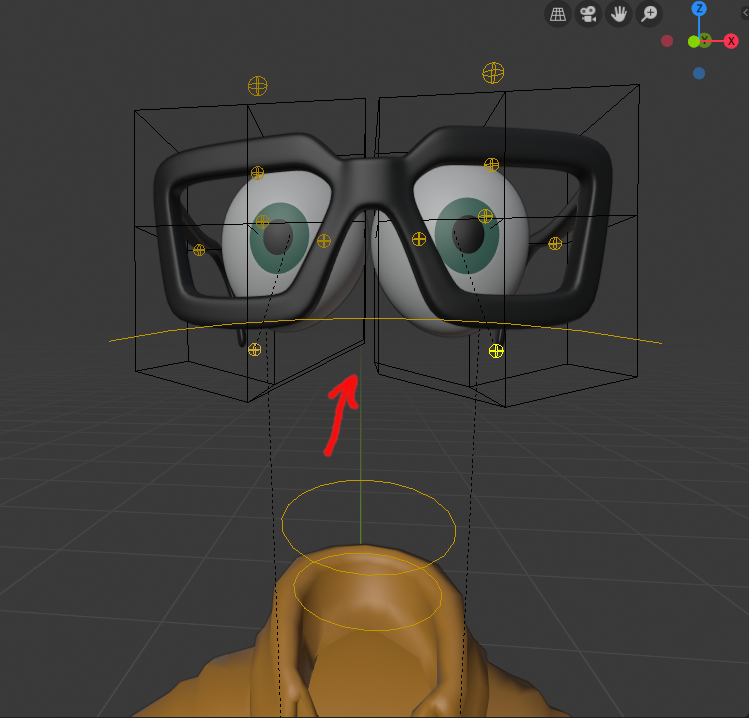
@3Dmaven in order for the toon deformation of the face to work, you have to add all the corresponding Lattice modifiers, pointed to the Lattices that come with BlenRig. Open vincent and check that out.
If you move the lattices to the position that fit your character, you’ll notice that they will deform badly, once you do so, click the “Reset Hooks” button that appears in the lattice data tab. That wil reset all the hook mnodifiers that the lattices have.
I think I found a small bug in the toon eyes lattices. You can see there are 2 vertices in LATTICE_EYE_R that do not move with the toon_eye_low_R bone.
EDIT: This is from the Vincent model, but the same bug happens in my model


")