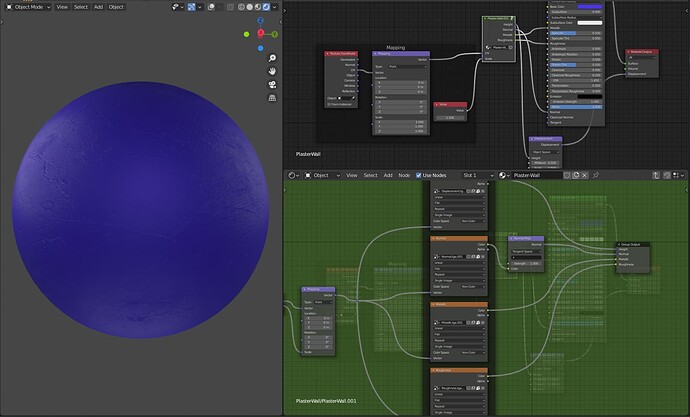
Blue-painted plaster?

I want to create some old buildings in the style of colonial Cuba. There a number of blue walls that I think are painted plaster. Something like this: https://www.cubatreasure.com/the-cuban-colonial-architecture/

How would I make that? I can find CC0 textures for plaster, but they are all white/off-white. I want to export to the Godot game engine, so I guess procedural texturing won’t work. Any suggestions?

The ref isn’t very good. If you found some in white color them. :man_shrugging:

2 Likes

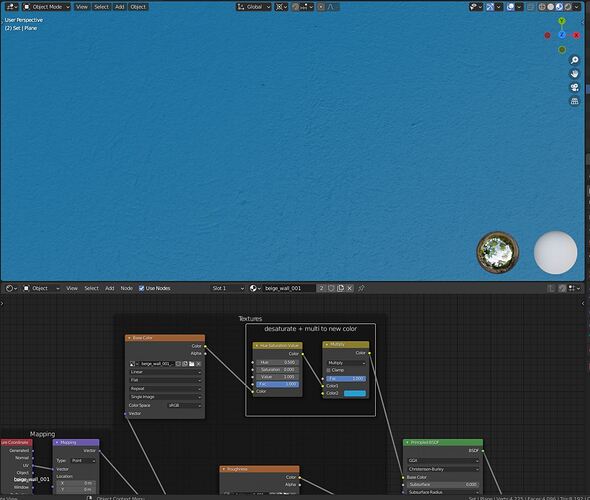
You can try this texture,for the blue ,just put a mix rgb color node before the base color input and set it to multiply and color pick the blue you want in the second slot.

edit,i downloaded the tex,here the example

2 Likes

I know it may not be much help right now but I will jump back on here later. What your looking for is called “stucco.” It is a very specific kind of plaster used for walls and you will be able to acquire some better references. Like I said, I will hop back on later to hopefully provide some more constructive suggestions but I would start there.

1 Like

here is a stippled plaster wall

adjust bump and color

simple-file-empty1.blend (2.7 MB)

happy bl

1 Like

I can advise you to check four sites

Ambientcg, I think it is the new name for cc0textures
Cgbookcase
textureheaven
3dtextures DOT me (1k without support but cc0)

All are cc0 and you can search for wall, plaster, or stucco. You can colorize a whitish texture I guess, and it can look good

If you cannot find and great one, you can go procedural and it can look realistic. There are many “procedural plaster” tutorials on youtube. What I think is you cout mainly use noise for the broader strokes and add smallet details with a musgrave, very low dimension to be grainy. If you want a worn wall, you can create patches with that, different colours.

It can look absolutely great. Not as fast, but also an option if you find no fitting PBR maps

1 Like

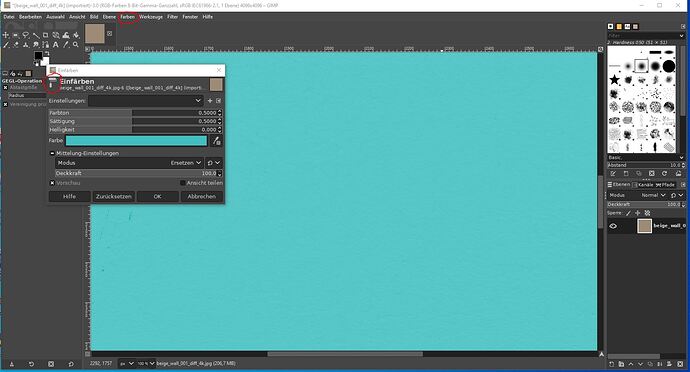
You can also load the Albedo IE the material i posted before,into gimp or any other Image app.And you can do the same procedure within the Image app and save the Blue map then.

In Gimp just open the diffuse texture,then under colors select coloration.Adjust the color you want press ok and save,done.

Here a screen from Gimp.The language is maybe different than yours,you can see the symbols where you can find the functions.

1 Like

Thank you everyone for taking the time to share your knowledge!

@pixelgrip I tested the node setup yesterday, and it looks great! I haven’t tested it in Gimp yet. Thanks!

@RickyBlender I tested the node group, it looks good. Thank you for putting it together for me!

@AgentTuron I was unaware of CGBookcase and 3DTextures dot me. Thanks for bringing them to my attention!

2 Likes

I know I may be beating a dead horse but I think the reference is paramount. Both @RickyBlender and @pixelgrip did an absolutely amazing job making pebbled stucco but what you likely would find in cuba in the first place would be flat travine trowel stucco. It is unlikely that there was a whole lot of pebbled stucco in use in Cuba in the 1800s. That is an important distinction that has to do with both era and region, which brings me back to the statement about references.

Let me give it a shot in substance for you and if I come up with something good ill post the material.


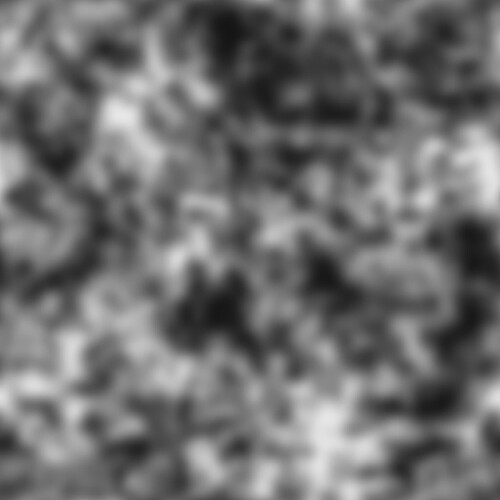
Here is my quick 5 minute method to hopefully get you a little closer to what it would be. I didnt go into any sort of complex layering. This is all pretty basic, but now you get a little more of that flat travine look that will be if nothing else more period/geographically correct. I know its not the same as telling you how to do it but if you are not 100% sure how to augment an existing material to change color or texture then I am not sure how much good the complex explanation of how I did this would be at this time. Definitely start with learning blend modes.

You will want some method of nonuiniform tiling when you use this but this material is about 1.5-3 feet in scale (sorta just up to you and what looks best) so it may not be the end of the world if you don’t. Up to you.


1 Like

@ThorntonStrolia

1 - where did you get these images ?
is it some equivalent or the real thing ?

2 - can you show for all people coming here
the nodes set up for these images with PBR

3- is it good for cycles or EEVEE?

thanks
happy cl

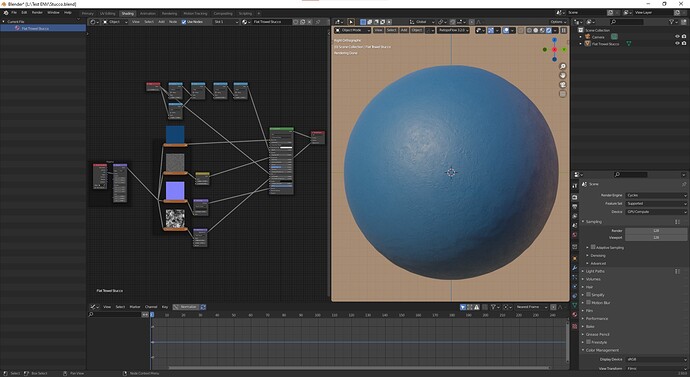
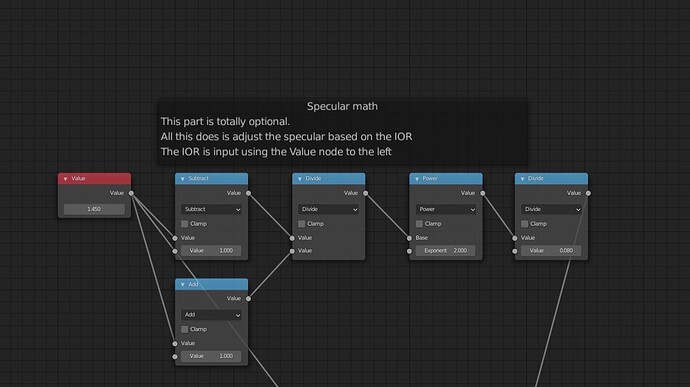
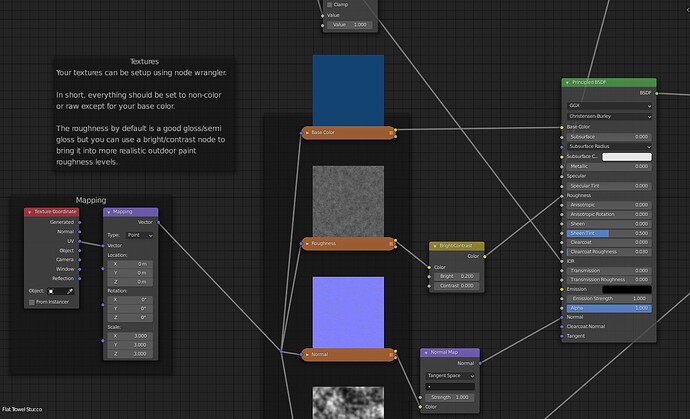
Textures are completely made by yours truly completely procedurally, free for anyone on the forum here to use however you like. I would be happy to show how to setup the nodes in a PBR workflow. Should work fine in just about any engine. EEVEE should be no an exception.

I will post a picture showing how to set this up for cycles/eevee


As a side note to this. The better way to handle the roughness, in my opinion, rather than what I did here, but it was quick and easy, would be to use a math node and simply add 0.2 but make sure clamp values is on so it cannot exceed a brightness of 1.

You can download the exact blend file here-

2 Likes

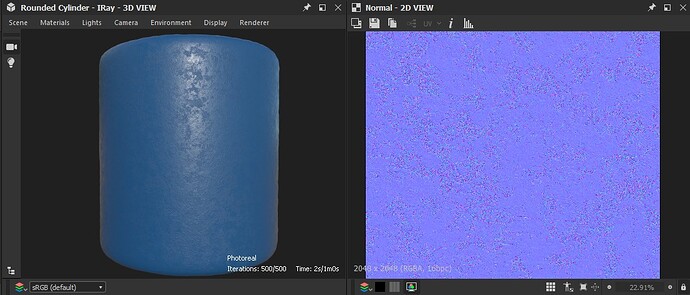
I worked up an example also ( but didn’t upload as it was answered already), using a Painted Plaster Substance File I had…
You can import Sbar files now in Blender with the free add-on…HERE

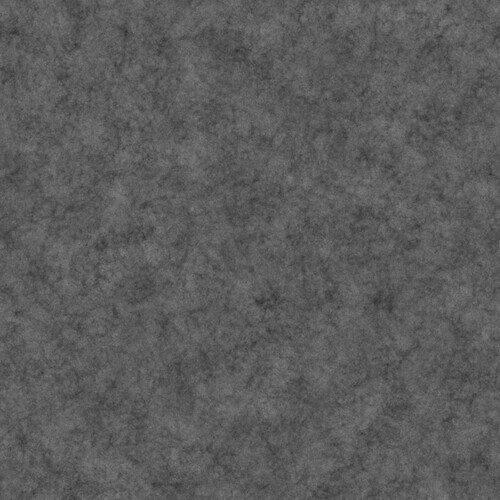
It is just a grunge image with Normal / Displacement / Metalness and Roughness
Cycles is Better but you could use the displacement as a new texture and add a displacement Modifier so it would work in EeVee…

Cuba-Stucco-Blend

1 Like

@ThorntonStrolia @RSEhlers Thank you both for the textures; I will try them out first chance I get. Would you be willing to share the .SBS Substance files? I bought Substance Designer a while ago but haven’t had time to study it.

@ThorntonStrolia You know a lot about stucco, would you have any resources on the subject? In particular early 1700s Caribbean?

I no longer have the SBS for mine. I didn’t actually save it. I did it so quickly that it isn’t at the typical standard I keep in my library so I didnt bother saving mine. I apologize.

As far as resources, not particularly. I studied traditional art before going to school for computer animation so for a while we had classes on architecture and its overlap with traditional art and possibly more obvious than not, fresco paintings are a huge part of that. Most of what I know came from my classes so I wouldn’t know where to begin trying to dig them up but I can hand down a small wealth of knowledge that you may be able to use to more easily target your research. All this to say, this was some time ago and just what I remember from school so some of it could be just a little off but the technical details for the most part stand.

I want to add that stucco literally means plaster but the context is what defines it at least for english speakers. Plaster is a bit of a catchall because the specific application of plaster can be vastly different vs just saying stucco which has some pretty specific applications and means of application.

Frescos obviously derive from Italian history but the principles of creating the plaster exist pretty much the same all over the world since long before anyone thought to paint on it. There are several methods but some exist even today, the most common is by using variations of lime. If the target is a beautiful fresco you will use quicklime (calcium oxide) and sand and water mixed together to create the intonaco, which has a high hydration level and will crack over time as it dehydrates. Alternatively what would be used for something like a caribbean building during the 1700s would be probably just straight crushed limestone (calcium carbonate) mixed with other raw earth materials like straw, sand, or even dung, and then water. Main problem with straight lime is the water retention and increased chance of cracking. These days we have really high quality materials and fiber glass that allow us to reduce cracking but back in the 1700s they would rely on other things for stability, which is why cracking and layers of patching was so common. They would have painted dry but they probably would have painted with calcium carbonate also. Thats part of why there is so little pigment. Lime is typically white which means not much darkening, and makes a great binder, but it is also white so it will desaturate the color quite a bit. You can mix pigment straight into a wet mixture of lime and water and begin painting away. This is where the process begins to act more like painting fresco agian, except instead of painting water onto plaster you are just mixing the pigment into the plaster directly and using it as the paint.

Pebbled plaster even then was made with, well, pebbles, but you needed to first get the pebbles, and it was less sturdy since straw famously is not as strong as fiber glass. Then we run into the next issue, water retention would be poor, and if it cracks its harder to stucco over because of the texture. For that reason finer granuals like sand were more commonly used, especially in caribbean regions where there is an abundance of sand. It then can lay down smooth, is easier to attain, easier to manage and repair, easier to paint, easier to clean. All around its just sorta easier. Initial application requires a bit more care sicne you have to shape it with a trowel instead of just packing it down with the back of a shovel, but all in all lead to less expensive better results.

hopefully, that helps a bit.

4 Likes

Thank you very much for sharing your knowledge! It really helps

So flat travine trowel stucco contains sand as opposed to the pebbles in pebbled plaster? Is that right?

1 Like

not inherently. Its just that you need a thin medium to be able to use a flat trowel to get a smooth result. Think of it like baking. You dont need a specific bake pan to bake but you need A bake pan in order to bake. A frying pan, with rare exceptions (like cast iron) would not be all that much use to you in an oven as it is designed for a stove top. In the same way that you could use some other earth medium, or even none (it just wouldnt be very strong. At the end of the day the lime is acting sort of like a chalky glue) it just has to be fine. If it is too course you would just be damaging your trowel and could have just done it with the back of a shovel to begin with

1 Like

here are 4 common types

The lower 2 are most like what you would find in all likelihood. In some cases it may be completely smooth like clay. Especially if they used a dung filler or base layer. But realistically the bottom 2 in my opinion are the 2 most visually appealing while also period and geographically correct but if someone with more expertise jumps on here I may make a fool of myself by saying all this. Just regurgitating what I was taught which makes the most sense. Dont shoot the messenger lol

2 Likes

Thank you for the great summary! What I often miss in case of realism is actual logic and reality of materials. It is not just about textures, and lightning that you nail… if the models wont have realistic logic, then it would not work. You wont put realistic oak leaves on a realistic birch bark right? :grinning_face_with_smiling_eyes:
You all know these wooden furnitures, that often have these printed outer layer, that is not actually real wood, and the “bump” on those wont follow the wooden pattern. In this case the seemingly incorrect realism IS the correct one. See? :joy:

Btw for AC Valhalla, Ubi studied the actual flora of the middle age english regions. (Claps) check their dev vlogs

So, even though we do not need to stress on this too much, it is good to know these details, and I would say it is a must for “real” realism. It all changes the textures you use, patterns, colours, bump, etc… That is the greatest thing, to do the homework, and channel this all into Blender.

So yes, thanks for a piece of this above! :blush:

2 Likes