Another great update and I agree, they are just details which you can add in the end or not. But adding just a few goes a long way imo (not like I did ;)).
Keep it up.
Thanks Ranquin! Yes, I suppose it’s that old saying less is more  I think it was a good idea though, but it’s probably just something with me not being skilled enough with the painting to make it look the way it needs to. I’ll definitely have another go at it though.
Not a whole lot to say this time, but I got two more pieces of clothing done. Next I’ll work on the wool coat and then try to add a bit of snow. I probably won’t do too much post processing in the end, but, just for fun, you can also see how it looks in black and white and with an old photo feel below 


The snow and the coat are put in. I’ll try and work on the face a bit more next and do just general tweaking of things in the image, but amazingly, I think the image might almost be finished!

Quality update as always! Your fabrics are fantastic.
Thanks Toshi, that’s really great to hear It’s been fun trying to figure out what it is that makes each kind of fabric feel the way it does. Each one is so different that I have pretty much had to create each set of particle systems from scratch to get them looking right.
Great model, texturing, lighting, composting etc. But I really gotta go now and chase away these ninjas that are cutting onions.
I know, I know, so original.
This just gets better and better
Thanks Ognjen! Seeing your comment really makes all the long hours worth it. It’s really meant a lot to me as well If only I could find where those ninjas keep hiding…
Thanks edgarej! It’s really been a fun adventure to have:) I didn’t know what to expect with it when I was starting out, but I’m glad it’s turning out fairly well in the end.
I’m following this for a while now (on different sites  ) and it is truly awesome work. Very inspiring.
I hesitate a bit to say it. But a two cent issue for me are the teeth. Obviously he had some problems with his oral hygiene in the past and yet he has these three white and blank teeth. That doesn’t work really for me.
On the other hand I see that you try to make him likeable in some way. Kind of a dilemma here, as dirty teeth would be repelling. But perhaps a tad more yellow would look more natural?
Thanks so much for the encouragement minoribus; I’m glad I could be a part of something that’s inspiring :).
Ah, I’ve been found out  Yeah, I thought it would be a good idea to post it on CGsociety and CGfeedback as well, try to get as much feedback as I could. There’s really only been a few people who commented on it, but I’m glad I did.
I think you’re right about the teeth. Just as you said, I wanted to keep him from looking too repelling, but I’ll work on it a bit more and see if I can get a good balance. Thanks again!
Ah, I’ve been found out
Yeah, I thought it would be a good idea to post it on CGsociety and CGfeedback as well, try to get as much feedback as I could. There’s really only been a few people who commented on it, but I’m glad I did.
Don’t get me wrong. I started to do that also and there is nothing wrong with it. As artists we need as many fresh eyes on our work as we can get. And sometimes I feel that every community has developed it’s own preferences and viewing habits. Here on BA for example, there is a still ongoing SSS hype. We have been missing that in Cycles for so long that many of us want to see it everywhere and not too subtle, please. (I’m not talking about your work in this point!)
This is really great, and I love the back story as well! Great work all around!
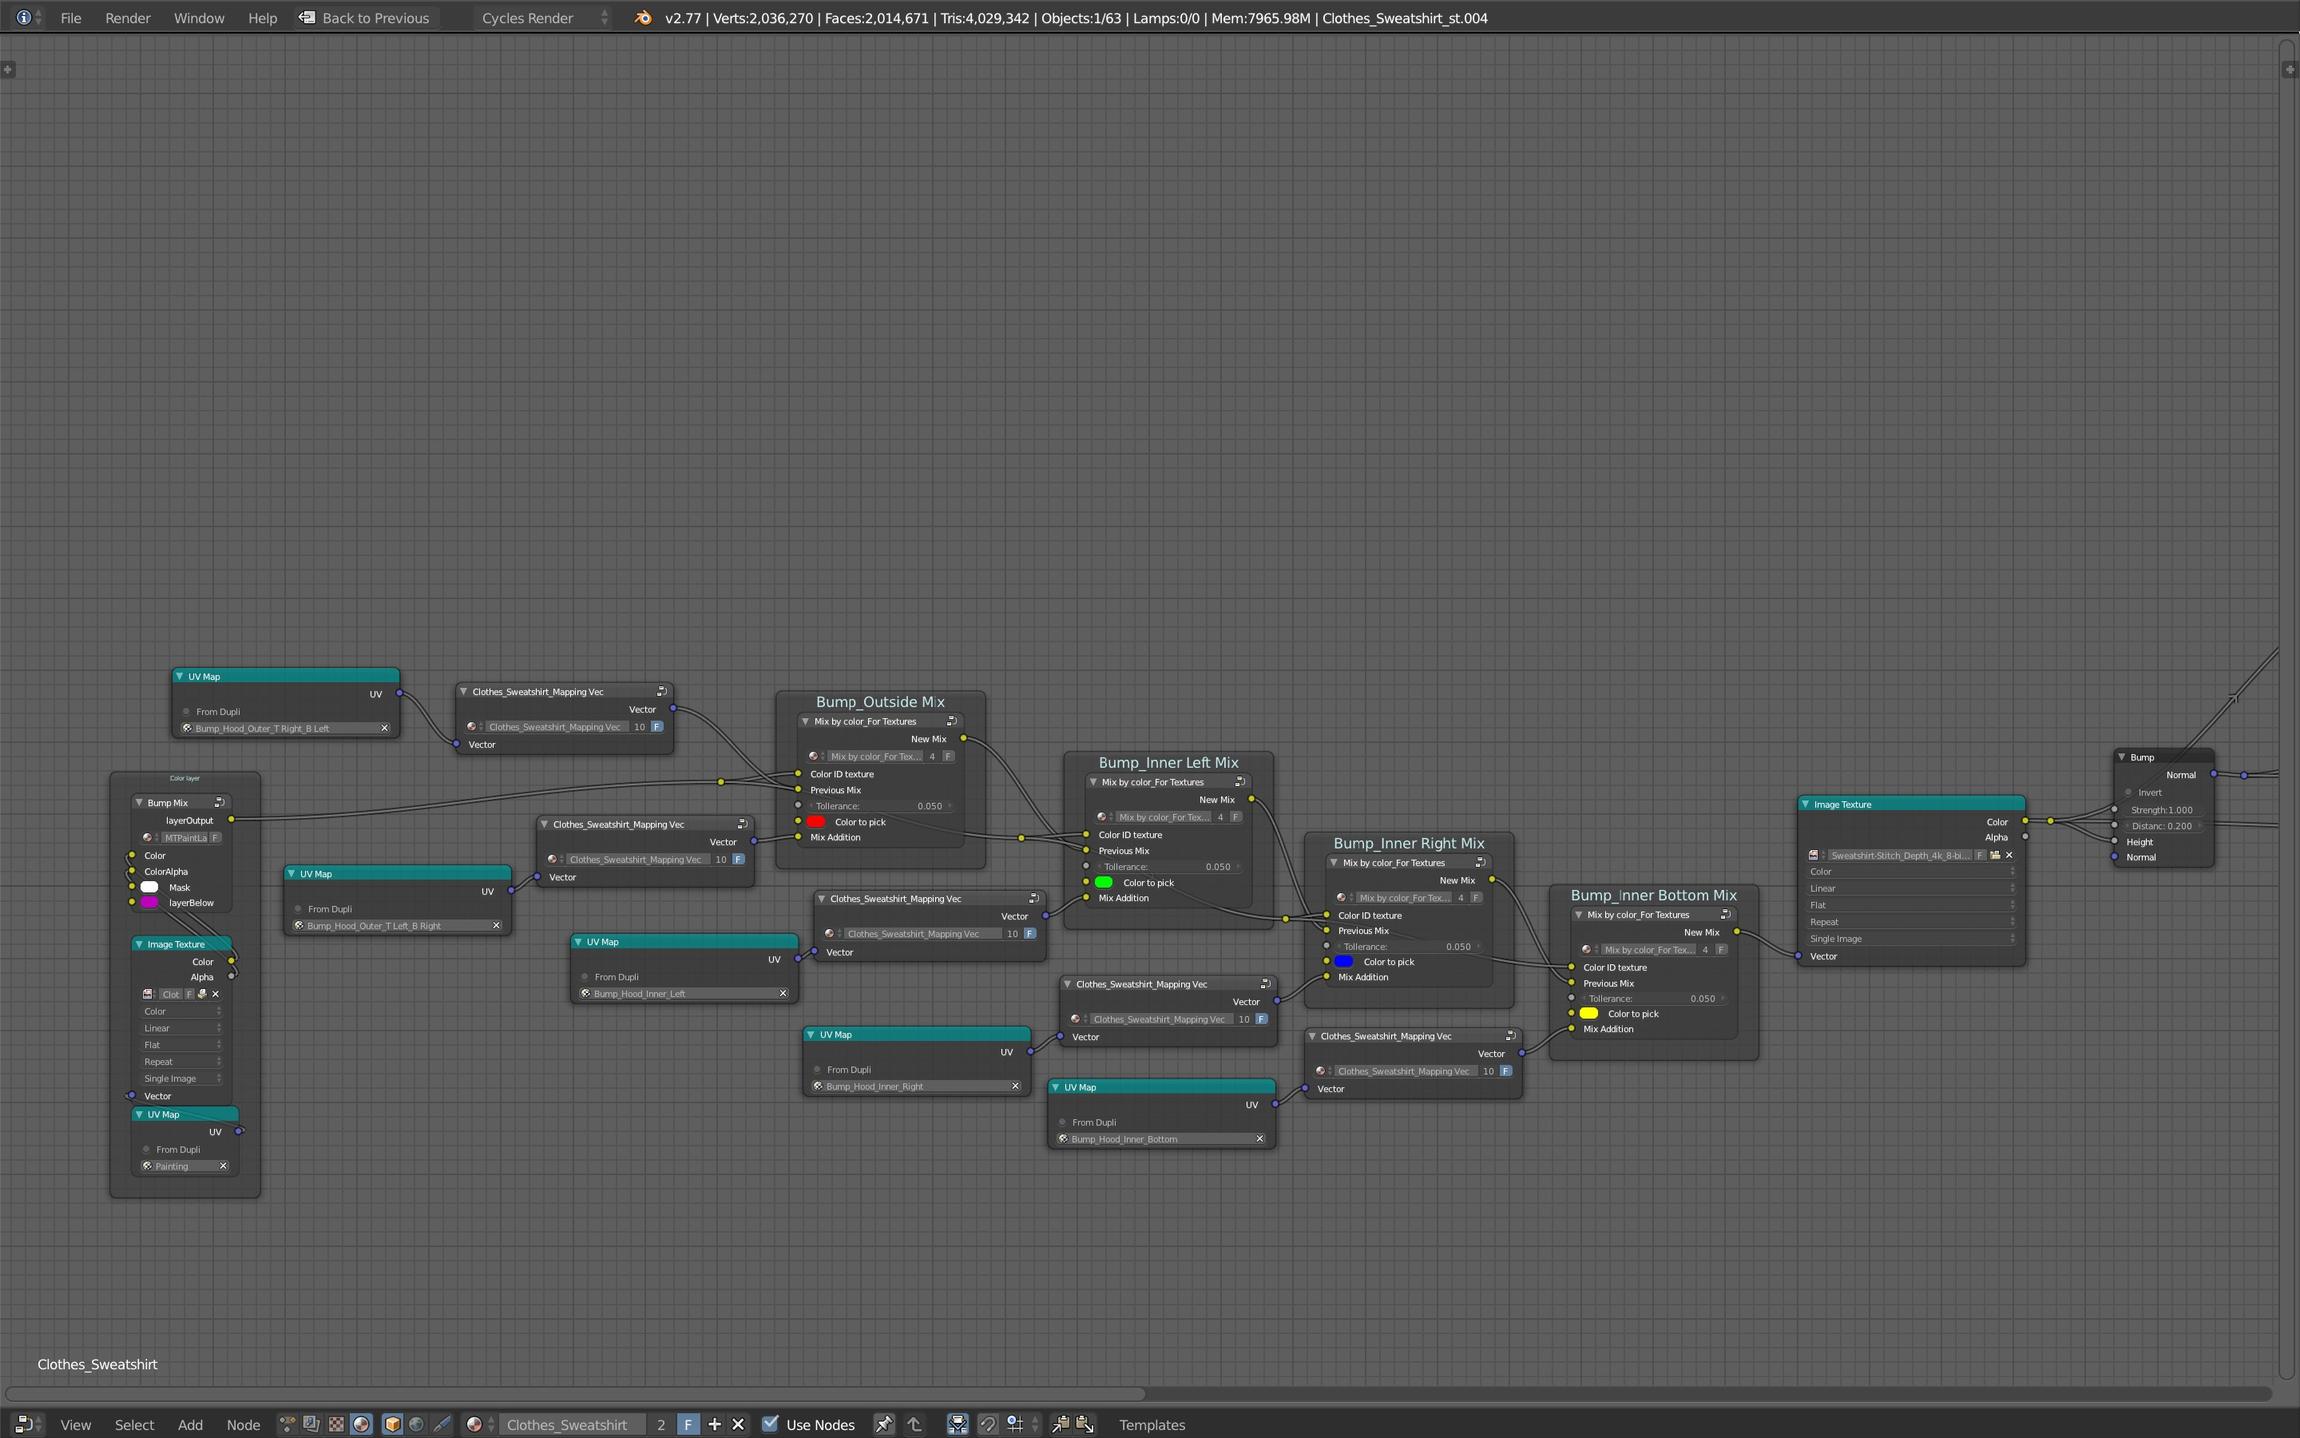
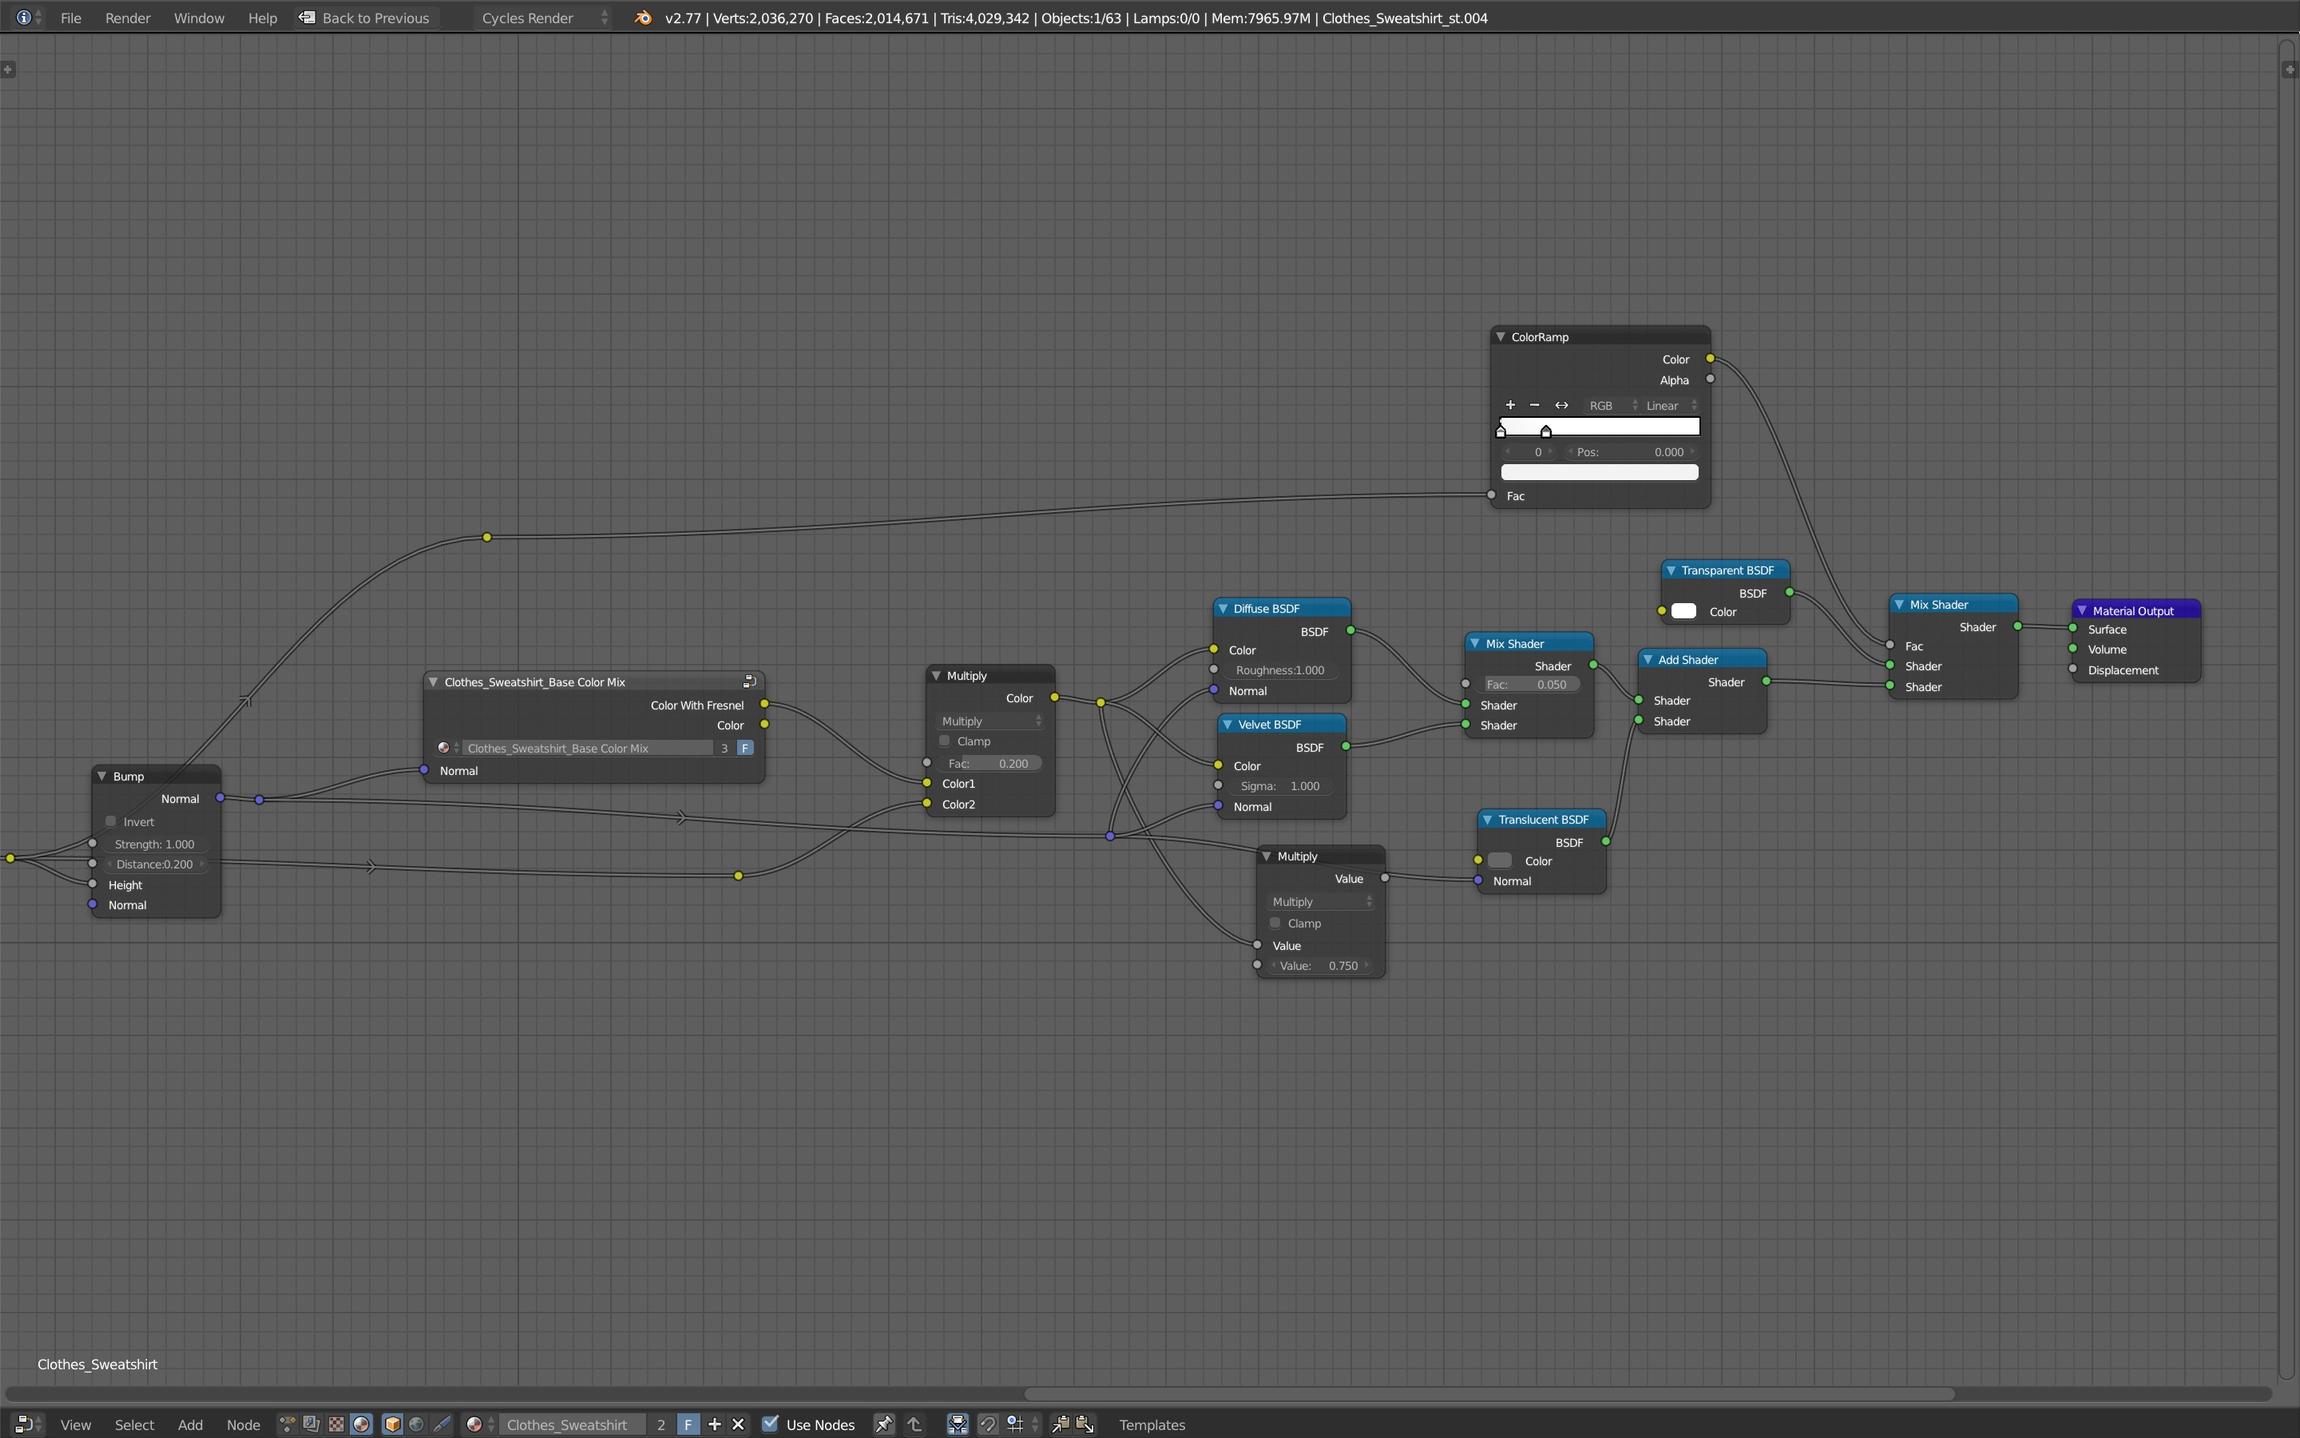
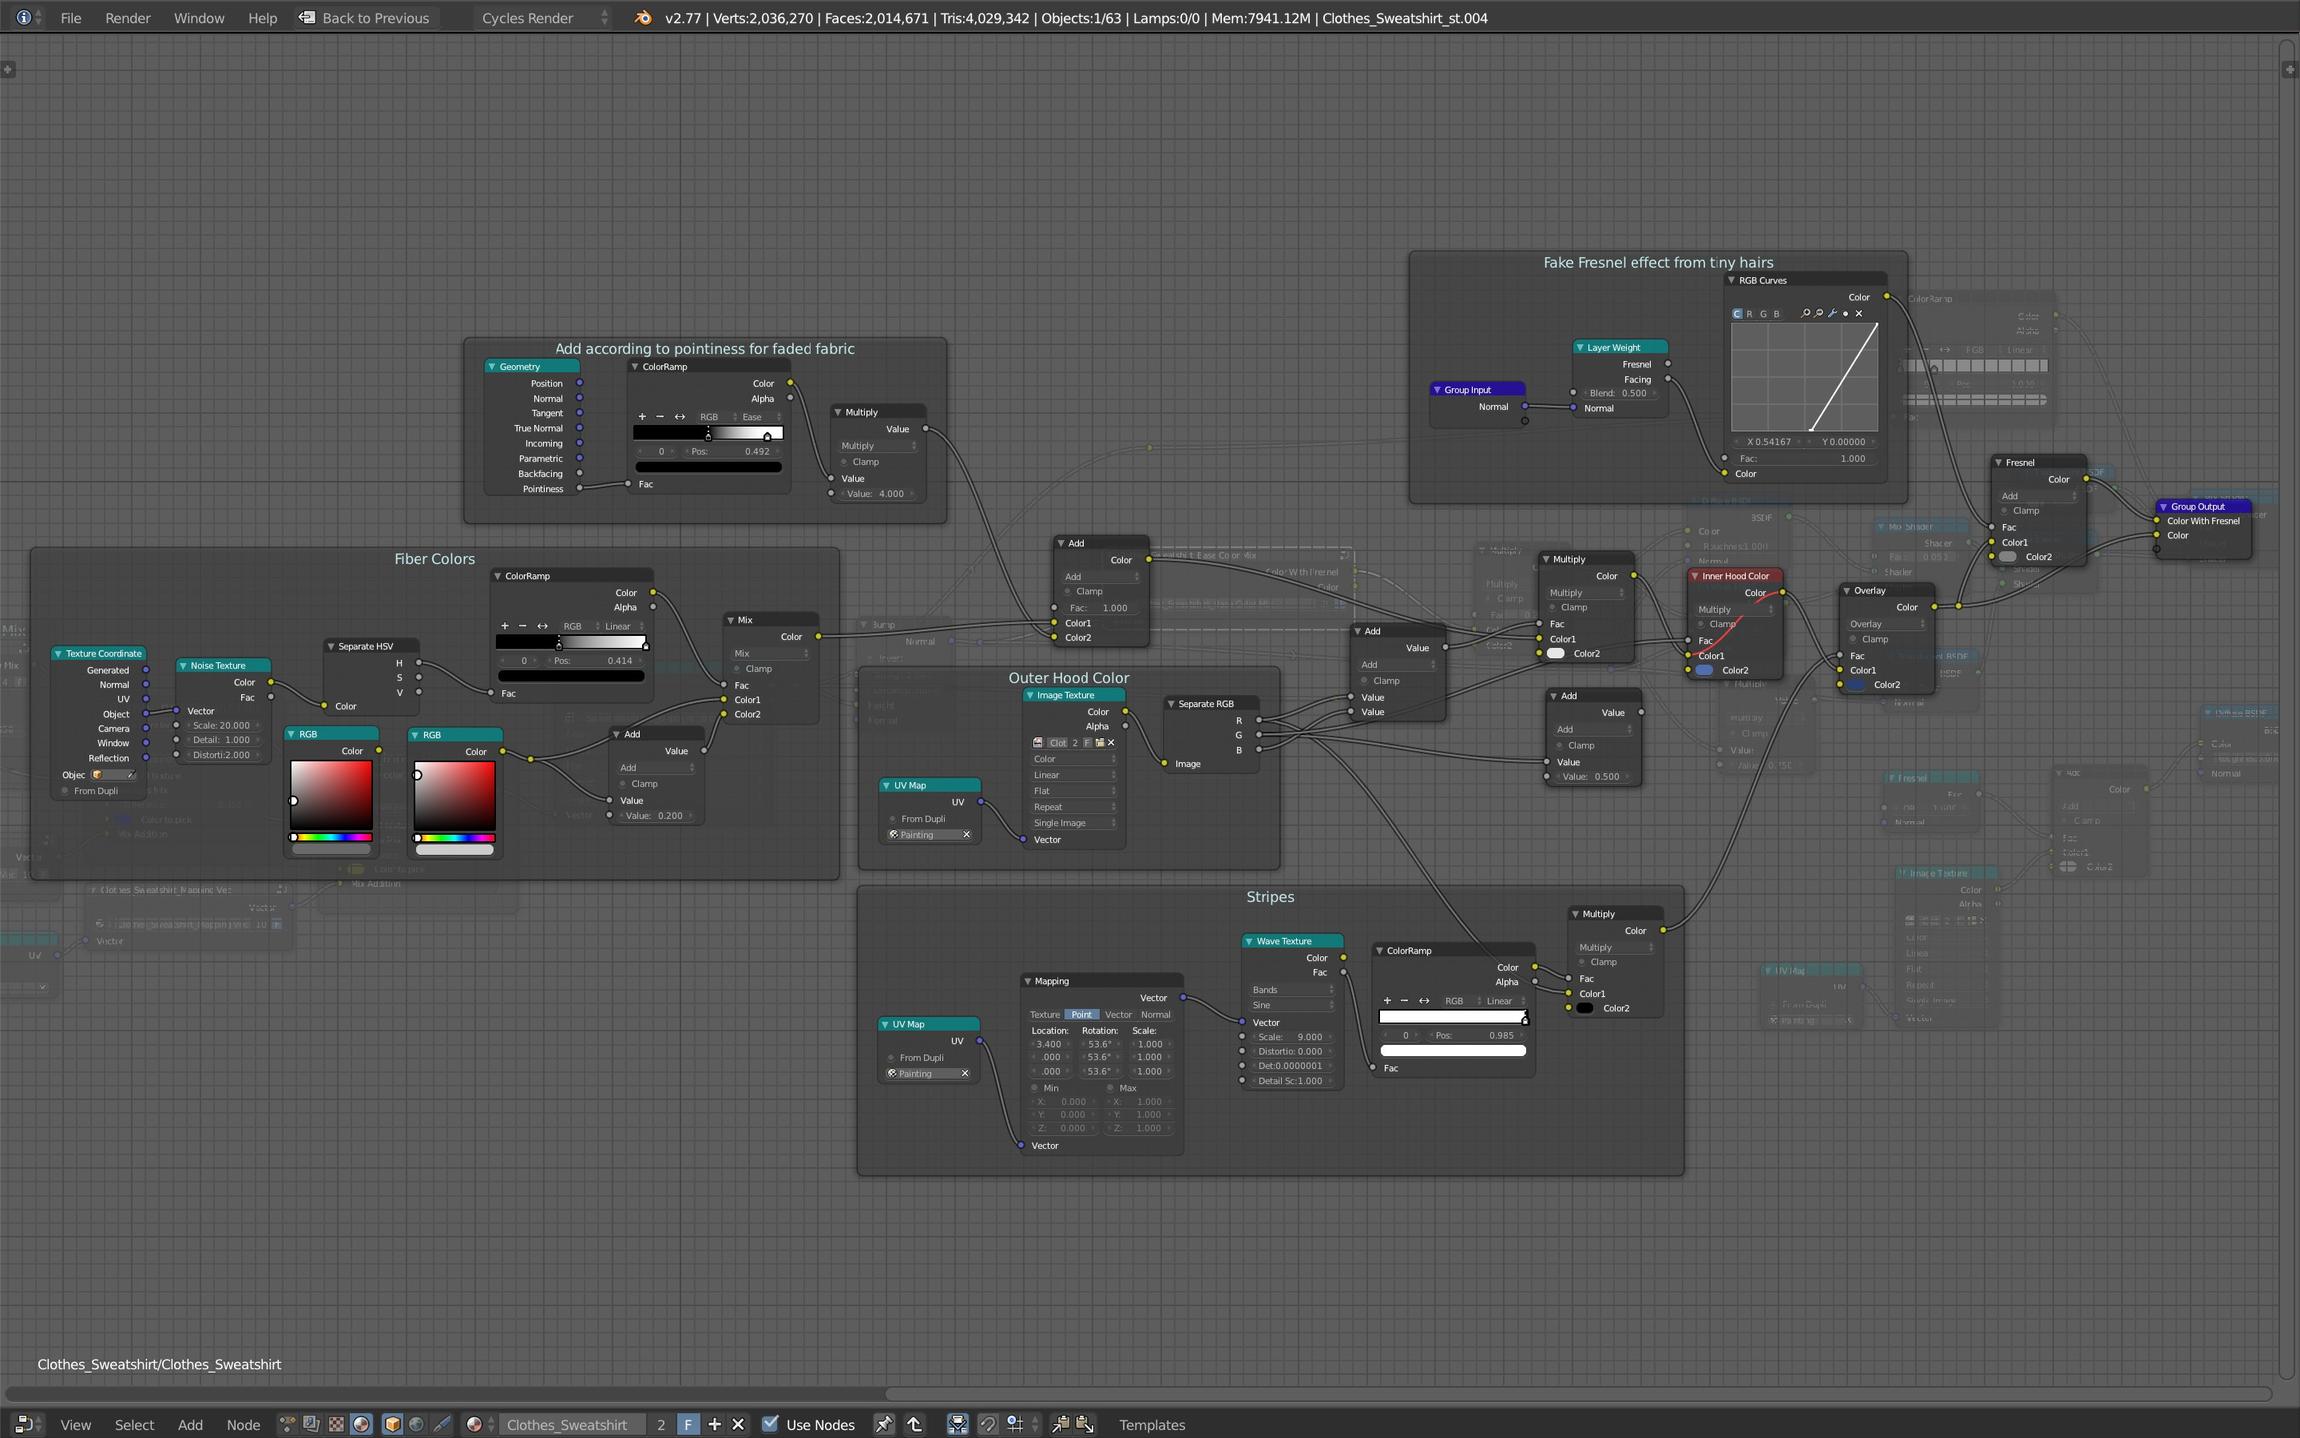
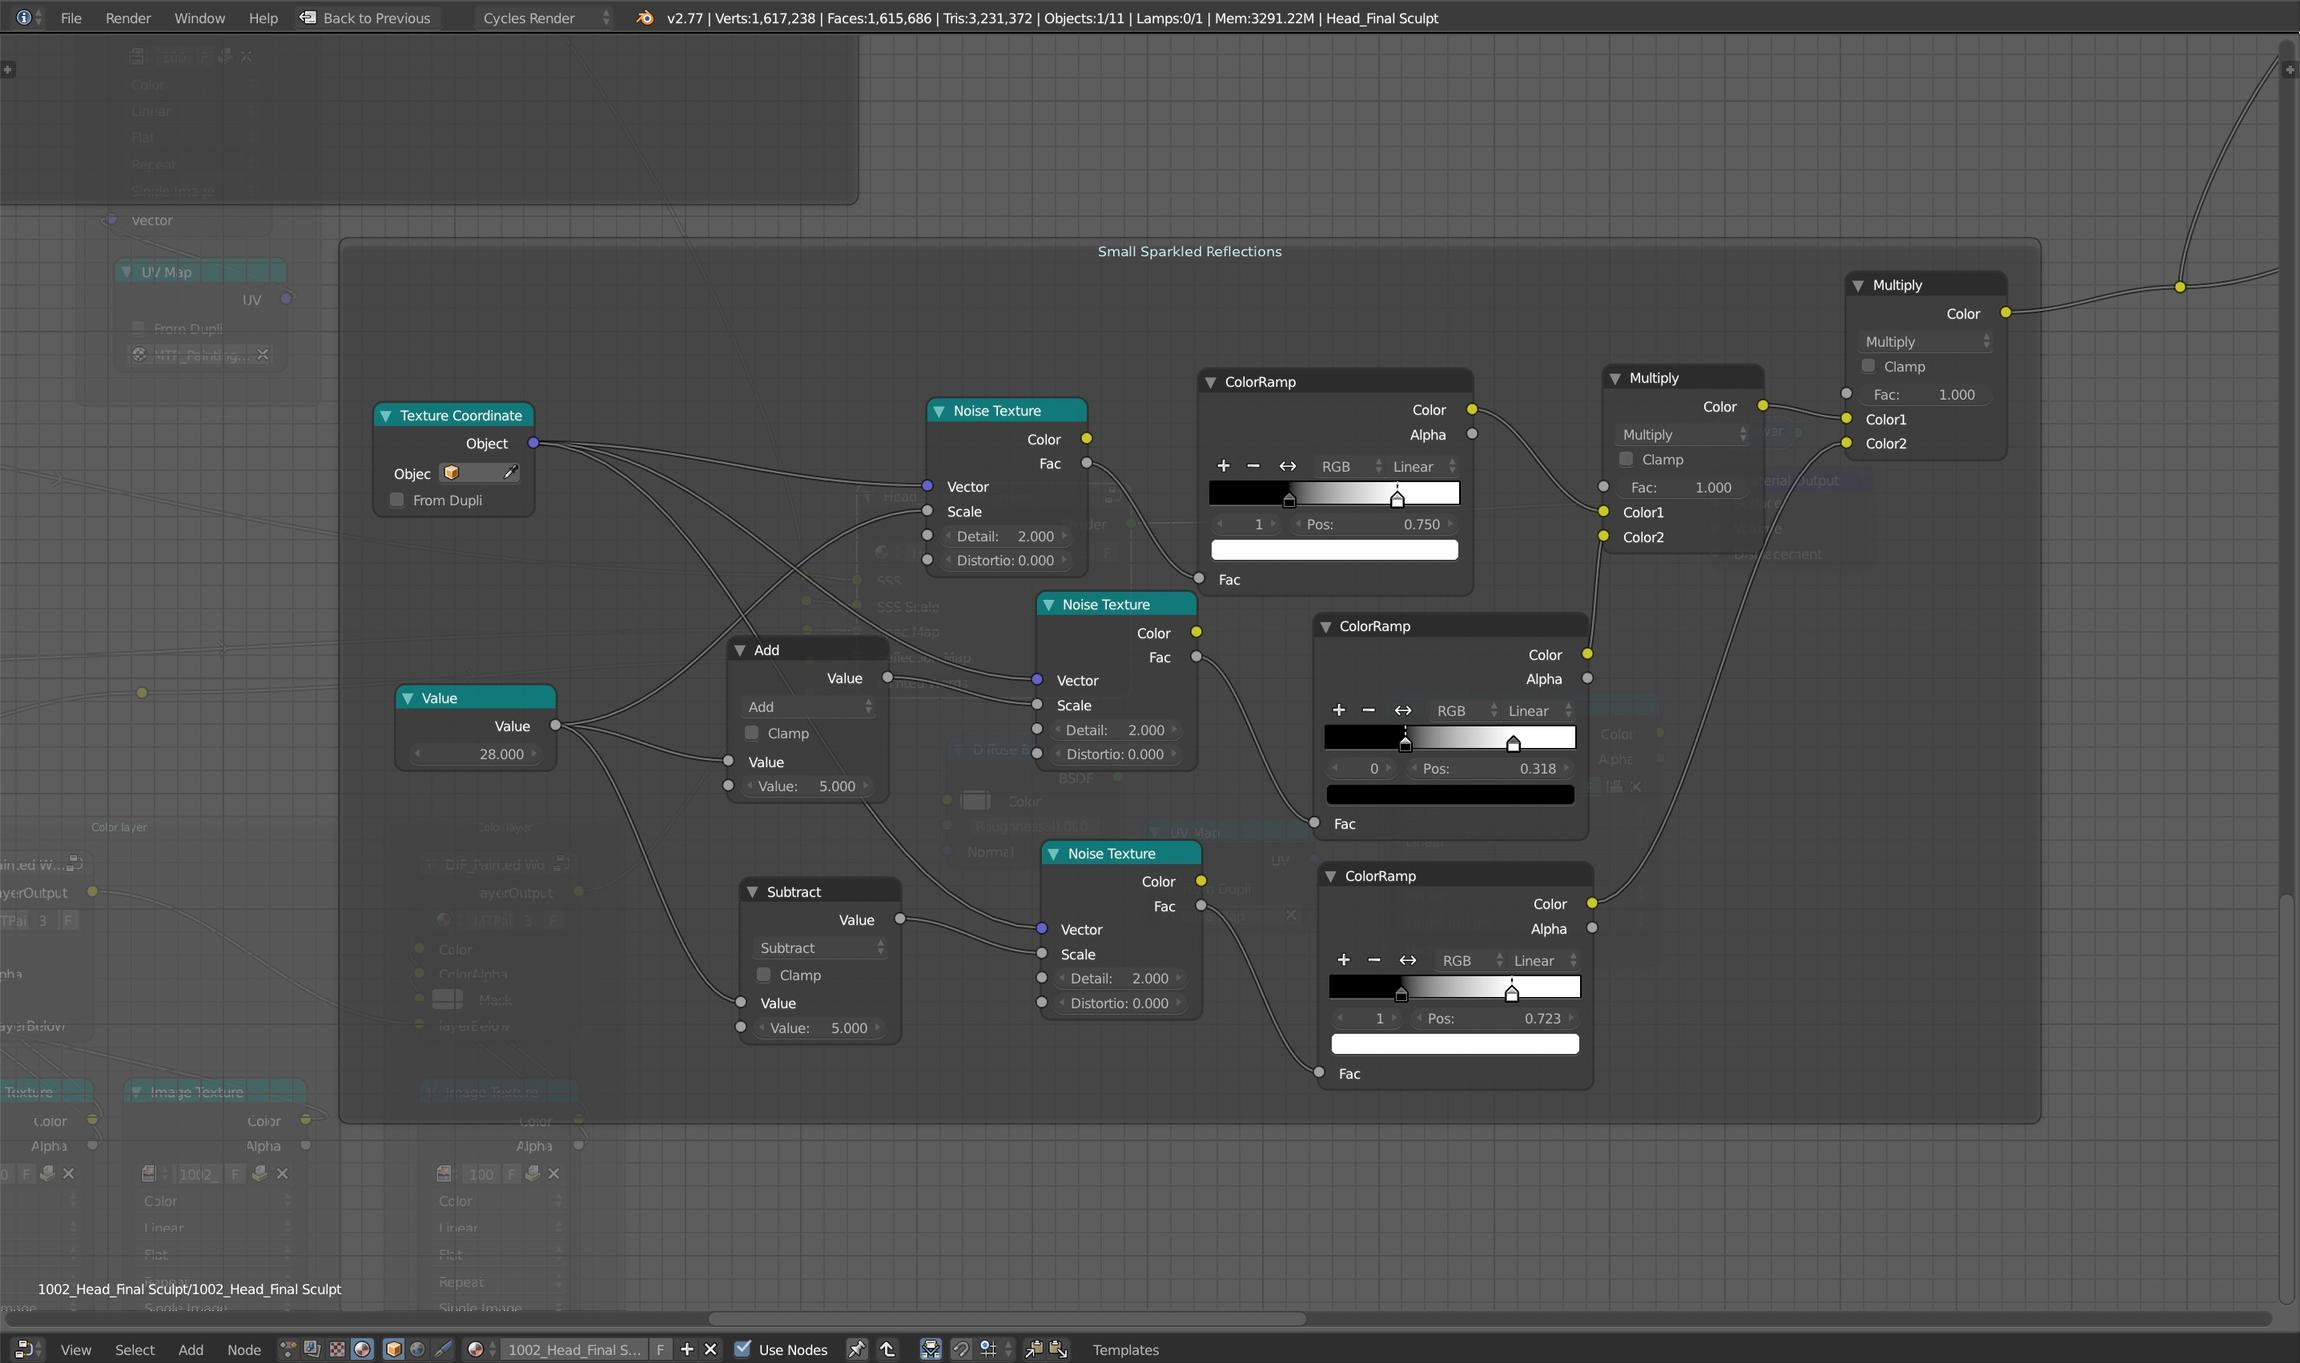
I’m still working on the head, but I thought I would go ahead and post the shader setup and particle settings I used on the sweatshirt, since it did turn out alright. Hopefully it’s fairly self explanatory, but one thing I did find interesting, that is seen in the Base Color Mix node group, is there had been a short video I had seen a while back that showed when you use the color output of a noise texture and plug that into a Separate HSV node, then use the Hue output, you get a really interesting result with all these soft and hard transitions. I thought I would try it out for fabric and it seems to work pretty well for getting variation in the threads. As long as you’re not really close to it, it also works quite well to get the look of multiple colors of thread being used in the fabric.
I also used that idea I had talked about previously of using a painted texture to control where the seams would be for each piece of fabric in the sweatshirt. It can be a little bit finicky because you have to create multiple UV maps, then overlap them for each seam, since the sculpted seams don’t line up with the edges in the base mesh, but it does work. Thanks to these node groups here: http://www.blendswap.com/blends/view/81017, I was also able to mix each piece of fabric with only one image.
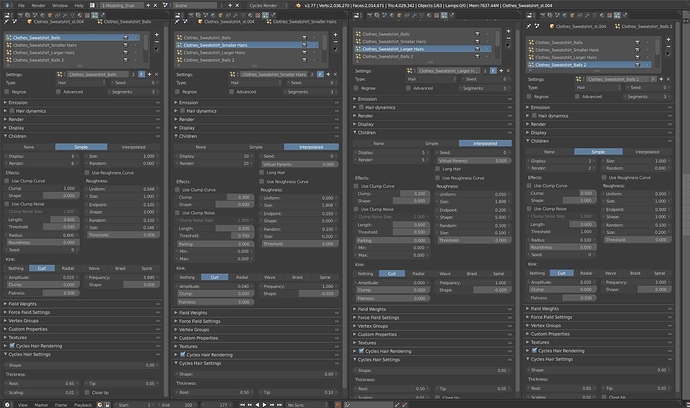
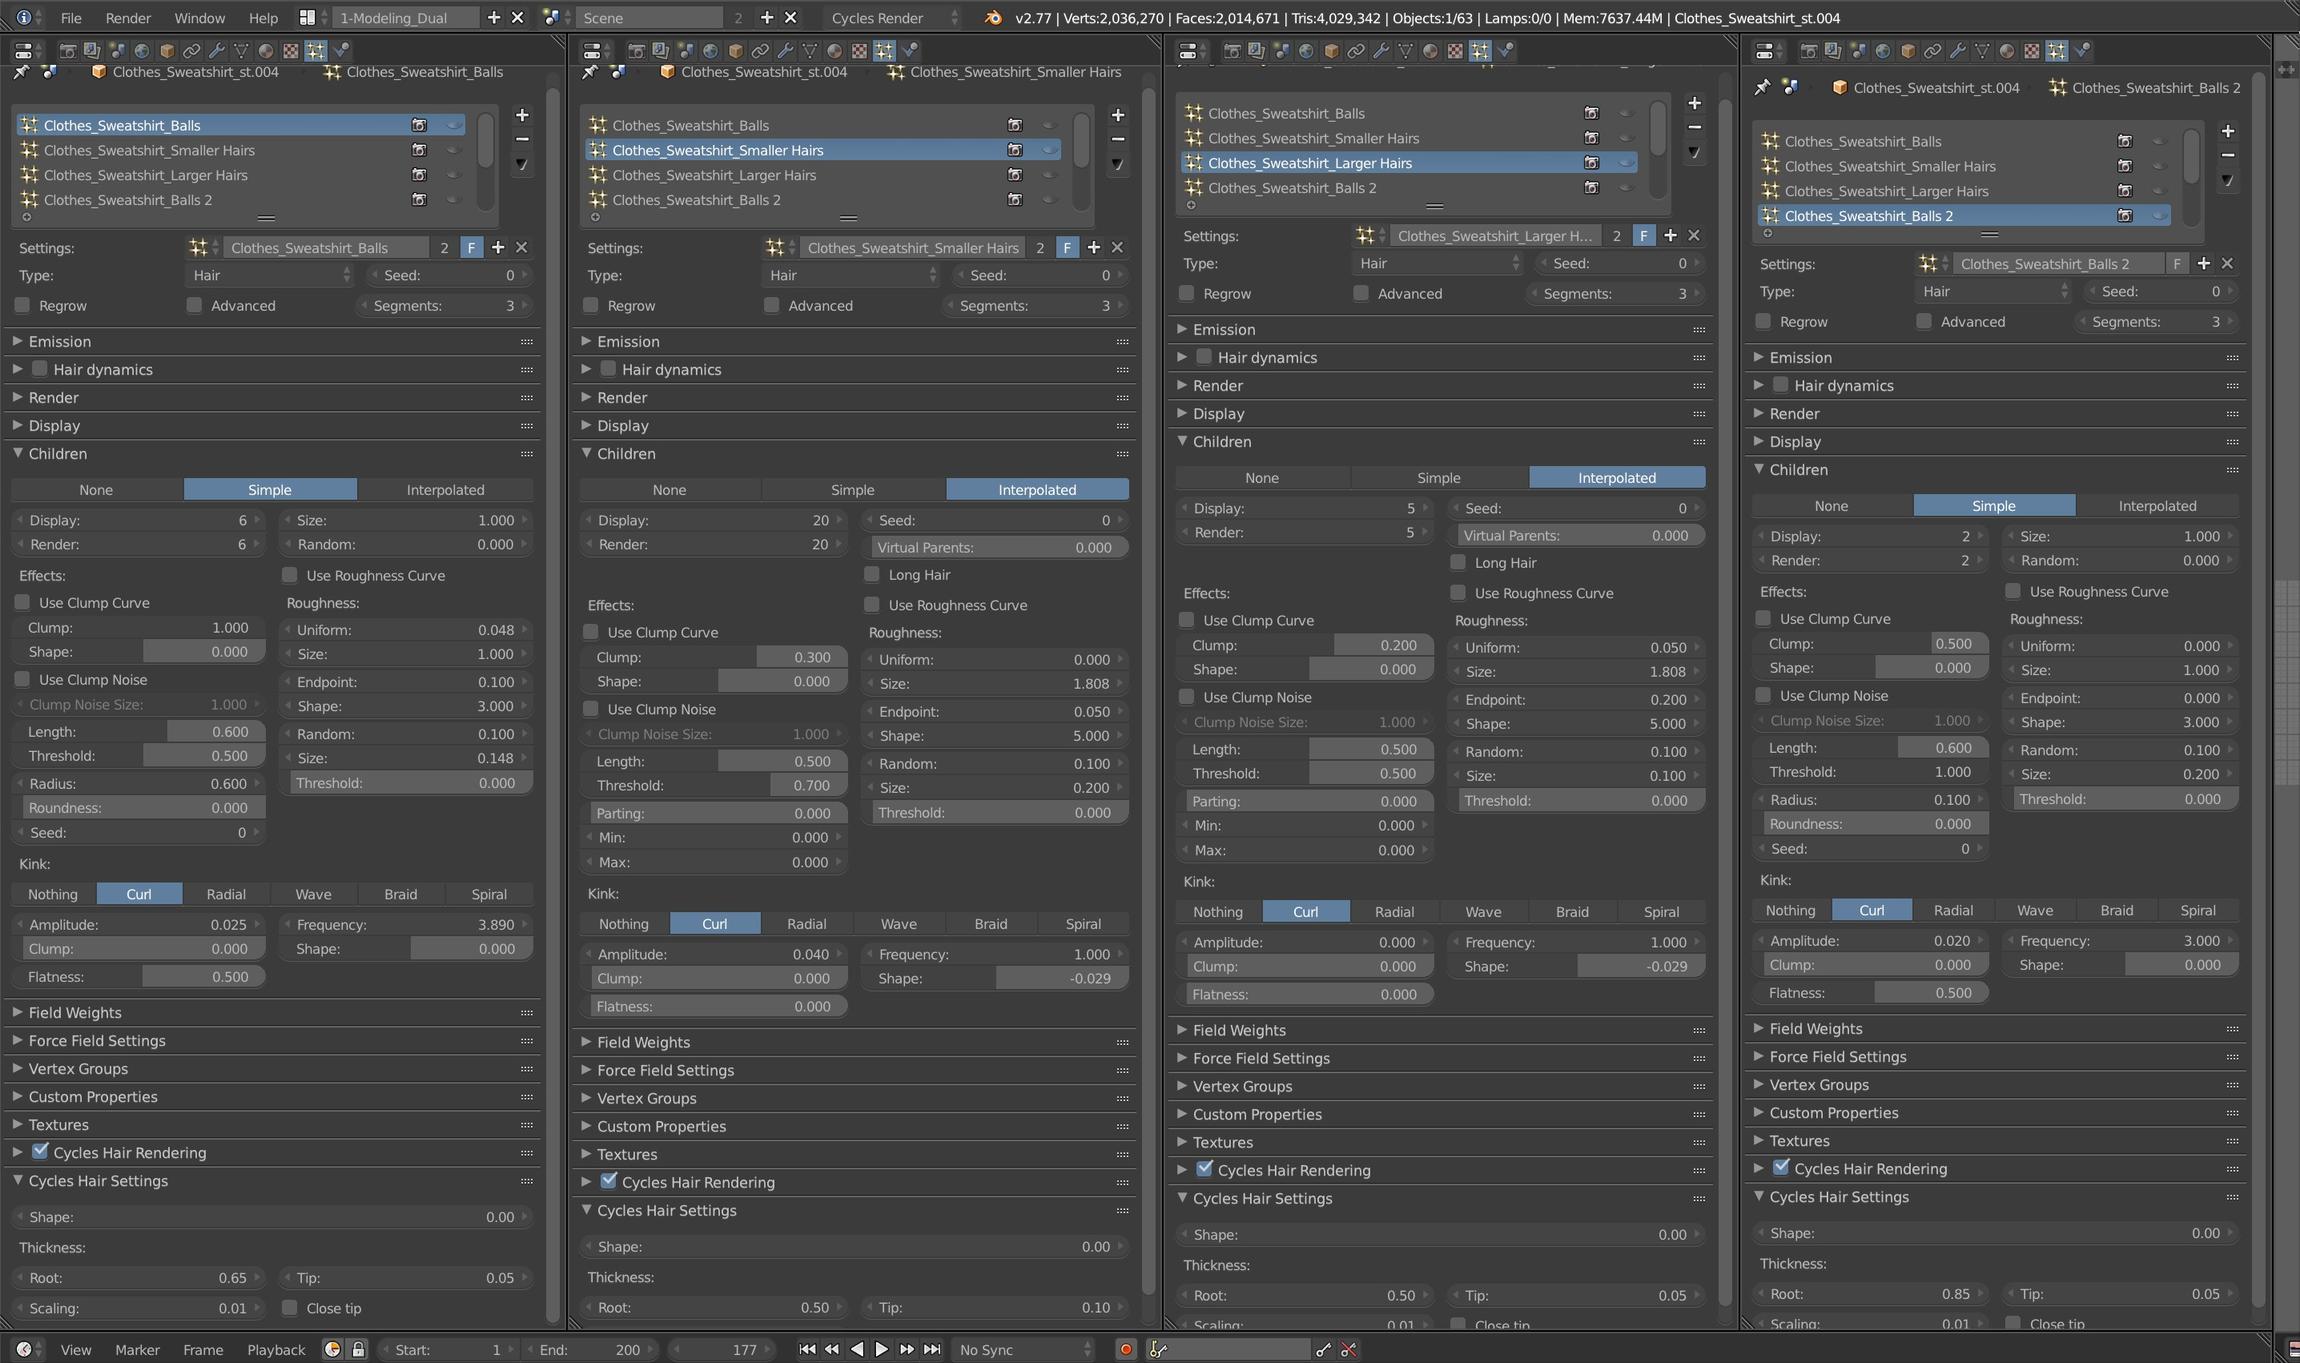
One last thing I found interesting with the particle systems is for all the individual hairs, if you use the interpolated method for the children hairs, then add a little bit of clump, the hairs will lay down a little in different directions because they are trying to be clumped to the guide hair. You do have to have quite a few guide hairs so there isn’t a long distance for the children hairs to clump to, but doing it this way, I didn’t have to try to comb any of the guide hairs to get the children not sticking straight up, it was all done automatically.
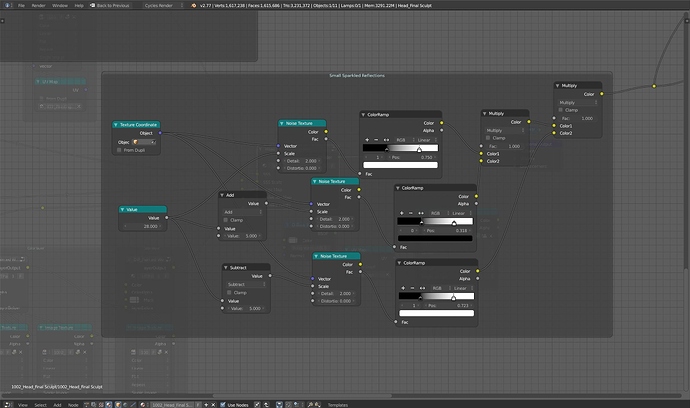
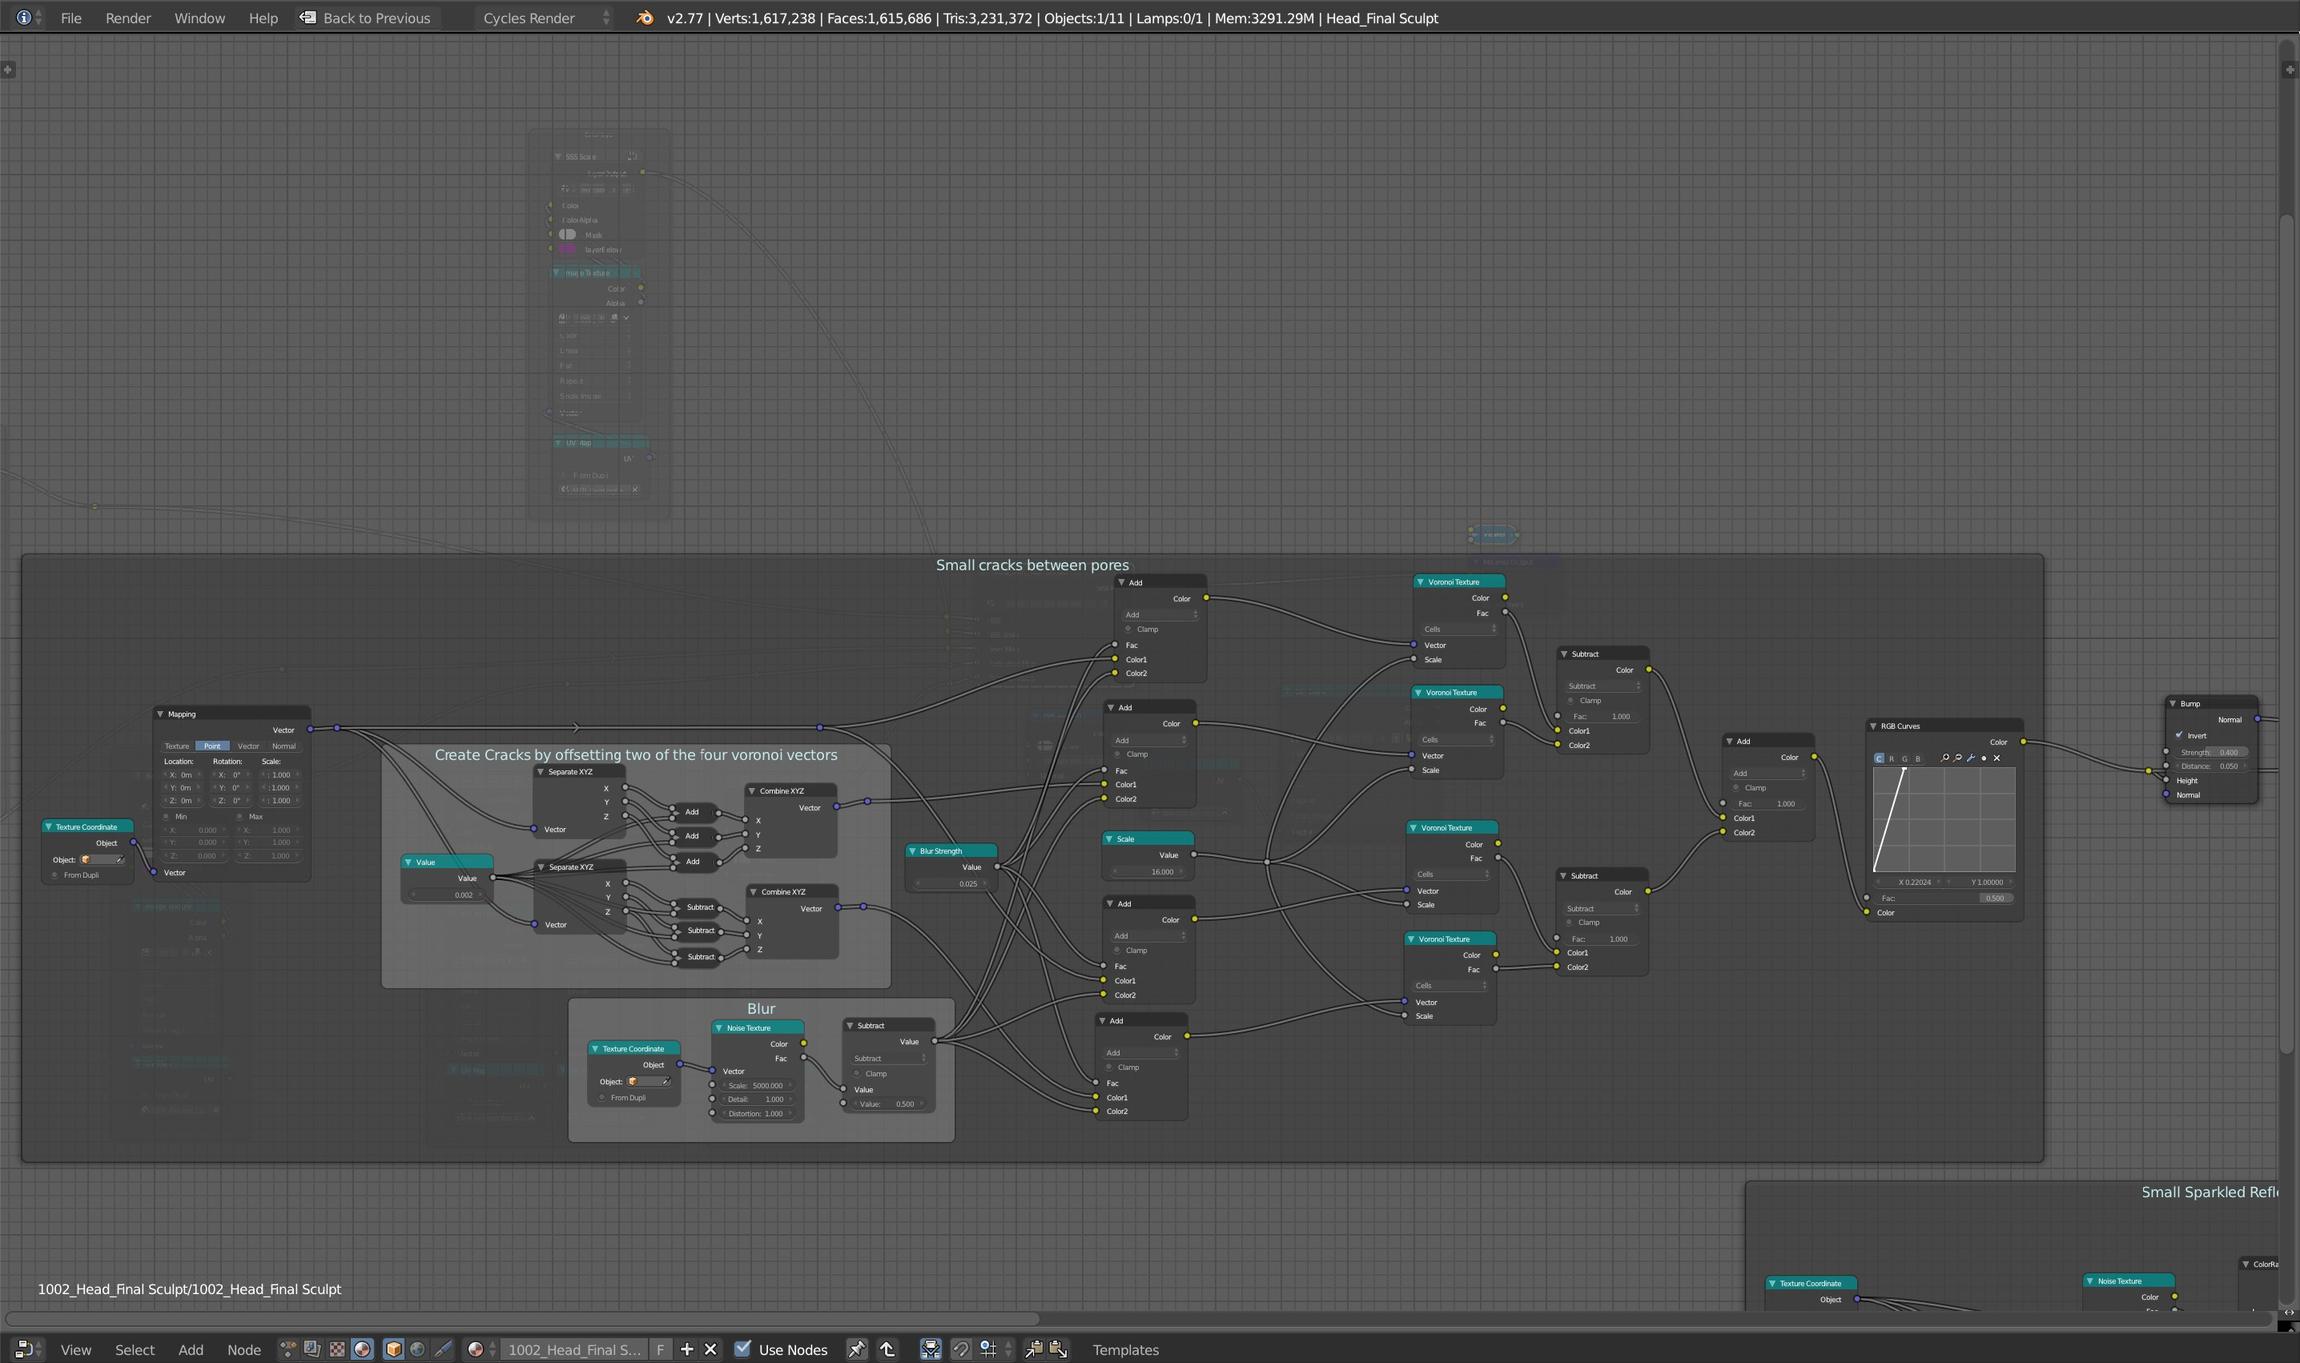
Beginning of node network:
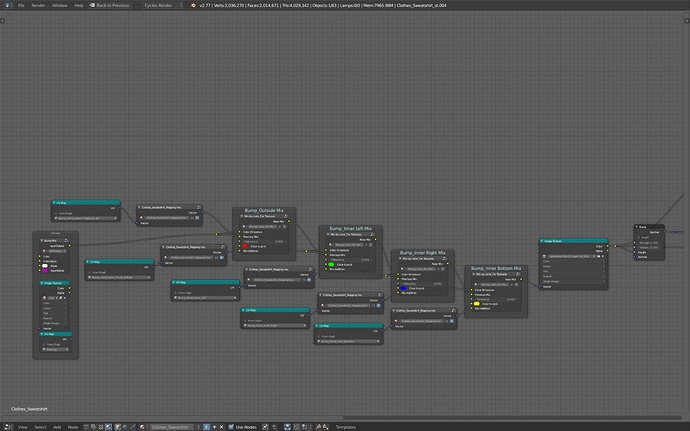
End of node network:

Base Color Mix node group:
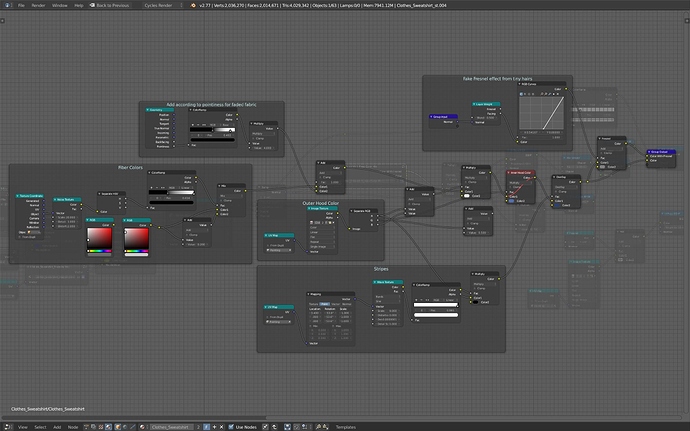
Attachments
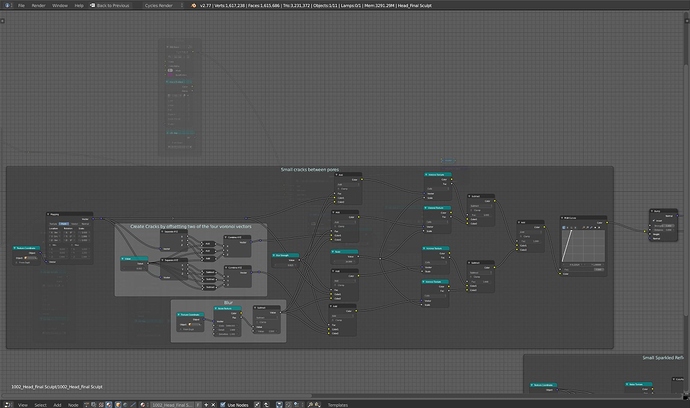
Well, I think (fingers crossed) it might be done. I made the teeth a little more yellow and added in a few sun spots, so hopefully things feel a bit more natural now. Since it was the first piece of clothing I added materials to, I worked on the hat a bit more using everything I had learned, so hopefully it looks even better now. I also reworked the skin shader a bit and added in the micro-geometry of the skin, based on this: http://gl.ict.usc.edu/Research/Microgeometry/, using a procedural node setup. It’s a subtle difference, but it is interesting how it changes the way the skin feels and makes the shine not feel as perfect. You can see the node setups below. The first one is to get the cracks in between the pores and the basic idea comes from this CGMasters tutorial: http://www.cgmasters.net/free-tutorials/cracks/ The second one is just some noise textures multiplied together, then added to the base amount of reflection using an add node to create the kind of sparkled feel of the skin.
I guess that’s it for now. Unless there is something really major that needs done, I’ll probably be posting it in the finished projects section over the weekend. Thanks again to everyone who has posted along the way; it’s really been great having your encouragement


Attachments
Congrats on finishing this piece, it’s awesome!
One thing that kinda bugs me is that the attention is drawn to the cloths a bit because of how detailed they are (which is awesome in and of itself). Don’t get me wrong, the focus is still on the face but the balance could go a little more towards the person by having more detail on the face and possibly less detail on the cloths.
Interesting stuff with micro-geometry. Do share some info if you have a minute.
Congrats from my side too Absolutely fabulous.
I experimented with your final render and added a tiny gaussian blur of 2px to it in gimp. I feel it makes it even more photoreal, because it eases the crystal clear sharpness of the face a bit, which is a clear sign of CG.
I kind of see what Toshi mentioned. And in my experiment with post processing I cropped most of the sky above his head away. I also made the composition a bit more unbalanced to the right. A tiny bit of vignetting in the upper corners and reducing the value of the bright background areas also helps to give more focus to the face.
Everything strictly imho, of course
Thanks a bunch to you both Thanks for your ideas as well. I saw your posts this morning and made some last minute changes from your suggestions. I think it looks a bit better now with the focus being more on the face. It also feels a bit less planned as well. You’ll be able to see it in the final images soon
So sorry Toshi, I’m not sure how I missed your post. I think the subscription might have glitched or something. Yeah, that microgeometry is pretty interesting stuff. I’ll try to find all the things I’ve run across about it, then give it to you in the next few days.
Thanks, Art! I appreciate it!