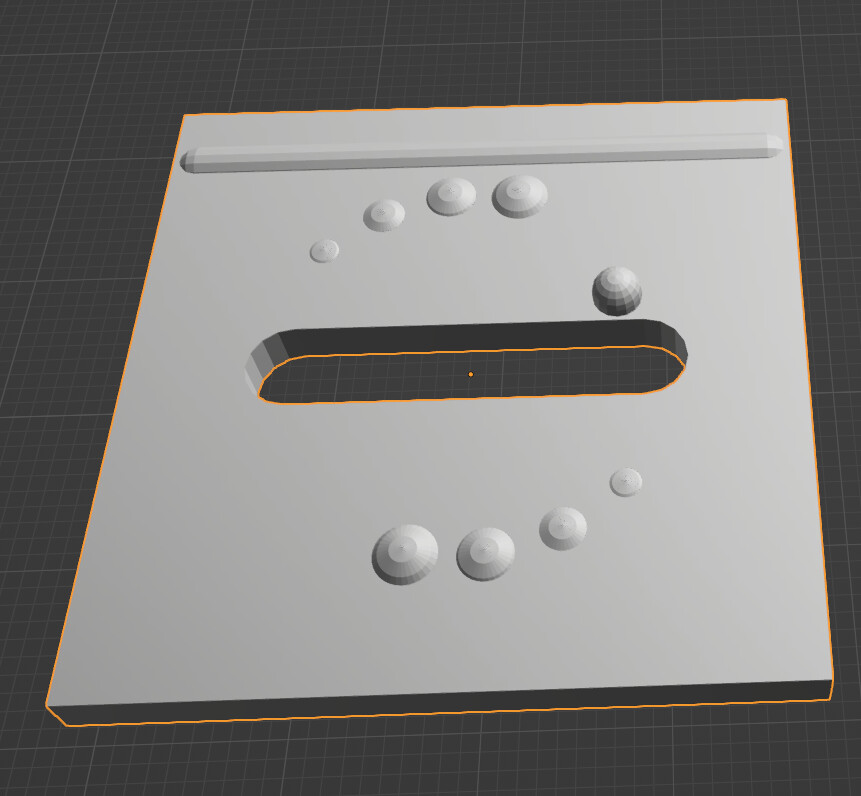
I have a number of tiles that are 40mm x 40mm x 3mm. Some have parts on one of the 40mm side and others have a slot through the tile, from one 40mm side to the other. Here’s one, it’s part of a 3D printing project:
This one is the most frustrating. I have multiple tiles close to this, with variations. I’d like to rotate it so the bumps (made from parts of UV spheres) and the slot are 90° from where they are now. (Or so the ridge at the top is running along one side.)
Due to the edges connecting the parts on the face, or going through the object, I can’t just rotate some of the features easily. I did notice that when I re-constructed this earlier, by using a boolean modifier, most of the bumps no longer had an edge connecting them to the main part of the object. They behave okay and print out okay as is, so I’m wondering if I could just remove the edges connecting the slot to to the rest of the mesh and rotate the slot and the bumps.
I’m open to other ideas. I have to deal with multiple similar but not matching tiles and just rotating the slot or the items on the face would be easier than other solutions I’m looking into - if it can be done.
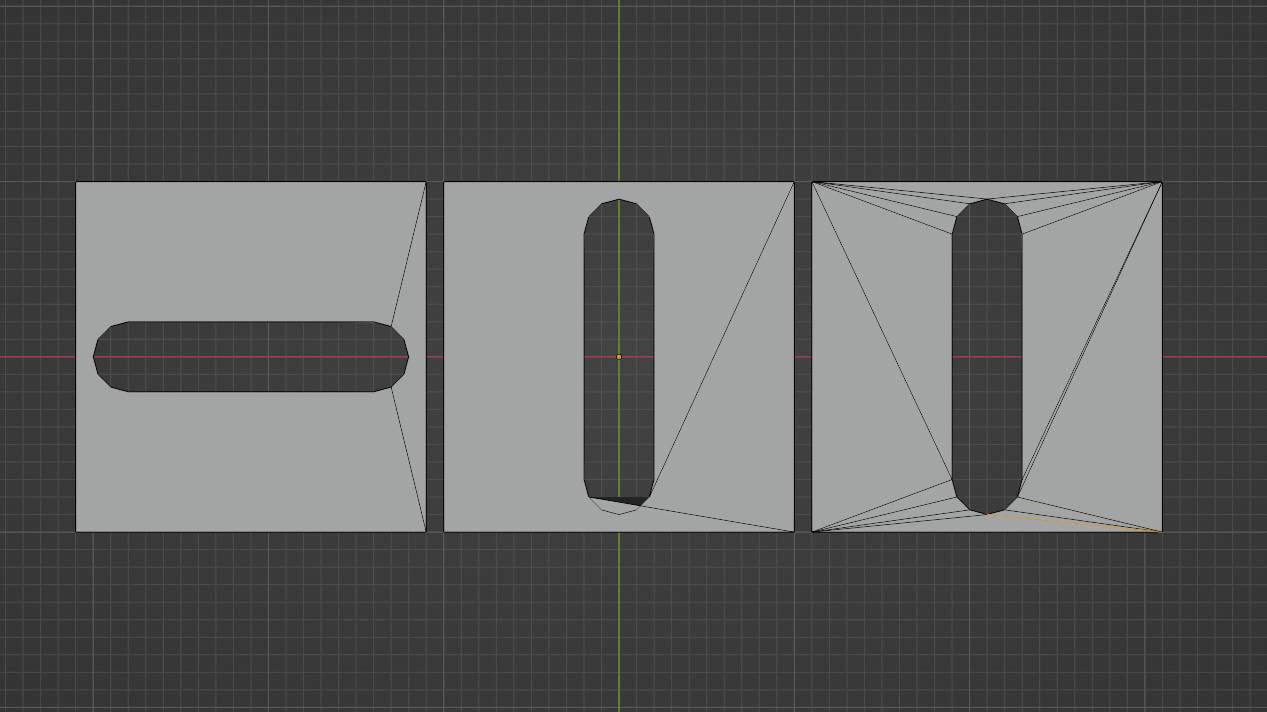
You might get lucky rotating the inner vertices/faces and then triangulatie the ngons and use Rotate Edge (C)CW in edit edge mode fro the problematic edges so that they do not overlap like so…
I get to the 2nd image, with the overalp. I haven’t used Rotate Edge before, so I’m experimenting to see if I can do it like that.
Often, with printing, I don’t triangulate the surfaces until I have most of the work done - often the face being just one n-gon is useful for some types of editing. Plus I’m not shading.
I’ll keep experimenting with this and let you know what I get. Thanks!
For various reasons, I can’t just rotate the whole item. For instance, in the one in the photo, I need to treat the slot and the 8 “bumps” as one unit and the ridge along the top as another. The slot and bumps are part of the locking system. (This is part of a connection system that lets me lock parts together.) The ridge along the top is part of what lets me snap this plate into place and then have it held in place. The other plates have other issues. Another part, that I didn’t want to get into is that there are three plates for each locking section. 1 plate is the lock plate. It slides into a holder (that includes the plate), and the holder is part of a larger object. The last plate is a simple plate, but it’s wider than longer (to allow for movement when being slid into place). That is attached to a pipe that goes up against the plate the holder is part of.
I tried your suggestion. A few comments on it:
I had to rotate CCW on the top face, then rotate it CW on the bottom face. Also, for some reason, triangulating the top face was simple and I did one edge rotation and it worked. But the bottom face, which was far less complex, wasn’t that easy. When I made triangles of the one face that made the mess over the slot, it added multiple edges that crossed the slot. But rotating all CW did the trick.
This should make it easier for me. The alternative was to rotate the plates (along with a bit of other work) and then go through the process of attaching these plates to the bigger objects all over again.
I know what you mean. I’ve always wanted to learn 3D animation, but also just 3D modeling. I’m working on starting a business based around 3D printing and I’m learning a lot. If you want to try it, I’d encourage you to look into it. There are thousands of STL files out there for use on 3D printers and it’s amazing (at least to me) when I start with an idea of something that doesn’t exist and create it in Blender, then see it sitting on the print bed, now actually existing as a solid object. I’m betting for someone experienced with Blender, it wouldn’t be nearly as hard as it has been for me to learn printing and using Blender at the same time.