Can someone help me get started with a simple script?

Ok, I have another thread going asking about a plugin to import a 2d image pixel by pixel as cubes? While I wait to see if anything is available, I thought I might try a little coding.

Can someone help me get a basic script going. Where should I start (I don’t need a python lesson, just an organized structure to write the script).

So I have a 32 x 32 png. I want to read each pixel and make a cube out of everything that is not transparent in the image. I also want to make sure that each cube is the same diffuse color as the pixel.

How can I get this up and running? Any help is greatly appreciated. Last night, I did an image manually and it took me 2 hours to do what I did with the pixels in 2 minutes?
I guess this is what you are looking for… http://blendersushi.blogspot.in/2013/03/python-pixel-art-in-blender.html?q=pixels
If not it should give enough info to get started.

Thanks I’m checking it out right now.

I looked through various references and I managed to put this together. Can someone clarify how to put this together?

import bpy

d = bpy.data

img = d.images[‘c:\pics\ est.png’]

pixels = img.pixels

Ok, I was able to load the image and I found it in the image listbox. What I would like to do, is loop through the pixels array and place a cube for each pixel that is not transparent.

To do this, I would use this here -> bpy.ops.mesh.primitive_cube_add(location=(x, y, z))

but I do not know how to loop through the array and confirm that the pixel is transparent? could someone give an example on this. I’m scavanging whatever code I can find.

Wrote a simple script:

import bpy

scene = bpy.context.scene

file = r"D:\Bilder\Blender\32x32-colors.png"
img = bpy.data.images.load(file)
width, height = img.size
width_half, height_half = width // 2, height // 2

bpy.ops.mesh.primitive_cube_add(location=(0,0,0))
ob = bpy.context.object
ob.scale = 0.5, 0.5, 0.5

mat = bpy.data.materials.new("Object Color")
mat.use_object_color = True
ob.data.materials.append(mat)

cubes = []
for h in range(height):
    for w in range(width):
        pixel = (h * width + w) * 4 # RGBA
        col = img.pixels[pixel:pixel+4]
        if col[3] >= 0.5: # could use something else here
            cube = ob.copy()
            cubes.append(cube)
            cube.location = w - width_half, h - height_half, 0
            cube.color = col
            
for cube in cubes:
    scene.objects.link(cube)
    
scene.objects.unlink(ob)
bpy.data.objects.remove(ob)

bpy.ops.object.select_all(action='DESELECT')

scene.update()

alpha handling might need your adjustment

I just tried your script. It works beautifully. Thanks for that.

I did come up with a question though. in this line -> col = img.pixels[pixel:pixel+4]

How is the color actually placed into col

I have just a little familiarity with python and I do not want dig through tons of documentation. I do have the latest Learning Python book as a reference though, so you can mention chapters from there.

What data type is col setup as and what value goes into it from the confusing looking array.

I found a problem. When switching render engines from Blender Internal to Cycles, all the colors disappear. Could someone tell me what I need to change in the script to make sure it works with Cycles?

set the pixel color to the diffuse_color of the material

or if you use nodes, it is this instead:

nodes[“Diffuse BSDF”].inputs[0].default_value

How is the color actually placed into col

I use slicing to get four elements out of the entire pixel array (4 floats, red, green, blue, alpha).
Not sure if it’s covered in your book, but check out Chapter 4 Introducing Python Object Types - lists. Although this isn’t exactly a list…

>>> type(D.images['Untitled'].pixels)
<class 'bpy_prop_array'>

… it can be used exactly like one:

 >>> D.images['Untitled'].pixels[0:8]
(0.0, 0.7647059559822083, 0.24705883860588074, 1.0, 0.0, 0.760784387588501, 0.24705883860588074, 1.0)

Slicing off multiple elements returns a tuple:

 >>> col=D.images['Untitled'].pixels[0:4]
>>> type(col)
<class 'tuple'>

I use that tuple to assign to object color. Let’s look at the Object.color attribute:

>>> type(C.object.color)
<class 'bpy_prop_array'>

>>> C.object.bl_rna.properties['color'].type
'FLOAT'

>>> C.object.bl_rna.properties['color'].subtype
'COLOR'

>>> C.object.bl_rna.properties['color'].array_length
4

.color is another bpy_prop_array, but you don’t need a prop_array nor a Color type to assign a color - blender and python aren’t really picky about types. So we only need a tuple or list with 4 floats, no explicit type conversion required.

Set the pixel color to the diffuse_color of the material?

If I run the above script after changing to Cycles, no colors show up. Does this mean that internally the data does have the right color, I just have to make sure it’s copied?

How exactly would I do that. The API documentation is nuts. After switching to Cycles, there are no materials, where you can select Use Nodes. There is only an option to create New materials. In script, I have no idea how this is organized?

you need to use cycles nodes to set material specs for cycles renderer!

but then how do you choose between blender and cycles ?
need like a small panel may be or add a new variable to select blender or cycles or the 2 material types!

happy bl

Ricky, I might not have explained it correctly. Let me start over…

The script above works, it’s very helpful. What I would like to do, is instead after starting Blender, I would just switch to Cycles as the renderer and then run the script to do what it does. It works fine, but the colors are not setup when the image is imported. It only works if I want to us Blender Internal. So I would like to update the script for this. It does not have to work for both Internal and Cycles at the same time, I can always run 2 versions of the script. I don’t do much coding, so I’m having a hard time figuring this out.

but in any case you need to add bl mat before adding cycles mat!
but if your goal is for cycles only then it should work

have to locate a thread or an example for adding cycles mat!

happy bl

You could just run the Blender Internal to Cycles material script converter after you run your script. Or examine that script to figure out how to make Cycles materials.

here is typical node set up
but not certan how to add it each ob as it is done in the script


cmat=bpy.context.selected_objects[0].active_material


cmat.use_nodes=True
TreeNodes=cmat.node_tree
links = TreeNodes.links


#    mat   typical 
 
for n in TreeNodes.nodes:
 TreeNodes.nodes.remove(n)
 
shOut = TreeNodes.nodes.new('ShaderNodeOutputMaterial')
shOut.location = col1,row1   
shDiff1 = TreeNodes.nodes.new('ShaderNodeBsdfDiffuse')
#shader = TreeNodes.nodes.new('ShaderNodeBsdfDiffuse') 
shDiff1.location =col1-400, row1
shGloss1 = TreeNodes.nodes.new('ShaderNodeBsdfGlossy')
shGloss1.location = col1-400, row1-200
 
shMix1 = TreeNodes.nodes.new('ShaderNodeMixShader')
shMix1.location = col1-200, row1
links.new(shMix1.outputs[0],shOut.inputs[0])
links.new(shDiff1.outputs[0],shMix1.inputs[1])
links.new(shGloss1.outputs[0],shMix1.inputs[2])
 
shBright1 = TreeNodes.nodes.new('ShaderNodeBrightContrast')
shBright1.location = col1-600, row1
#shBright1.operation =" "
shBright1.name = "Bright1"
links.new(shBright1.outputs[0],shDiff1.inputs[0])
 
 
shTEX_VORONOI = TreeNodes.nodes.new('ShaderNodeTexVoronoi')
shTEX_VORONOI.location =col1-400, row1+200
links.new(shTEX_VORONOI.outputs[0],shMix1.inputs[0])
 
shMIX_RGB1 = TreeNodes.nodes.new('ShaderNodeMixRGB')
shMIX_RGB1.location = col1-800, row1
links.new(shMIX_RGB1.outputs[0],shBright1.inputs[0])
shDiff1.inputs['Color'].default_value = cmat.diffuse_color.r,cmat.diffuse_color.g,cmat.diffuse_color.b,1
 
if shDiff1.type=='ShaderNodeBsdfDiffuse':
#shader.inputs['Roughness'].default_value=cmat.specular_intensity  
 shDiff1.inputs['Roughness'].default_value=0.3333


here you need to select add/ remove which nodes you need!

happy bl

Thanks, I’ll try to take it apart.

sillytoon - would you mind posting a screen grab of your Blender workspace with the result of running the script? and a rendered image? This sounds interesting.

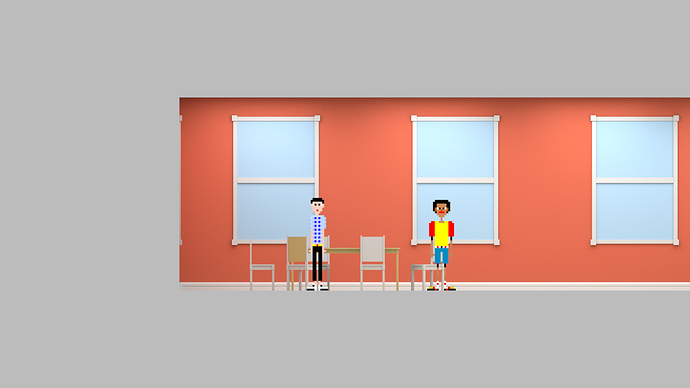
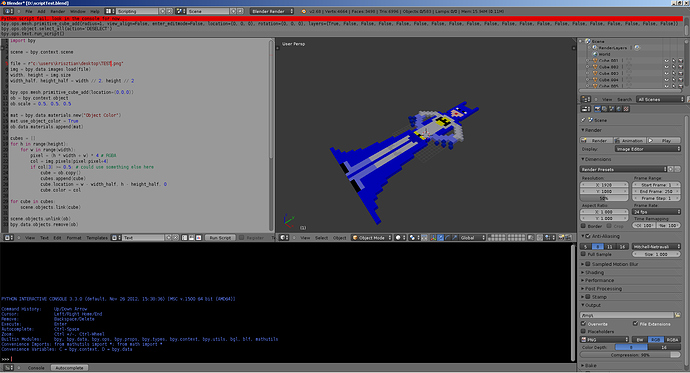
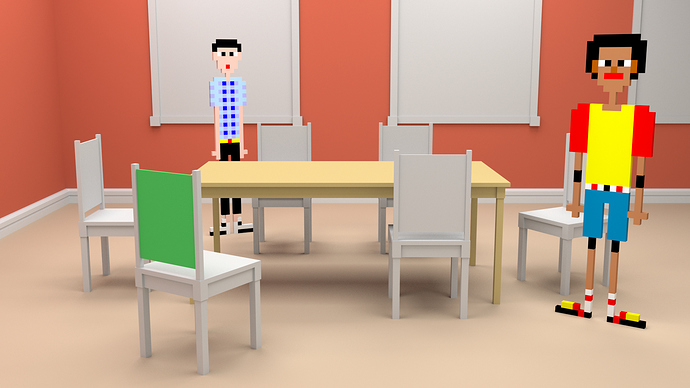
These are test images. In the first 2, the pixel character were done manually (I will never do that again), which is why I need to get a script going. Otherwise, it’s way too time consuming. The third image is using the script to import a character, much better and no errors on filling in the colors. The problem is, it does not keep the colors when switching to Cycles, so I can’t use it yet, unless I manually create the materials. I actually only need a Diffuse import, since the pixel images are simply colored pixels. Sorry, the images are 1920x1080. I have 2 resolutions in mind 720p and 1080p and looking at the renders at a larger resolution gives better test results. Also, on final render a higher sample makes it a little smoother.


Attachments


This is a nice concept! are you going to animate the characters…?

Thank you. I’m talking to someone and asking about custom work on animation options for the importer we are talking about in this thread. If I can figure out exactly what I’m trying to do (sounds funny I know, but trust me when I say I’m disorganized), then animation options would be great. Such as automating rigging and importing back to back images. The reason mostly is because I’m not texture mapping images for this. I need to stay strictly with shaders for coloring, except for text and decals.