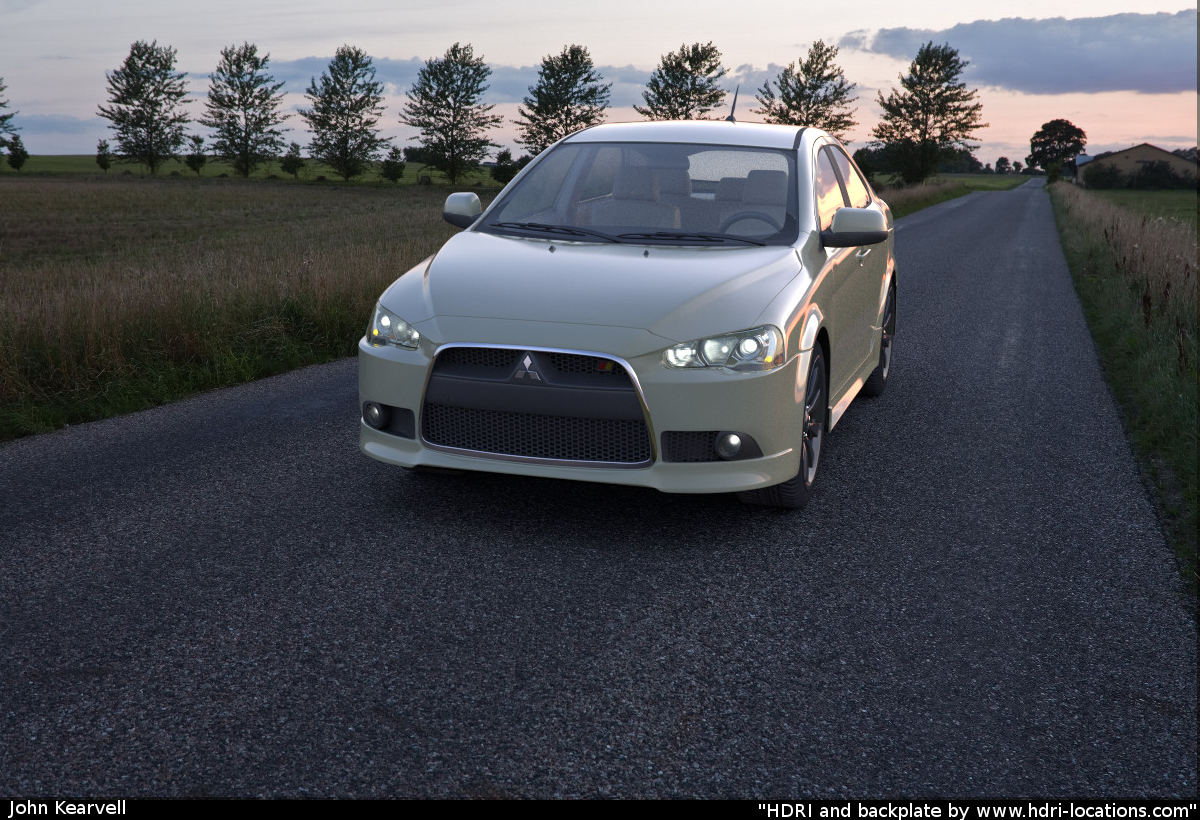
So I’m after some advice. Heres a render of my Lancer model from finished projects (the model is finished which is why it’s there). Anywho, today I decided to stick it into a scene with a background. But I’ve got a problem.
I’m having trouble aligning the scene with the backplate. I tried using Blam, but theres not much to go off in terms of straight lines. I got close, but I still had to fiddle manually by rotating and translating the camera. So can anyone point me to a workflow, for aligning cg to a static back plate (rotation/scale etc), or is it just trial and error? Of course I can’t track it as it’s a still image. At the moment it still doesn’t look quite right to me.
The shadows come simply from AO, as theres no lights in the scene except the environment HDR. Therefore no shadow pass. I’m fine with that for now as I want to get a prettier HDR location for the final image anyway. (Now that I built a panoramic head for my tripod) Plus theres not a great deal of shadowing in the BG plate.
When i align, i just do it by eye… if there is a better method however, i would love to know about it too. Also does anyone have any tips on compositing AO and shadow passes into the backplate.
For AO I do it really rather simply. Take the alpha from the render layer invert it, add the AO, and multiply with BG plate. But for shadows, you need lights in the scene, an HDR won’t cut it as the shadow pass (at the moment) doesn’t include light from the environment. Without the shadow pass I think it may be a fair bit of compositing, but with shadow should be fairly easy to just multiply over the BG plate, then Alpha over the forground, I assume.
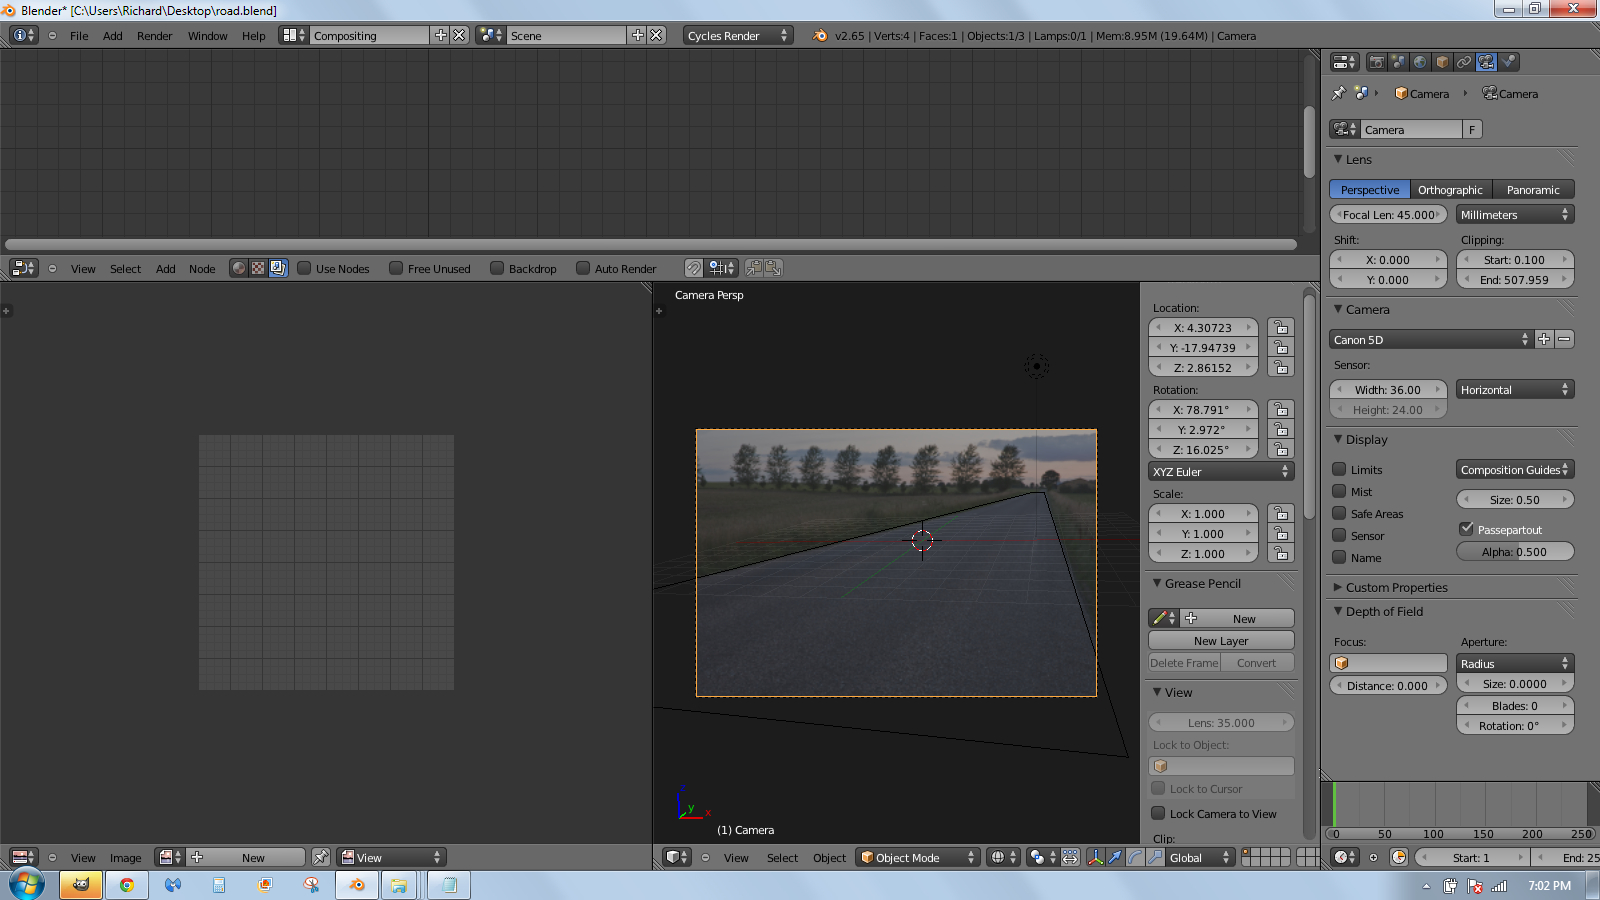
The back plate is just a still image. Set it as background for the camera, the align it with the scene geometry (the bit I’m having problems with). Then align the hdri with the back plate (roughly). After that just render the scene in layers, ground plane and car. You have to set transparent in the film section of the render settings so the hdri doesn’t render.
This will give you the ground plane and car with alpha’s as render layers in the compositor. Bring in the background plate as an image file and comp it altogether.
Try getting the focal length from the exif data in the pic,then just set the camera to the same focal length used in the pic. That will help with the aligning.
I just downloaded the file and its 45mm, so, set your camera to that.
Indeed. As it’s shot on an EOS 5D, it’s a full frame sensor, and 45mm should work great, but it looked very wrong. Maybe I need to fiddle some more. The scene is real word scale, so that should be fine, but using a f/l of 45mm the perspective just doesn’t look correct.
Of course I basing this on the fact a flat plane doesn’t match the egdes of the road which I’m assuming to be perpendicular, and I’m assuming blender default camera uses a full frame sensor. Hmm, I’ll check this and report back.
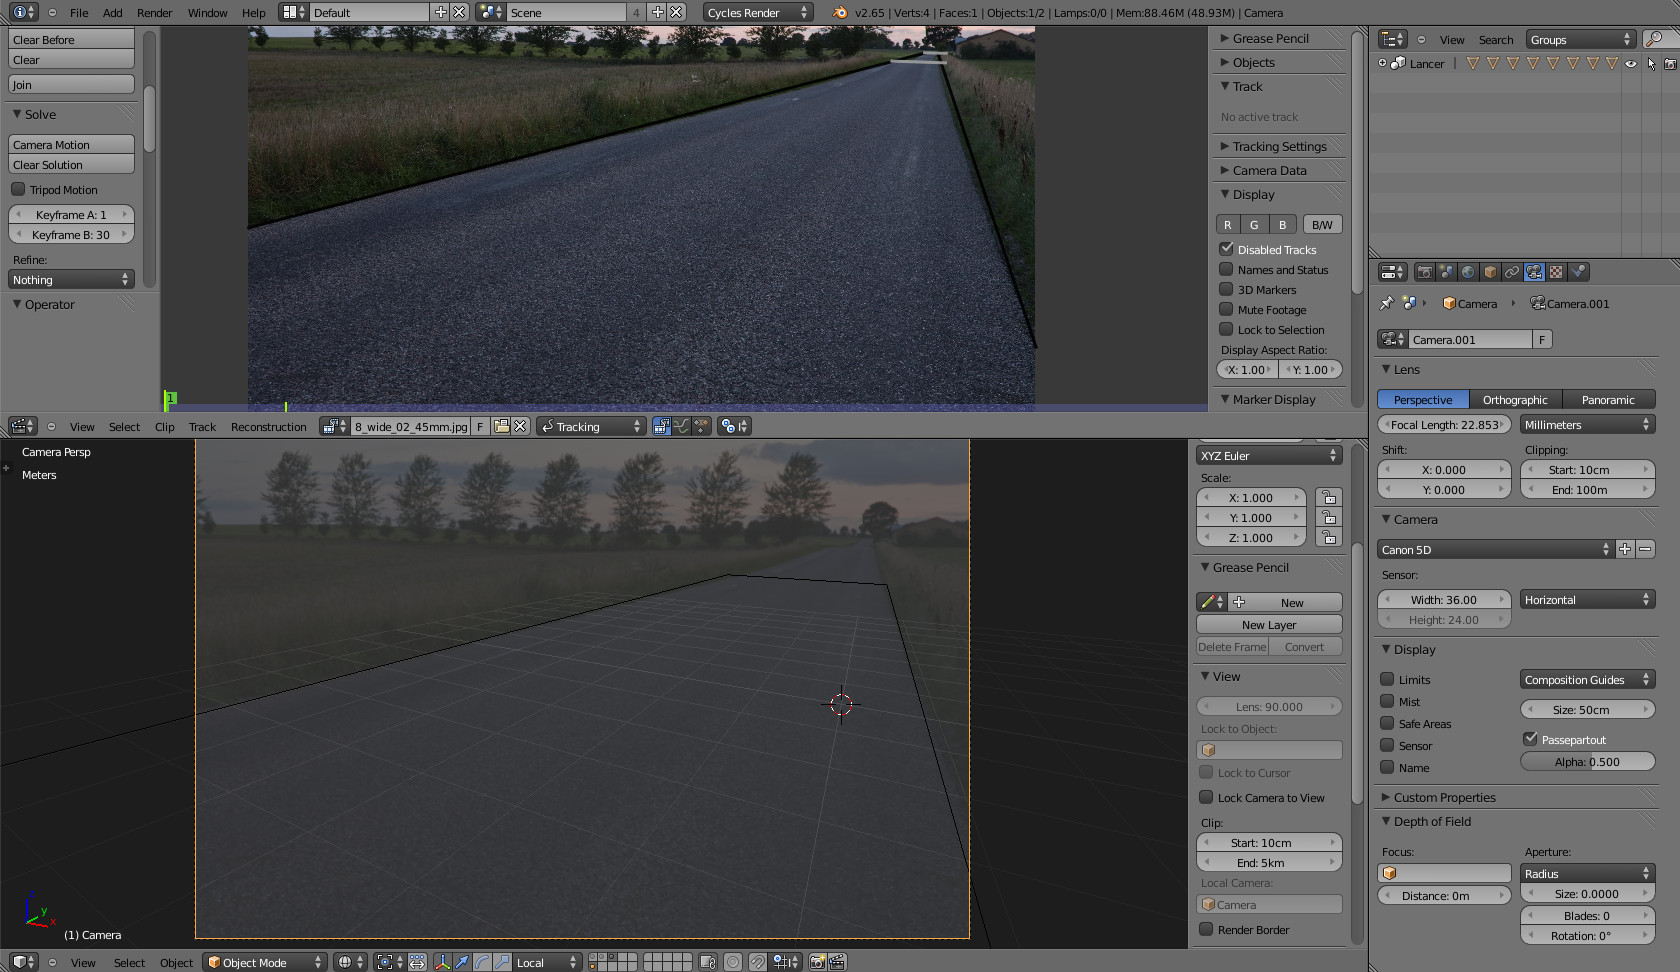
So I made sure blender was using the correct sensor size, and I’m still having some problems. Heres two images that illustrate the problem. In the first the camera position and focal length are caluclated by Blam. It looks pretty darn close (best result I’ve got yet), but calculates the f/l to almost 23mm, half of what it should be. The plane in these images is about 6.8 metres wide. This seems a little big, but I don’t think it’s too far off the mark, because it’s two lanes, and there are some reference images showing a real peugeot 207 which is about 1.7 metres wide, and you could easily fit three of them side by side on this road by the look of it.
I use HDR for the background and for the lighting - this also gives correct shadows and lighting on the car itself. For the shadow and ao, I have a plane with a light coloured diffuse/glossy mat applied; I render on separate layers and composite. The plane is positioned directly under the car as you would for a studio set-up and I tend to curve it behind to completely fill the camera view (It makes it very simple to composite in.). This has the advantage of only requiring me to rotate the ao/shadow plane when needed due to changes in the camera angle.
Check out my Super Car link in my signature; that is the first successful compositing I’ve managed. I would be interested if there is anything I could do to improve; basically, does it look convincing. Also, if anyone wants a node set-up, let me know
kettlefish: it is really interesting…but I would use this which sets ti the backplate…but try to add car and you’ll see how does it looks
here is my first try with backplate
it has lots of mistakes…but it was really fast try…
it has 2000 samples but the color has noise
Writer, I would like to see your node setup for the shadows, my Lemans project is almost getting to the rendering stages. cycles shouldnt make it so difficult to add shadows to a ground plane.
Writers block - I see where you are going with this. Filling the enitre camera view and extracting the shadow with compositing. Thanks
Bohy -
but I would use this which sets ti the backplate.
I don’t quite understand what you mean here, sorry:( But nice model and background. At 2000 samples I would have thought it would have cleared any noise, the one I posted was only 500 samples, and although it clearly has noise in it, it’s ok for the quick test render that it was. Maybe it’s a shader issue?
Kernal -
cycles shouldnt make it so difficult to add shadows to a ground plane.
indeed. But if you have lights in the scene it’s not, the shadow pass works in that case. It’s only if you are relying completely on the environment like I am in this render.
Unfortunately I’m brushing up on mel in maya today, so I won’t be able to fiddle with it until later. Don’t you hate it when life gets in the way
nicely composited but the shadow is way to strong considering how bright the ‘day’ is. the shadow may not look quite right either, although I’m not sure.
I’m thinking the sheer strength of the shadow is taking believeability from the scene; turn down how much shadow is applied.
Which one of the three do you guys think is the most accurate? I know which one I like but I’m interested in what you all think. Er I should mention actually in the first image the car is slightly rotated to account for the camber of the road, and to show a little more of the side which, might make it look off (which I think it does).
kettlefish: I think that the second is the best …In my previous post I meant that I would use this the focal length 23
Writer’s Block: I agree that it is really hard…I tried to use sun shadows … I have to use some different method
They put a 1 x 1 metre cube into the plates to allow easy alignment, works great. Load the plate, load the geometry object, set up the camera sensor, and focal length, then just move the camera til they match. Ta da!
Only problem is they take the HDR image from the position of the alignment cube, so when I loaded it in blender I couldn’t get it too match the BG plate, because the environment origin is the camera rotate pivot. The gives unrealistic very odd looking lighting. I tried mapping it to a sphere but I could get them to line up. :mad: Does anyone have a solution for this?
heres a 50 sample example, Lighting and reflections are way off:
Edit: whoops left the ground plane visible in glossy reflections, updated.
Here’s a link to the blend file showing the compositing setup I used - I had to strip out a lot of stuff and unpack it to make it small enough.
The exr the file uses is also about 280mb; if anyone wants it to experiment with I can email it to you. Might take a while. Otherwise let me know the best place to upload it to.
Just a note, that the node set-up looks more complicated than it is.
Excellent Point Rich. Thanks for that heres a quick 50sample render, using your alignment. The perspective looks pretty much bang on. With that in mind I’ll take another crack at aligning with that image tonight.