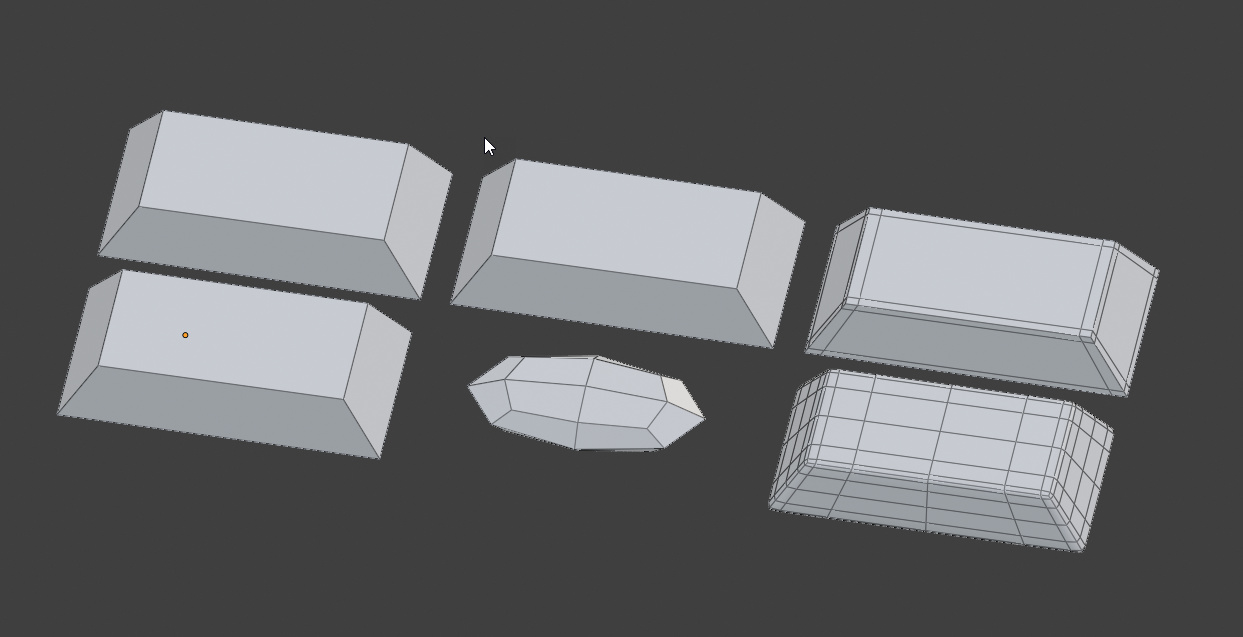
You need to add in some supporting edge loops. In this example left to right are: No Subdivision modifier, sdubdivision modifier and subdivision modifier on object with supporting edge loops. The top of each row shows the geometry with the diplay of the Subdivision Surface modifier temporarily turned off.
Ctrl+R to add edge loops and slide them over to near when you want a (relatively) sharp edge.
Thanks both of you but there is no way I would slice every key each one at a time. to lazy to do that.
Insted I’ll use the bevel modifier.
Now I’ve another question.
Is it possible to map the background picture on top of the rather complicated uv-map ?
If you just have a link where I could learn how to do it, I take it
Let me know if I should rather open an other topic.
!
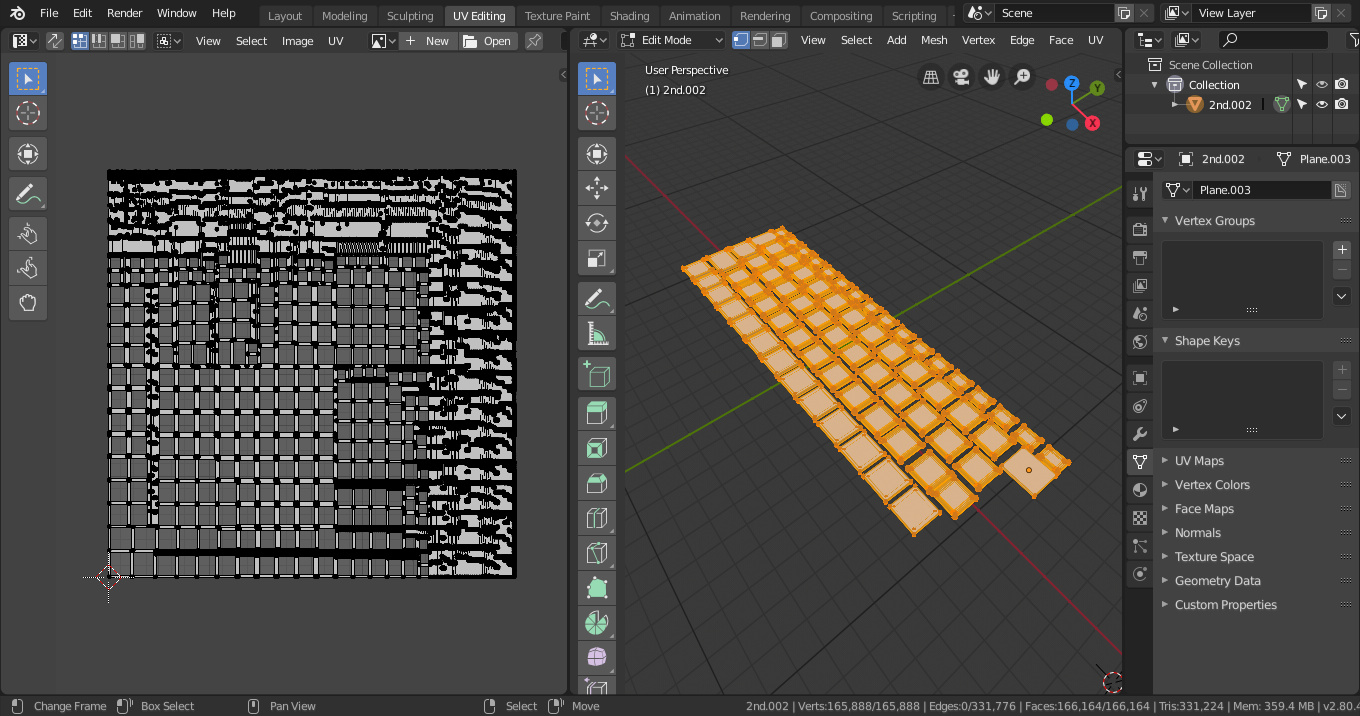
Next after uv unwrapping them, and this was just a standard smart uv project, we will now have what may be not quite the most unergonomic uv layout to work with.
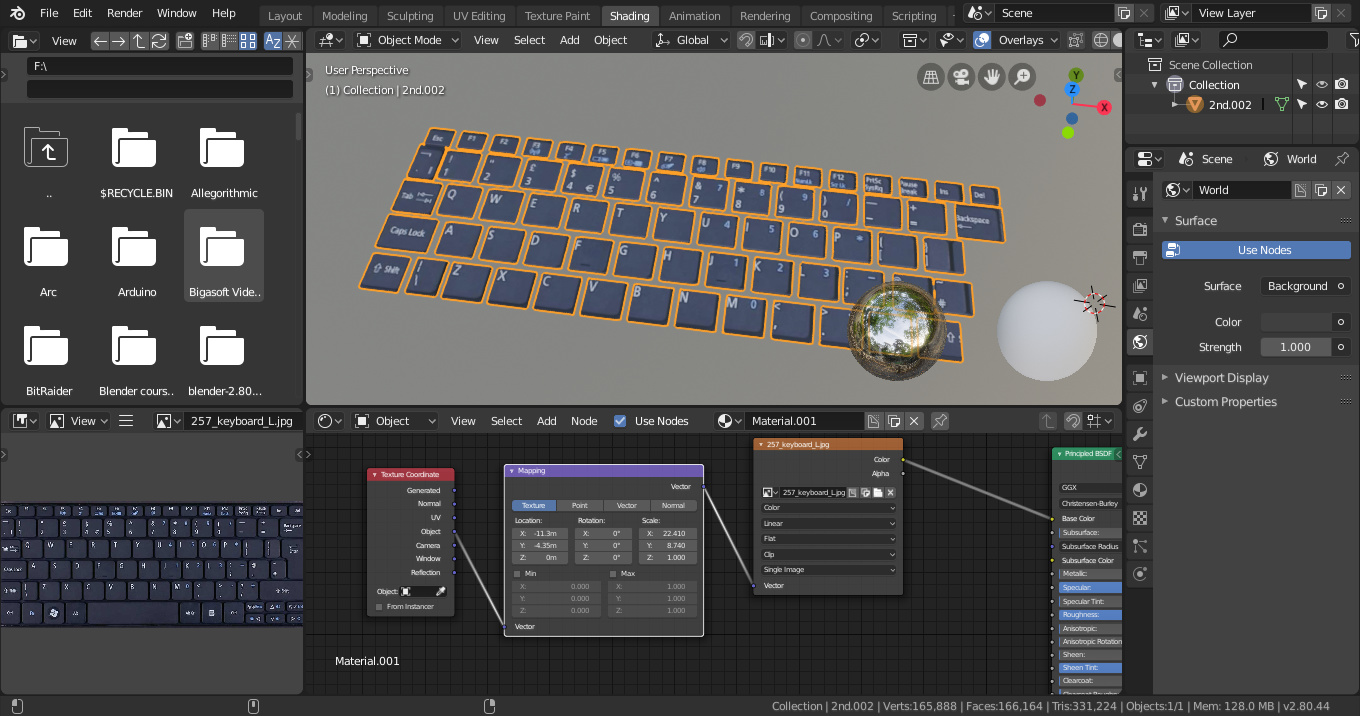
From here we are going to use a texture coordinate node, and either a mapping node (or you can use an empty if you are so inclined and select the empty in the texture coordinate node) and we are going to use either flat or box projection and we will tweek it so that this texture is projected over our very ugly unwrapped mesh.
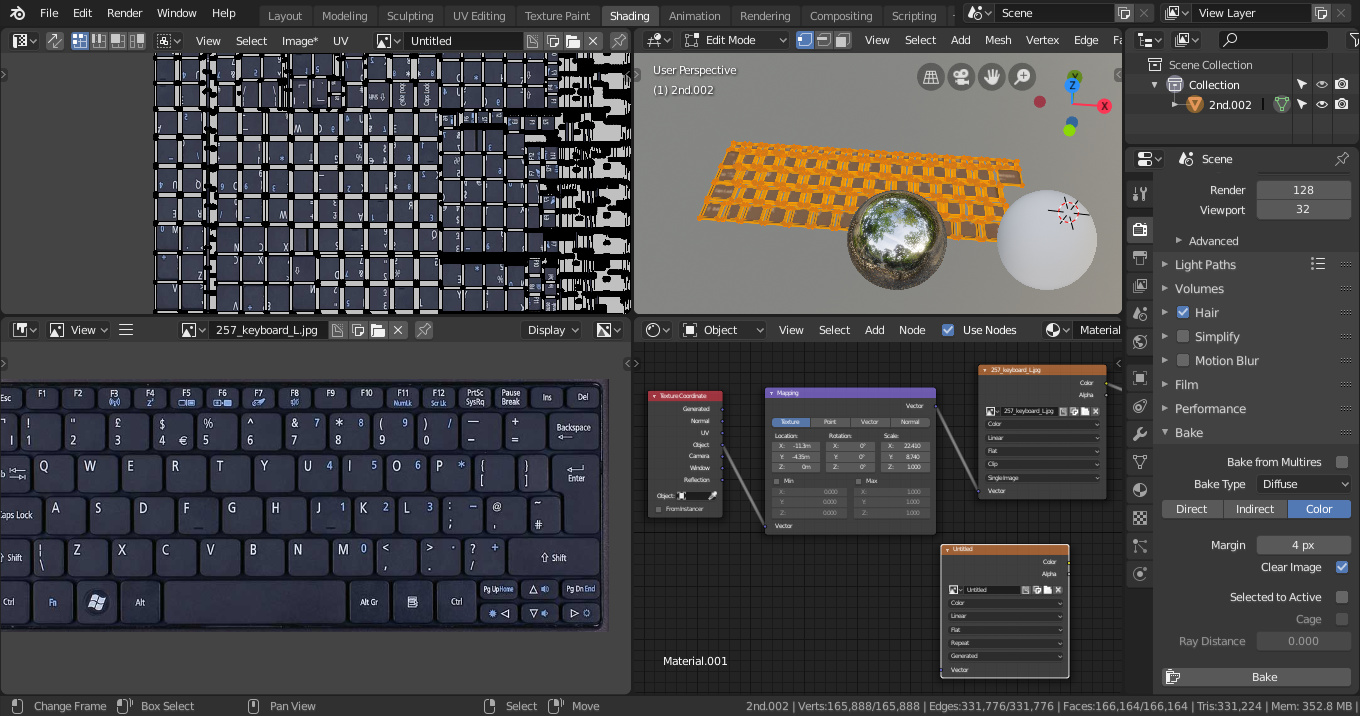
From here we will do a standard bake and then get on with our lives, if you use some control maps for painting masks this can be a VERY powerful texturing technique
I just understood that I have to pay attention to the number of vertices for each faces
Not more than 4, otherwise strange things happen when I want to bake a AO map ok apply a modifier.
So I use the knife a lot to add edges here and there.
85 of the keys are the exact same object basically. You’d only have to add supporting edge loops to one and then link the object data to the other identically sized keys. You can then use U>Make Single User>Object & Data to make them all unique objects again