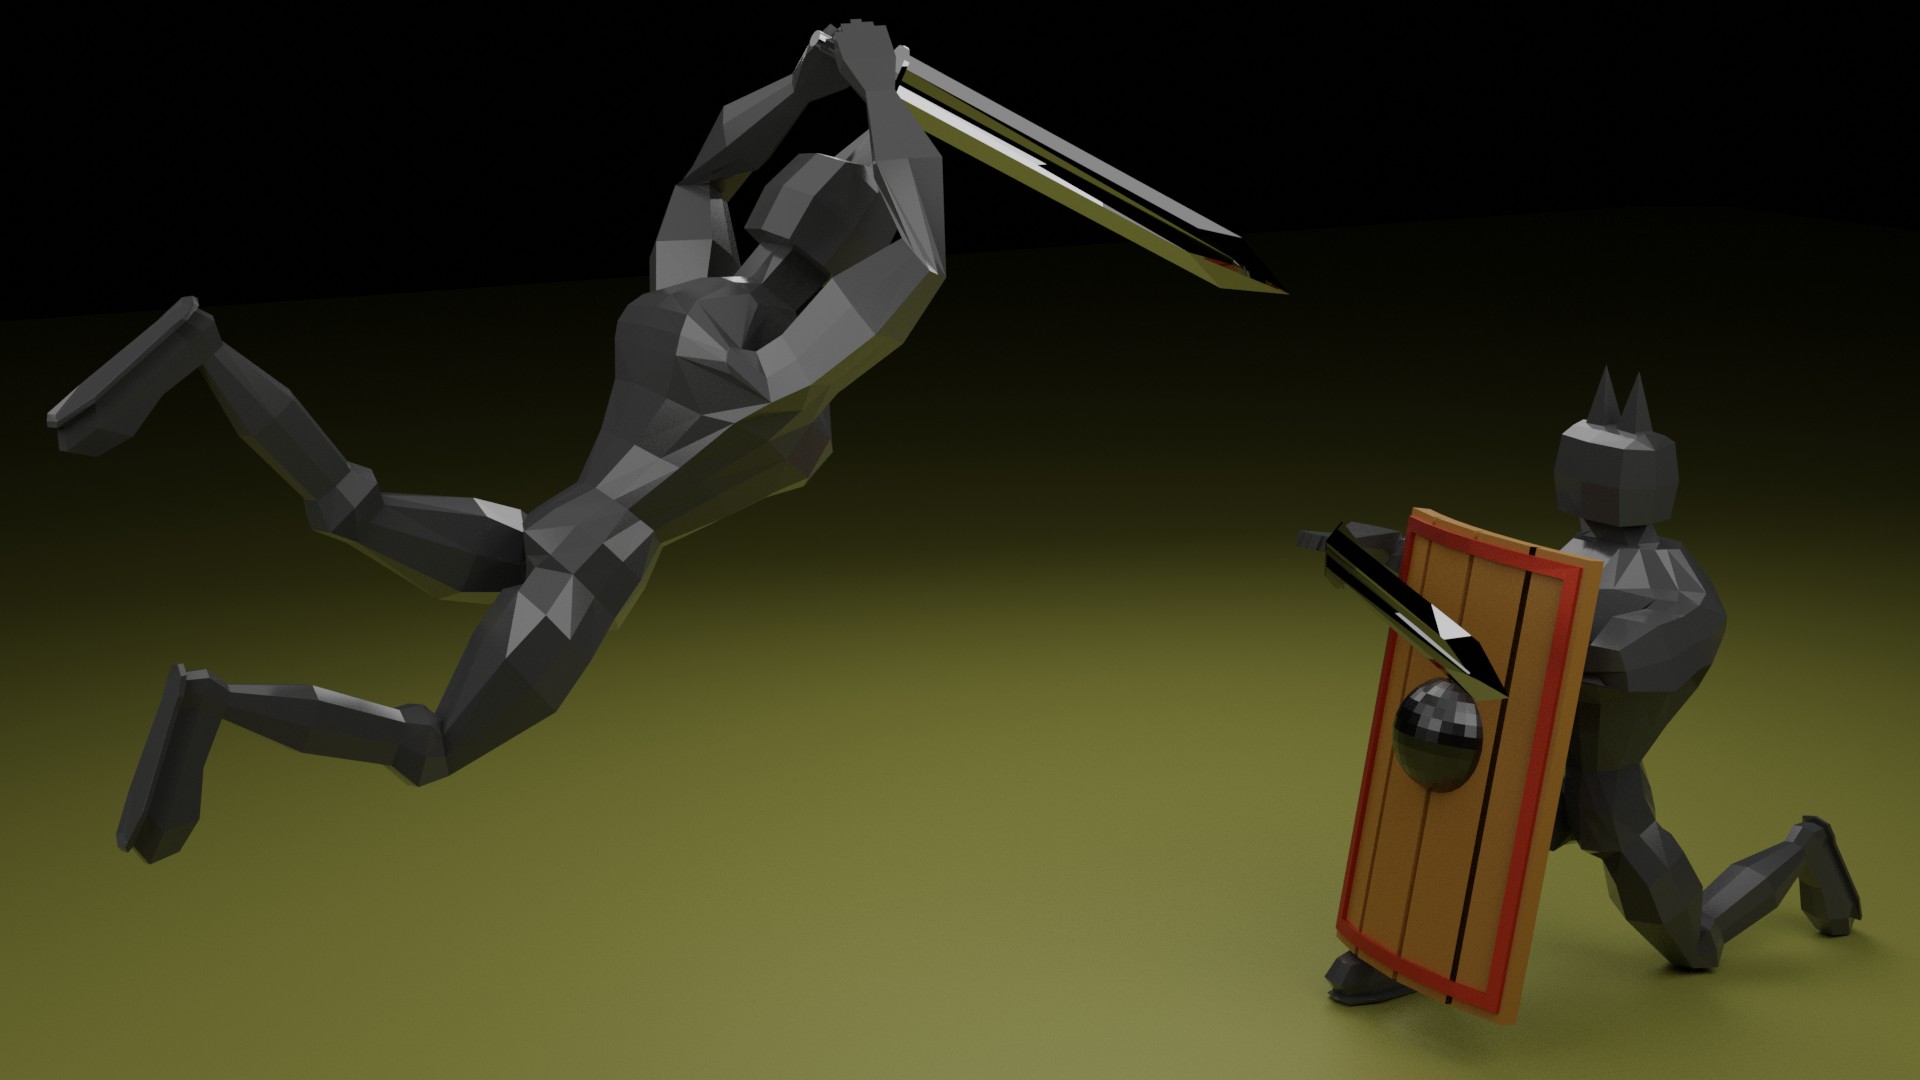
“Fighting in Grey…”

Pure entry, 500 samples, Open Image Denoiser, I was short on time, so I wasn’t going for the colors and textures… focused on sculpting and modeling as the main goal…
“Fighting in Grey…”
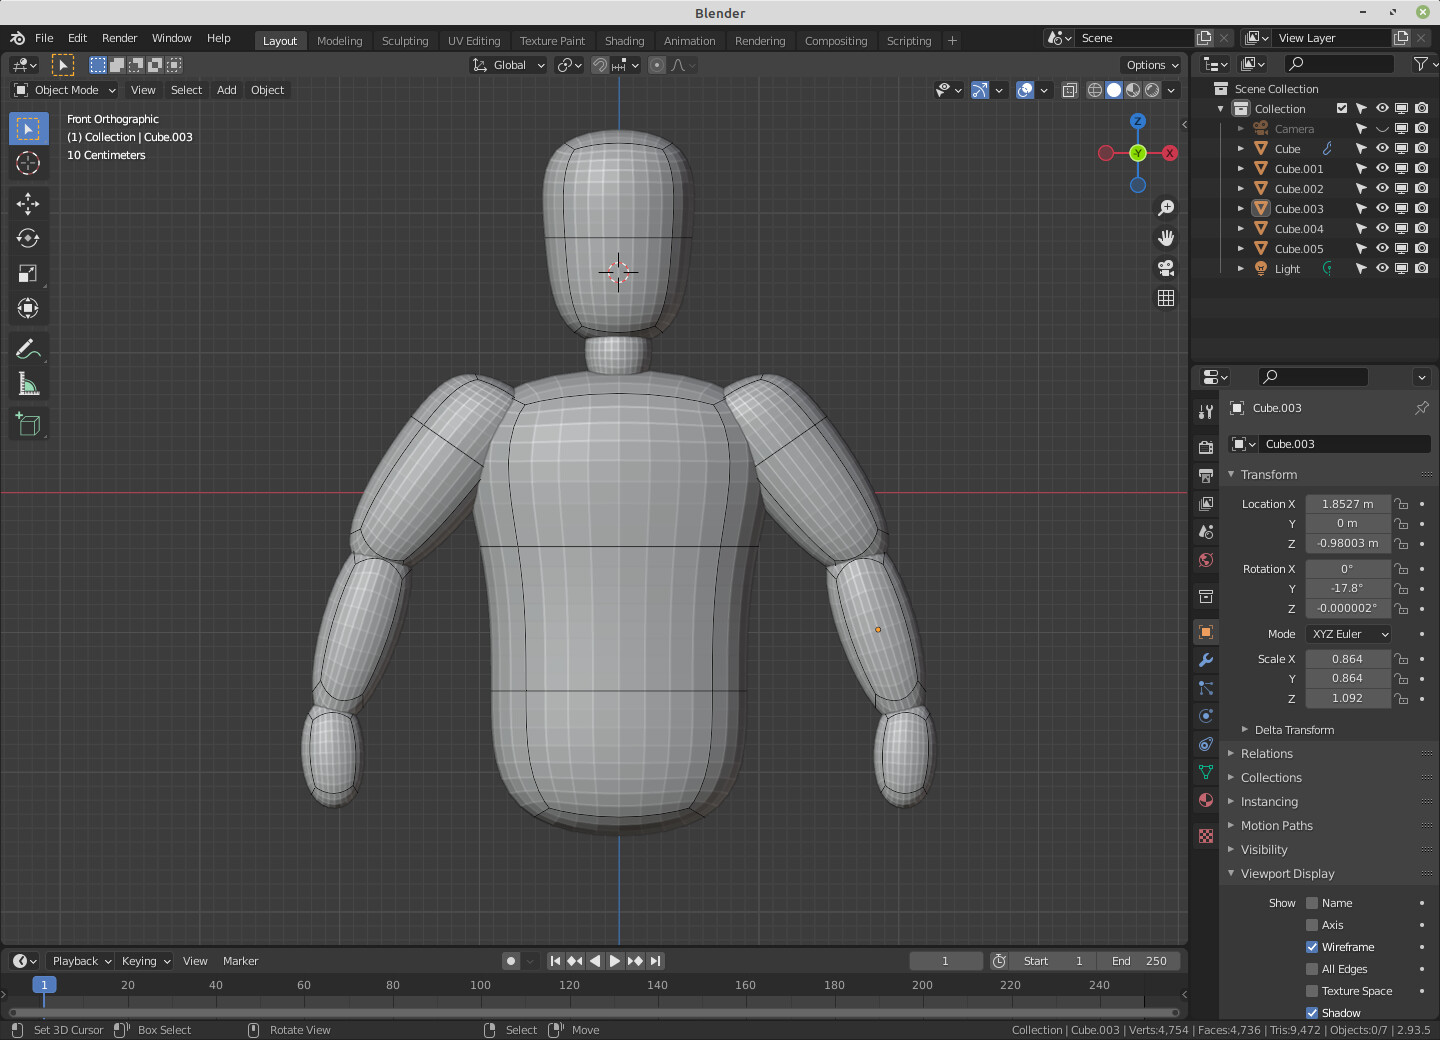
I use this method, or very similar… i dont start with spheres, but cubes with SubSurf with 2 viewport level. Basicly you have a sphere with just 4 control points… then i do basic shapes, aply subsurf, sculpting and remeshing from rough to more or less detailed, then aplly mirror if necesary and merge with boolean. Sculpt the whole object. Rig with Rigify… It is hard just for first three times, then not so hard :D. And the importat thing i didnt realize for a long time. U need to know what u want to do. I mean for this chalenge you need a good render. U dont need to retopologize your model. Just sculpt base mesh, rig the full mesh, apply pose, then repair the damage from posing a refine visible details… U need retopology just if your model will be used as a whole model a viewed from all sides(in a game or as an 3D asset)… then u need retopo, proper UV, etc… but here, u can do your poses and repair what will be visible…

I like the action in the scene 
Thanks for your detailed answer.
I tried to start from an already shaped pose if i can find the desired reference, knife it out the reference, solidify, subsurf and start from there, but it seems that make more problems afterwards. So i guess spending time in a good blockout in “neutral” position is necessary.
I gived up rigging long time ago, cant get into it, nothing worked as expected. I guess i have to spent more time for that. I tried to pose this time with the sculpt brushes but that seems only to work for small changes.
I guess for a big arm movement for example you have to cut the arm off, pose the arm and attach back.
Will try this next time, maybe it is faster / easier than rigify.
Yes, i often change my mind in the process.
You mean rigging in the desired pose or in the “normal” pose. If you make the details in pose and rigify that, would there not more distortions if you change pose in compare to a “normal” pose?
I take a look at the vid, thanks.
That is not possible, this guy must have sold his soul for this skills, it looks so easy.
How is the multipicator on that video to get the real time he used.
He could not do this within one day, or not?
The boolean trick with the stones is so nice, also i didnt think over use curves in sculpting.
I guess i take a look at other vids from him too.
There are a lot of ways how to sculpt, I like this one for this 3 reasons:
Answers to your points:
Yes, he is a good source of knowledge in digital sculpting, he knows what he is doing.
The last thing, find some simple tutorials of human characters in rigify. And do them step by step. I was suffering a struggling with it too. But I learned. If you have problems, there is always an answer somewhere on the internet. Personal advice: in rigidify go for FK, not IK - IK is inverse kinematics and it just does not work for me… I don’t know why. But when I think about movement a go from the core to the end… from the shoulder to the hand… not backward… find that and if u don’t understand rigging now, u will see what I am talking about… it is a lot easier.
Sorry for the long post, trying to help… good luck with your creations, and have fun with Blender.
I guess you mean something like that where you adjust the edges an loopcuts / face sizes to get the base shape? Yes, i see the advantages there. So i can resize the parts and attach them if i satisfied.
You did a great job with that, first i “saw” the missing details although they are not there cause all looks so natural. Only on the third view i saw how you hide it without making it obvious.
As i started with blender i often left unseen details, but at the finish i always try to get the best camera position / lightning to improve the scene, and i cant do that cause the missing details occur. So started to change this behaviour and make more details even if the details wont be used in the end. I have to find a compromise for that.
Thanks, i will try that too.
No, not to long, thanks for sharing your knowledge.
well, I learned to start with posing the camera(no joke a do it with cubes that represent objects…  ). When the camera is set… my scene environment is concrete… half of the scene can change, but I don’t move the camera… Yes, that is the point. U can move one edge and the whole mesh is reacting to that… if u can use it, u can change shapes quickly and do small corrections, but also drastic changes in just one move. It is quick and effective.
Thanks a lot! This was a fun little project, which fitted astonishingly well into my usual Saturday night timeframe. ![]()
Well, in that case, I’m glad to have added the dust particles into the air. ![]()
Fata viam invenient:
(Vergil, Aeneis X, 113)