I’m in the process of creating interior scenes for a color catalog.
I have 100 colors that I need to use on the walls in the scene.
I could set an animation of 100 frames and render each one with a different color but all of those images, with the render times I have, will take me many days to finish.
Is there a way to use passes or something else to have a sort of black and white base render and just render color passes to use them in the compositor or Photoshop and change the color of the wall in the scene?
I know I could just isolate the wall in a layer and render different colors but the whole color in the space is affected by the light that reflects on the wall. It would look strange if it doesn’t reflect the correct light color on all the objects in the scene.
I could edit the colors of the wall in Photoshop but I don’t get the exact same result as if I render each image with a different color on the wall.
What’s causing the High render time.? Is it high poly models or lots of lighting effects like emissions and such.?
If you haven’t already tried baking normals and lighting is the only thing I can think of…
Also, I believe there are some options in the render tab under performance that may also help…Cache BVH and Persistent images… (but I’m guessing you’re already using those )
How could I use light and normal baking to help me with this? Every time I change the color on the walls, the whole environment has a slight shift of color too. I would have to bake every texture again to have the correct colors. Wouldn’t that take the same time as rendering 100 images with different colors?
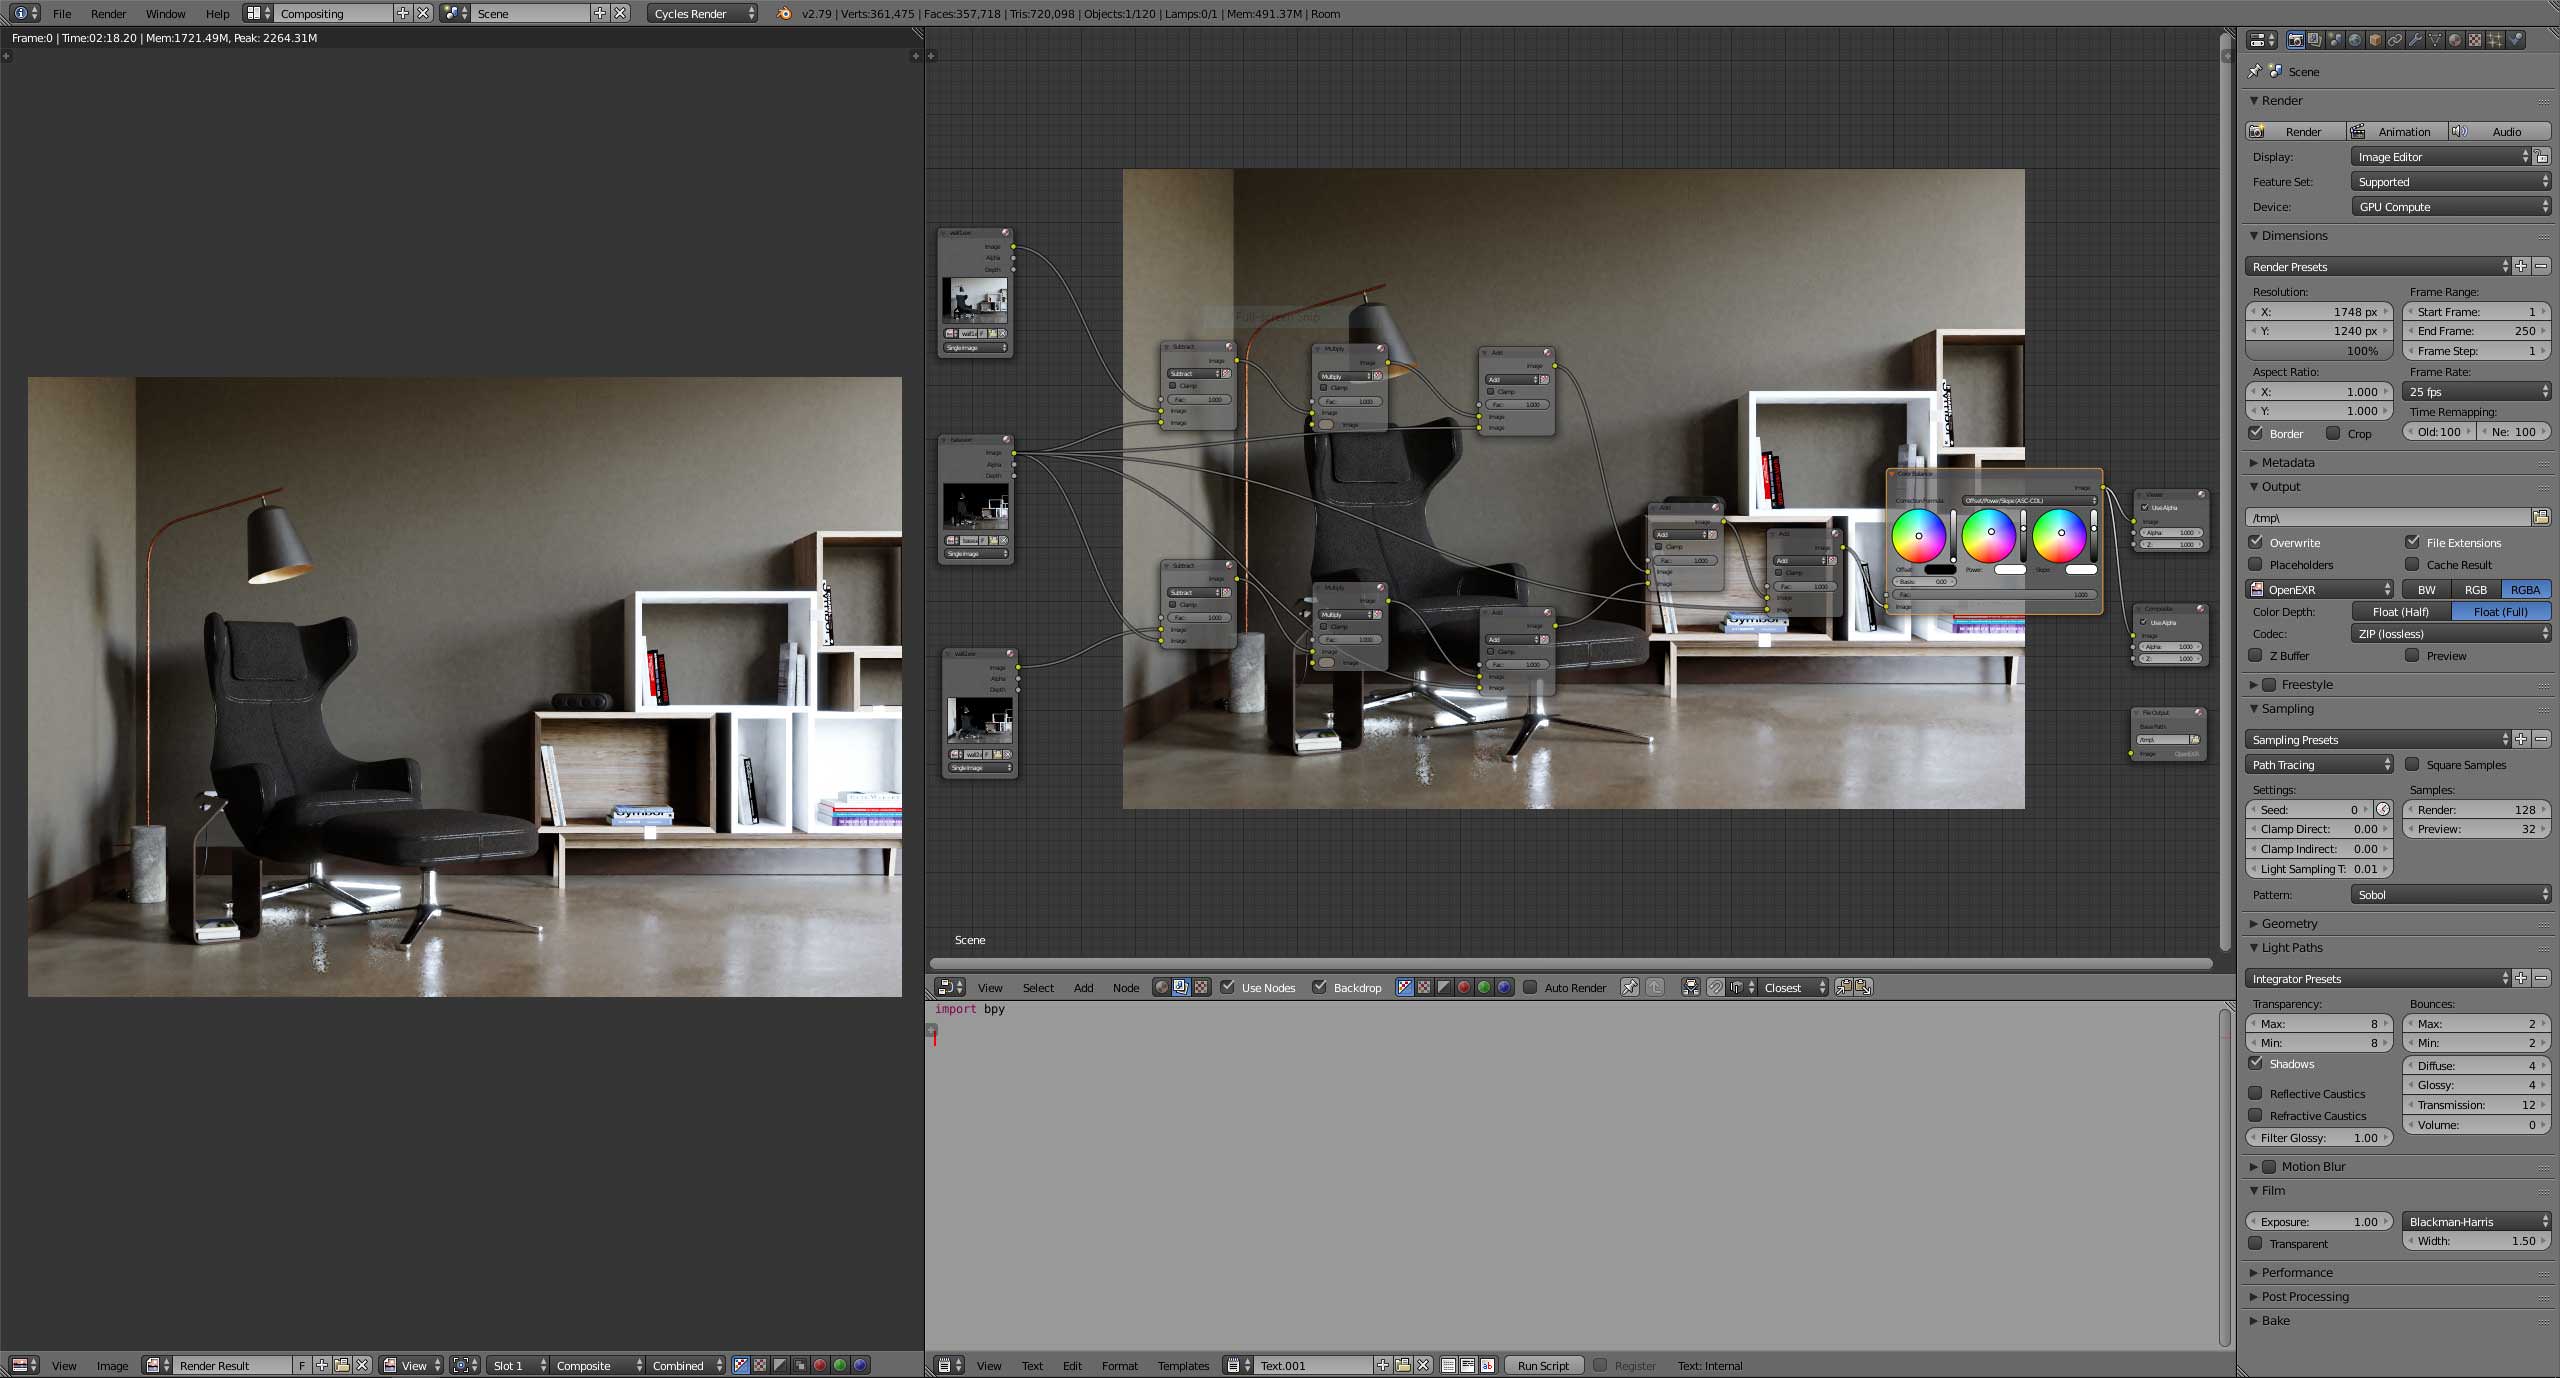
Render with black wall, render with white wall, compute difference, multiply difference with your intended color and add it to the black render. This will give you color bleeding, reflections etc.
Note that this trick relies on linear colors, so it will work in the Blender compositor, but not in e.g. Photoshop.
Also, note that technically this is not exact - higher-order indirect bounces that interact with the wall more than once end up with a power of the color value in the throughput, which is an effect that you won’t get with this approach. Mathematically speaking, the final pixel color is a polynomial (a + b*x + c*x*x + d*x*x*x…) where x is the color of the wall and a, b, c, d etc. are components representing light paths that interacted with the wall zero, one, two etc. times. Obviously, rendering with x=0 (black wall) gives you a and rendering with x=1 (white wall) gives you a+b+c+d…, so with the trick I mentioned above you end up approximating the render as a linear function where b+c+d… are all packed into the linear factor. If you really wanted, you could use renders with varying grey levels to reconstruct the higher-order terms, but I don’t think it matters - the impact should be tiny, I don’t think anybody would ever notice.
True True… Now that you say it “if I recall correctly” baking the light saves the color as well… (I never really use it that much as if anyone couldn’t already tell, haha!.)
@lukasstockner97 wow!.. I just wish that I knew enough about this to repeat what you said, let alone be able to actually make it happen… Well done…Well done
It’s not really hard, just ignore everything after the first line. Save the two renders as .exr, add them in the compositor as file nodes, add a subtraction node, a multiply node and an addition node and you’re done.
@lukasstockner97 Thank you for this. This works exactly how it should!
There is a slight difference to the render but I am pretty happy with the result.
Now I’m wondering if it’s possible to use the same technique when I have 2 wall in my composition with different colors. How could I create a node setup where I can get the same result but having the possibility to change 2 colors in the compositor, instead of just 1?
@kesonmis I followed your node setup to accomplish this. Thank you for the help!
Yes, that’s also possible. Render with both of them as black, then with white wall A, then with white wall B, then build (blackImage + colorA*(whiteAImage - blackImage) + colorB*(whiteBImage - blackImage)) in the compositor.
Now it’s time to find a way to automate blender to export the different wall colors without having to change the color in the nodes one by one and exporting each file at a time.
 )
)