I need help regarding creating characters and armor in a cartoon-like, low poly style similar to Albion.
I’m learning blender, there are many things I don’t understand and can’t do yet. After a few days of searching I found a film, in which one of the creators explains some aspects.
I also found a thread, in which one user explains: "You will need character’s main skeletal mesh and separate skeletal meshes ( all have to be rigged ) for torso, pants, shoulderarmor etc. and attach each one of them to different a skeleton slot.
You could start up with character dressed in only underpants, then add every clothing element with use of script / blueprint. "
Can someone please explain how to achieve this? Is it supposed to be on separate layers or saved as a totally different models? Does baking concerns textures and model? I would love to be able to learn and to move on
About Joining Meshes
You can select two objects (eg: body + face) and hit “Join” command (typically Ctrl+J) and then you will have one Object with one Mesh but it will consist of two parts. It means that now conceptually in your mind you have two pieces but they are within the same Mesh.
What you can do with meshes most importantly is not to join vertices\faces but keep them apart so you can distinguish them better. Avoid doing destructive editing in them because you might loose important UV texture or material information (unless it is really important to do it – but it will result into manually fixing any problems). Say for example you select a vertex of a body piece, you hit Ctrl+L and now you have entire piece selected, then you can move it around a little bit better. Keep joining pieces of the model together and moving them into position until the entire model is constructed.
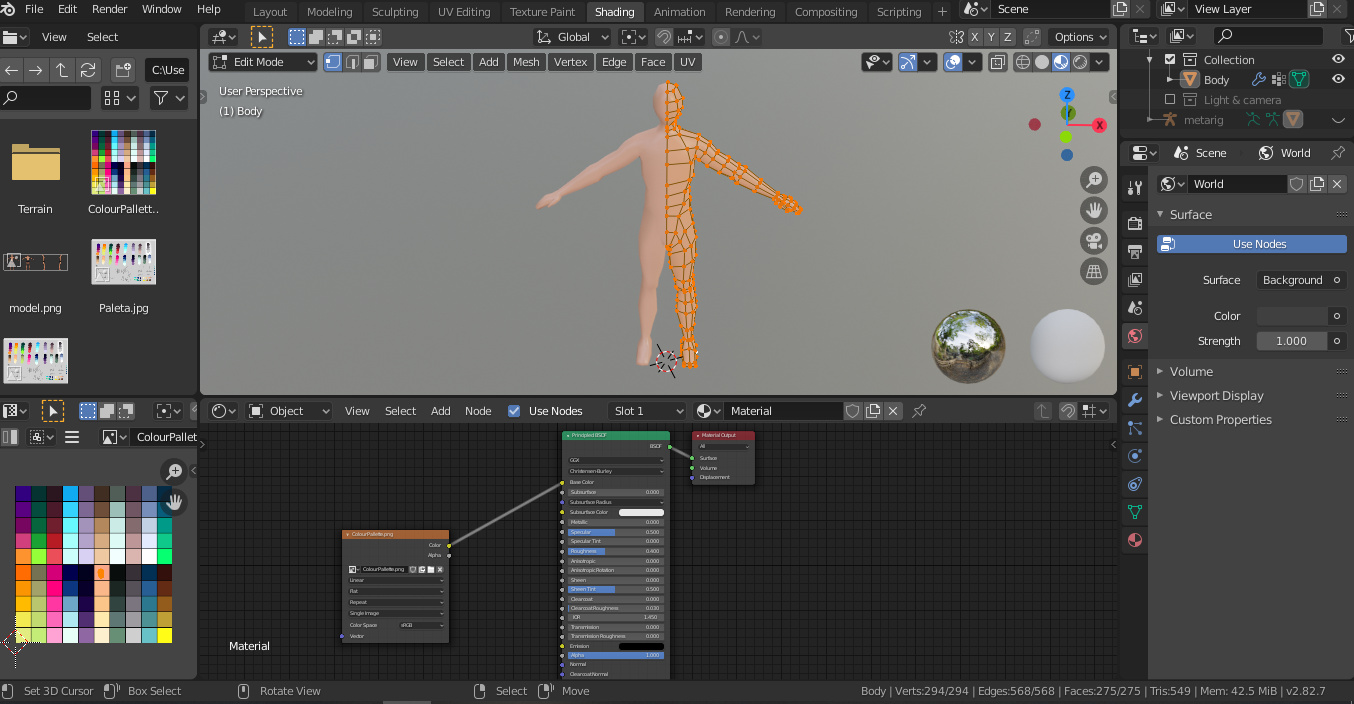
About The Materials
Some times various pieces might share a common material, however other times each piece might have it’s own unique material. However if you join two pieces together (eg: you will join the face to that red uniform - the red uniform becomes the master object) you might notice that one piece might loose it’s material (eg the face gets the material of the uniform). To get it back right, just go to the master object (uniform), open a new material slot, and pick the correct material of the face.
Say for example you can get ideas how to work with these (unfortunately Blender 2.7 – but you might be able to follow it in terms of thinking – techniques are exactly the same):
In a new .blend file, import these pieces and do that exercise, to try to join everything into one object. You might try it 4-5 times from scratch to get it right, but do not worry if you do mistakes, is only about practice.
P.S. I am not mentioning the rigging now not to confuse you, but later on once you are OK with the model you can post an update here and move the process.
If you plan to use only one material it means that you will have to either go for one texture with all of the pieces in it or have one material with multiple UVmaps and multiple textures.
One texture is really good for efficiency and mostly better in game engines, because optimized resources are much better. However the downside is that you can’t have variety in your textures, such as changing only the eye color results into changing the entire texture.
Another way is that you might be able to have only one material, but this material will use multiple UV Maps. So that way you can keep all textures separate but all connect to the same material, you can have modularity (eg: change whatever texture you want without affecting anythin else), also not compromise in any way the resolution of each UVmap (trying to fit everything into one texture requires always difficult decisions).
If you like multiple UVs, I remember having answered this one here:
Another way which is much more technically advanced is to use the new feature UDIM. I have not clue about this one, haven’t tried this yet, but think of it as just a more advanced version of the previous technique.
 You might try it 4-5 times from scratch to get it right, but do not worry if you do mistakes, is only about practice.