Not really. I usually do it by controlling the voronoi scale and the threshold of a greater than node. Just means I have to adjust both to control the “density”. There is probably some way of setting it up so that one combined with the other also drives the scale, but it’s not something I’ve bothered looking into.
Voronoi color output is modified to be used for flake normal (I’m preventing excessive change to avoid them go black). A BW version is also used to vary the strength of the mix between the base coat and the flakes. Color of flakes are usually aluminium, but can be colored or more chameleon like - technically pearls rather than flakes, but I don’t care. I also noise up the voronoi coordinates, but the noise scale has to be synched with voronoi scale to prevent islands from forming.
I’m messing around with it again now (have no idea why - I don’t need it, lol). I can post it later if I remember.
yes i had the same idea,it works well,except for the masked out cells we have to remap the intensitys,with the effect the higher the threshold the darker (with the mapping) becomes.i guess with a clever use of a math node this can be compansated to the original intensity.
only black and white is not sufficient, because the cells should have different intensitys.
yes,the use of the normal is maybe the best way for a angle based reflection,i have to test that.not sure atm how, since not all shader have a normal output like these on the screenshot.
would like to see your testresults.
btw i dont get it, why we dont have a density control on many shaders.this makes sence on so many cases.I think nobody want allways the full distribution of a shader,especially voronoi.
Short answer is: Speed.
In the case of the Voronoi, having a ‘density’ control would require each cell to call the density function, and also probe much more cells than the typical 27 cells of the Worley algorithm.
If you have a better implementation for a new Voronoi algorithm with support for density… ![]()
No i haven’t.I just saw a voronoi cell density control in a Arnold shader video,would be super usefull.
From what I know about the cell noise in Arnold, the density only scales the values between the different recursive calls… It doesn’t change the cells density (the worley algorithm is still used).
(we don’t have a recursive voronoi, but stacking them together would result in a similar effect).
could this rebuilded with the nodes,or you are talking about the code?
Mix several Voronoi nodes with different coordinates and here is density. But this decrease your performance.
can you show a example please?
I’d say with nodes (thought OSL would be my preference)!
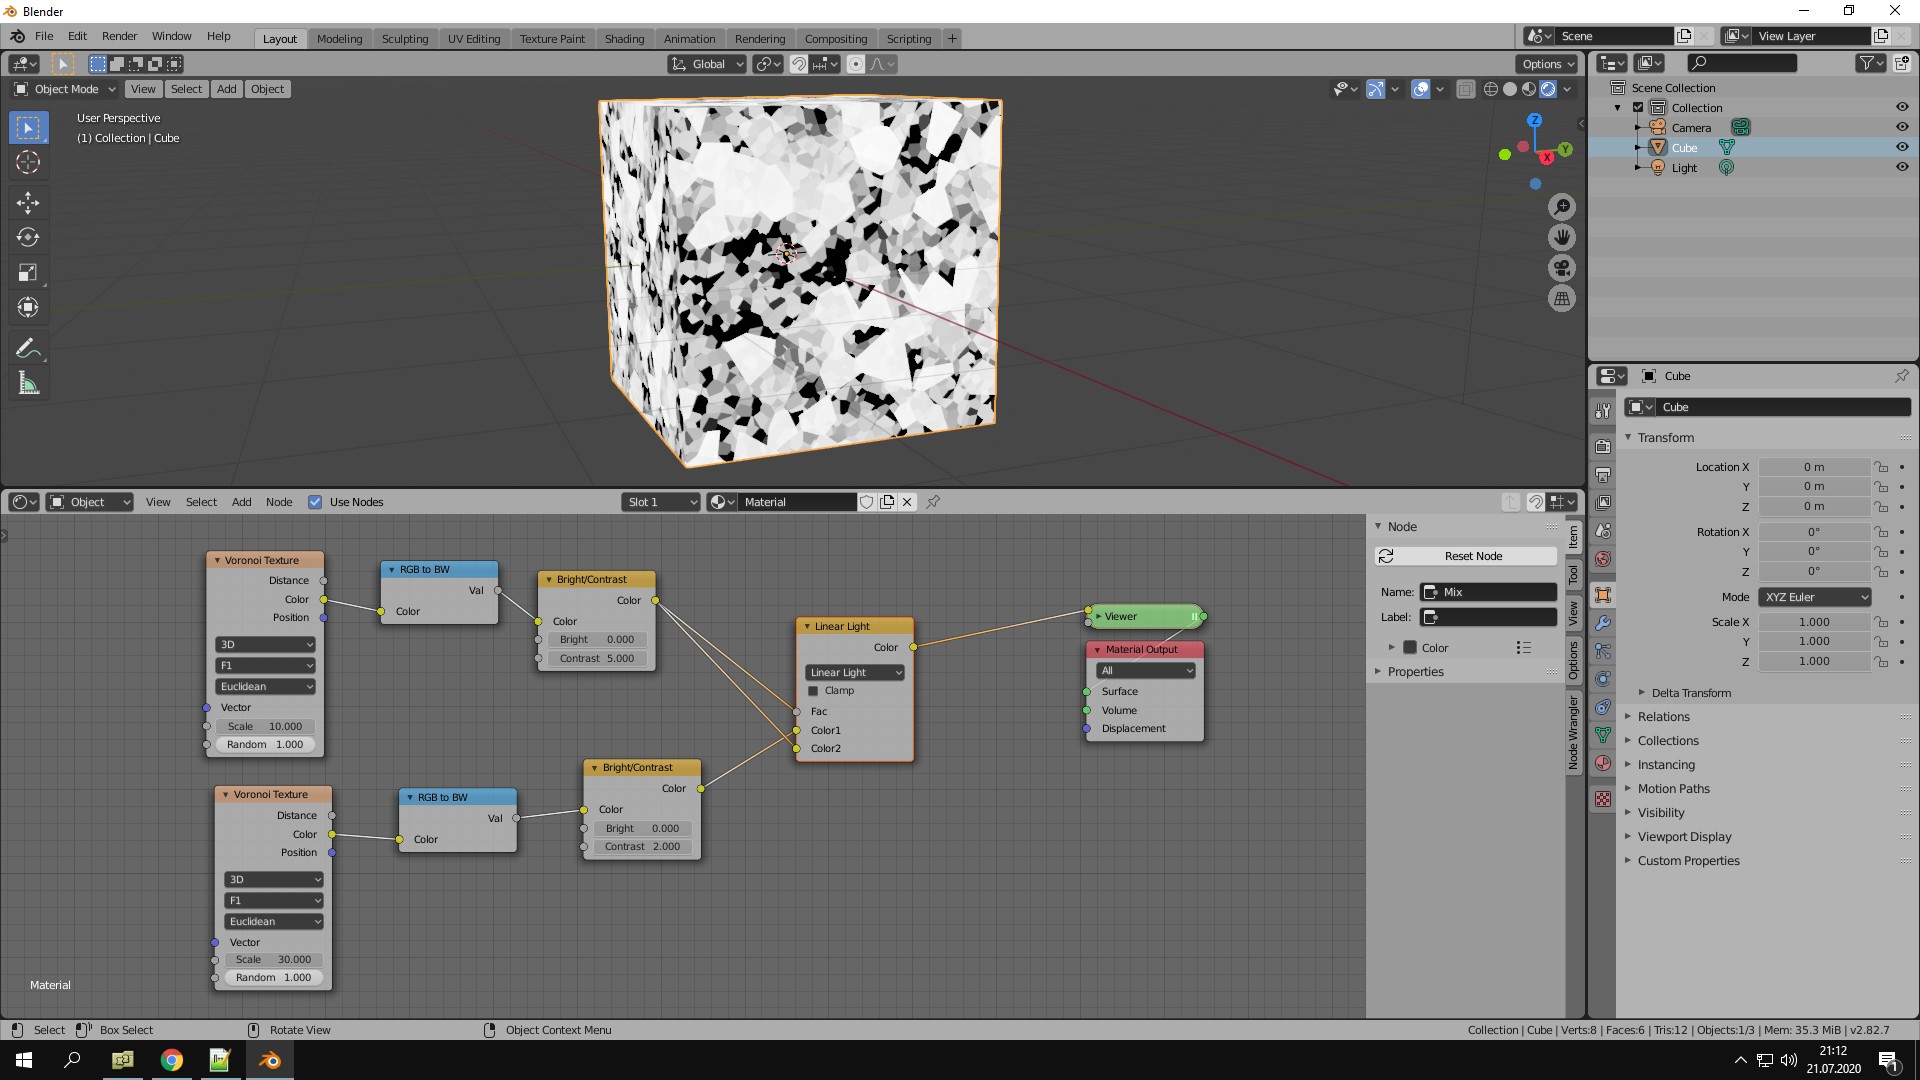
Just like @Hikmet has shown, but probably with a better function than ‘linear light’. ![]()
I don’t know exactly what’s the equation for the aiCellNoise.density function, but it’s still some mixing of n voronoi functions where the coordinates’ scale for each n are different, and n goes up to the number of ‘Octaves’ (the amount of voronoi calls).
Thanks for posting.interesting node setup.looks like a sem foto of flake particles.maybe usefull.
I guess there is a bit of counfusion about density.I mean something about this,then the gaps between the cells are increasing with less density.
here are the examples at the bottom
https://docs.blender.org/manual/en/latest/render/shader_nodes/textures/voronoi.html
I know it wouldn’t be procedural, but if you want, I can make you something in substance.Flakes are a lot easier in substance because you can assign a random angled gradient based on edge detection and generate a normal map from it so you can get flakes of different angles and things like that, or you can just get better depths and things. You could use the same principal suggested above but with the images. I’ll probably do that later and post it and you can use it if you’d like and if not, it will be here for anyone who wants it
yeah why not,we can see how it looks.
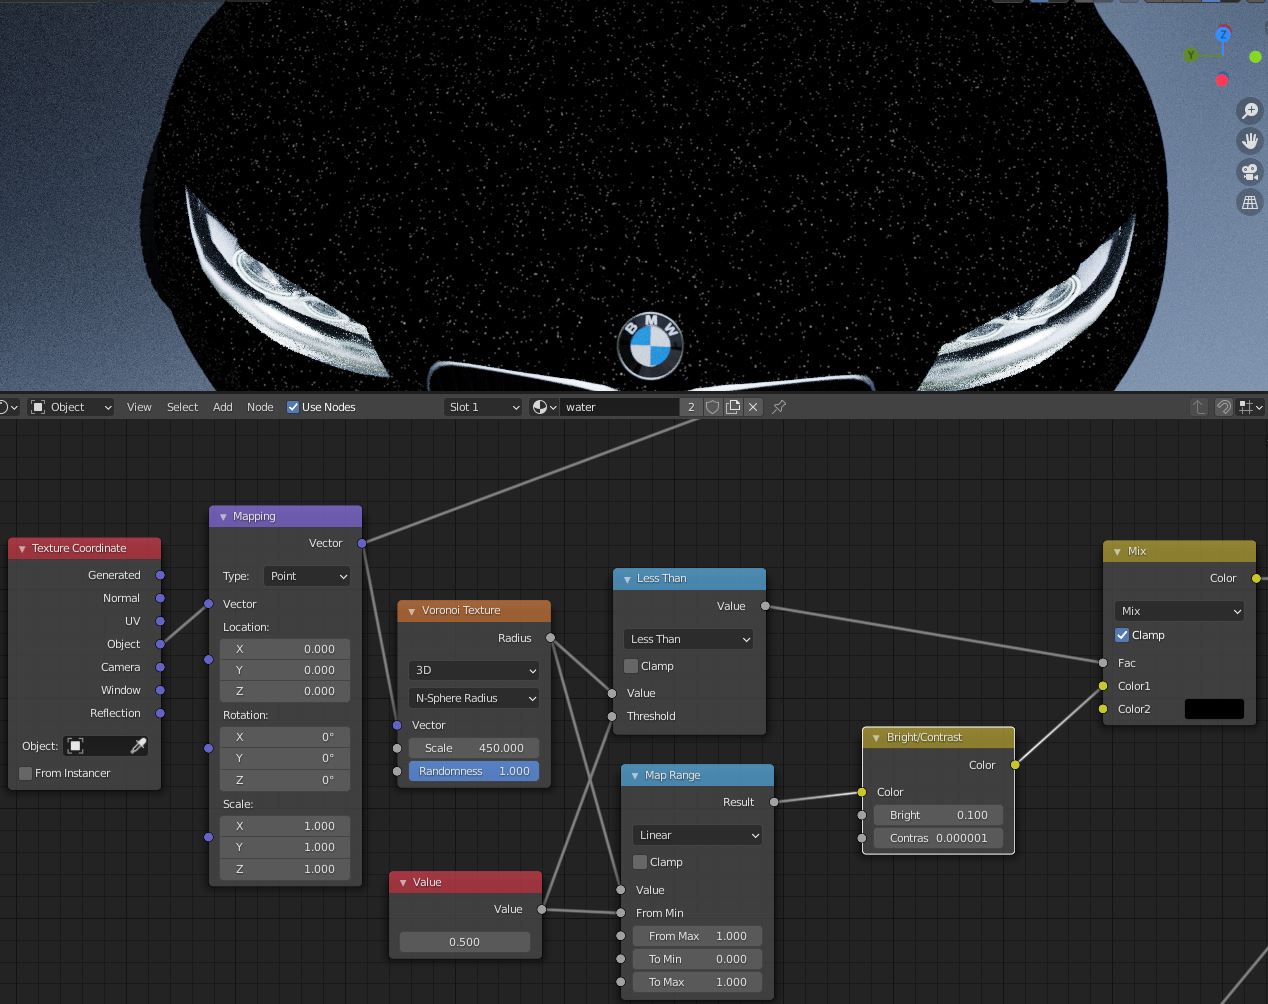
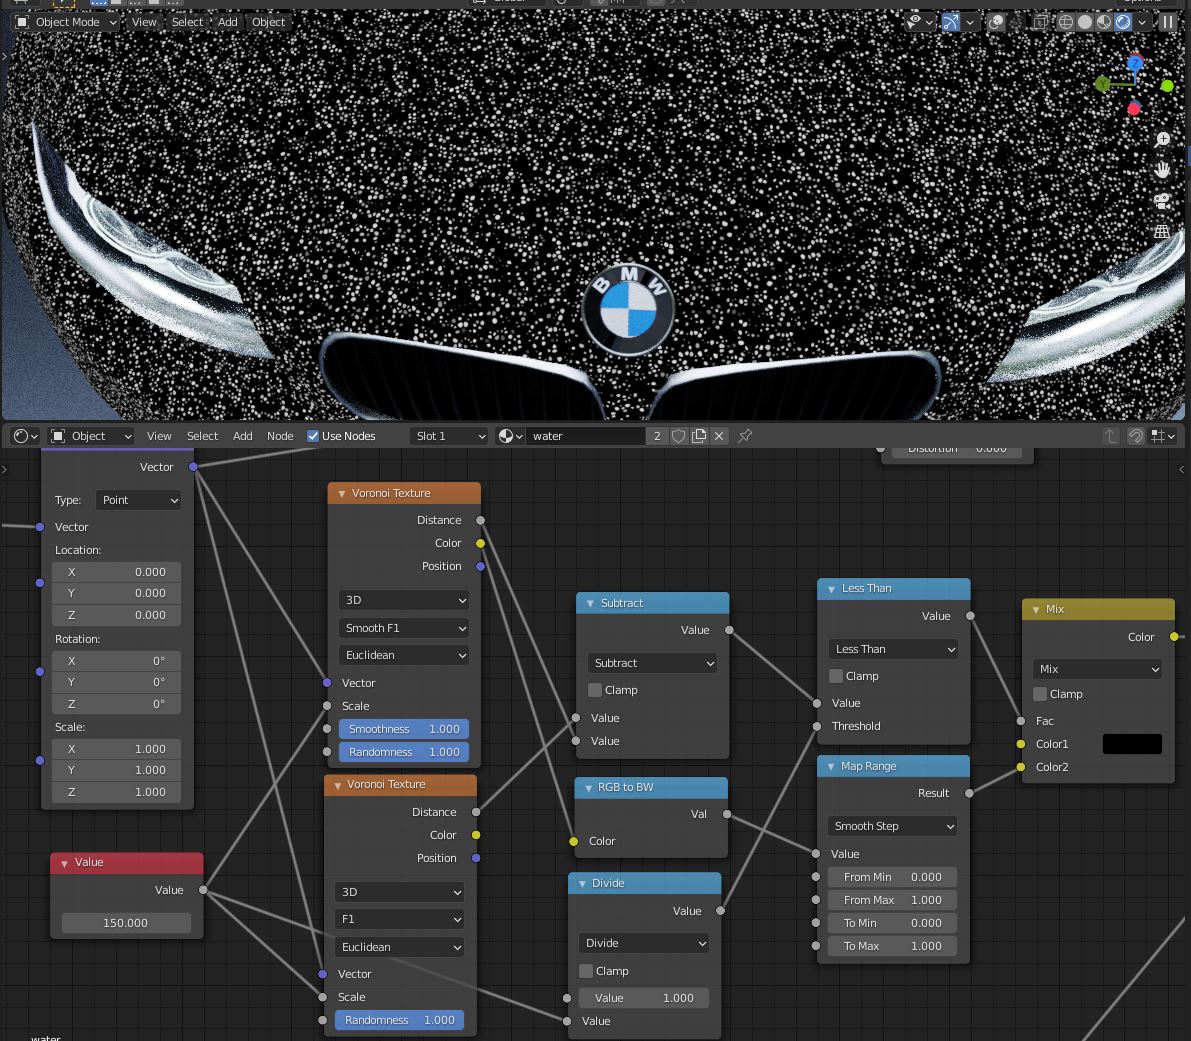
here a setup from the examples posted above.i think its not bad,but something is missing i guess.for better visibility i made a shot with a small 150 scale.maybe a more noisy type looks more natural,or something in between.
The node group I use to change any random color output into a normal modification.

Use default F1 voronoi color output to drive this, and default F1 voronoi distance output through a less than for the flake glossy.
Thanks for posting the setup,i check this out.
Here are aluminum pigments overview from a paintmanufactur
here are the flakes I did. Not going to play as nice with blender procedurals as making it entirely procedurally in blender but it should still be useful. The height map will probably be the most useful part to you. Later I may also do a random color assignment one so each one will have a different color but this way you get a normal map too with random rotation and random angles and I will update soon with the other maps. For the time being this is a start.
The textures included represent between a 3cm and 5cm space depending on the type of flakes you are making. Probably shouldnt go above 6cm to scale if you are trying to keep it realistic because it will begin to just look like large glitter flakes. These are also sorta big maps. I doubled it to 2048 for better map resolution but given that these are 16 and 32 bit maps, you may want to scale them down 50% first if memory is a concern.
https://drive.google.com/drive/folders/1VHdfuaV0NO9mwiXe_Y2eIwHnSbDoTVwX?usp=sharing
Thanks for upload this,i try it out.I prefer to make it procedural, because its more flexible with changes in scale ect.
And yes big glitter is also wanted.Like a black paint with large flakes.This is the reason for the gaps in density,otherwise the basecolor would be covered by a complete metallic layer.
For very tiny pigments, like in the paper, this is the case.
Interesting is,i have read that the pigment layering direction is wanted to be as flat as possible,for the best mirror like reflection quality.
I will see if I can bake out the parts when I wake up as different layers for you so you might be able to add them up to control density by depth. Obviously that won’t do anything about scale but given the minimal amount of change to scale for this application it would at least give you more control over the density it’s self.
I went ahead to see if there is a way I can make the texture proceduraly in blender, and there actually pretty much is. The main problem is you pretty much have to manually define the number of possible iterations there are of the splatter and more so, it’s not seamless. In that regard I think substance has a huge leg up. I may be able to make a generator for you though which you could pop into substance player which is free and use that to adjust the maps as you need, but still, wouldn’t be procedural inside of blender, so you wouldn’t have the added benefit of that.
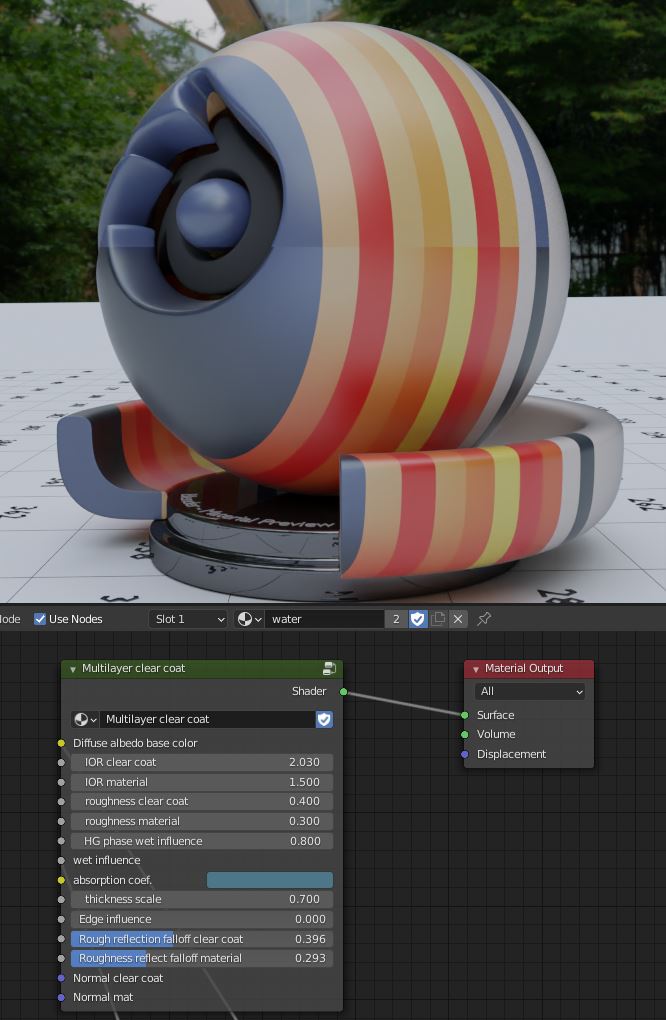
I am still not happy with the darken math.For this reason i have builded a henyey greenstein phase function group.With this HG group i want to try make use of it in the absorption build.The problem is,it is used for redirect the light in a SSS or Volume shader.For this 2D shader it can be used as factor i think.Since the Reflections and the absorption are set,i have to think about how this can be usefull for the darkening of the substrate appearence.In a wet surface paper the materials appears darker and more transparent since the water has a high anisotropy,the diffuse materials that is getting wet,becomes darker for this reason.(less diffuse =appears darker)
btw i had the idea,although we have no access to the lightscource,we could set the sun/hdri sun world position as vector instead the view vector.must test this out.
Here a testrender,with a value of 0.9 anisotropy into a diffuse shader.seems that it work as you see this spotlight effect in view direction.at 0 it is diffuse as default.

I have to make this work first,then finetuning with metallic ect.
I found a way to extract the scatter coefficient from the albedo and recalculated the albedo with the reduced scatter coeffcient and influence control of the Henyey Greenstein phase.
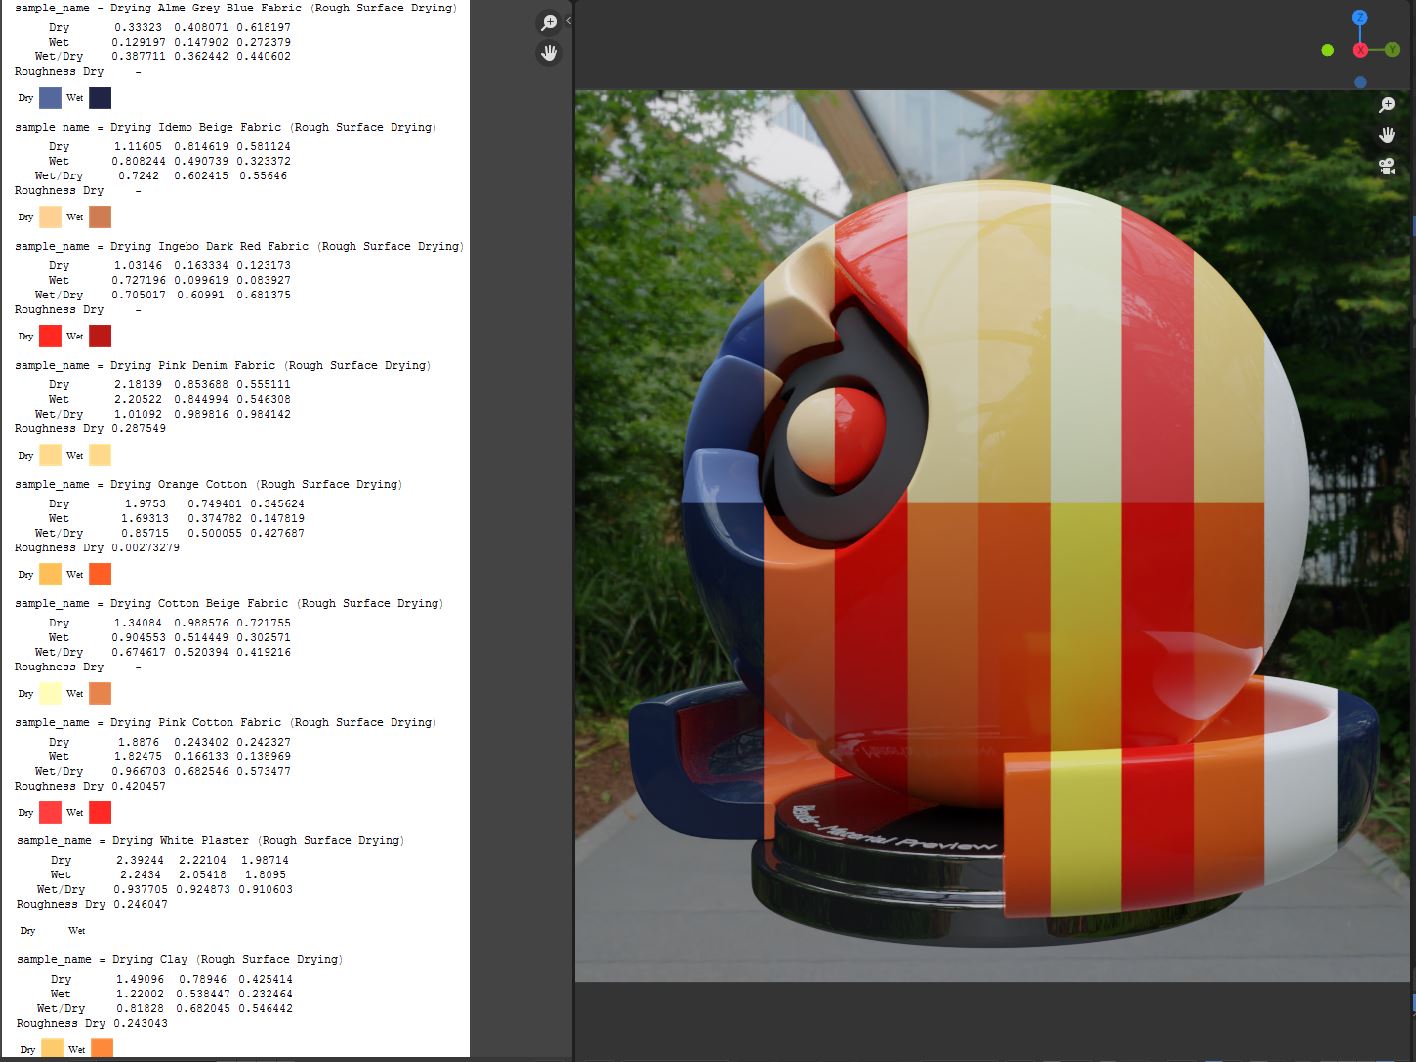
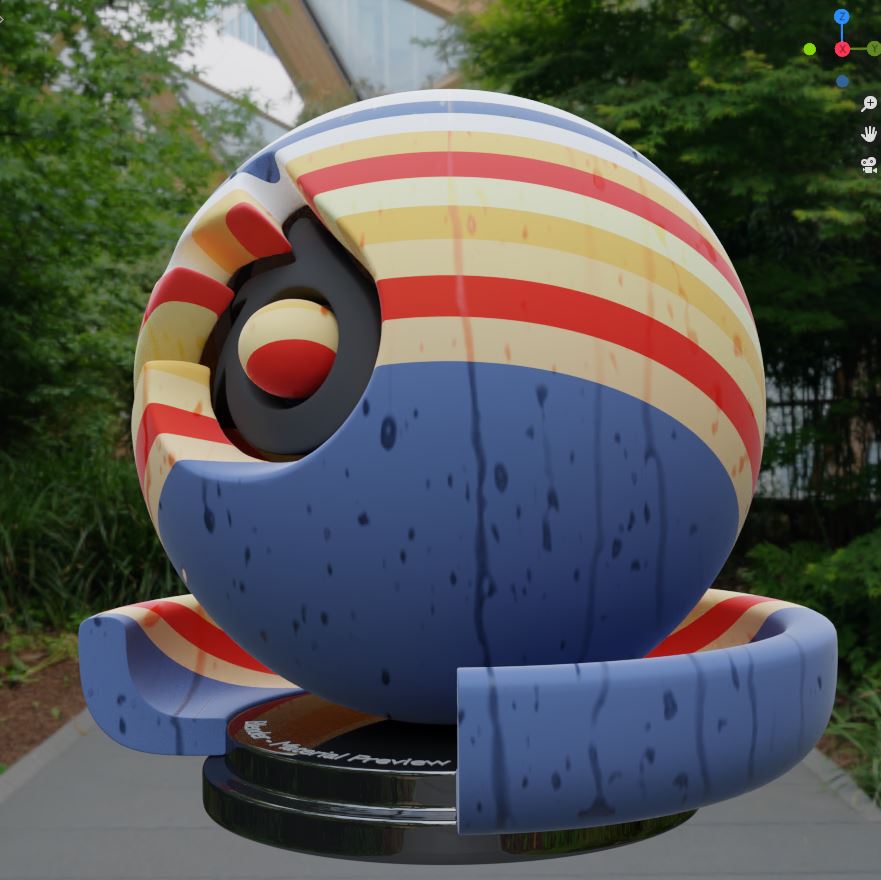
Here a screenshot.On the left the original stone diffuse texture.In the middle a reference pic with dry/wet stone.On the right side the material useing the original diffuse from the left and the result with all calculations.

Testrender with dry values from the left chart.On the shaderball the lower material is still dry color, but with wet darken effect added.
Masking test with dry and rough base color
More masking tests.I cleaned up the nodes and grouped it together.
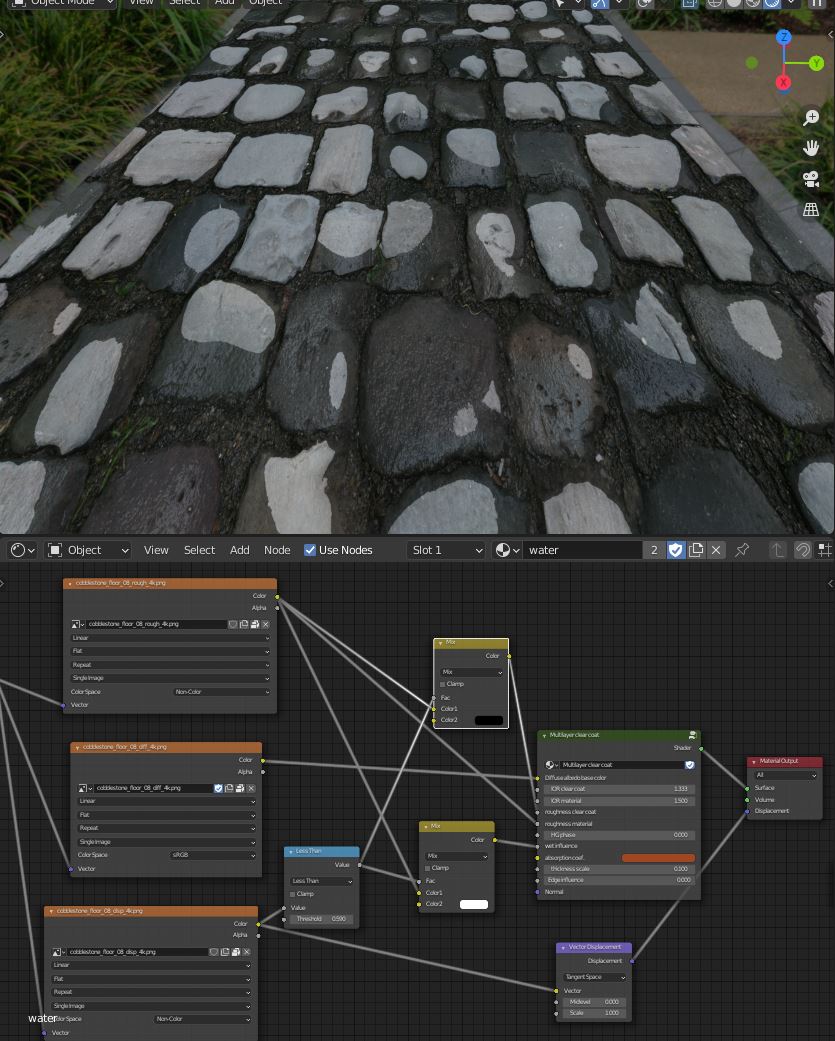
Added reflection falloff,for approximate less edge reflection with increasing roughness.with control for both clearcoat and mat reflection.