This is how I understand this to work:
When I marc the seams I use the edge Select tool.
Then I used UV projection. ( I dont know what to do when it does not project )
Then I select the faces that I want to assign the new material to.
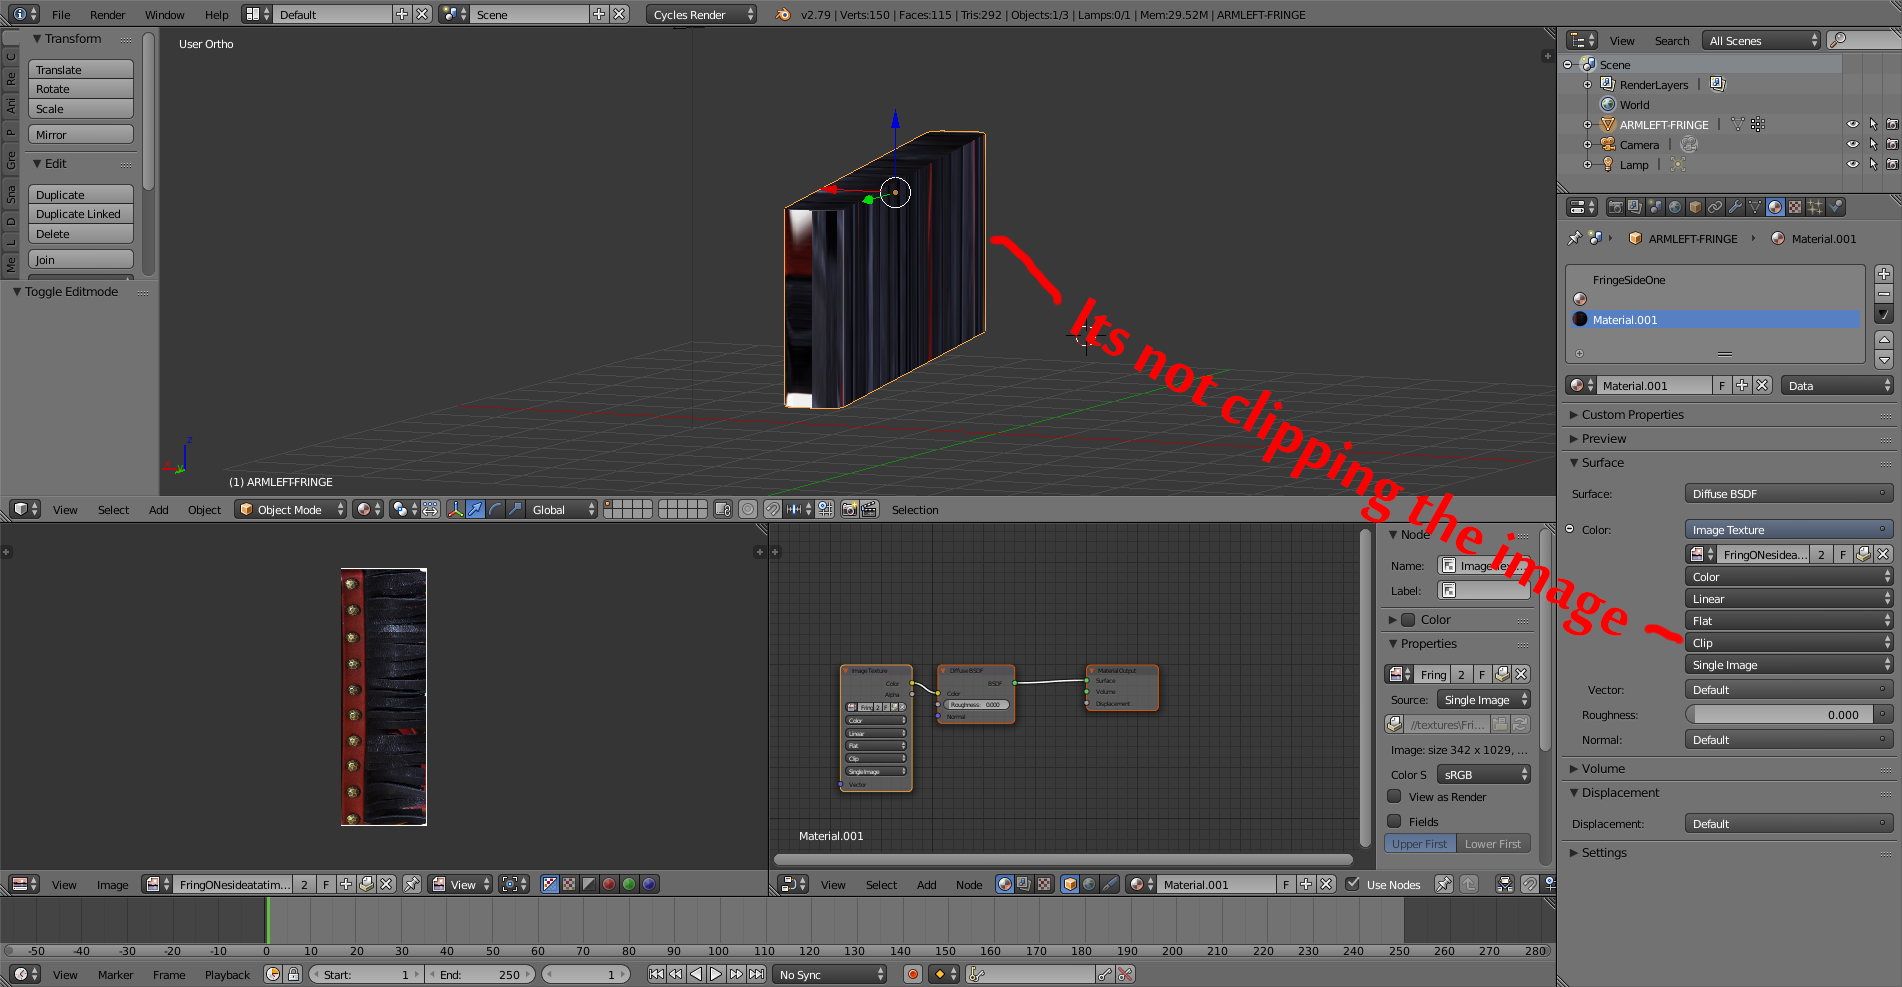
For some reason blender is repeating the image even though I tell it not to. Why ? I did not assing any images to the other faces. How do I lock this in so I have control over what image I put on what face ?
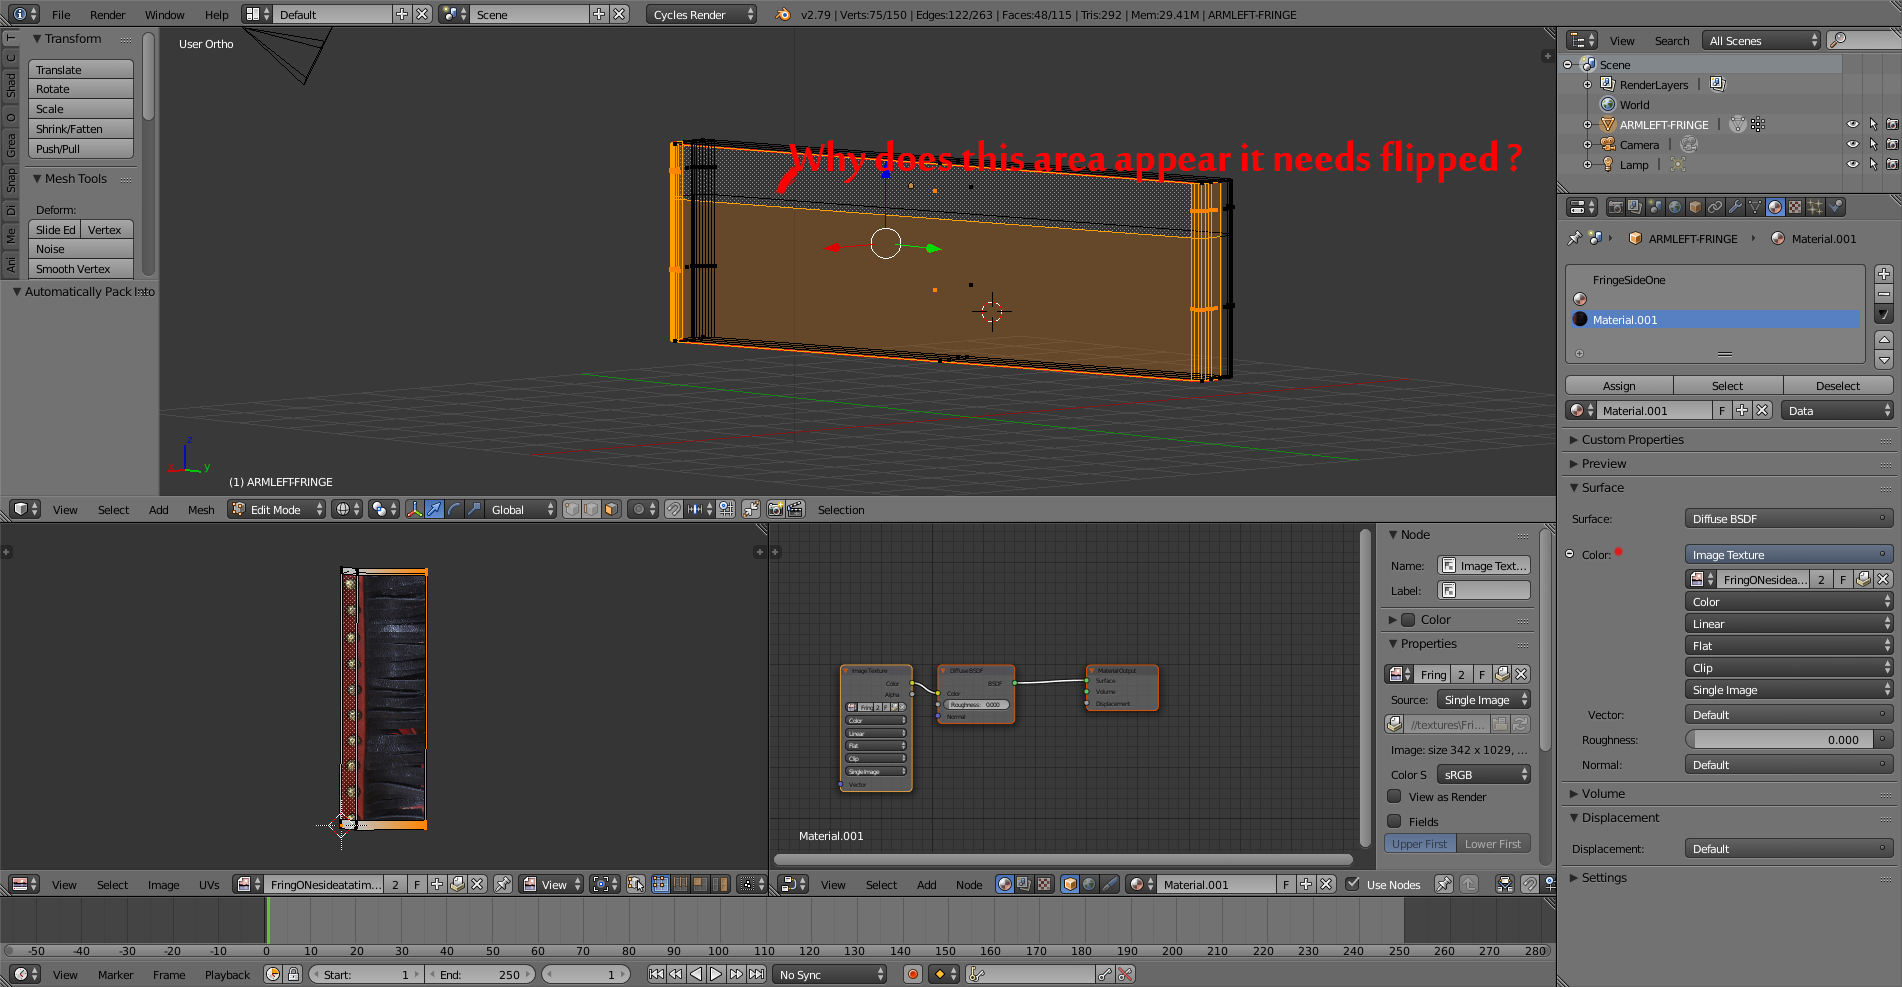
I select Edges and I marc the seams ANd then when I unwrap what should be selected ? Just the edges ? Or the faces. ? and when I assigning a material it is only assigning it to the face I have selected is that right.
And when I marc the seams on the same object and unwrap the same object and place a materiel on the same object what things do I need to be aware of when I do this ?
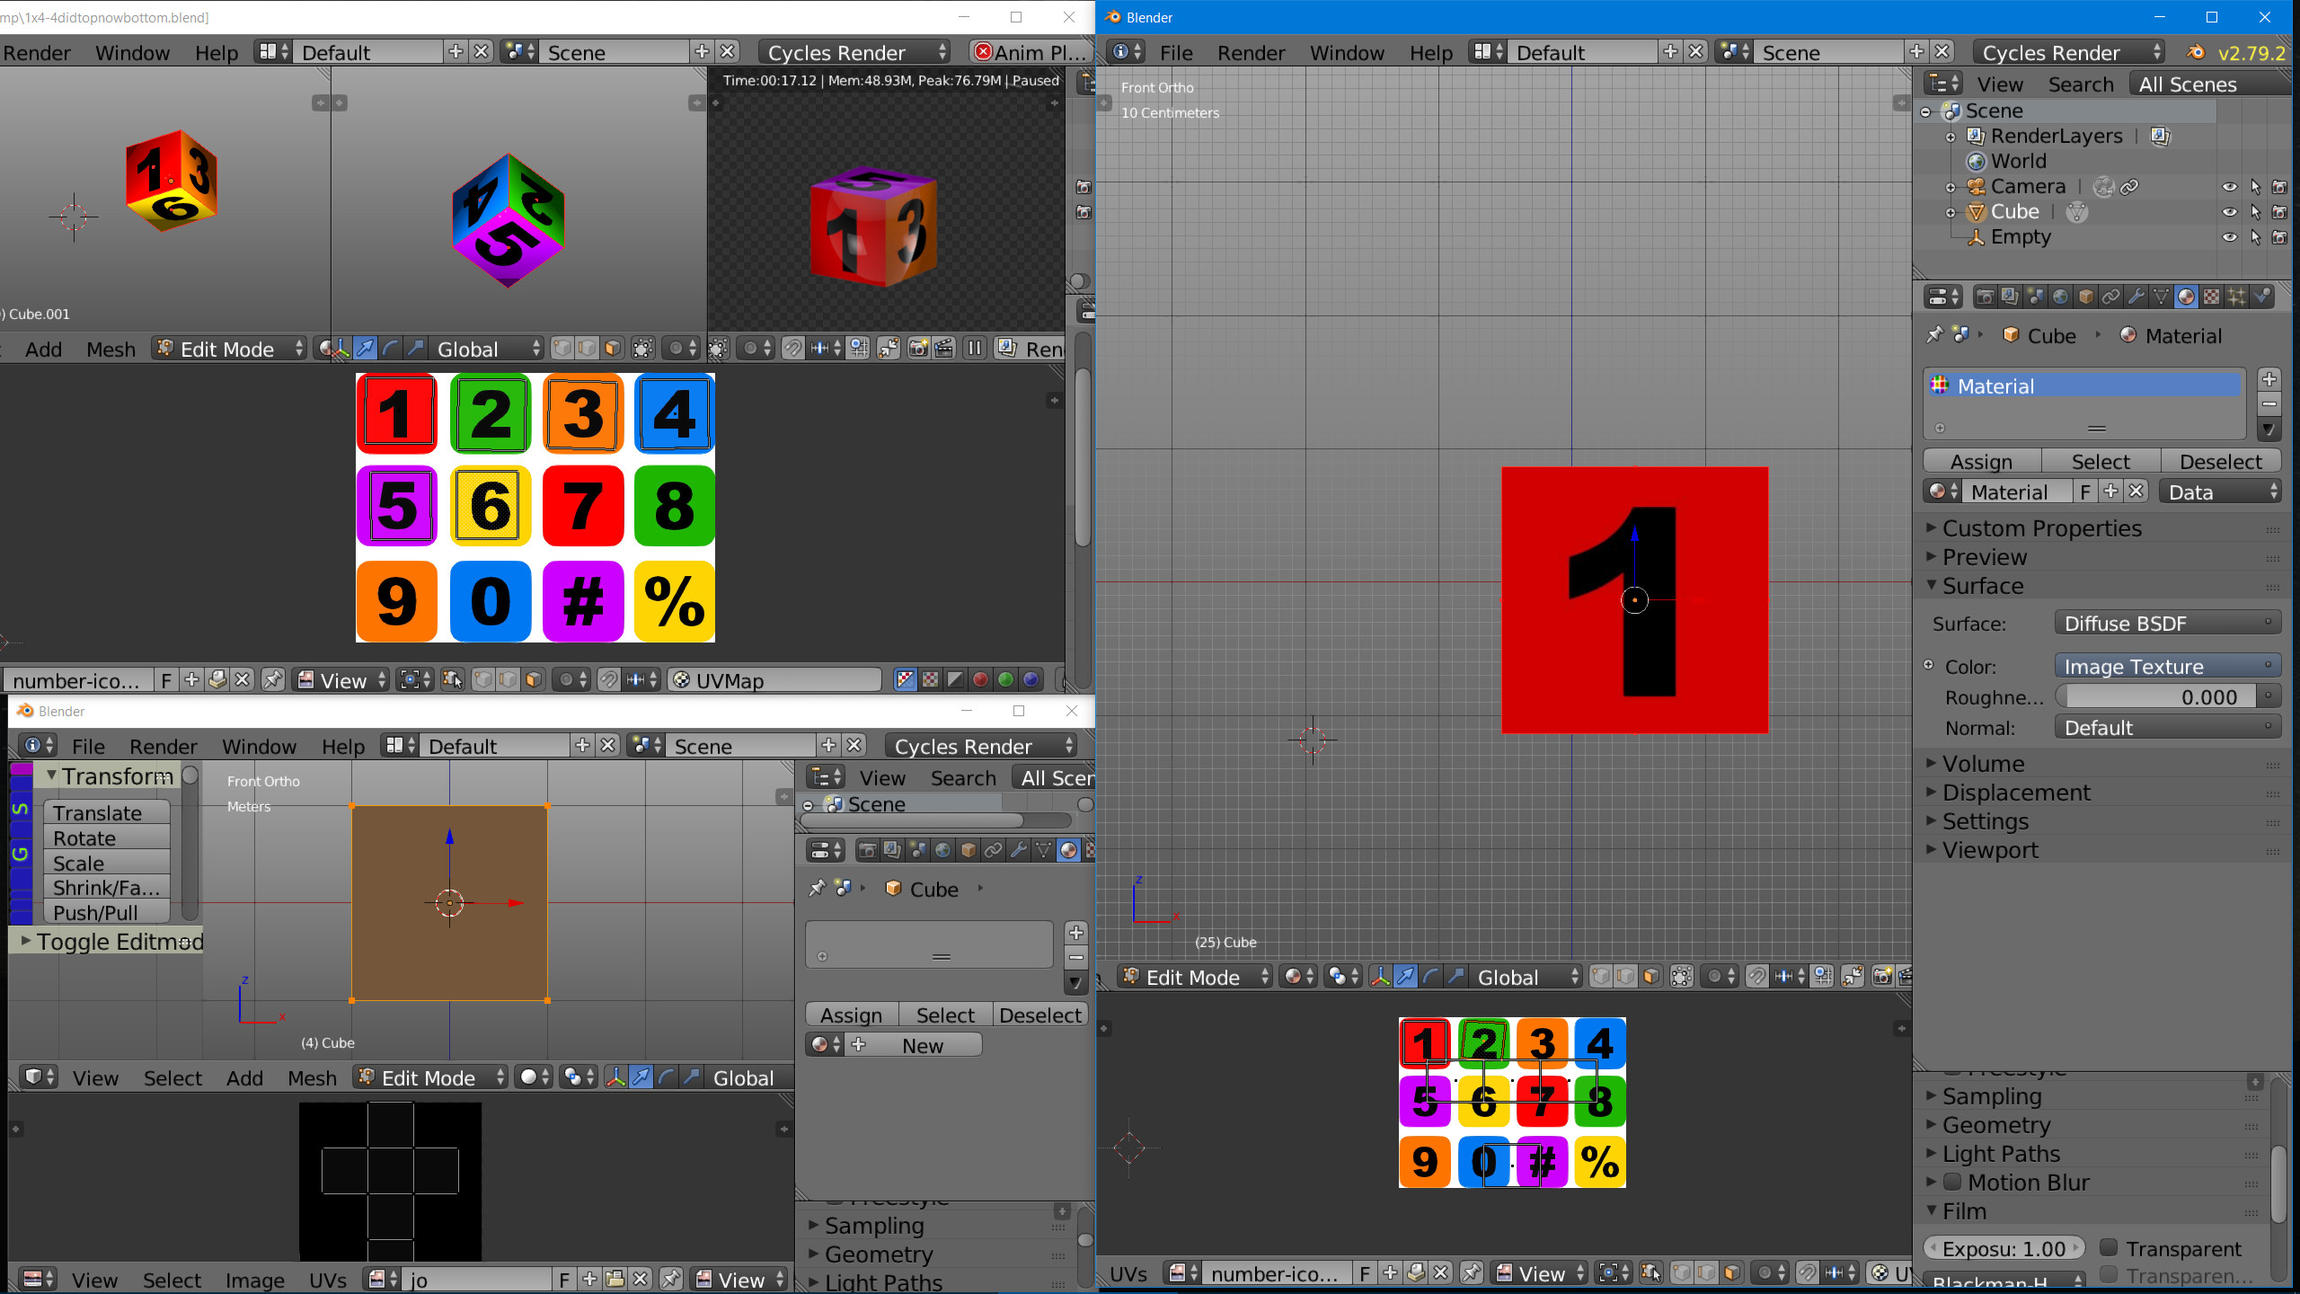
I have seen Your Blend file…I think I know why You are confused…I’m a noob but One thing I know is: KEEP It SIMPLE what ever You do…Don’t make it difficult for Yourself…Here is a Picture…Forget Node Editor and…for know…
First Blender show a cube with a UV - Map and 6 faces unwrapped with U - Project from View…and placed in the UV - Map.
So - 1 Picture/Uv-Map with 6 faces assigned to it is all You need…
Before Picture…Project from View do what it say’s Think about it when You use it…You get what You see…!!!
1.Pic - EditMode 2.Pic - Face select Mode and render…
Last - Uv Editor - Menuline Icon before Veties select is…Keep Uv and Editor in Sync…Click it…It only work in Face select Mode.
Editor and Uv - Editor…I used Automatic Generate Uv - Map…See it Uv -Editor.
Shift + a / Add Cube In T - Panel button…Open Tap and Tic Generate…Now go EditMode…There You are.
In Uv - Editor Press New button to Save the Uv - Map Name it and close…Now there will be a little Star in Menuline
over Image… You don’t see it in My Picture…I have done it…
Select Image and Save it - F3 - to a Place You can find…Cube Now have a UV - Map with a Black Image.
Put Texture on…A Number Texture here…In Properties Panel Add a Materiale and seletct Your Texture.
In Last Blender:
Editor Front view…Face select Mode Face Selected…Move cursor to Uv - Editor - Sync Selected Press g to select the Front face move it and place it in the Picture…Edit Mode Press 9 Back view…And repeat…Puff Puff
This is just one way to do it…Hope it can help You a little…Remember how Project from view work…