Hey guys, I have a scene of a scooter in a white studio setting. I need to deliver the scooter with a transparent background but with the dropshadow on the floor. So im using the shadow catcher option in Cycles (2.9). This works fine, but when I load the image into photoshop, I can see that there is also some ‘atmospheric’ shadow in around the scooter, not just the dropshadow. So it’s not completely transparent around the scooter
Is there a way to check and control the shadows that the shadow catcher is producing?
Light. Just add area lights and illuminate the environment around.
Also, use renderpasses (cryptomatte or AOV) to generate a mask and seperate the scooter from the shadowcatcher & combine them in post, edit the shadows seperately.
Another thing you could do is to add a spherical/radial opacity gradient to the floor shader, so only the (drop)shadow area is visible.
I dont want to fiddle too much with the current lighting setup, as it has been approved by the client.
So I think changing the shader of the backdrop might be a good option …
But I have no experience with radial opacity gradients… can you please elaborate?
What node do I use (colorramp?) and where do I plug it? (in the factor of the mix shader?)
Honestly - though I don’t want to sound vulgar - if it is not too bad to begin with, just render the shadow layer separately and do some touch ups with a soft eraser in photoshop (or better yet with mask and a brush if you know how)… If you are not animating it or anything similar, it is likely to be the easiest and fastest satisfactory solution if you don’t want to fiddle with the scene too much…
THank you for your reply @Adam3141…that was actually a solution I also thought off…but it is not practical because it’s an image sequence consisting of more then 500 images… So that would be a bit time consuming
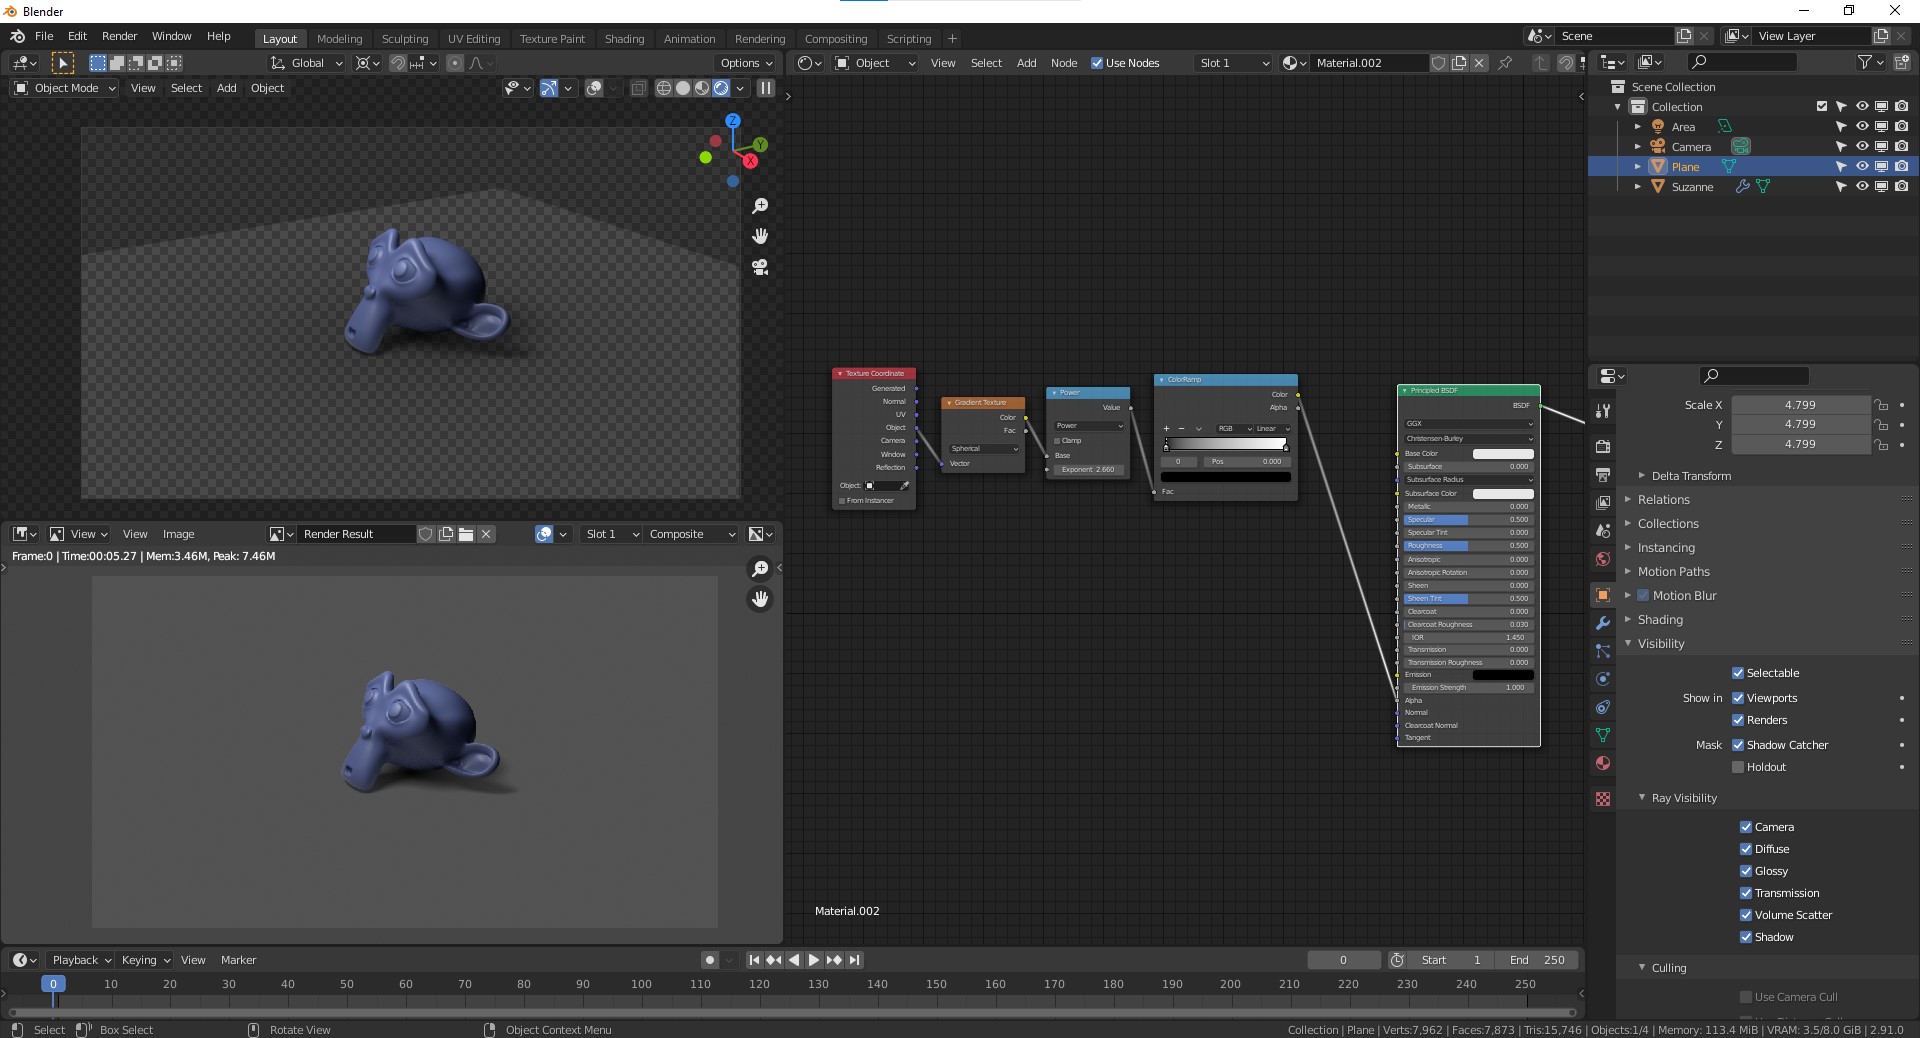
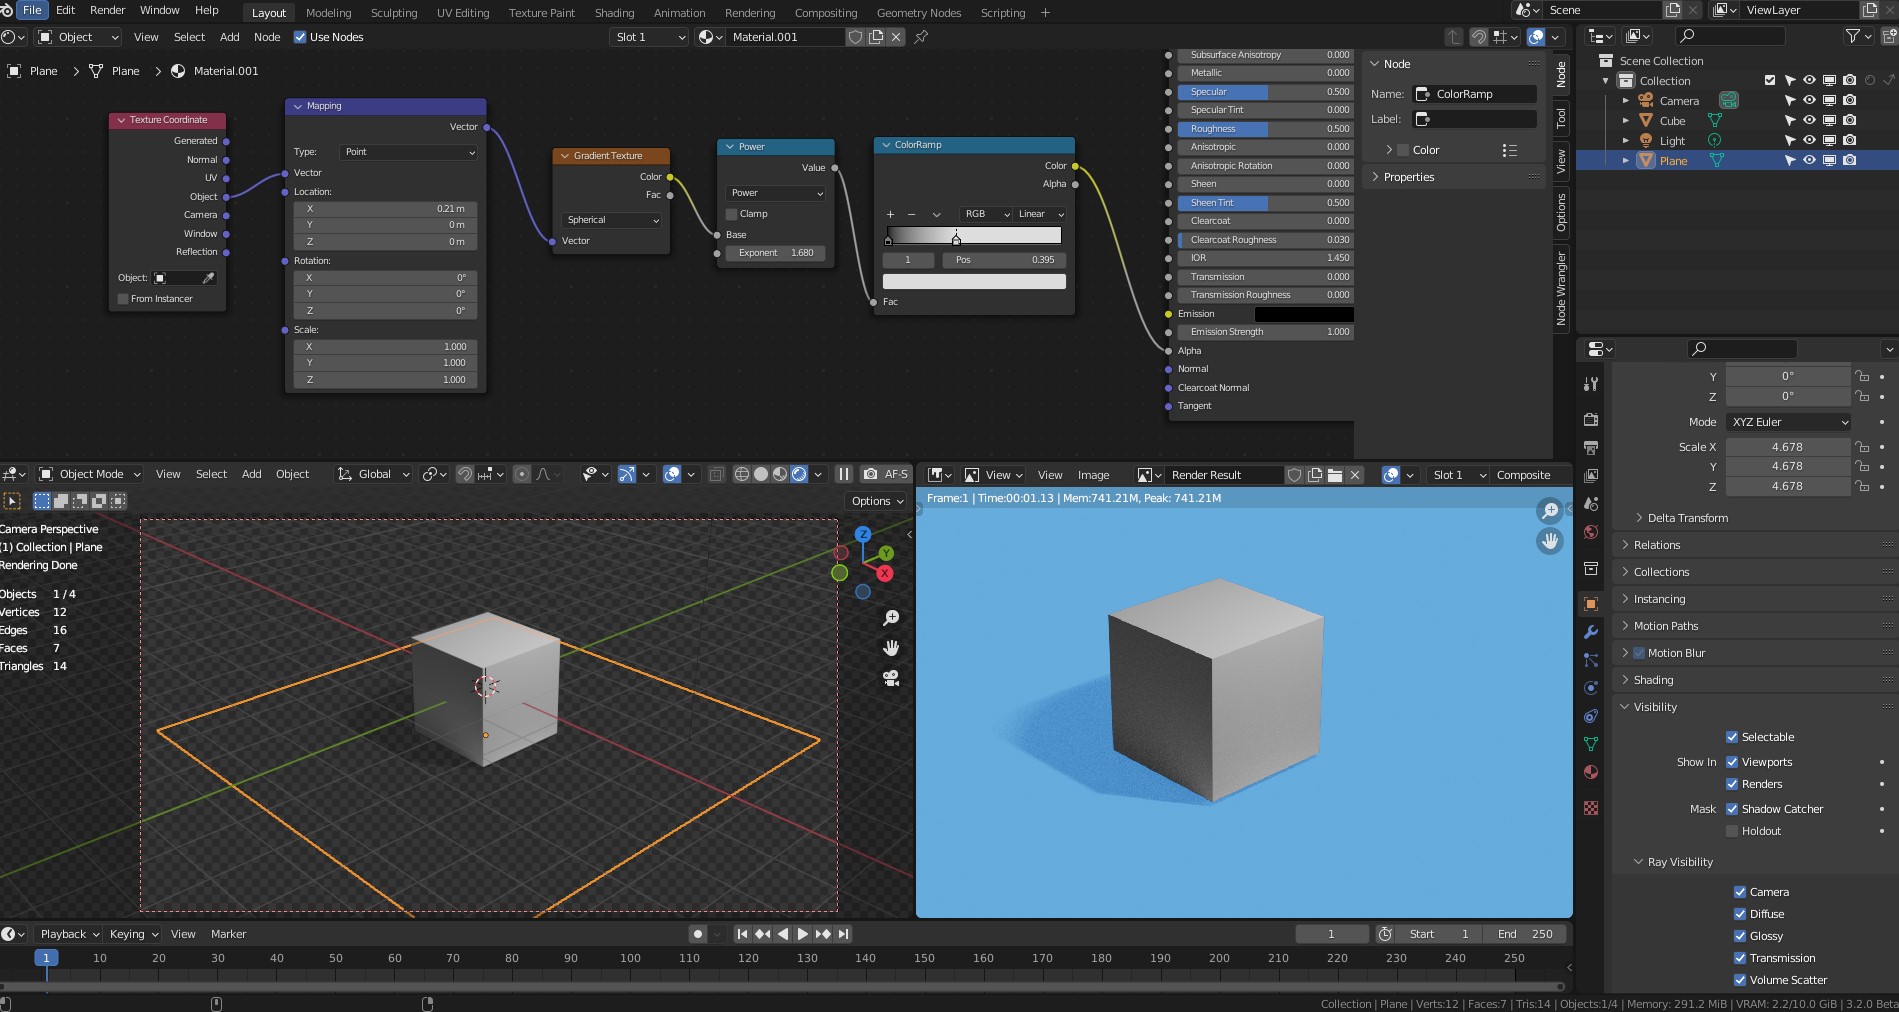
Pretty easy actually. I’ve included a screenshot of the nodes and the result.
To control the strength of the spherical gradient you can use math node (power) or a colorramp. To control the position of the gradient, the easiest way is to add an empty and select it in the texture coordinate node. Then position your empty accordingly.
Thank you so much for your answer @ibotpl, thanks for taking the time to make that setup for me…
I have got it to work, but just so I understand… what do the nodes do? What does the ‘power’ node do…and what does the ‘colorramp’ do exactly?
Because im looking for a way to make the shadows a bit less dark…but at the same time keep a nice feather for the falloff .
And as a follow up… why is it…that when I turn on shadow cathcher…and I import my TIFF Into photopshop and put it on a white layer… the shadow is MUCH more heavy then the shadow im seeing in Blender (when shadow catcher is turned of)…I mean… the backdrop in BLender is also pure white…
You’re welcome!
Both nodes, after the gradient one, are there for tweaking the black and white alpha mask. I don’t know the exact math behind it, but i use the power node a lot to add more contrast to the scene (very useful for hdri light setups btw). Just try out different nodes and values and i’m sure you’ll get there. With the colorramp you can further tweak the edges. To lighten up the shadows, you could decrease the white value.
This works a treat @ibotpl. One thing puzzles me though. The spherical masks works well but when I tick the box ‘shadow catcher’ for the ground plane and render there is no drop shadow visible. It seems like the gradient has not any effect in combination with the activated shadow catcher setting?
Look for your renderpasses. If “Shadow Catcher” is enabled, Blender will render shadows as a seperate pass, ready for combining in post (best method imo). If it’s disabled, and you have a plane set as shadowcatcher, it will render with shadows. You can still use the spherical mask in your shader setup to limit the plane (and shadows by doing so).
Hi…a bit late I know but another simple option to control the shadow value I use is to just lower the alpha value of the background layer - depends on lighting intensity but around .5 to .6 usually works ok with a pure white background.