Hi,
I will try to explain, what I am trying to achieve 
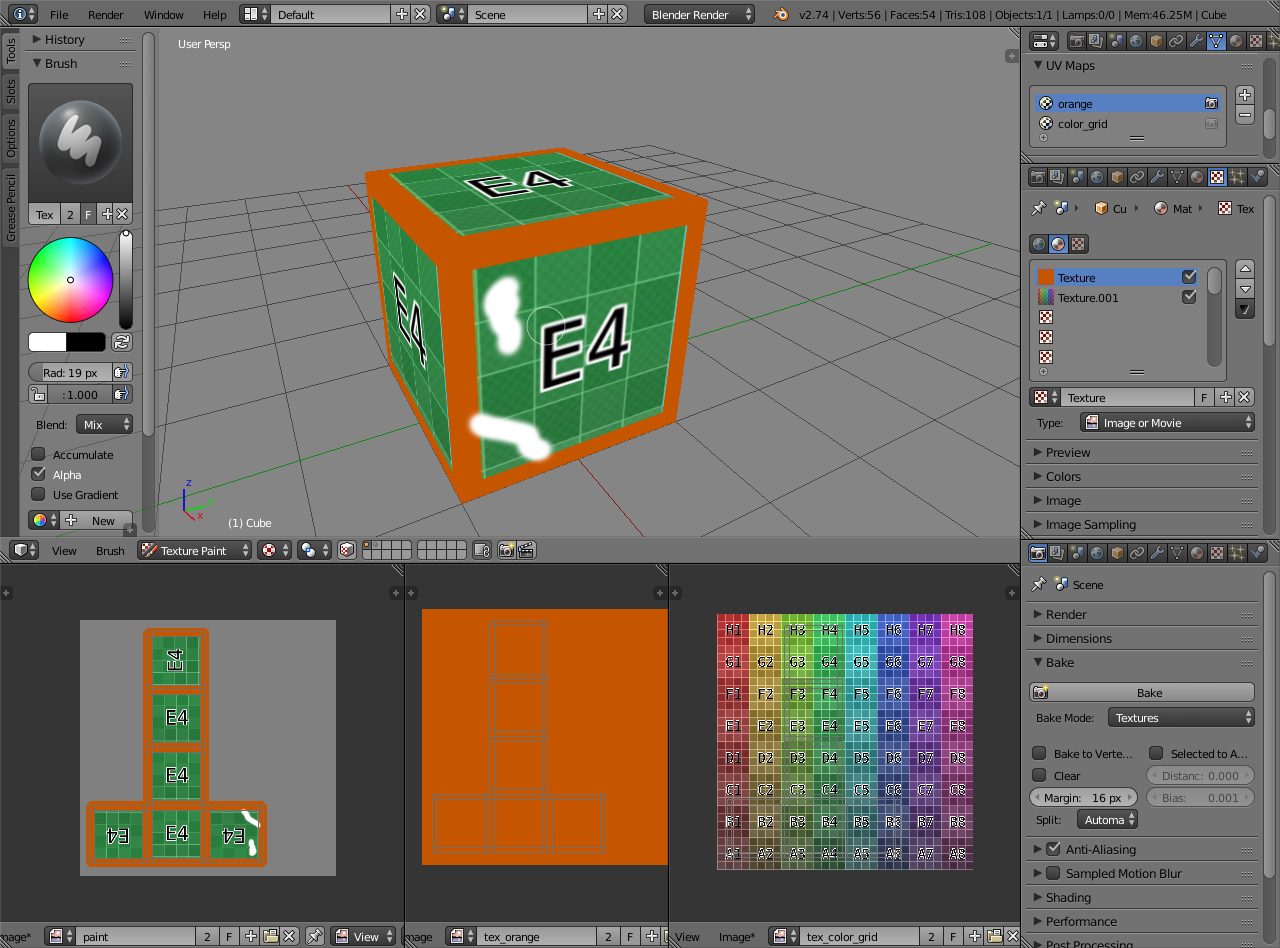
I have multiple UV mappings on my model and I am cloning texture from one UV mapping to another (basicly it is like texturing model from photo - one non overlapping UV map and then photos from side,front etc. and applying it to original UV mapping texture)…
So when I am painting texture I use clone brush in blender. Is there a way to just apply first texture or I need always paint it manually?
hope I explained what I need it´s a bit complicated
You could probably use texture baking to get a quicker starting point.
Images/screenshots help to explain.
baking does not help. I need transform image texture on one UV map, to another UV map and make new image texture. I normaly do it with clone brush (cloning texture from another uv map), but it always take few minutes and I am not always sure if I painted it on every place, is there some button, that can make it to full mesh?
btw. explain this with sceenshot is even harder to me
thanks for the effords, but this image does not explain, what I am trying to achieve
I’m curious now to see… can you try posting some screenshots of what you’re trying to do?
I can do what I need, I just want to know if there is a faster way.
I used this technique for many of my models: https://www.youtube.com/watch?v=p4ngVoGIj1Q
- I have one perfect non-overlapping UV map, where I want to create texture
- I have more UV maps from front, side etc…
To do it I clone images from other UV maps to my first UV map (non overlapping). as it is on video.
I make this with clone brush, but I want to ask if it is possible just apply it on specific part of mesh (not by painting with my tablet or mouse, but just apply it with one click). It is possible, that blender does not have this option, but if it has, i dont know where
thanks much for helping!
That technique is actually pretty cool. I didn’t know you can use the clone brush that way! Thanx for sharing 
I don’t know about a one button method to replace that technique but you can try the following:
Make 2 uv sets using project from view. One for the front view, one for the side view. I used mirror modifier for the mesh because the photo isn’t exactly symmetrical. Also the one side of the face in front view has lighter shading and matches the sideview colours perfectly.
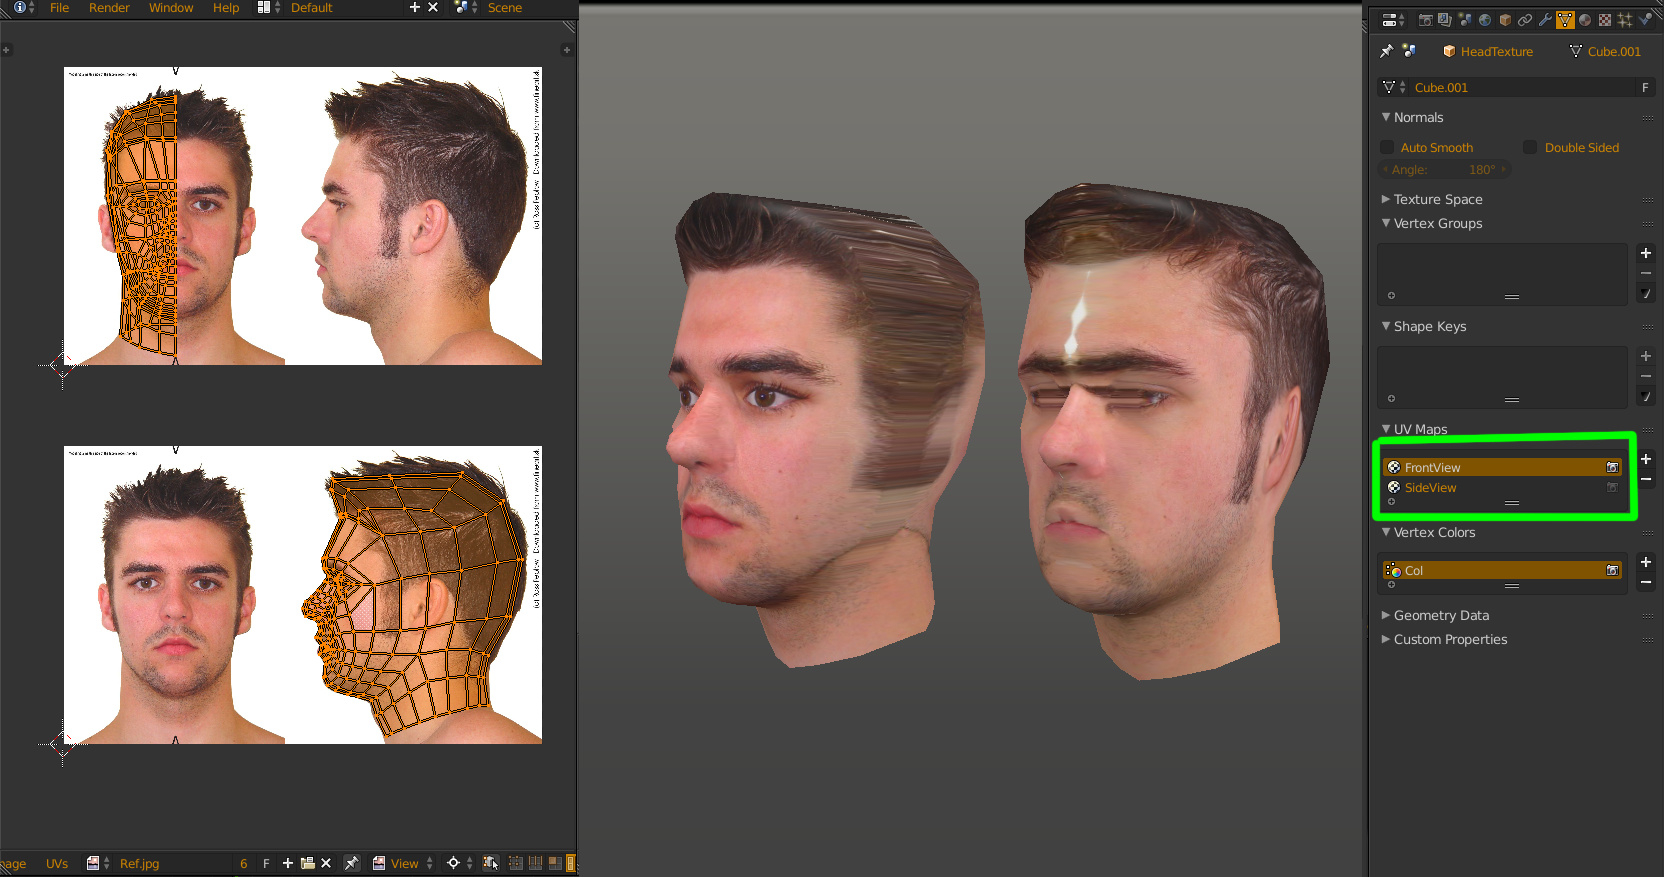
Now to get rid of the stretching you need to blend the two textures together. I used vertex colours as a mask to mix the two textures. This is done in blender render mode. Mix the two textures with mixRGB node and use the vcols as the factor.
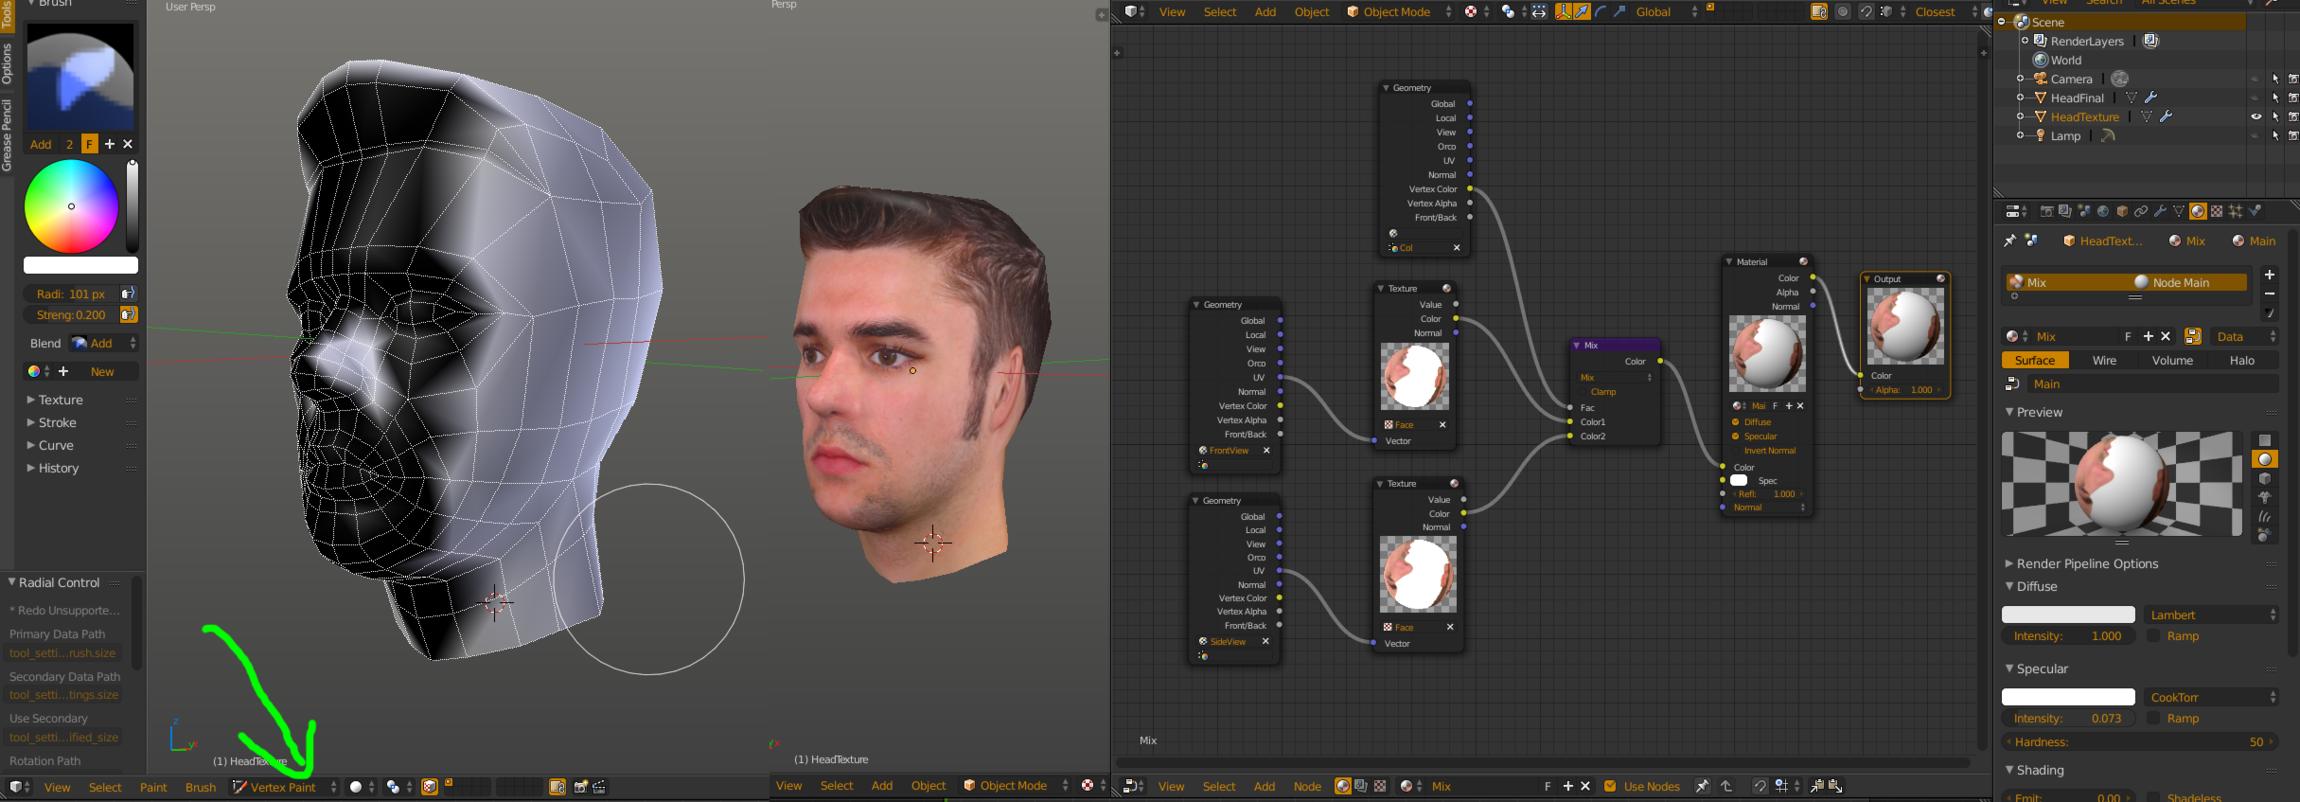
Then duplicate the model, give it better uvs and bake the texture across. The result isn’t 100% because i didn’t have top view and back view images to work from but that can be fixed with clone brush in either blender or external photo editing program.

2 Likes
it seems there is not faster way to do it
nice idea with that mask, thanks! 
How did you line up the uvs so well with the picture??