it was a very fast work from a low res thumbnail, but I was intrigued by his pose as he was coding…
Anthonis used to visit me often, before going to Amsterdam.
And, likeness is great, you captured something not in photos.
MAybe you’re lucky on this, maybe magic happens from time to time, who knows.
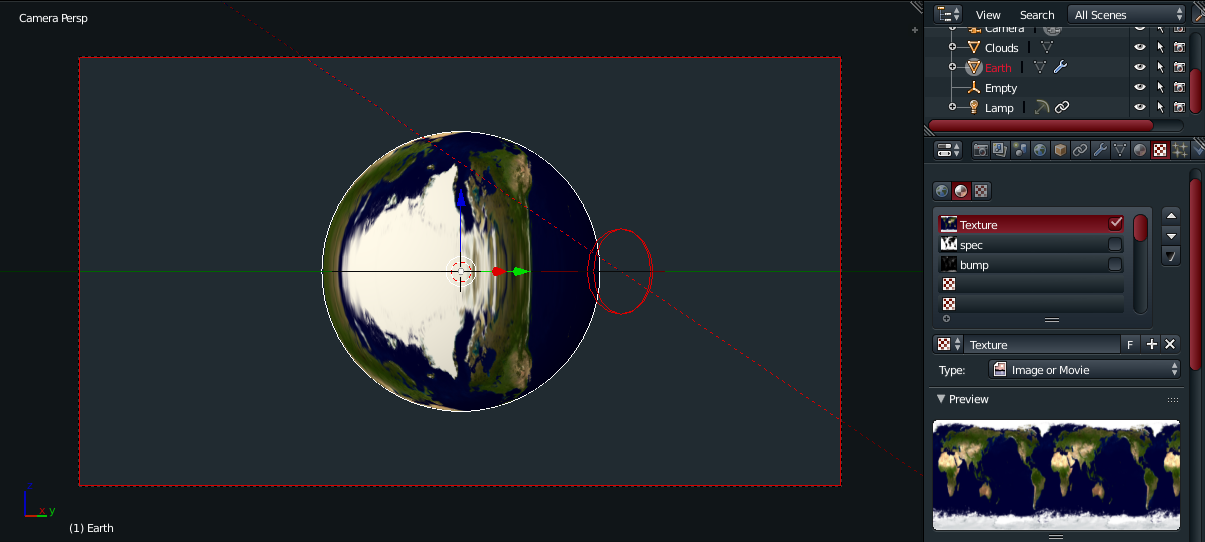
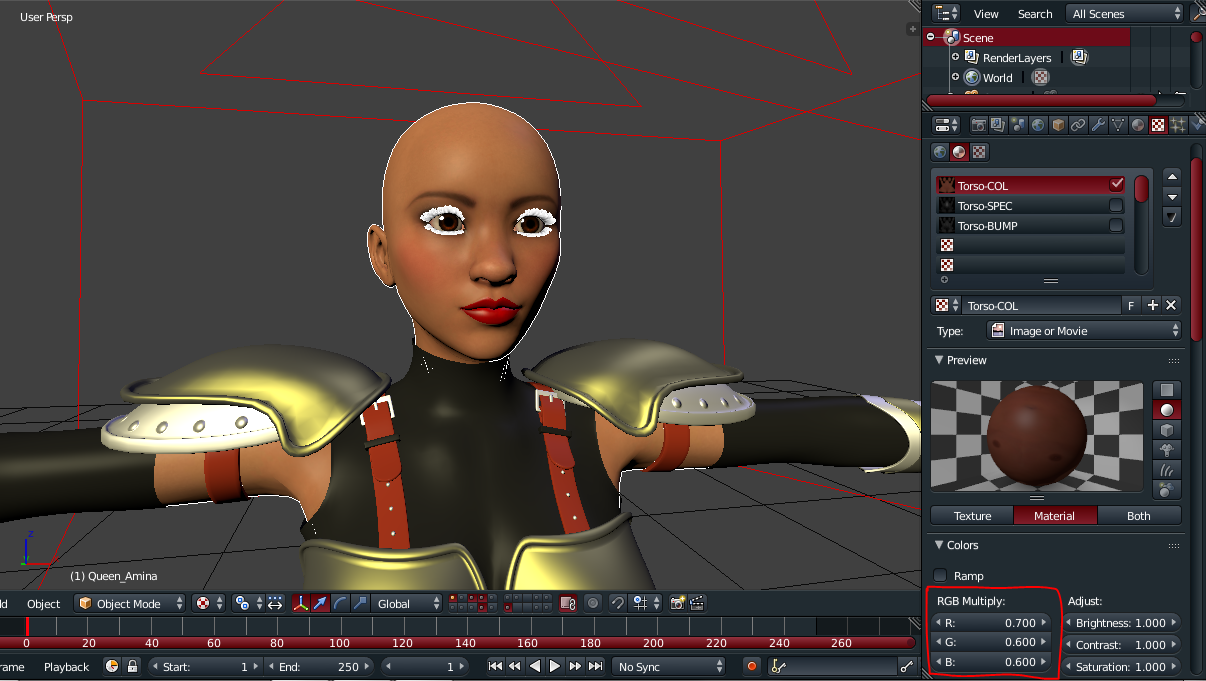
the changes to the RGB values are not even reflected in the viewport. it’s easy to see how this will quickly get more complicated when different texture layers need to interact with one another to get the right results. Clearly, the viewport and the material preview aren’t on the same page.
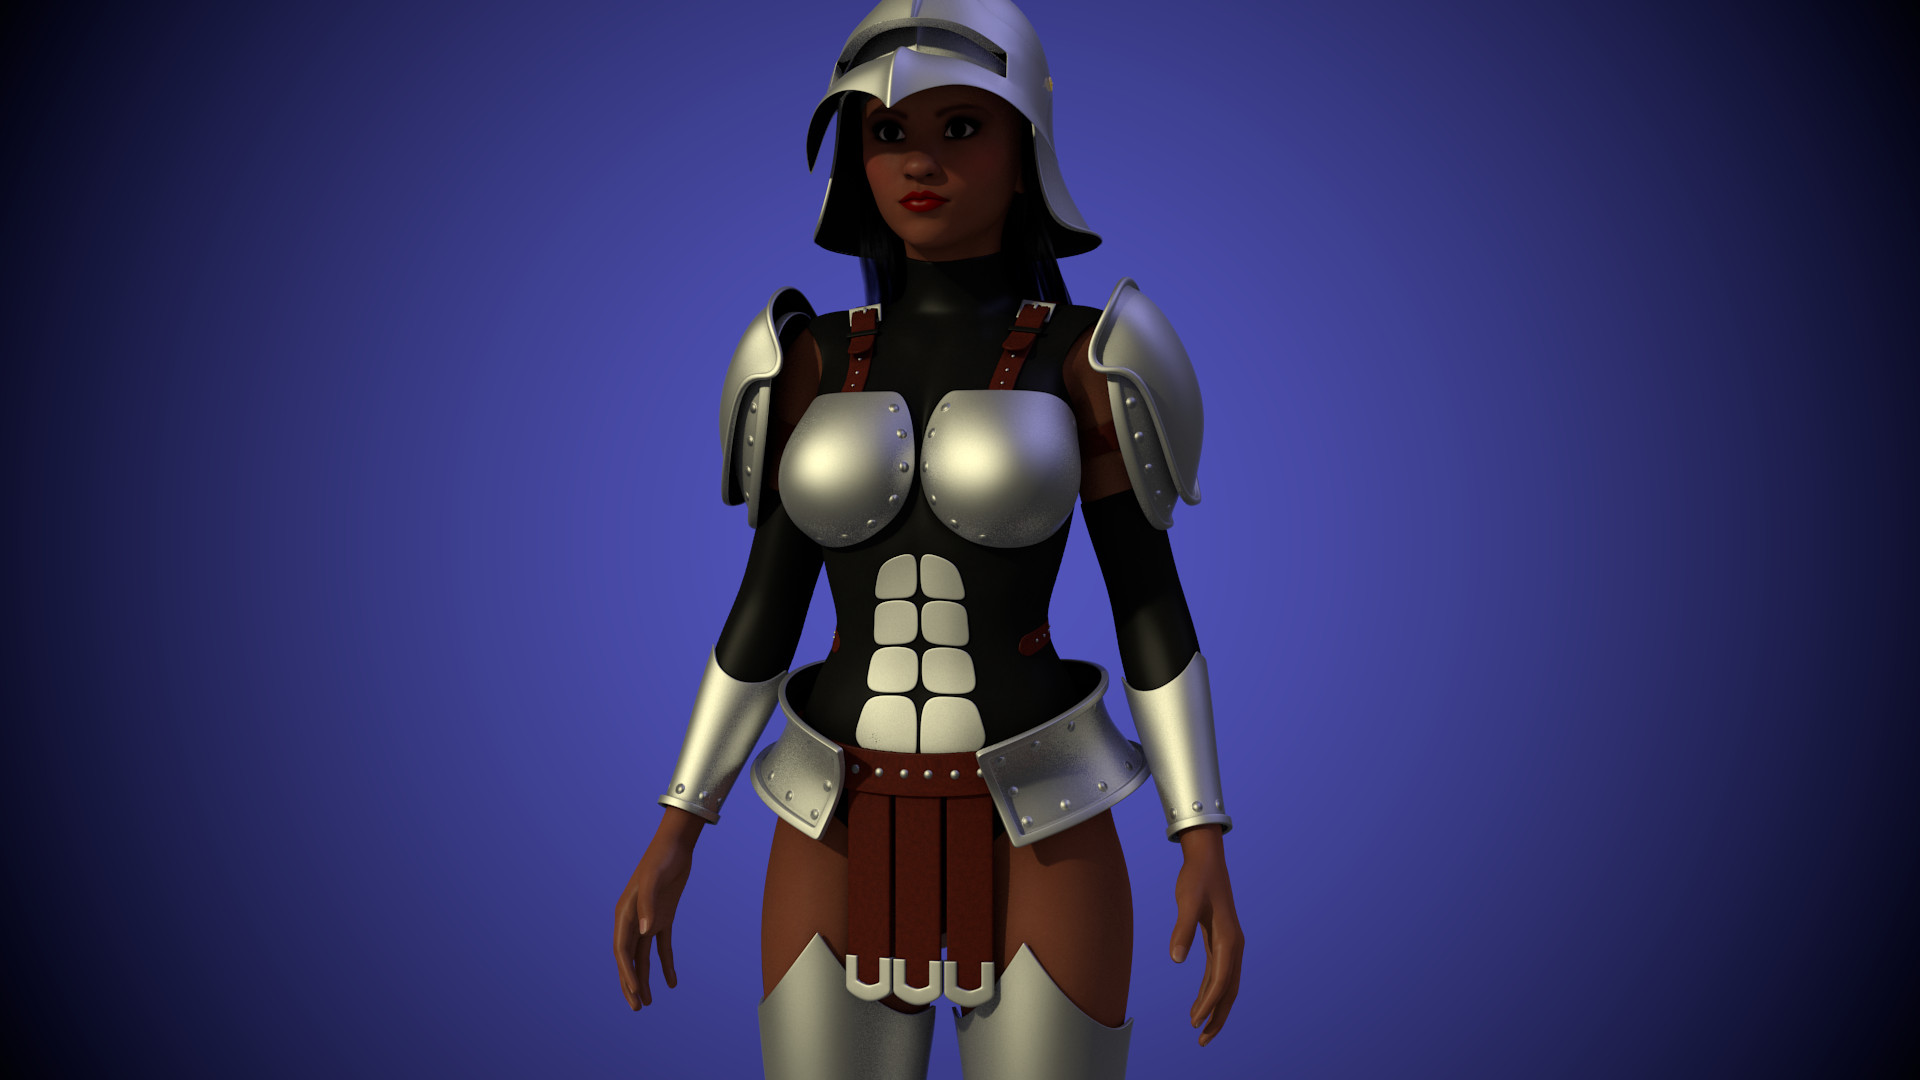
here’s a render of the same file i made earlier. only the armor has changed since then. this is what her skin color should look like using the settings in the first snapshot.
There are lots of other examples of these oddities with the GLSL preview that i’ve come across over the years. but this one in particular hinders me the most.
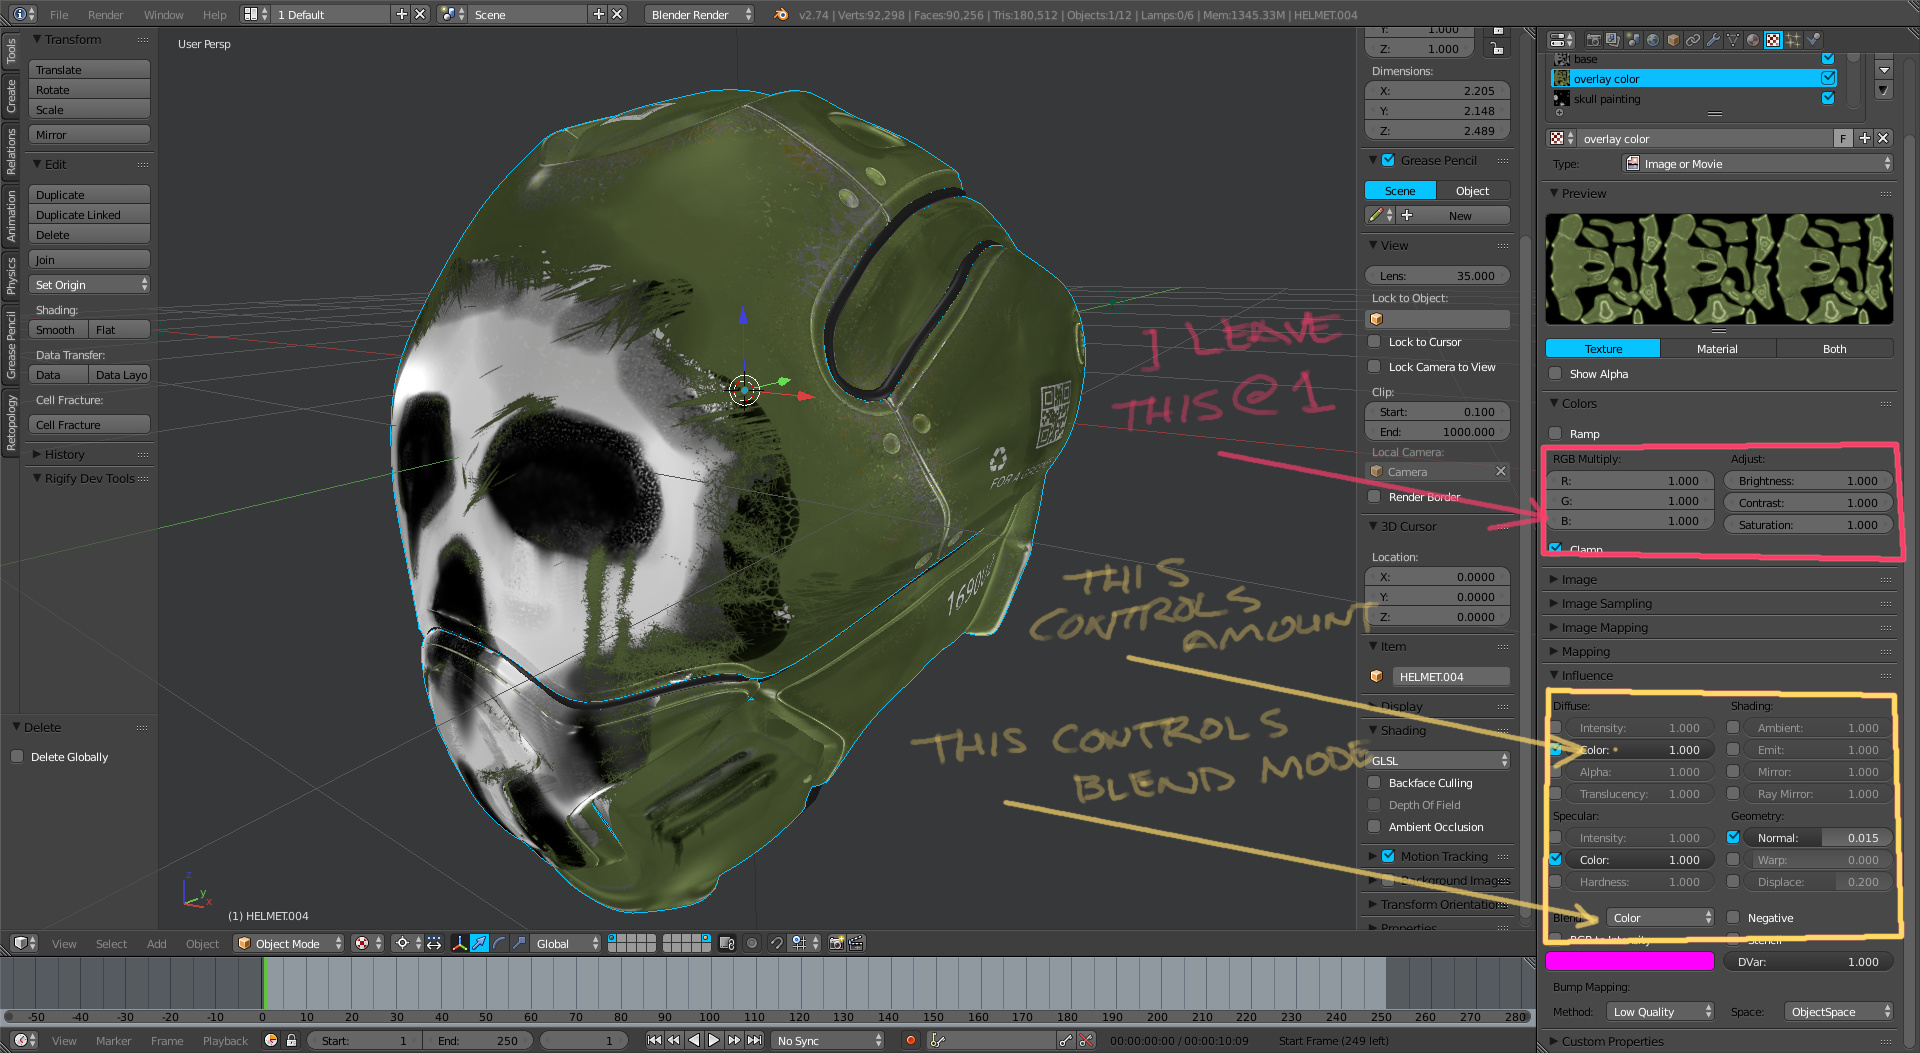
I use the blend modes of the texture itself to control the type and amount of mixing in viewport, and I have never messed with the values there under the color ramp to adjust anything other than the color ramp itself.
I’ll experiment more, but generally I set the amount of Color value and Spec Color value and then decide what method of mixing I am going for - Color for general coloring, multiply for dirt, add for some effects, etc. I treat it the same as I treat the layer mix mode in Photoshop.
I tested further, and you are right- the color RGB multiply affects the render view, but not the GLSL feedback in viewport. Strange, I have not ever used them this way, mainly becasue when I convert to Cycles I just set up nodes there to make changes like this after I have painted.
i see… that’s an interesting way to approach it. but what if you’d like to adjust the color channels individually? like if a model looks pale and you’d like to add a bit more red… or if you would like to flatten a bump texture a little bit, wouldn’t it be more convenient to just turn down the contrast?
aaah! so to fix the pale model, you just add a blend texture and set it to “add” a red color using RGB to intensity, right? i think i’m getting it
my lack of photoshop/gimp experience makes it harder for me to understand these sorts of things. i still sometimes have trouble predicting what blend mode is appropriate for certain situations
i obviously need to experiment a lot to understand this method thanks for sharing
EDIT:
yeah, my thoughts exactly: strange!
when i get the chance, i’ll post some more of these strange happenings. it’s hard to learn how to paint when you have to keep guessing at the final results.
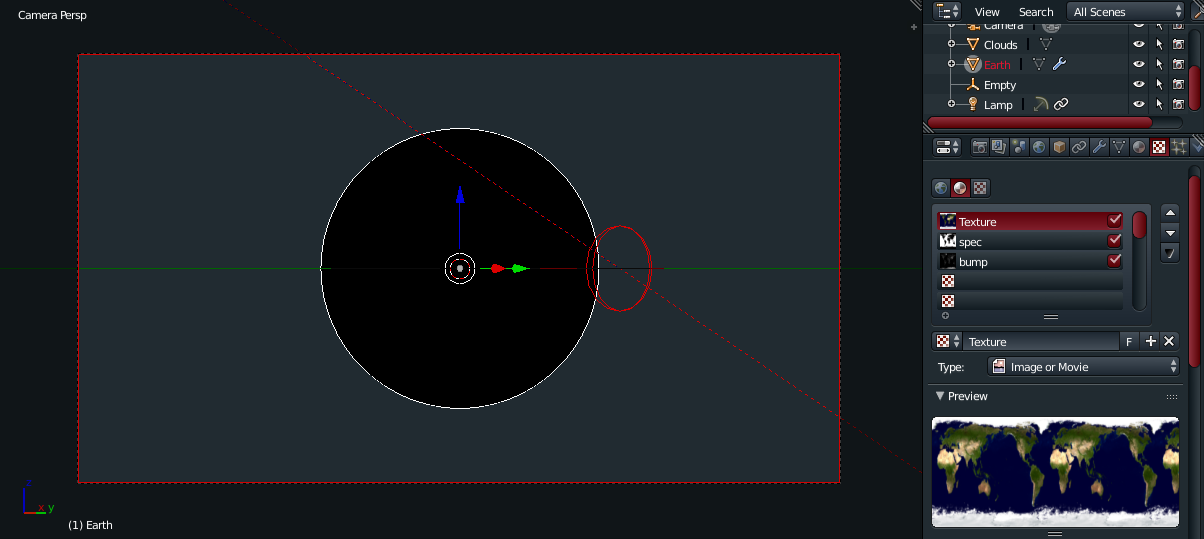
spec and bump maps enabled. everything turns black even though they do not influence the diffuse as is evident in the render preview.
the site seems to be having some trouble with uploads at the moment. i’ll upload the blend file later. even the snapshots had to be uploaded via an image hosting site.
Actually in painting you wouldn’t make adjustments like that, because color picking would grab that adjusted output and feedback loop a bad result. I never used this adjustment because I would always feed my textures into the compositor and adjust them there and save iterations. This Color panel is more like the nondestructive adjustment layers in PhotoShop, and there I don’t use those until tweaking finished work for the same reason, consistency in painting. Of course if it gets sorted out that we get this to work, I’d like to try it in my workflow and see how that can then be reproduced in plugging into Cycles the resulting paint images.
oh yeah i’ve seen/used those adjustment layers in the past. i can relate with that. sort of like modifiers.
using the compositor is a great idea. is that applicable to BI as well?
for this to work perfectly for me, it has to be a non-destructive process. is it possible for one extract the compositing results without having to render out the results first?
perhaps i can explain a bit what my process is like. most character artists design concepts in 2d before realizing it in 3d. i sometimes use pencil sketches as concepts, but more than 90% of the time, i use 3d concepts. i use DAZ studio to try and get as close as possible to my idea, and then i refine the character repeatedly in blender. it usually involves taking 2 steps forward and 1 step back. i might go down one road and see how well the colors work. if it’s a disaster, i need to be able to go back. As a matter of fact, even the meshes themselves usually have more than 10 modifiers. So it’s vital that i keep a lot of stuff as non-destructive as possible.
I use the compositor to make iterations (.001,.002,etc) and to render them out, I use an UV Image Editor set to Viewer and save image as from there. For now, there is no direct tie in to the compositor from the texture stack, but later on when we get Texture Node refactoring we might see something like that there.
thanks a great deal. you’ve certainly given me a new direction to explore. i’ll test this method on my next painting attempt and let you know what happens.
I can’t really say that i’m surprised. All the focus is on cycles right now, and nothing seems to be going in the way of BI. i’ve managed to replace quite a lot of blender’s functionalities with other apps like unity and daz studio. now i think i might have to find me a texturing app. it’s unrealistic to wait for blender’s viewport project to produce a new opengl renderer.
But it’s great to know that the devs acknowledged it as a bug.
by the way, my latest painting attempt in blender was a complete disaster the compositor approach worked well, but the brush was very difficult to use.
sculptris wasn’t much better either… no layer support.
this is one of those moments where i’m glad that most of my artworks require very little texturing
It will depend on the new shader system for the viewport really - that it might be easier to paint with real materials and get better response in realtime would be cool. I don’t know that the Color panel adjustments while painting would really work well. BUT… have you tried setting another 3d window up, zoomed to view you want to see feedback from, and set it to render view? Similar to how I get feedback from painting in Cycles shaders that way, since any adjustments will actually show up exactly as you intend them to.
yes i tried doing that. it’s just too slow to be practical. it hangs for about 5 seconds when i initiate a stroke. in the end, the stroke isn’t even completed.
i plan on getting a new pc soon, so maybe that won’t be such a big issue.
You could just try the fill tool and drop in the color you want directly instead of using adjustment layer stuff… and with cavity mask, you can get some really good patina stuff.


 thanks for sharing