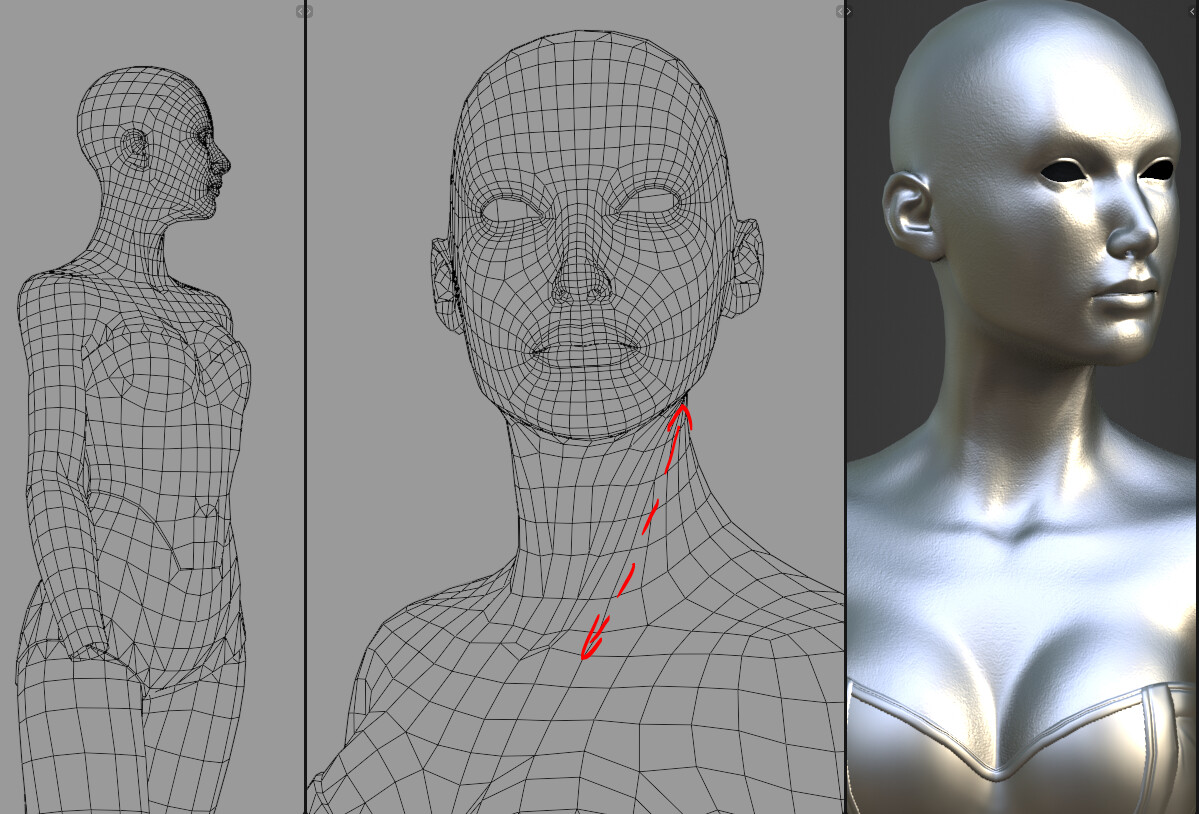
- Love the breakdown of your next steps and thoughts.
- Understand the seemingly easy choice of not doing/pursuing things. It’s hard. Some days it’s so hard it doesn’t feel doable at all. But this is where the magic happens, if one decides to get up, despite all these negative voices (which sound completely rational right in this moment) and does something. No matter how “small”. Truth is, there is no thing as “small progress”. Progress is progress, compounds over time. Hats off to you for reflecting, speaking about it and deciding to walk further.
- Never heard about the assembler object. Will def look into it, thank you for giving so much insight!
- You’ll get this far. Can’t wait to see the updates.

3 Likes
Thank you for replies and support ![]()
I did mention it a couple of times… there’s a screenshot of its interface somewhere in my sketchbook (and a link to google drive), but I don’t think I’ve written anything about it ![]() I can share more if there’s any interest, but experiments with GeoNodes show that the method became largely unnecessary in its current form. Will be re-writing the thing after this model is done.
I can share more if there’s any interest, but experiments with GeoNodes show that the method became largely unnecessary in its current form. Will be re-writing the thing after this model is done.
Don’t get me wrong, it’s not actually a thing per se, that’s why I put it in quotes ![]() Seemed like a fitting name.
Seemed like a fitting name.
This is something that’s become easy with Geonodes:
- take a mesh object (it can have 0 vertices);
- add a simple node tree with an Object or Collection inputs;
- and just output the geometry (maybe Realize Instances in the process).
It results in a new combined mesh with all modifiers, constraints, materials and poses applied. Simple, but can be oh so useful. And non-destructive too until you Apply Geonodes modifier! No need for “Convert to Mesh” and “Join Objects”.
You can store prefabricated object with the Geonode tree in Asset Library and just pull it wherever.
Seems pretty straightforward but I’m still testing for potential issues with this method.
3 Likes
I hear you. It sucks so hard, especially if one used to be able to trust one’s own head, but there’s no other way than to just put that stupid head down and plow ahead. :plod:plod:plod:
Yup, that works for me too. Small tasks, digestible pieces. Stuff I can check off, to make myself feel good, even if the inner critic scoffs.
I do hope it works for you. It works for me. And yeah, it still feels silly, but I don’t even want to argue with my tiny bits of success (inner critic scoffs again, but what has he ever done?) (It is hilarious that this shuts him up for a while. Just a wee bit sensitive.)
All that geonodes stuff gets me vicariously excited. ![]()
3 Likes
The lengths we have to go to trick ourselves ='D Thank you.
Right? ![]() I largely ignored them all this time, but now that I glimpsed the Power…
I largely ignored them all this time, but now that I glimpsed the Power… ![]()
3 Likes
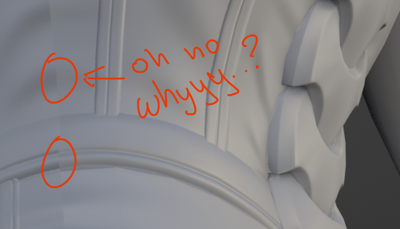
Why is it so hard? ARRRRGH!
I don’t really know what I’m doing, but it looks bad. I just wish I knew if it really is. No idea what keeps breaking I just feel the need to fix it somehow ![]() AAAAAAA!!!
AAAAAAA!!!
3 Likes
I know this isn’t helpful right now, but I think it looks absolutely amazing
1 Like
Ahha, thanks ![]()
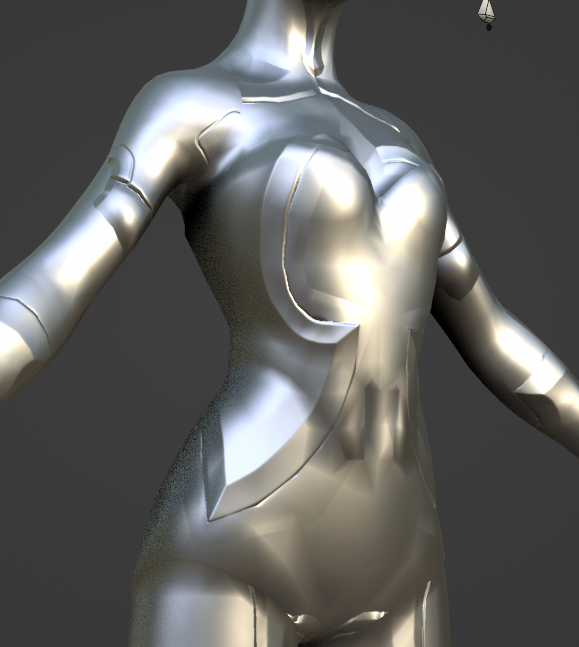
All I can see right now is corners sticking out of silhouette, lowpoly lines that will be seen when I’ll add textures, potential for weird stretching… I look at various “real” game topo and I’ve no idea what to think.
Should I let it go and add more polygons? Just roll with it and compensate with Shapekeys later? Am I overthinking the whole thing? ![]() * confused screaming *
* confused screaming *
Okay, deeeep breaths. I got this. Less whining, more modeling.
The “issue” here is that I’ve finally started playing a sequel to one of my favourite game series. And it’s SHINY! Everyone is so pretty, and animation makes them more alive than ever and I just can’t. SQUEEEEE!!!
Couldn’t happen at worse time ![]() Since when not in-game I revert to my boring pessimistic side, naturally, when I look at this model it’s so… flat. Makes me want to start over. Which is unreasonable, of course. Not doing that.
Since when not in-game I revert to my boring pessimistic side, naturally, when I look at this model it’s so… flat. Makes me want to start over. Which is unreasonable, of course. Not doing that.
So I continue to push. If there’s not enough geo for something, let’s just add geo. It’s not like I really have a limit or rules here.
Probably got through the worst part of retopo, the rest is pretty straightforward now - should be able to finish in one session.
5 Likes
I always wish I could say something to help you, but I just have no idea how to do any of the things you do, it’s all way above my own abilities.
Oh, this one I recognize. Ghods. Me and my partner both, so easily captured by The Shiny, and then hours have passed, days have passed, weeks have passed and we didn’t do any of other things we wanted to do, and even things we had to do fell by the wayside. I don’t want to blame video games as evil because they’re not (most are not, and I am pointedly not looking at those mobile gatchas), but the dopamine hits are so good, nothing else works as well.
So, good on you that you tore yourself away and actually spent time and effort on something that you want to do, but that’s less rewarding at this point, where the reward is delayed. I know how much effort that takes.
And yeah, while there is still something to be said for keeping to a polygon budget in certain circumstances, like if you were developing assets for a mobile game in current production, it might be too much of a straitjacket for something that’s still largely a learning process. It feels like the right decision to relax that for now. You can chip away at improving your workflow over time. Real game topo also depends a lot on the design of the entire game, on how it is textured, how the character fits with that, how it is used in the game, how close it gets to the camera, how active it is (how much it needs to deform and in which areas – does it kneel, jump, speak), so I think just looking at the topo of real game characters itself might not tell you as much in isolation, maybe that’s why it’s confusing, because there is no one clear rule set? You might have to do a little analysis of what the character does in that particular game and compare to how you imagine your character would be used. (Forgive my blather if you already know all this and do it; it’s pretty much the limit of my theoretical knowledge.)
Hurrah, you worked on it!
3 Likes
I really appreciate your comments and support! The fact that you took the time to leave a thoughtful comment means a lot to me. Thank you ![]()
It’s not that I’m suffering from “mania” - I’ve actually have very strict game hours, because I feel anxious and wasteful otherwise.
But normally I look at a great game/animation and go “This is sort of thing I want to be a part of!”
Except on bad days it turns into “Well, I’m never going to make anything near as good. Look at these models! Look at the textures!.. now look at yourself”. And then I abandon a model I’m doing at the time because now it looks boring and/or broken. Last two full characters suffered that fate ![]()
You’re right. Since this is only a “theoretically game-ready” character the only real limitation I can derive from that is it needs to be “real-time”. I suppose, I’m overthinking things for the purposes of this project ![]()
It probably would be a whole different thing if I had a particular game to conform to.
2 Likes
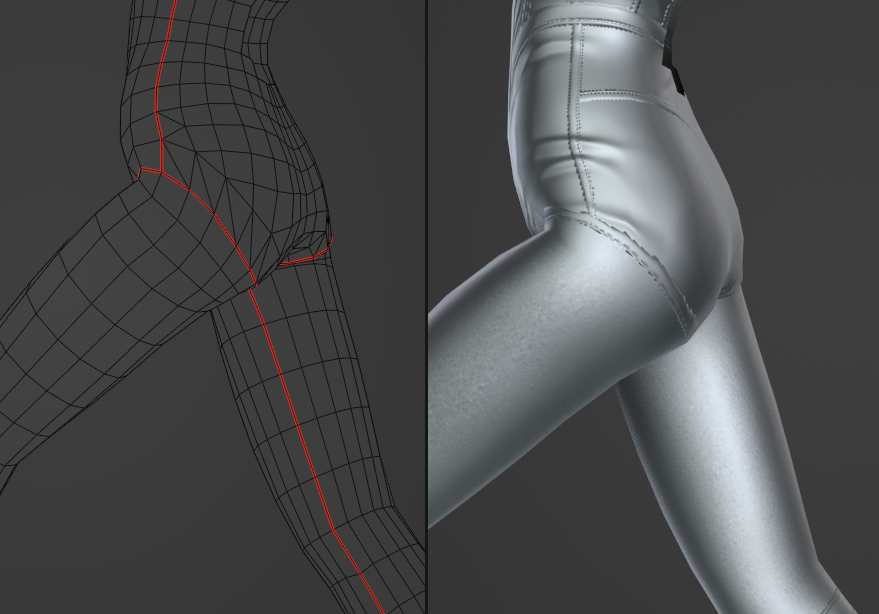
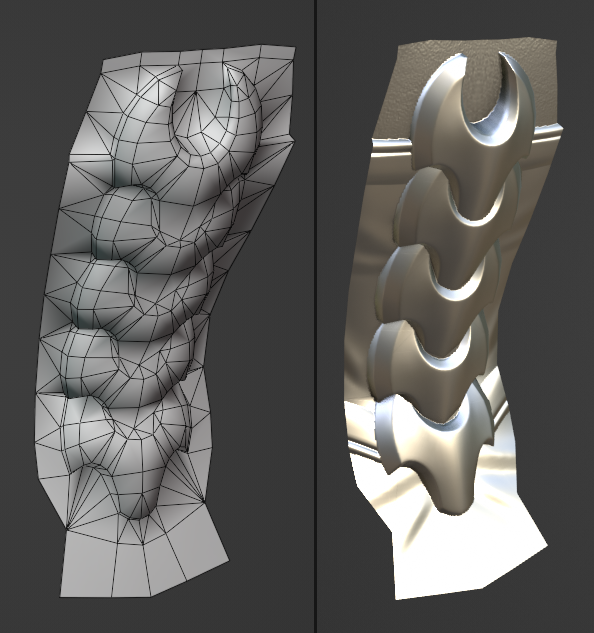
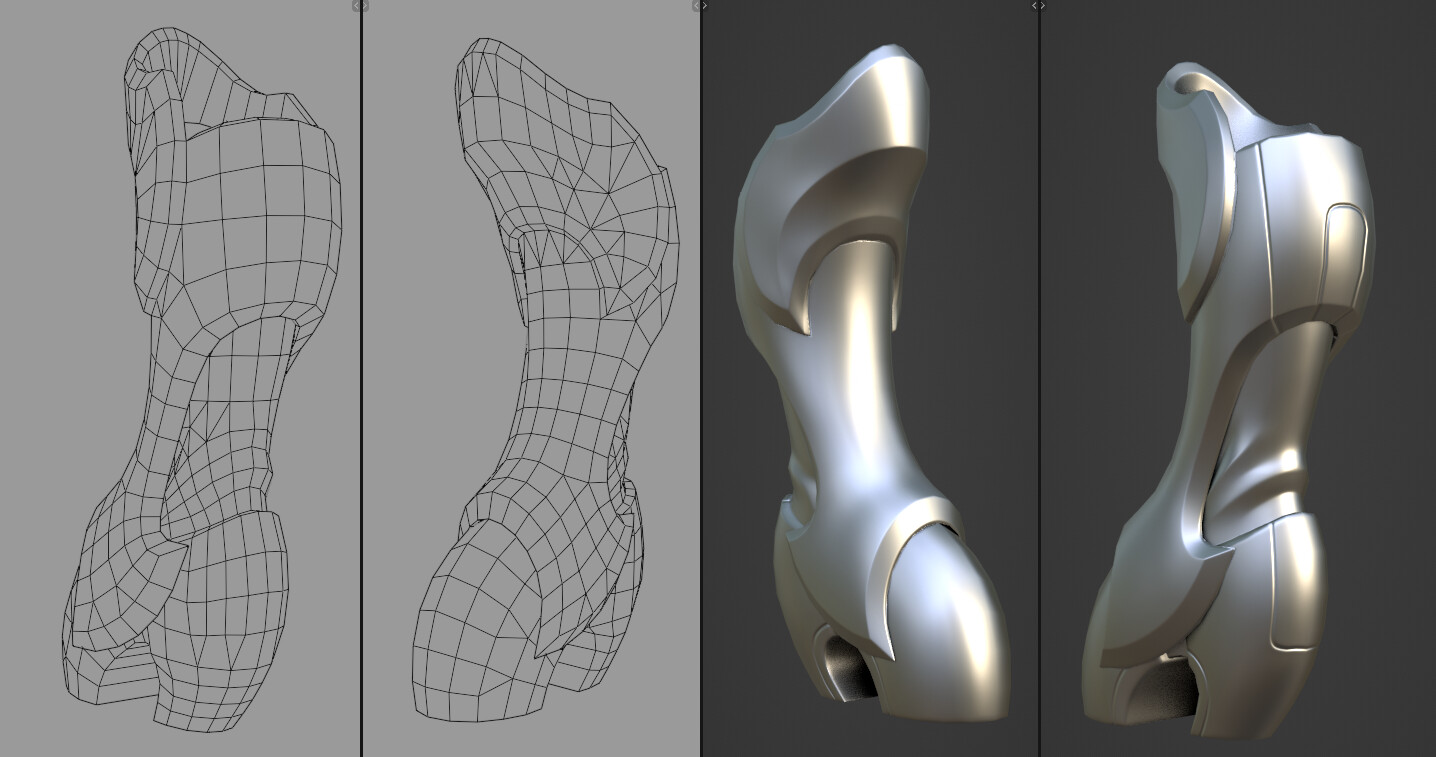
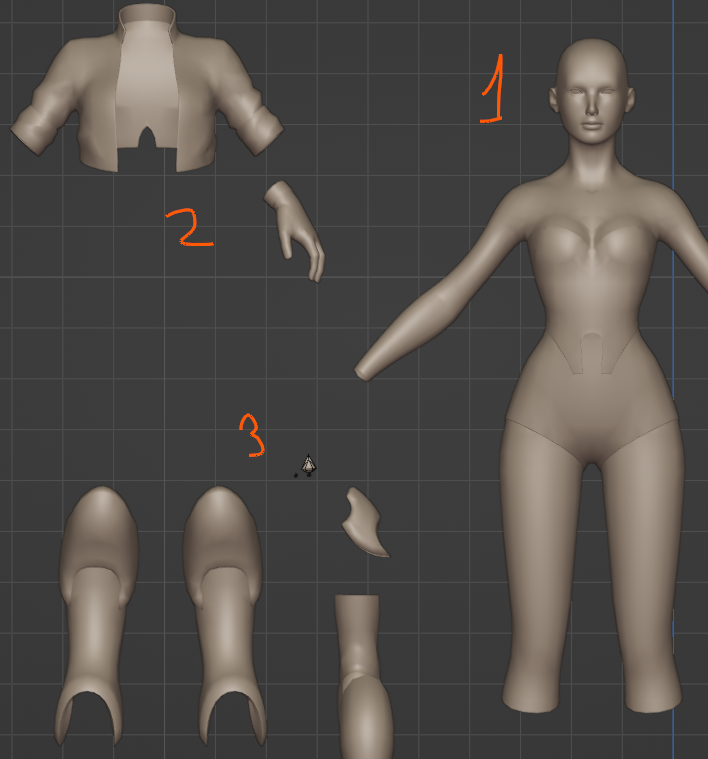
Done a bit more. These are weird - one has prominent folds/details on the inside of joints, where you’d want less geo. The other is mostly made of non-deforming parts, which gives certain freedom.
Rest will be tomorrow if there’s no power outages again.
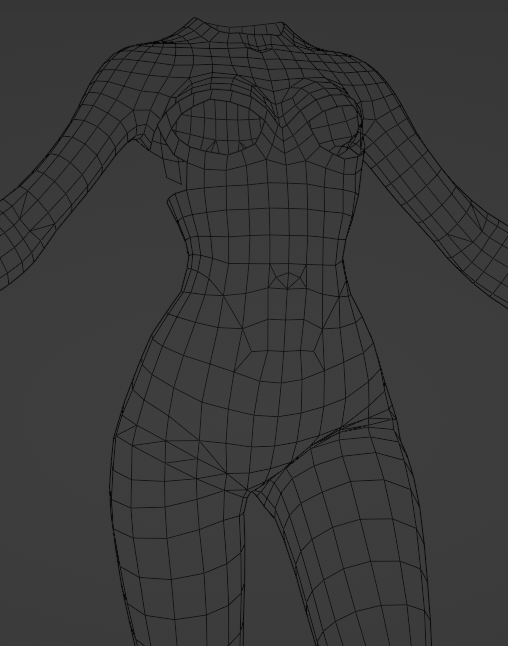
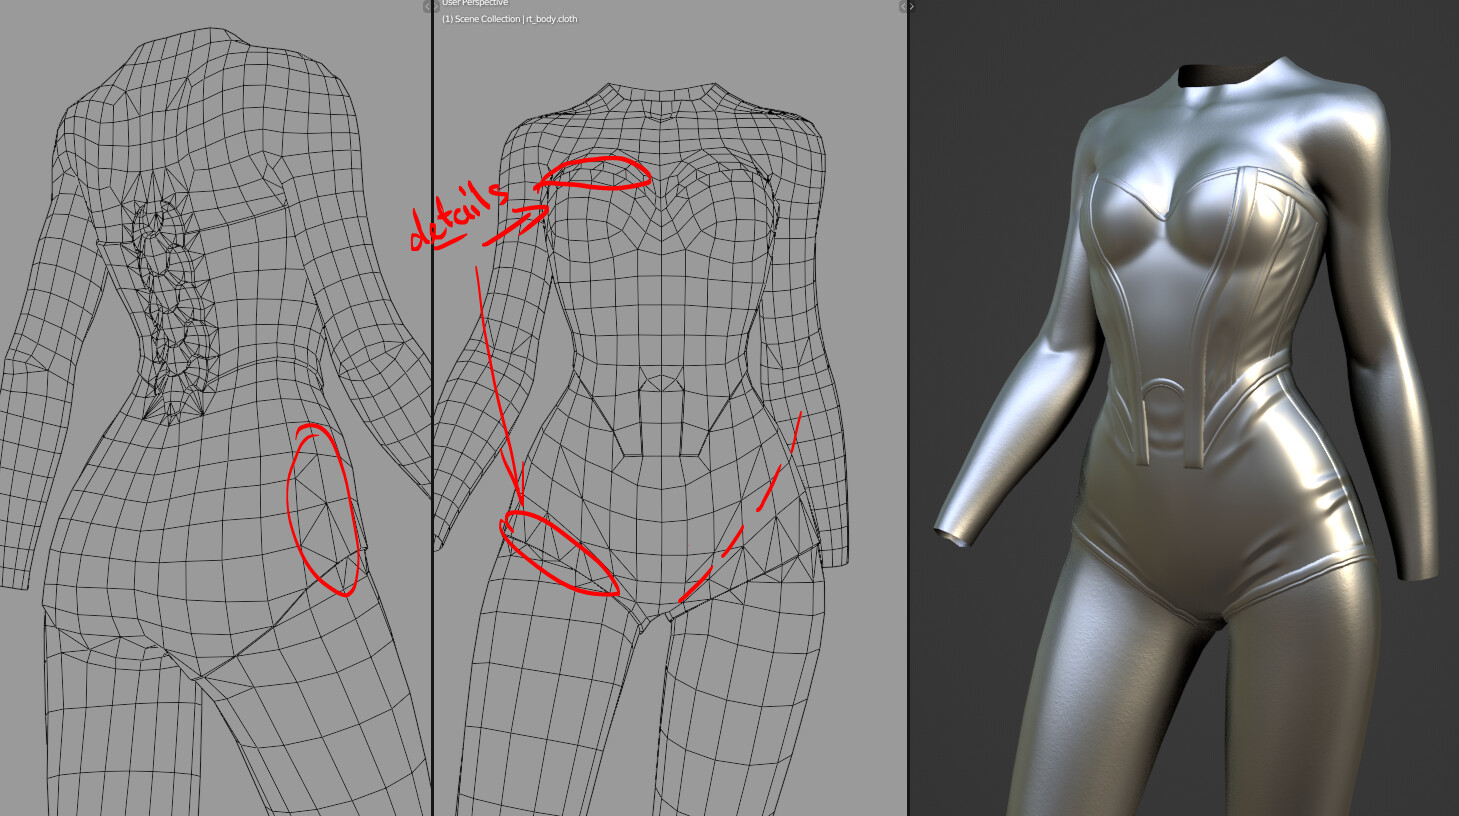
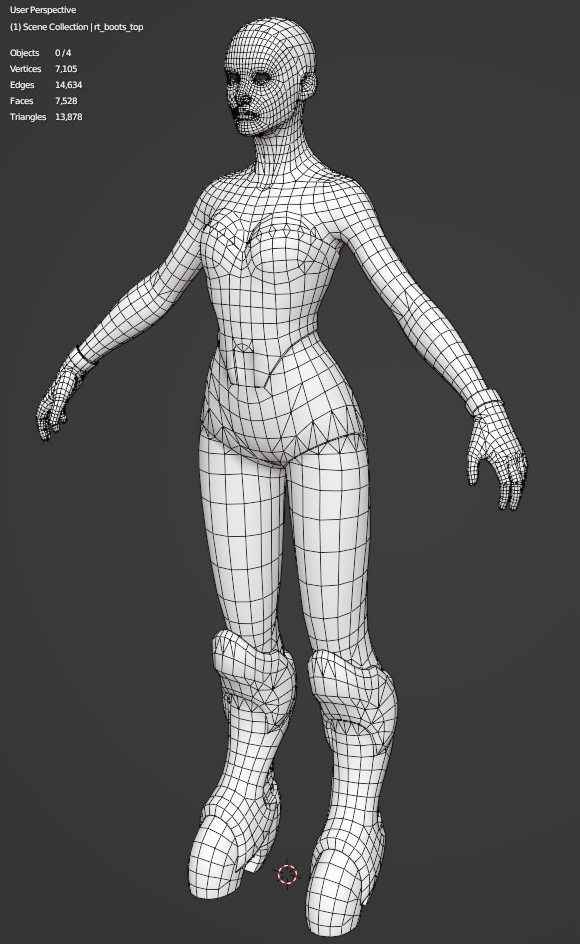
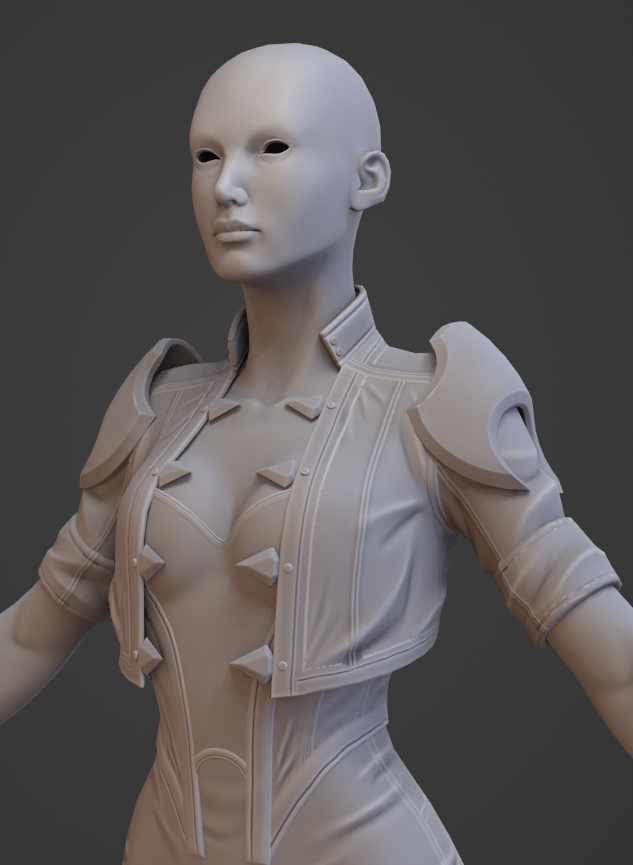
Main body done, yay!
Accidental clothing design ![]()
Still have a couple of hours to maybe start on Inktober (no prompts) but I’m not particularly optimistic this year.
4 Likes
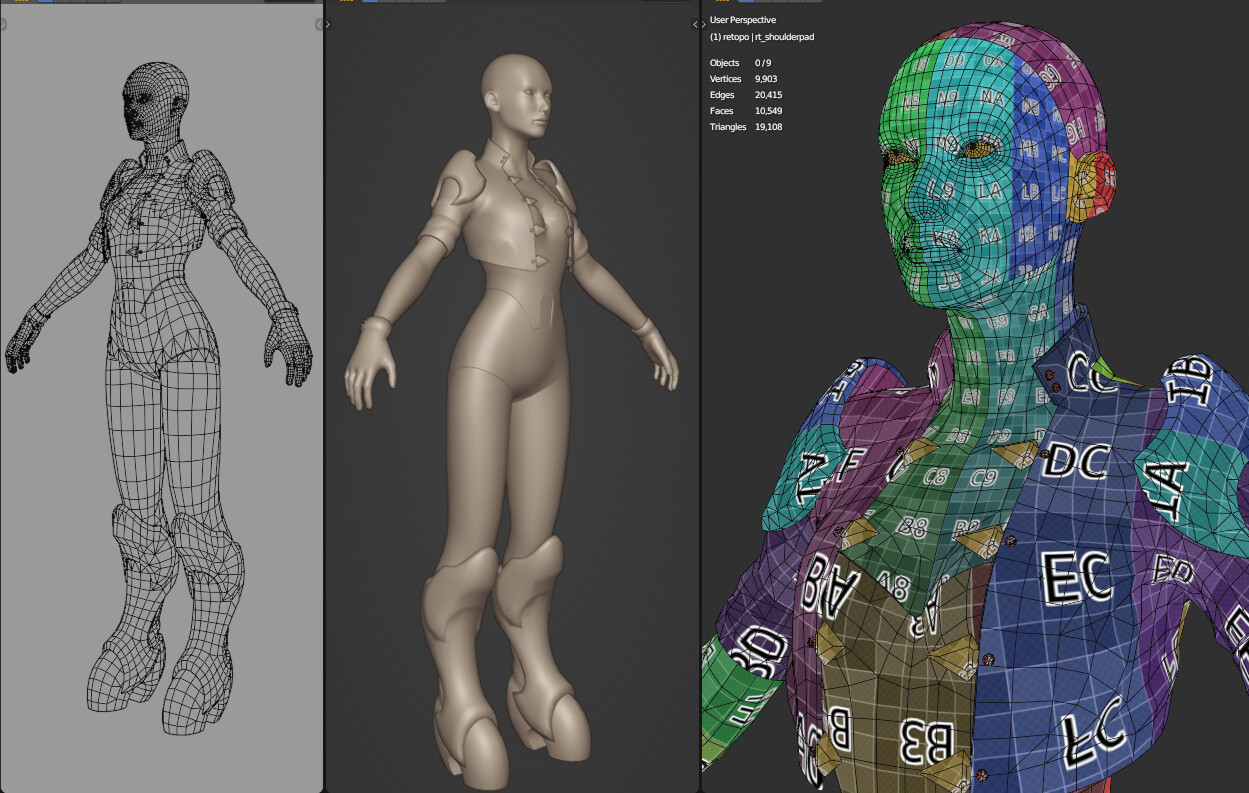
Huh, just 19k tris? Hair will probably add about 2-3k, but I still expected more ![]() Oh well, making a mental note for the future.
Oh well, making a mental note for the future.
Ended up with 2 map spaces: “head + chest” and “the rest of the body and clothes”. Eye will probably get its own map though.
This concludes retopo and unwrapping! (hopefully)
Next up: baking - will I bake ridiculously large maps to fight aliasing or learn to use XNormal and see if it works better? ![]()
4 Likes
Wow, yeah, that’s pretty darn good. It looks clean too, at least to my eyes.
3 Likes
Pain. PAIN, I tell you!
Can’t install an external baker at the moment. Very sad, but ok.
Back to Blender. I won’t even try to bake a HUGE image. My PC makes terrifying enough sounds at 4k.
So. Plan was to break the body texture into 3 separate ones and then bake it all to final (-ish) 4k resolution in an attempt to reduce inevitable aliasing effect. Head texture I’m leaving as is at 2k - no artifacts there to speak of.
I’ve separated the pieces into groups and added a second UV map, so every group is unwrapped on the whole space.
Baking is straightforward enough. 3 materials, 3 images. Once it’s done, I can forget hipoly.
Now, I’ve done re-baking to another UV map before. It’s not exactly intuitive process, but I had no problems before. Now I’m thinking maybe I had cases where those problems just weren’t obvious? I can’t remember.
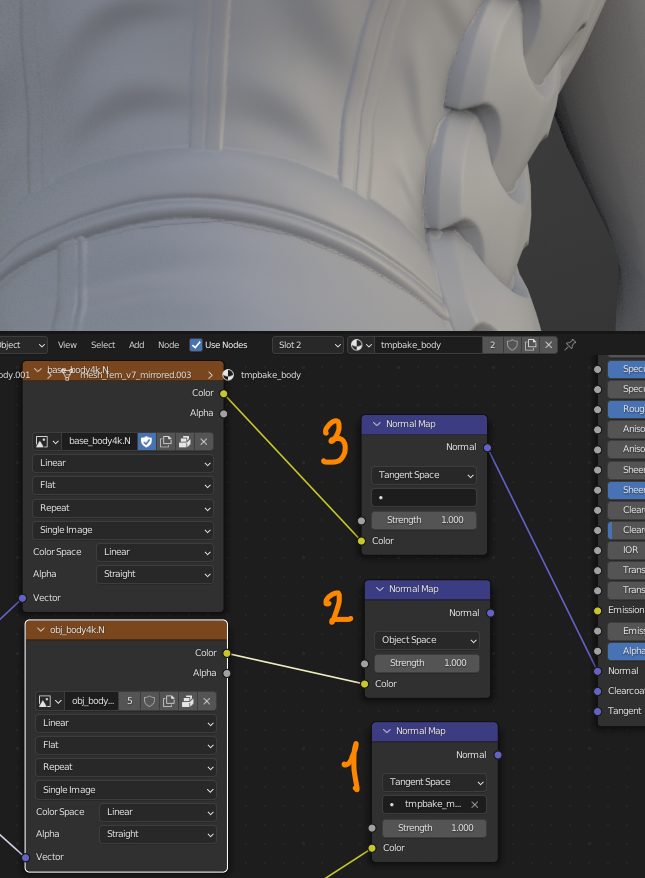
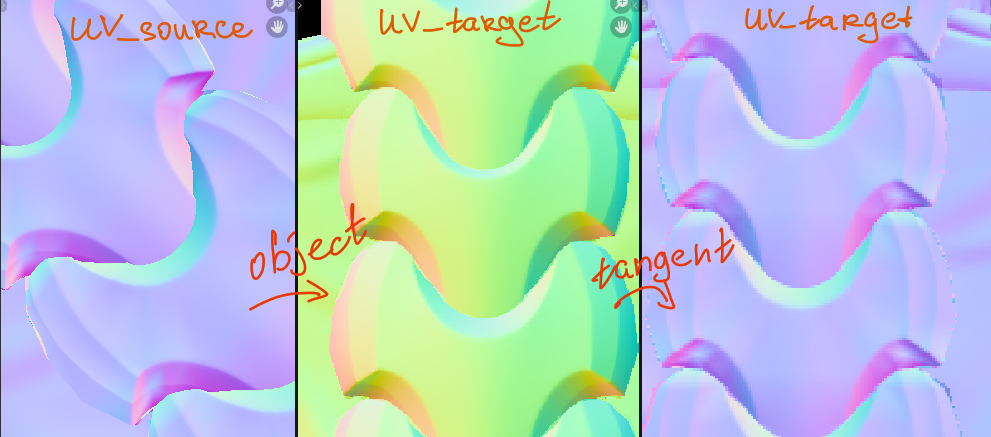
But I do recall someone having a similar problem that occurred this time. Normal values didn’t bake correctly (something to do with tangent space and UV maps?), there were seams and other indescribable weirdness:
I’m pretty sure there is some way to fix it, but nothing comes to mind now.
Came up with immediate random solution: bake to original UV map in Object space, then bake again in Tangent Space ![]() Well, it worked, so I’m not complaining. But I can’t say I understand this process either
Well, it worked, so I’m not complaining. But I can’t say I understand this process either ![]()
It was not that hard once I’ve got the steps down. Result is Normal and Pointiness maps. Both will need some manual fixes, though, especially pointiness. I think that’s all I will get from hipoly this time.
Painting, here I come!
8 Likes
Tangent space is really sensitive to hard low-poly vertex normals, which Object space doesn’t care about. Seams in the UVmap can be a real problem for Tangent space because the normals might be widely divergent across a seam.
2 Likes
I have an idea, though I haven’t tried it. Could the aliasing problems be helped with the compositor’s anti-aliasing node?
The baked image would have to be imported in a new blend file just for that purpose, and the color space would have to be set carefully, but if it works it could reduce the need to bake huge maps.
1 Like
Yep. Turned out to be really handy. There’s something about normal baking I don’t quite understand though.
I’m assuming the issue occurred because normal values were not actually recalculated: it’s as if I baked an Emission map - the image just rotated with UV islands, maybe? ![]() I’ve seen this happen, but not always. Sometimes it works… for some reason. Probably. I think tested specifically for this issue at some point. Should have taken notes
I’ve seen this happen, but not always. Sometimes it works… for some reason. Probably. I think tested specifically for this issue at some point. Should have taken notes ![]()
Oh… Oh! I didn’t realize we had that option ![]() You’re a genius!
You’re a genius!
I did a quick test:
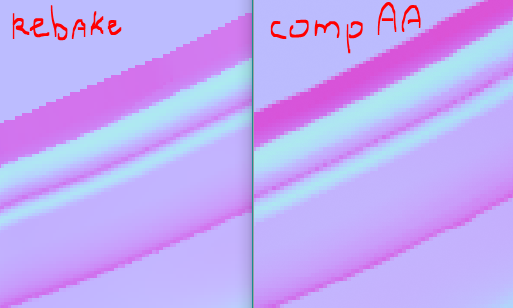
On the left is the map I have now. It’s the edge of an island so aliasing at the top is to be expected.
On the right map freshly baked straight from hipoly to target resolution and with AA filter attached.
They are very close ![]() But there’s seem to be some artifacts filter won’t pick up? Don’t know if I can get more out of the settings.
But there’s seem to be some artifacts filter won’t pick up? Don’t know if I can get more out of the settings.
Worth exploring this method in the future - it definitely might cover a lot of cases easily.
4 Likes
The compositor node is not a true, supersampled AA, so it’s to be expected that it will be imperfect. But if it does improve the end result, that’s good to know and an extra tool at our disposal.
2 Likes
Very nice. Also love the fact that she has a normal err… front and is not another Lara Croft ![]()
2 Likes
Thanks ![]()
Good thing a modern game-ready woman is entitled to a reasonable polygon budget)
1 Like