Hey guys! I haven’t done 3D animation in many years, so I decided to get back into it since my passion for it has sparked up again. Definitely not an expert in animation like most of you here, but thought I’d share something I started couple of days ago. Decided to do Cubone from Pokemon. Would love any critique on how to improve him. Please throw tutorials my way if you think it’ll help. Thanks 
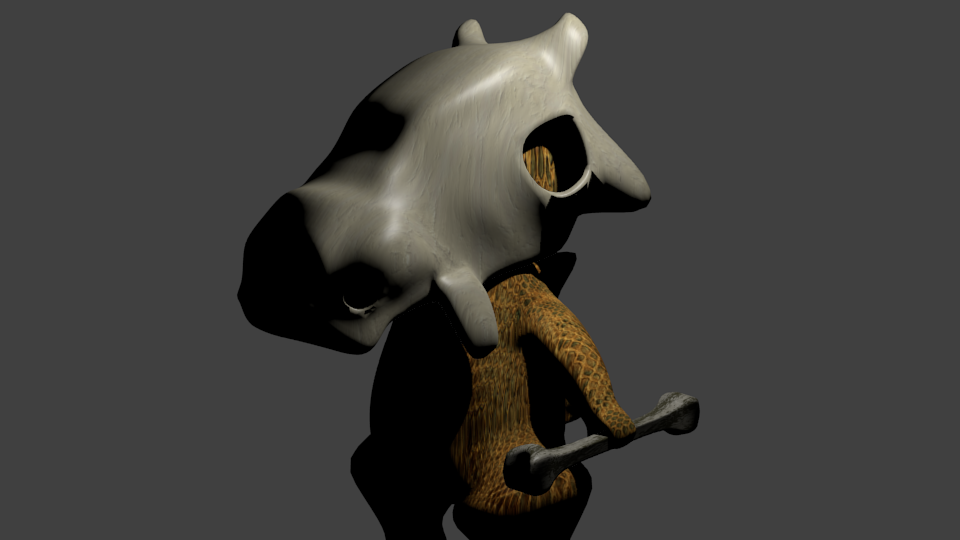

Looks like you did it from memory and many things are quite different compared to the original pokemon design.
You should perhaps start by going over the shapes and proportions with reference images and use them on viewport background as you model.
That’s what I did with the side profile, but I just can’t seem to model it exactly the way I want. ![]()
EDIT: Sorry, double post.
Have you tried box modeling it? I think you can get a free cubone model in roestudios.co.uk and possibly in models-resource.com. You can always see how they did the models by looking at those.
I may be wrong, but to me it seem as the skin texture is flat-generated. If so you should try to UV map it.
To me the skull seem to big and furthermore I strongly recomand you to download a Cubone 3d model and so compare the proportions. There is one at ROEstudios (http://roestudios.co.uk/project/3d-pokemon-models/) and there is one ripped at models-resource http://www.models-resource.com/wii/SuperSmashBrosBrawl/model/7046/
Hope this helps!
Okay, will do! I don’t remember how to UV map textures. How do I go about doing that? I also remember Blender having a mode called sculpt mode, maybe I can use that?
Search for tutorials about UV mapping and sculpting on Google, there is a lot of them.
Sculpt mode: http://wiki.blender.org/index.php/Doc:2.6/Manual/Modeling/Meshes/Editing/Sculpt_Mode
UV mapping: http://wiki.blender.org/index.php/Doc:2.6/Manual/Modeling/Meshes/Editing/Sculpt_Mode
You basically UV map by going to edit mode, select all vertices by clicking “A” and then click “U” to unwrap them. Select an unwrapping method in the list that pop up, I recommend “Smart UV project”. This will give a UV map to the model based on its vertices. Now go to your texture you want to UV map, change the mapping mode from generated (or whatever you have) to UV. Now click on the bar below and select your UV map. Donely done!