I am having a lot of spare time right now so I went ahead and started up blender once again.
This time my goal is to finally get a working model on the “le commerce de marseille” a french 1st rate ship of the line wich was indeed a very capable ship back in her days.
link to see her: http://commons.wikimedia.org/wiki/Category:Commerce_de_Marseille_(ship,_1790)?uselang=de
A few months ago I modeled a naval Cannon and a Carronade. I am some sort of naval-history-nerd
I always adored the work from the piratesahoy community and looked up some tutorials there.
Things like hull and gunports, keel etc. is done pretty nicely on my project. at least imo. Maybe there needs to be some tweaking for more smoothness but I am pretty happy with what I have done until now.
But things start to get more complex with bow and stern parts wich I still dont know how to make them look good.
The bow seems to be less work and much easier to learn technics on. Its what I chose to do first.
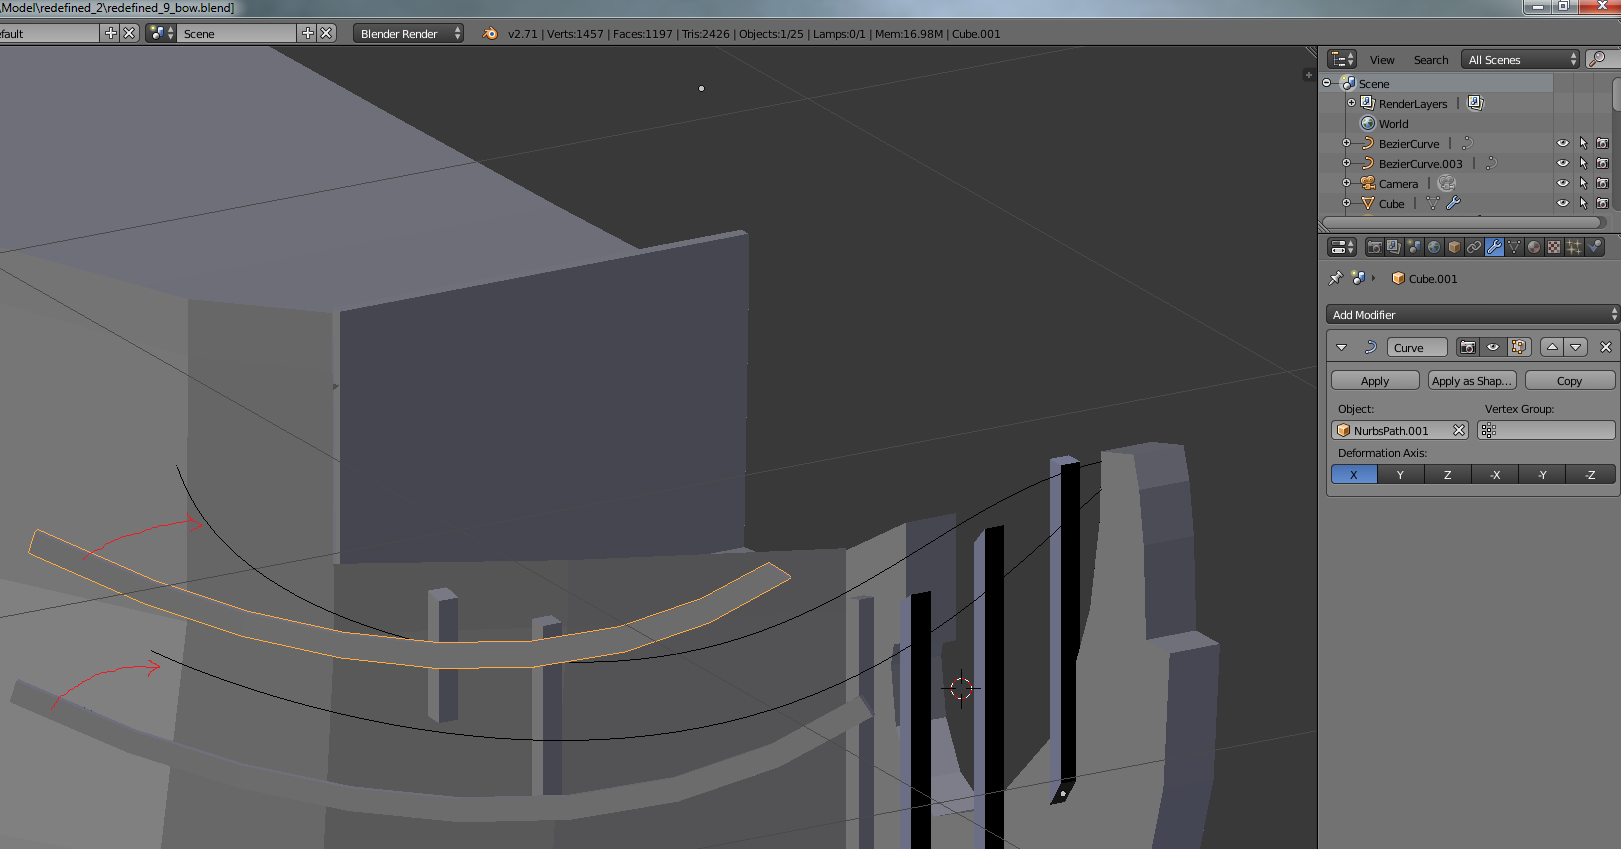
So here is what I am currently woring on:
My goal is to draw a smooth line between hull and the “keel” pat and then match a mesh on her using the “curve modifier”.
First time I was not satisfied and deleted my progress. I tried new adding a “path” this time rather than the bezler I used bevore.
A path I think suits me more for what I need it. And it indeed looks promissing.
But this time my mesh will not match into the curve. Its always offset and wrong scaled.
What do I do wrong here?
I plan on using this method for about all complex planking I need for the ship since it looks like a good solution…
May someone help me out? I really appreciate it =)
hmm
I just tested your suggestion and either I do sth. wrong or that was not the solution for me
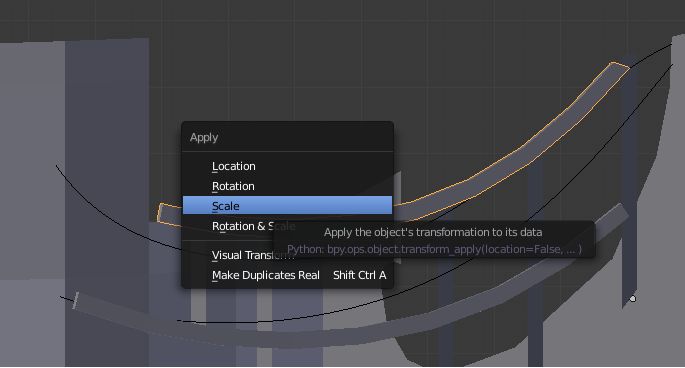
The ctrl+a only gives me this dropdown menue. But when I klick it there no further options or information shown. is that right?
The reason it’s hard to give you advice is that you have obscured the object origins in your screen shot. How about selecting the curve and the rail mesh and shift H hiding everything else? Or even delete everything else and post the file. In addition to applying the scale as Richard said you might also need to clear the translation on the mesh with alt G.
Curve modifier is an invaluable tool but complex for beginners.
all right. Done that.
Youll find the file here: http://www.pasteall.org/blend/30571 <<-- edited
Since I cannot upload it to the forums directly.
It should only include the questioned part.
Hmm… I hear this the first time now. I use this webpage to spread data for a few times now but when theres a much better way to get files shared for this forum… here you go http://www.pasteall.org/blend/30571
Here you are I don’t know if this helps you to understand anything though!
Notice the axis of deform in the curve mod is X. That means you can reposition the mesh along the curve by dragging in the x axis, EVEN THOUGH IT DOESN’T LOOK LIKE THAT DIRECTION IN 3D VIEW! Try it - G, X, drag back and forth.
It might help to think of it this way - when you use the curve modifier, the curve becomes the new space that the object exists in…
Ha tried to make a tutorial for this but there are restrictions there so my post was half finished and I can’t see it to edit it… here’s the full version.
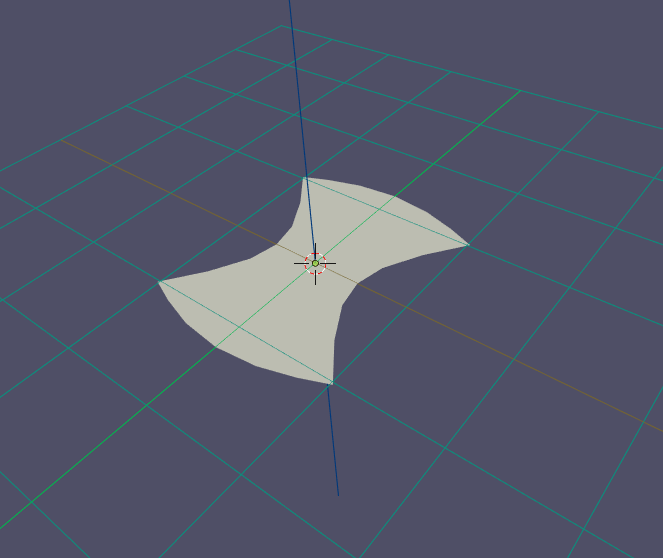
Select the profile and give it a curve modifier. See how it snaps to the curve. Try the various axes in the modifier to see which one you want - watch out for the direction of the face normal by the dark/light shading! This screenshot actually shows it facing the wrong way…
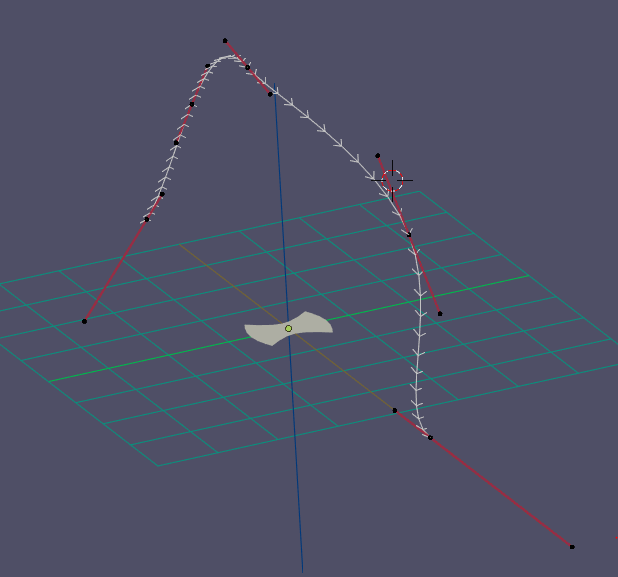
Make sure you click the last two buttons in the modifier that allows you to see the modifier and edit the cage in edit mode! Then E to extrude, and drag. You will see the shape extrude along the curve! Is that magic or what.
The extrusion follows the turns of the curve. You can edit the curve later - or step out of edit for the mesh, edit the curve and go back to extruding.
It’s IMO a lot less complicated than trying to fit something to curve. You can edit the extruded mesh afterwards, in place with those two buttons pressed… although this can be little wild.
Well… Since it worked for me the first time perfectly well so I guessed I messed up some options. I did that bevore.
I know about the axis I have to drag the mesh along. I watched a YT tutorial for proper use of curves and the modifier.
Most times I try to figure stuff out by myself. But sometimes I sit hours in front of a problem and wont come to a conclusion.
In your method is there a way to always get same sized extrudes? (exept from holding ctl and using the eyeball…)
Also… In my very project even your method is not working… I suspect an option is totally messed up somewhere
You can press ‘E’ then amount, say, ‘0.5’, then ‘enter’. Or E, then drag the desired amount, and click. After the first time ‘Shift R’ will repeat the exact action as many times as you press it.