Im sure there’s an easy explanation but I could use some guidance. I’ve followed several tutorials painstakingly and I cannot understand why im getting these results???
You haven’t included an example .blend so don’t expect an answer why your setup behaves like it does. The set deform axis looks wrong but there might be something else going on.
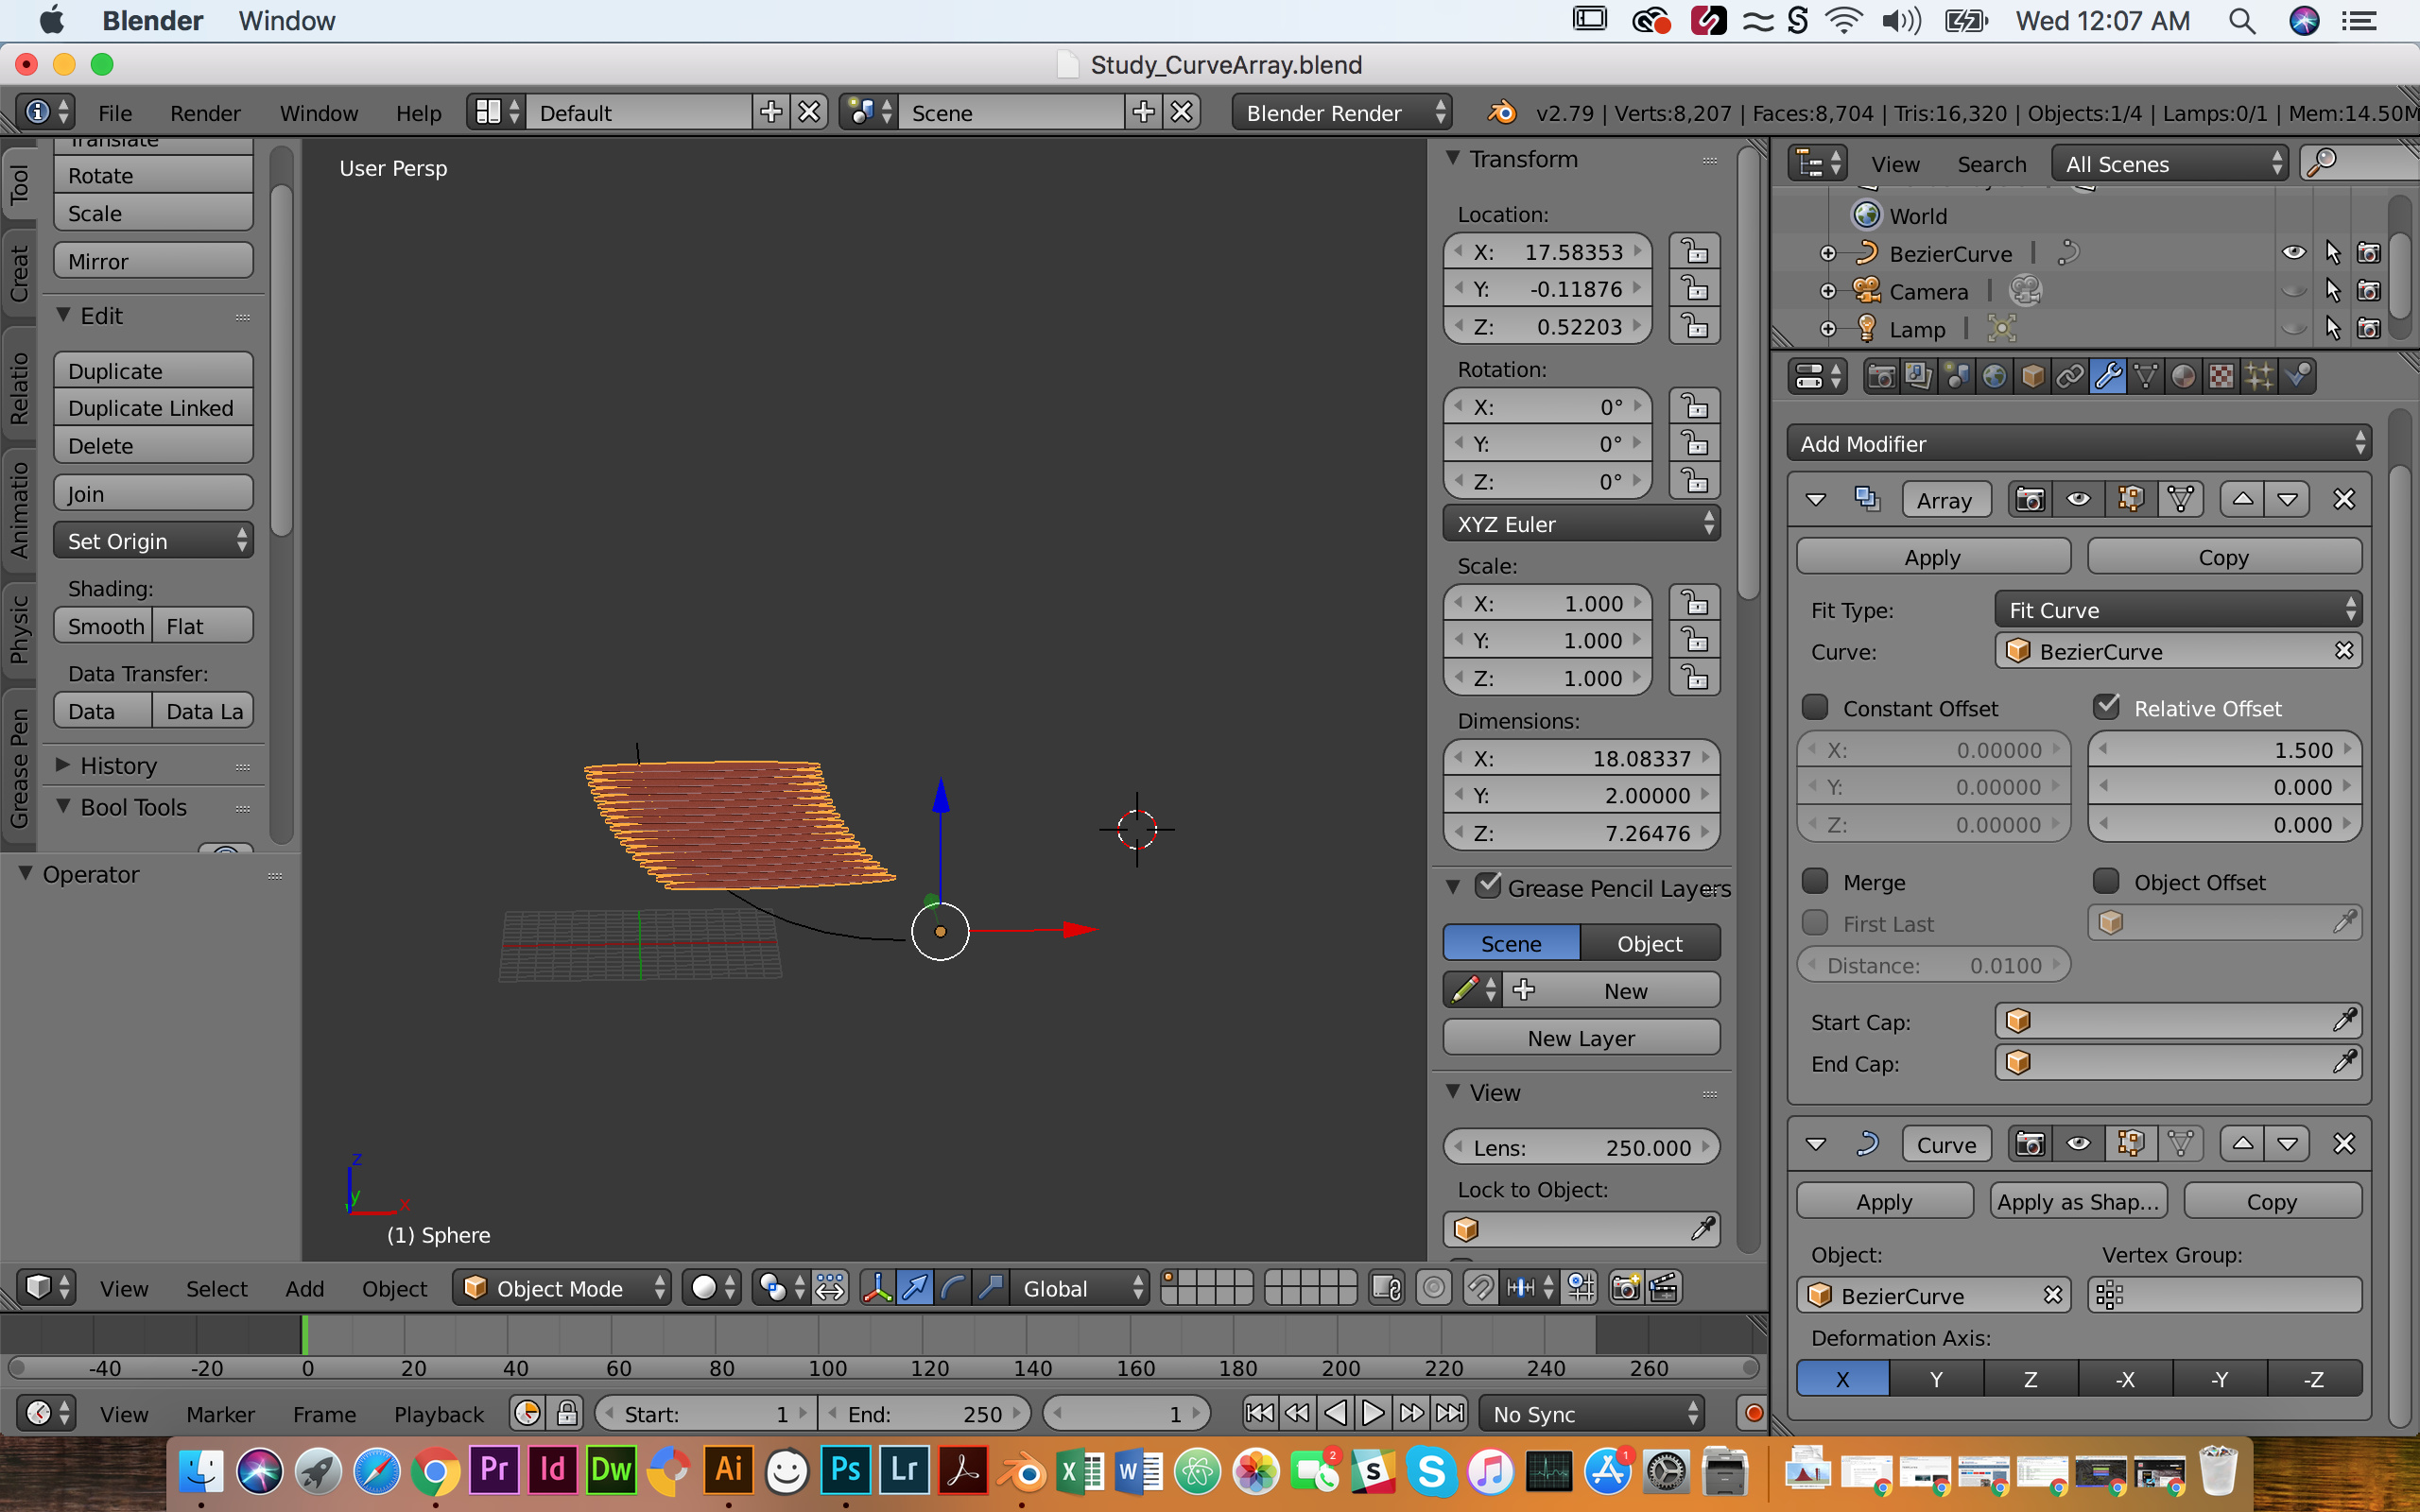
Curve modifier is a deform modifier, so it will distort the meshes. Use frame duplication if you don’t want that to happen.
Applying the scale transfers the scale to the curve radius. Either would have to set the radius in edit mode (W -> set radius, for the selected), or disable radius from curve properties.
The curve direction is from left to right, so would have to switch it in edit mode. The array goes to +x, but the curve is at -x. There’s also an offset between the two objects.
Moving, taking care of the radius after applying the scale, and making everything point to the same direction, it starts to make sense.
Or could use the mentioned frame duplication. Check the manual how to set it up but basically: parent the dupli-object to the curve, set curve path animation amount and enable follow. Enable frame duplication for the dupli-object from object properties, disable speed, and set the end to the same value as the path animation.