Secondly, make sure that in Film-section in your Render Tab, the render is set to Transparent. This will make your background of your render an alpha image, so you can insert your background image.
Third, go into Camera Viewmode, and set Camera Lock To Viewport. Position the camera so that the Grid lines up with the floor/ground in your background image.
Next, insert a Plane, scale it up so it fits the ground.
Extrude the Edge in the horizon up the Z-axis so it covers the entire background image.
Place this plane on another layer (press M and choose a layer). In Layers Tab, rename your RenderLayer to “CubeLayerWithLights” (this makes it easier to see where we have our Cube and Lights) and uncheck the layer you placed your plane on! and create a second layer, rename it “Plane”. Set it to the layer where you have your plane covering your background image.
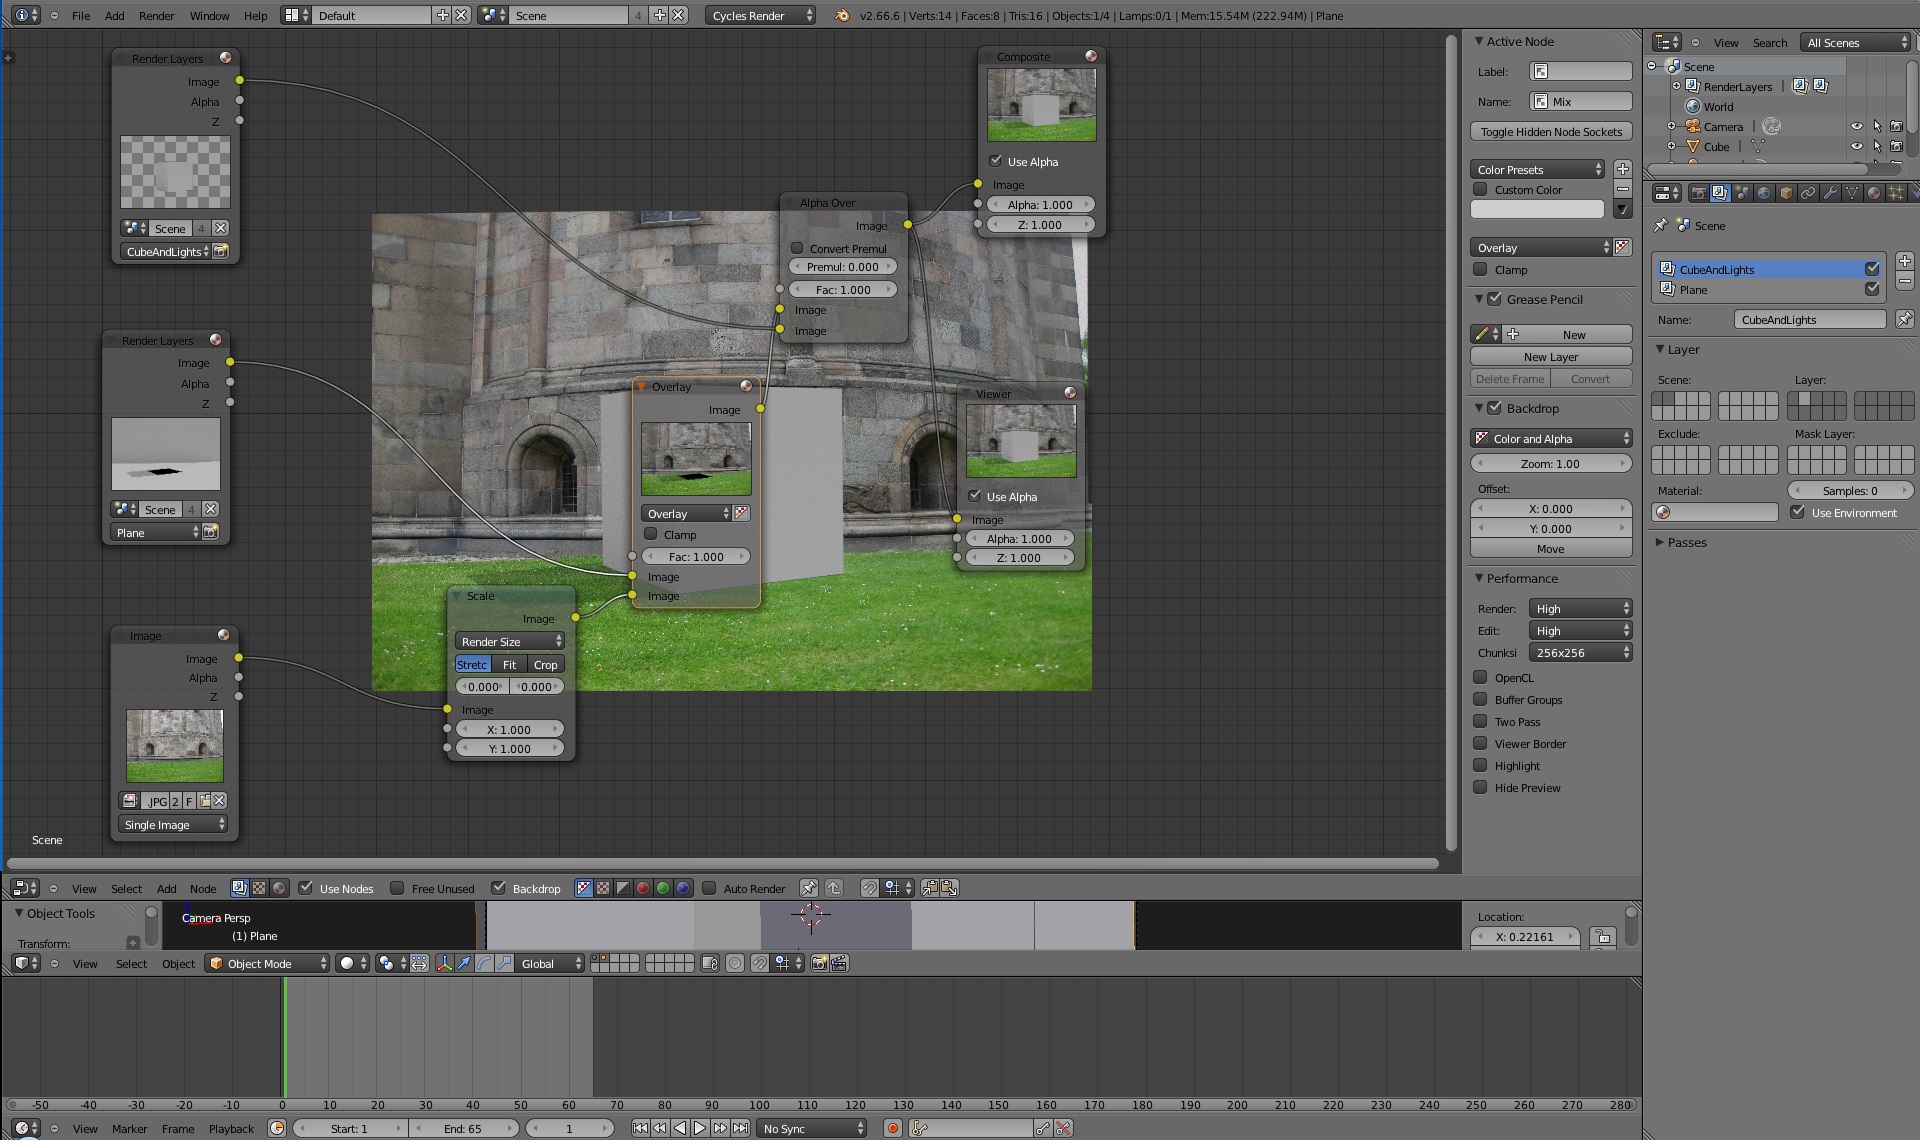
Then you go to the Node Editor and insert this Node Setup (always remember to set Use Nodes, I often forget this myself, giving me no results at all… ).
Image in the post below (my upload has reached a limit, sorry).
I have tried to knock the other shadows out with subtraction nodes, and by inverting another render layer that only shows the plane. But without success…
Tried to create a new project?
How to you get rid of the all the other shadows, except the ones made by the cube (in other words, not the gradient of the plane)?


 ).
).