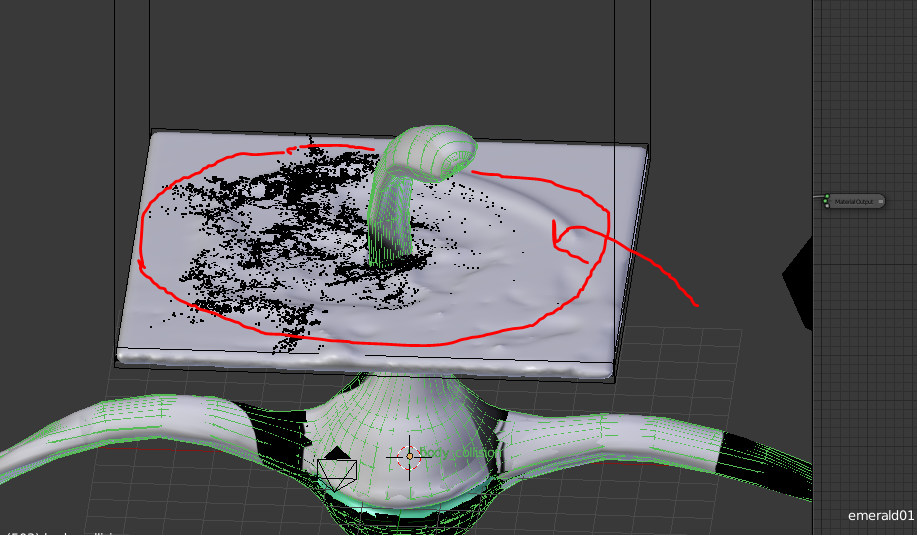
So I’m working in blender 2.79 and I have a render in which I’d like the edges all around the scene to fall off in transparency (so I can mix this render with a real-world ocean.
What I want is this creature’s arm and the splashes to be visible, but the edges (where the flip fluid water hits the boundary) to fall off in transparency.
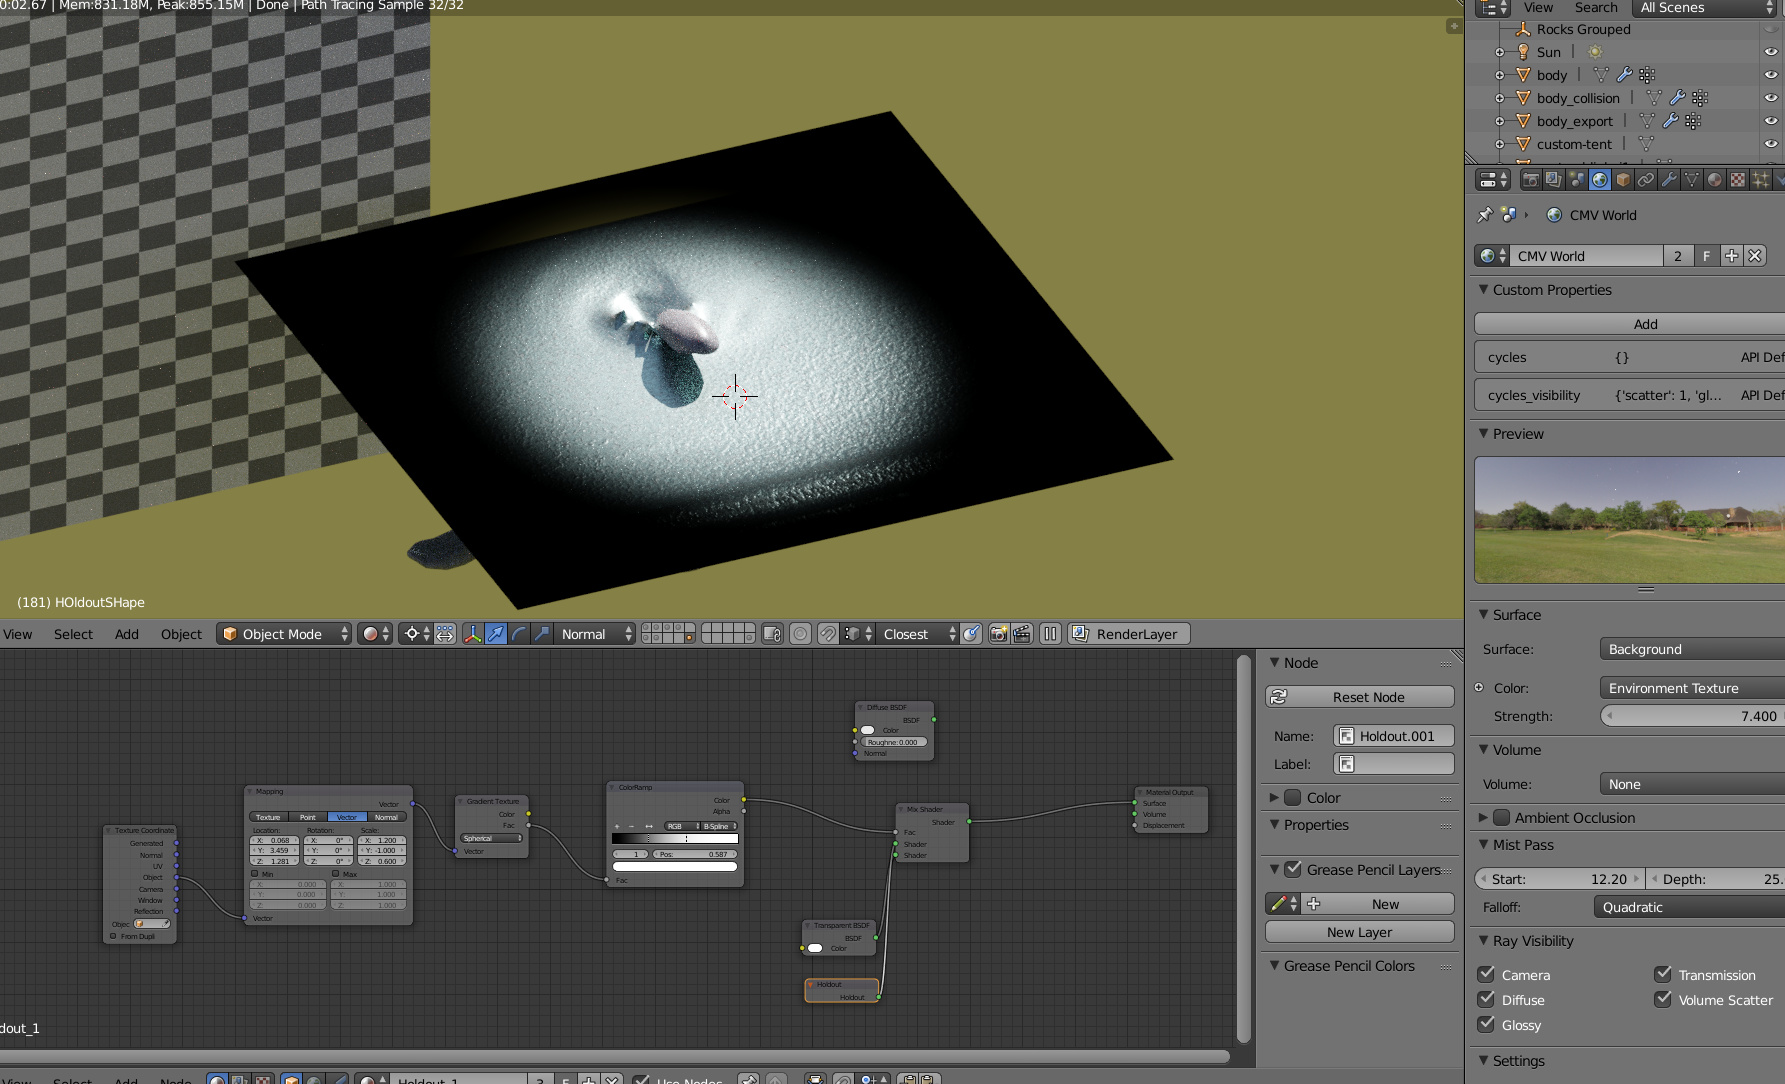
Interesting. Can you help me understand how this is working? I’ve copied your node setup exactly but I’m having trouble understanding what each node is doing.
The nodes in order are
Texture Coordinates - I think we’re using the object as a source of where the texture is being applied.
Mapping - In your example you have it set to ‘point’ however, I couldn’t see the sphere until I set it to ‘vector’. FYI in order to see the mask I added a diffuse texture placed it after the color ramp and bypassed the mix shader with the holdout/transparency nodes, and went straight into the Material Output.
Gradient Texture generating a sphere shape
ColorRamp - is feathering the sphere depending out how the black and white points are moved.
Then ALL OF THE ABOVE is going into the factor of the mix node, to control how much of the plane object is creating transparency.
Here’s where I’m confused - is the transparent node and the holdout node working together to create transparency around the edges and feathering into opaque/solid based on the what we plugged into the factor? I guess I’m confused by the transparent node - why is necessary? Is it there just for the plane object that we’re using as a holdout so we don’t see it?
As an aside, The transparency is really only really visible through the camera, and you HAVE to have 'transparent selected under the render/film settings