thank you soooo much
i must learn node logic, but looks diffucult.
Wow… This is awesome ;D Thanks for this! It’s really useful C:
Could someone possibly explain the math behind this node setup? I’d like to understand exactly how and why it works… =)
Sure…
First up i have a feeling that they have an un-needed step in it… but pretty much what they are doing is this.
UV’s are (usually) on a 0-1 scale, they are nice and interpolated… so when the renderer hits the face, it find out exactly where it is… because this usually isnt on absolute pixel of the image map, they do interpolation, or what this thread has called ‘blurryness’…
Now… we dont want that… so what we need to do is make the UV’s, a non-smooth setup… we need to have the UVs blocked off to a certain size… lets call this x, and has a value of 6.
so a UV map, has three components to it. U, V and W… for what we are doing, only U and V are used and are needed for this calculation… now, we need to break it out into its seperate components to manipulate what is actually happening, so a seperate RGB node can be used here… just think of it as R = U, G = V, and B = W
so… back to the concept, we have our 0-1 scale of UV’s… but we want it in 6 blocks… not infinite amount of blocks… what we need to do is multiply it by six, round it to the nearest whole number, then divide by six. the subtract node should not be needed in this calculation at all. This breaks the UV’s up in to absolute blocks of a width of 6.
After manipulating both the R and G values, we need to recombine it with a combine RGB node, and then have an UV output.
So thats exactly what those math nodes are doing (except that subtract, i dont understand WHY he put that in there, its absoultely not needed)
yes indeed cycles texture lookup does (probably linear) interpolation instead of just give the nearest neighbor (which would give the blocky look on small textures).
Which subtraction do you mean? The one in the original nodegroup? There’s been a half pixel offset in texture lookup. If you load a small texture in <2.65, the texture interpolation from one side showed up on the opposite side.
With >2.66 this half pixel offset was corrected, so i had to adjust the setup (see post #13), which now requires a subtraction of 0.5, then the rounding and then an addition of 0.5, this is needed because of the way the texture lookup now works. Imagine a 2 pixel image, the uv goes from 0-1, but the original color of those pixels are not at 0 and 0.5, but at 0.25 and 0.75 (pixel 1 goes from 0 to 0.5, pixel 2 from 0.5 to 1). We want the center, where no interpolation occurs.
Without those additions/subtractions in both setups, eighter the pixels are offset by half a pixel on the textured object, or the lookup is offset between two pixels, so that we get only interpolated results, see post #14 (middle picture)
@gexwing, yeh i just made a test case myself of one pixel image. your right, it seems like it does take the interpolated result.
It should also be mentioned that the size of the image map should definetly be inputted correctly… or else this setup will not work.
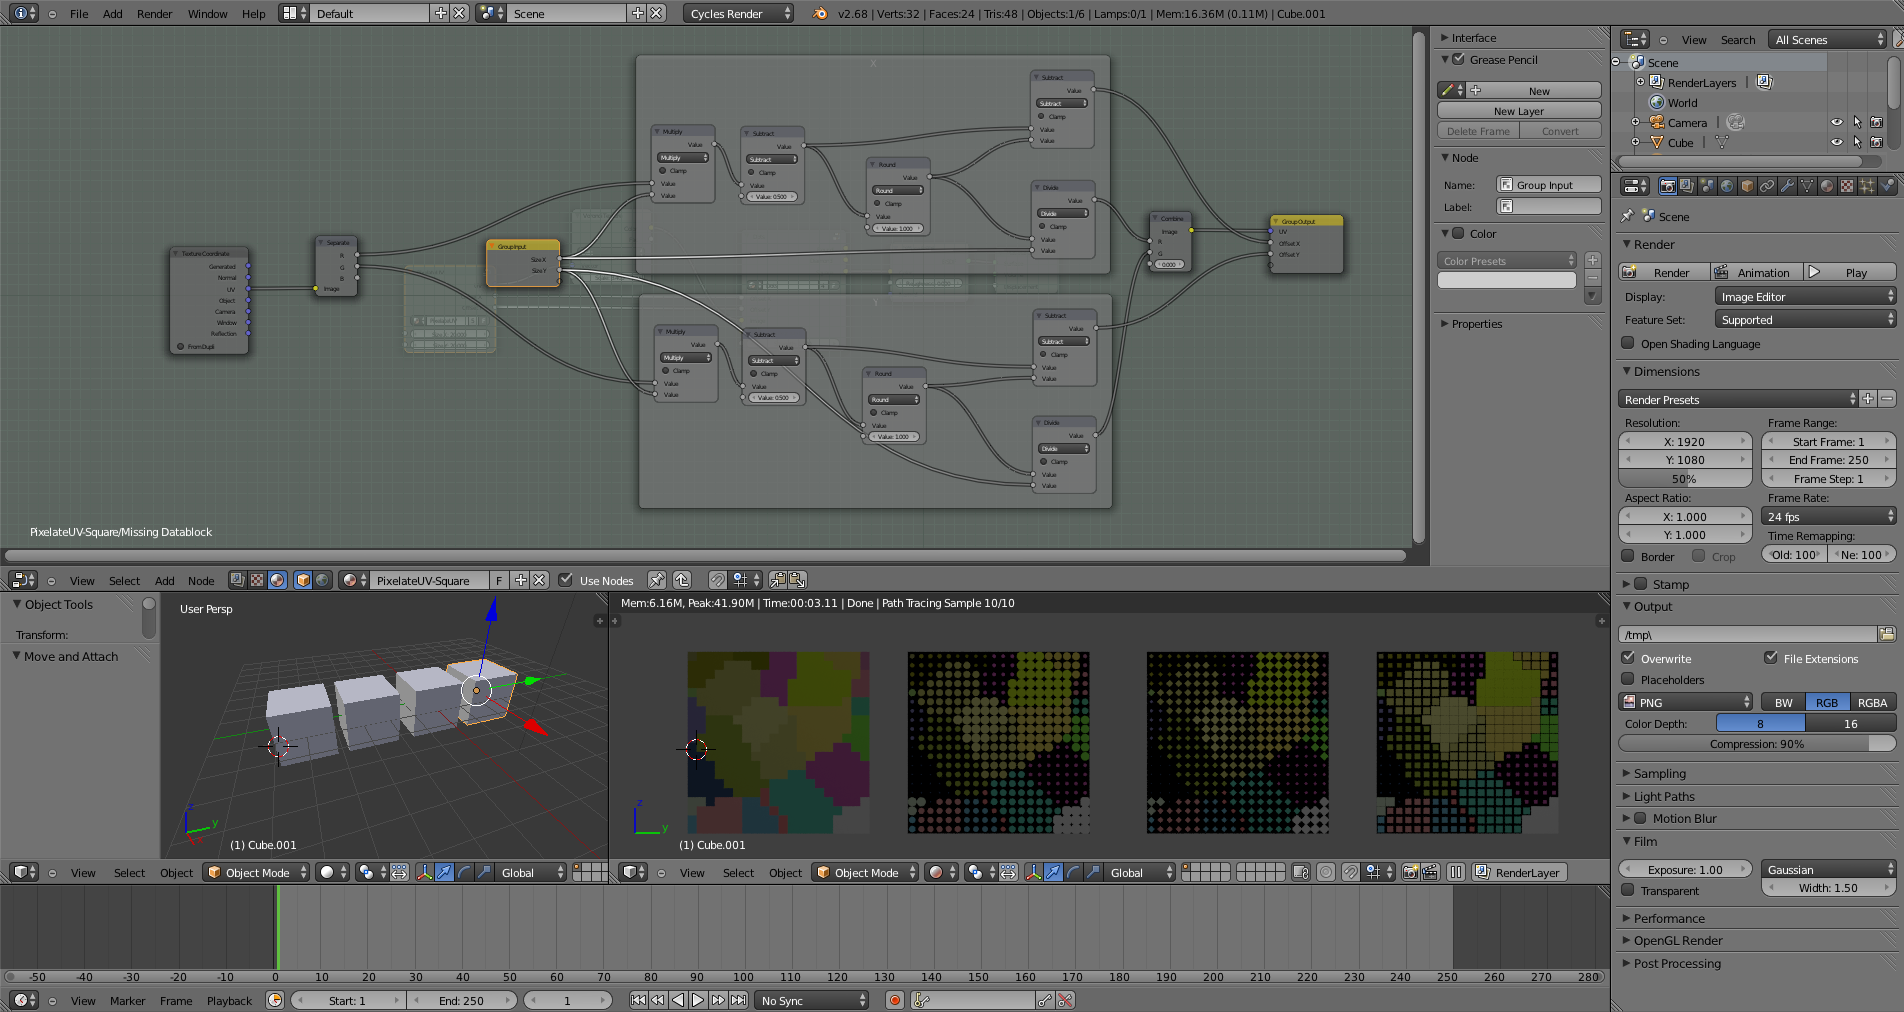
Here’s a little update on this, taking it a step further by outputting the offset coordinates, could be usefull for some other pixelization effects like shown on one of the screenshots.

Attachments
PixelateUV.blend (582 KB)
Hi, I’ve been using this and I came across this problem:
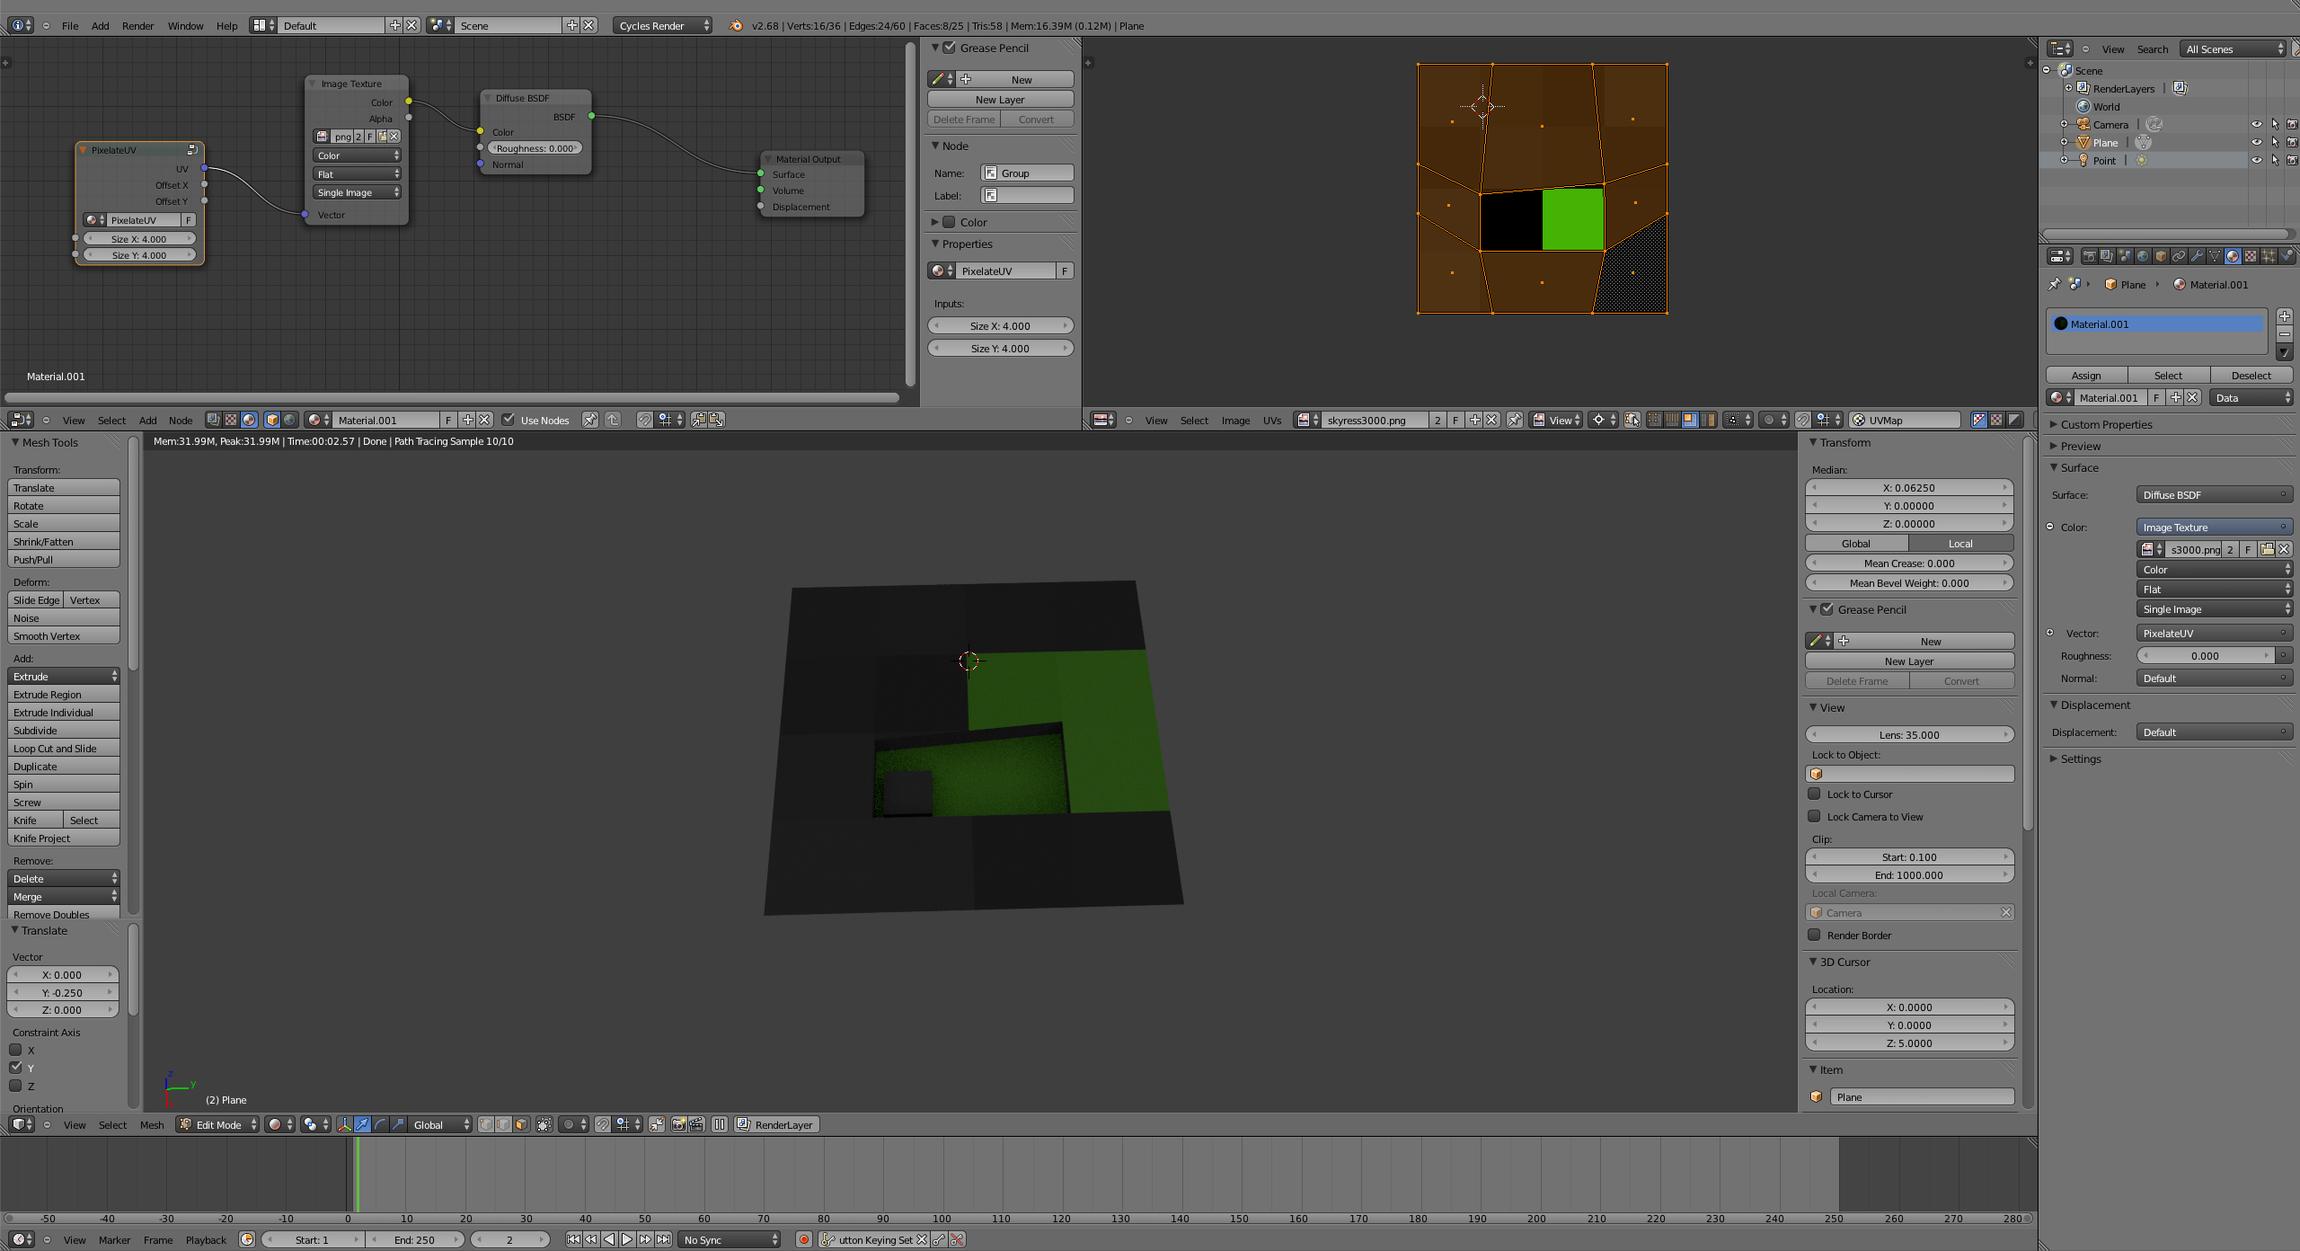
why is the green leaking through onto those 3 pixels?
do you per chance have multiple uv’s on that object? it might use the wrong one. Otherwise post the file if you want me to take a closer look.
i tried your blend, and it looked fine. I had to use a own picture though as you didn’t pack yours in the file. What you could try is snapping the unwrapped uv’s to the exact pixels (shift+s, selected to pixel), if your slightly off, the rounding in the group might snap to the wrong pixel and explain the green color, also make sure you’re using the latest version of the group as the image mapping has changed a half pixel offset some versions ago, other than that i have to idea what could be wrong with it.
Also excuse me for only answering now, i missed your post with the file 
something is still going on… it looks like there’s still some amount of interpolation, although I don’t know why.
here’s a picture:

btw, I made sure that I am using the latest version.
went to an old version (Pixelator_new) and it worked. you might want to look into that.
Does it work on the newest version of blender?
your texture is a 4 by 4 pixel image? you also need to set the x and y size of the nodegroup to 4 then
Unfortunately, this node setup doesn’t appear to work with UV mapping, I’ve tried to render both my minecraft character and a wolf but this node setup appears to only work with flat surfaces (of equal or varied height and width) or cubes (of an equal height, width and length)
Is there a way to have it set up so it works with UV textures?
If not, then my next option is to replace each face of the wolf or players body with planes and use your filter on each plane then set the X and Y values to the amount of pixels on the plane… It may have some errors on the edges though…
It does work with UV mapping, even minecraft: http://i.imgur.com/M5pWgHE.jpg
Maybe you tried to set the values to the “grid size”? You have to enter the pixel size of the whole image you’re using as texture. I think the minecraft image is 512x512 pixels?
YAY! It works!
I’ve been trying for ages to work out why it wasn’t working for the mesh, i thought it was how many pixels were mapped onto the mesh…
I figured it out after a while… i hadn’t had internet since my last6 post so i couldn’t see what “Sir Richfield” said (it would’ve helped a lot had i known earlier xD), now i can finally make minecraft animations in cycles 
Thanks again 
2.71 will have the texture interpolation mode (closest) you are trying to get with the above node setup.
http://wiki.blender.org/index.php/Dev:Ref/Release_Notes/2.71/Cycles
I would like to be able to vary amount of blurring of a texture.
Adding a choïce between 4 automatic interpolations does not answer to my need to have control on it.
It is just 3 other auomatic methods that I cannot adjust.