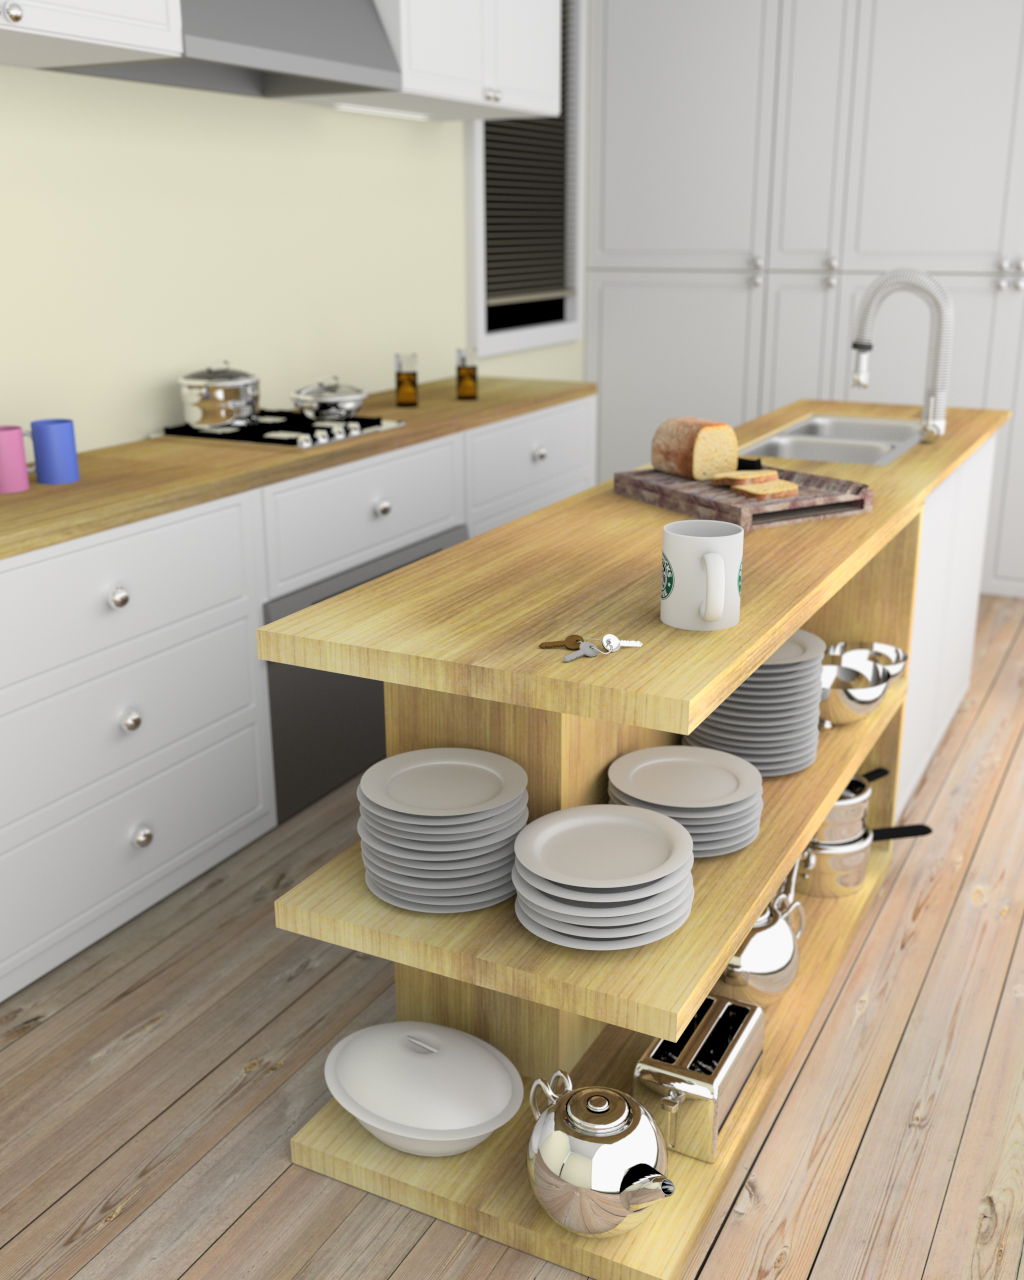
This is my first post on blenderartists.org and also my first piece in cycles :p…
I followed a BlenderGuru tutorial to make a kitchen. Andrew went on to render the scene out in LuxRender, but I battled on and rendered it out in Cycles, using materials and lighting to the best of my knowledge finally deciding on 5000 samples + 0.5 clamp.
Whilst it does not terrible, it does look rather flat and wondered if there were any simple solutions for this?
Secondly, why does my glass look black and how can I fix it? (I used 4 bounces max in an attempt to reduce a crazy amount of noise and so increasing bounces is not really an option)
Its a good attempt but I think it looks flat because this isnt enough light. If I remember correctly Andrews was pretty bright and well lit. Now thats not to say that you shouldnt have any shadows. You need bright brights and darker darks. The contract between the two is what makes a render pop. Not too much though since you going for a realistic render here. Also on the glass…you might check and see if your liquid inside is a solid object…the glass walls on the inside where the liquid is should be removed. What happens is you have too many surfaces bouncing light. Where the liquid and glass meet should be one surface. Blender cooking did a cycles tut on that I believe.
Personally I would punch the light comming in from the window a lot like 10 times brighter and the lite the room a bit better…right now it looks like a few light bulbs are out:P
Anyways, I would say introduce a large area light to the right, and add an HDRI Environment.
Then, you need to tweak around with the materials…a lot. The wood needs bump mapping and normal mapping, if it’s not procedural…lots of things to correct. I see potential in everything, because it’s probably the fact that I can’t model worth a damn.
@DerekG1080 Thanks a lot for your insight… Some things are just like Maya in Blender, and some things are completely different! But I’ll have it figured out soon hopefully. I’m gunna sort out the lighting and the glass light you said
Thanks swaschan, again a great help! Is there any reference/tuts I can use to learn about HDRI environments? - or is it just the case of setting up a big uv sphere with a HDR texture? Thanks
Then, go to the World Settings. If Background is enabled click the dot next to the colour input, and select ‘Environment Texture’. Then open the image you’ve downloaded. If the image is rectangular, leave it to be Equirectangular, however if it’s a spherical image, change options to ‘Mirror Ball’. Then adjust strength and enjoy. No need for that ol’ sphere.
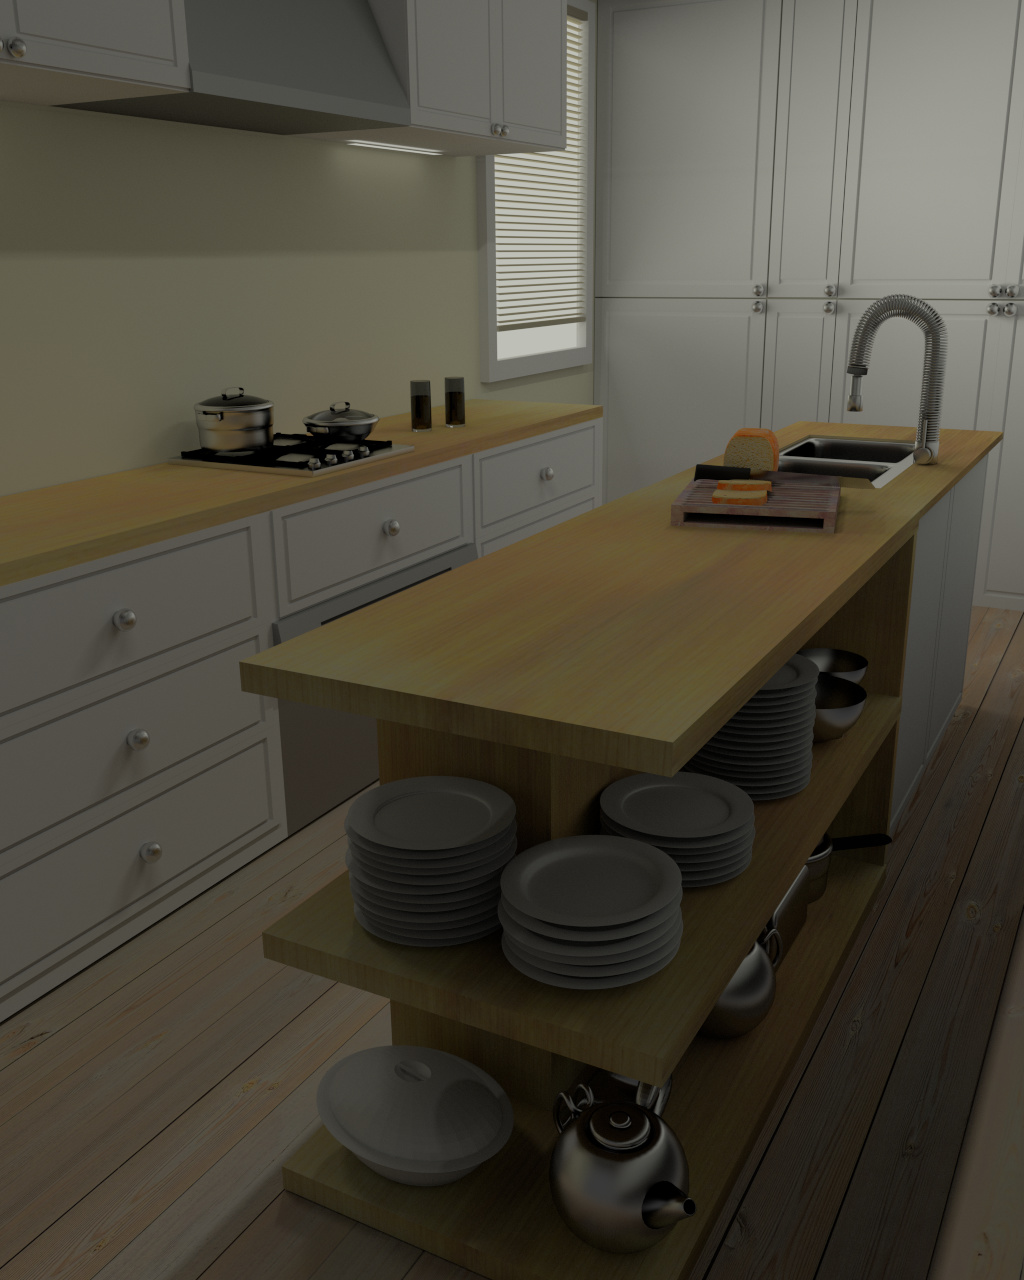
So I’ve added a HDRI environment, after a few issues (the mapping wasn’t working correctly in certain camera positions - but appears to be working for me now). I’ve added a big fat emission plan on the RH side.
I also realised that if clamping works effectively in the opposite way to how I expected… I thought it was too powerful in the example online at 0.5 so I tried 0.3, but seemingly was still too powerful… it wasn’t until I cranked it right down to 0.01 that I realised that smaller is stronger. Using clamping is useful for noise reduction though (if you are inept at setting up lighting correctly like me!) and thus I have left it at 0.95.
I’ve added some depth of focus, which I think adds something to this scene (and hides my poor attempt at texturing bread into a blur!)
I also got fed up with trying to make an image plane background look realistic in the background, and attempted just to make a warm glow - but using emitter planes seemed to mess with my lighting set-up, so I thought 'hey, i’ll just make it a night scene…" - however I’ve learnt that BLACK does not equal NIGHT realism…
I also increased the bounces for the glass back up to min 4 max 8 which helped, and implemented what Derek said about not having two planes in the same place for glass/fluid and just have glass on the outside and fluid on the inside…
So out of that comes a couple of questions:
How do you make a plane look like a background for a night scene - does it need lighting? should I just use a night time image to texture or is there a better procedural way?
When modelling glass, is it better to use single-thickness planes rather than modelling them in true 3d - which appears to lead to it being dark?
Anyway, thanks for your help, and I hope I didn’t miss any of the suggestions made in your comments - and that you can see a noticeable (positive!) difference.
wow, that’s a big improvement! i do see two areas that might be improved i think: the hood above the range looks flattish grey. this might be improved with a brushed steel look (and if it already has, by increasing the specularity). furthermore the material of the cupboards looks also quite flat. guessing from all that fancy wood i assume the cupboard doors are not plastic but real, painted wood. this might be achieved by adding a very slight bump tothe material, possibly stretched in the direction of the paintstrokes. otherwise, good job, wish our kitchen was that clean
 Some things are just like Maya in Blender, and some things are completely different! But I’ll have it figured out soon hopefully. I’m gunna sort out the lighting and the glass light you said