I’ve wanted to produce a retro reflective material in cycles for a little while now. I still have more tests to do, but this first draft yielded better results than I expected.
I suggest viewing in 1080p to see the detail of the sheeting.
I’ve wanted to produce a retro reflective material in cycles for a little while now. I still have more tests to do, but this first draft yielded better results than I expected.
I suggest viewing in 1080p to see the detail of the sheeting.
I had a request to show the material from more angles. So here you go…
It might be useful to describe retro reflective material to folks (I had to Google it) and the Cycles technique you’ve used. Looks cool though.
Probably could have used some more detail on my end…In simple terms, a retroreflective surface returns light to its source. An example of this is the material used for traffic signs. When your headlights hit the material, the light is reflected back towards the headlight. Occupants of the vehicle are seeing retroreflected light.
People viewing the material outside of the retroreflective area (or “cone of retroreflection”) will generally only see the sheeting as a slightly glossy surface.
As far as I know there are three main manufacturers of retroreflective sheeting. I know there are more, but most of the signs you see on the roads in the U.S. use 3M (same company as post-it notes), Avery (like the plastic folders at an office supply store), or Nippon (a Japanese company that makes tons of products).
There are many types of sheeting, but the best currently available is probably 3M DG3 (or called Diamond Grade Cubed). This is the type of sheeting I tried to reproduce in Cycles.
I initially thought I’d have to write an OSL shader, which I’ve never done. But I figured I’d try a normal map first. I found some images taken with an electron microscope of the 3M material and I replicated the geometry, produced a normal map and it gave me pretty good results. The normal map is scaled 400 times on the X and Y axis. I also mixed in both a glossy and diffuse shader so the material didn’t appear black from angles outside of the cone of retroreflection.
I will try the normal map in the game engine soon. I wanted to try it today, but haven’t had time. I could probably reduce the file size of the normal map and save on the memory.
interesting way
but can you show the map you use for this effect
it looks like it is working nicely
what is the nodes set up you use to control the normal reflection here ?
thanks
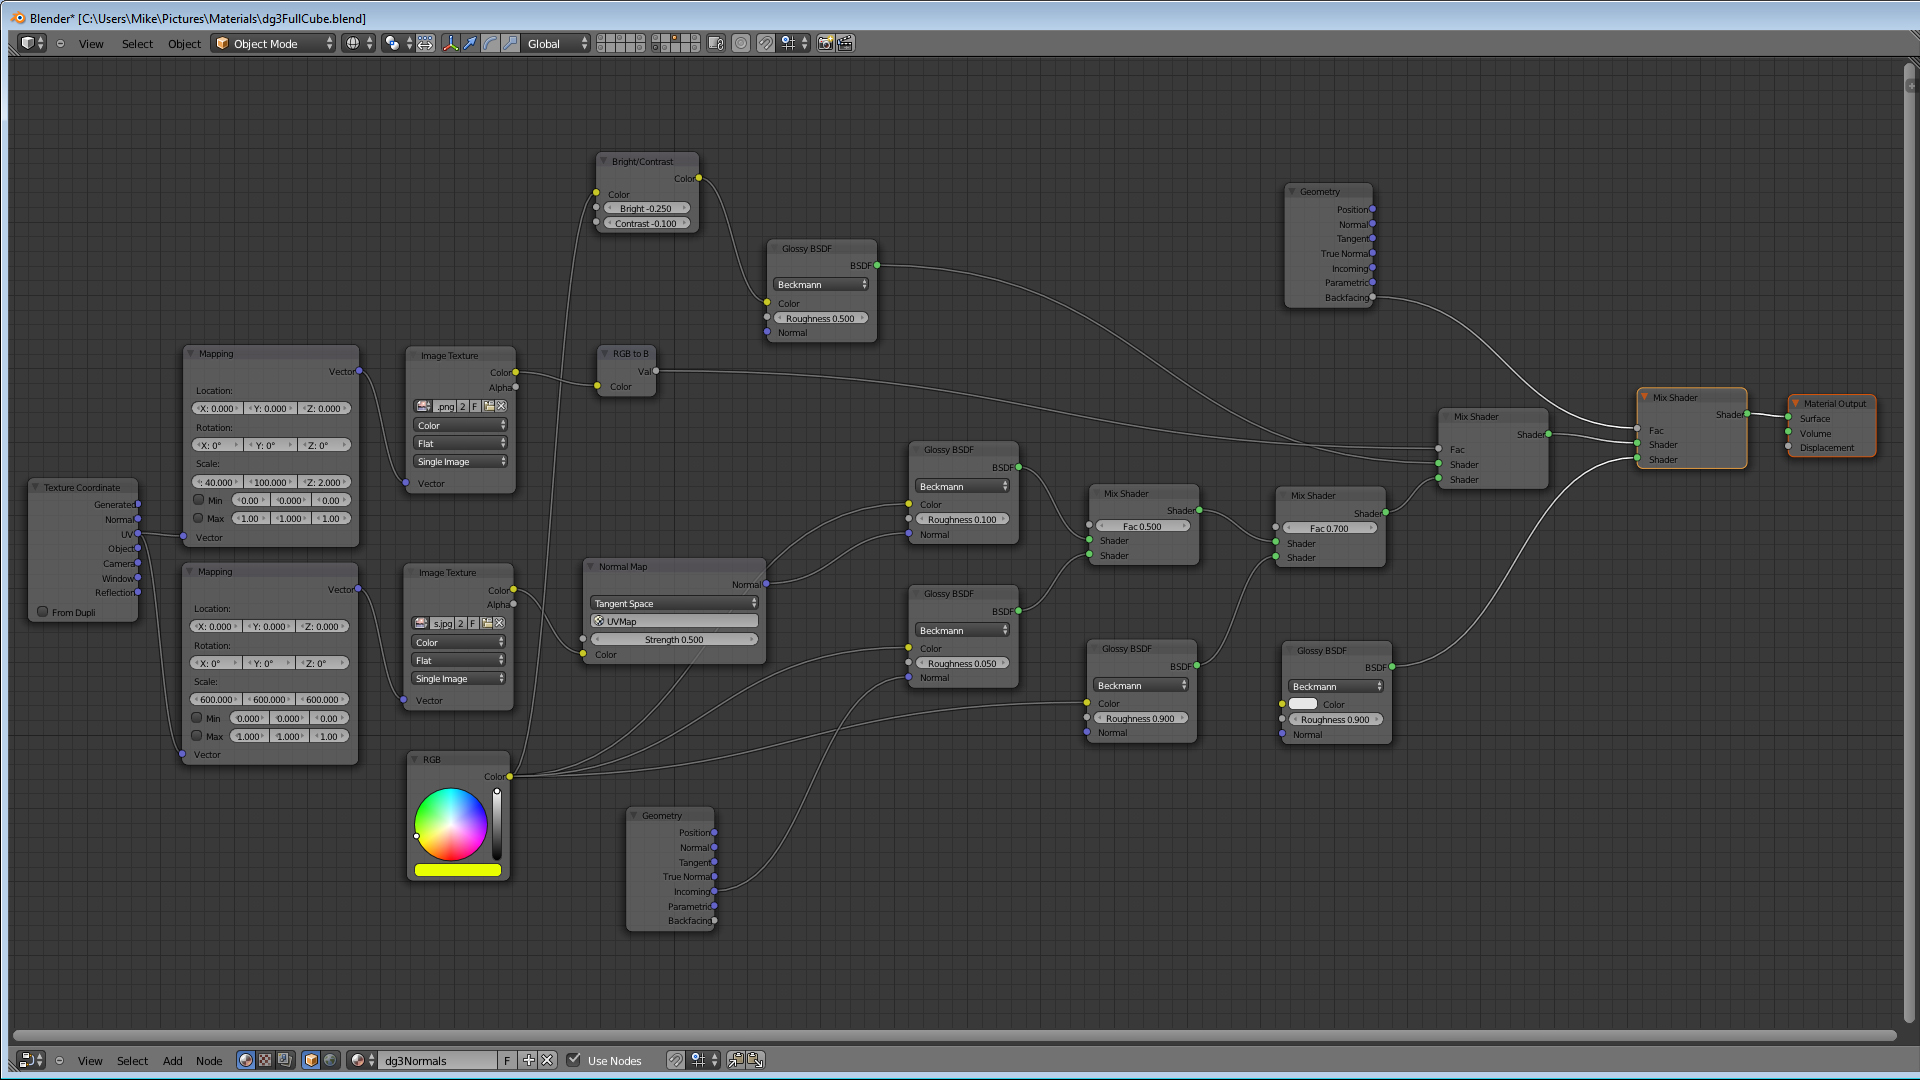
RickyBlender,
Here is the node setup. I’m sure this can be improved. There are two different images used. One is the reflective normal map and the other is a mesh-like pattern that doesn’t do anything but serve as the mix factor for a darker glossy material. That is the pattern you see in the video. If you go look at a stop sign up close, you will see a similar pattern depending on the sheeting manufacturer. So long as the sheeting on the sign isn’t more than 5 years old or so.
Anything traffic related that I post on BA is directly related to the company I work for, so I’m hesitant to release the actual normal map. But Here is a video from 3M that pretty much shows how to replicate it.
i remember these glass sphere
i can see it has evolved a lot !
i’ll try to redo the set up not certain it can work nicely
are you making like a mesh having these corner thing shown in video and using array to replicate it to get this effect ?
then backing a normal map for it and apply it to a plane may be!
thanks
Sheeting has come a long way since glass beads.
I reproduced the object shown at 1:09 in the video. What they call the highly efficient section.
No array necessary. I uv map the normal to the plane and scale depending on the size of the plane.