If you mean ortho from the spot’s point of view I’m not sure that’s possible because the spots rays are generated across a radius that begins with the point from which the spot originates
Well yeah, but that’s a bit like saying you can’t have an area lamp or sun lamps because lamps generate light from a point What I’m suggesting is that for a parallel beam (and shadows) you need to code an option for spots that makes the spot work in ortho not perspective. I think Broken agrees this is a solution so maybe I’m not as dumb as I thought.
Admittedly, I was thinking more about buffer shadows (my main bug-bear) than radiused light beams but the theory is the same - although it would require some sort of dimension input to determine the sideways width of the beam (maybe the existing size parameter would suffice).
Really, it’s no different (in simple theory) to changing a camera (also a single point in space) from perspective to ortho. Whether it’s easy to code is for others to decide. It seems easy, after all it only took me two minutes to think of it and five minutes to write two posts about it. How hard can it be??? :spin:
You are not on the “Big Dummy” list around here and I can’t imagine you ever making that list either, though I have managed to find myself crowned “King Jack-Ass”, and it’s a well deserved title by even my own measure.
Anyway, I haven’t seen anything of the sort in the wiki feature requests, though I haven’t looked too hard but, I’m sure you’ll find this one interesting:
I agree that a Cylindrical Spot lamp would be incredibly helpful for everyone! The idea of making a spot very narrow, and putting it miles away from the object where you want it coming from works in some situations, in the case of my Blender project, if I did this then you’d see the lamp traveling underneath the actual object. (Not a good look).
Lets hope that this feature does manage to squash itself into the next Blender release, and that some kind person will code it.
Ammusionist: That looks really nice! If you don’t mind, could I please have a look at your .blend, compare it with that of RamboBaby’s and try to get it to work in my file. As I’ve never really used nodes before.
Thanks very much for that Ammusionist! That looks absolutely awesome, and I’ve had a good go at trying to get the same or similar effect on my file, but I appear to be doing something wrong.
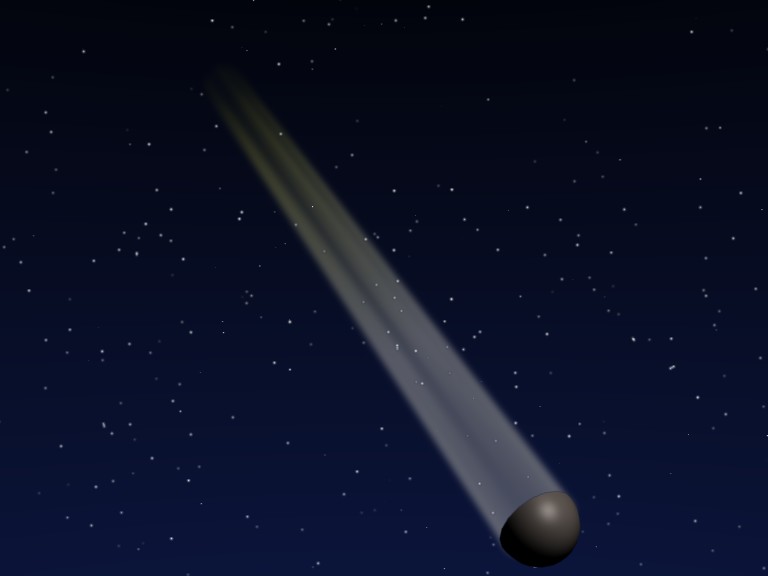
My biggest problem is that the spot light (closets to the camera, and actually a cylinder anyway) is being rendered behind some other objects in the scene, as you can see in the picture attached…
I was wondering if you’d be able to have a look at my Blender file Ammusionist, and see if you were able to solve the problem. You don’t have to of course, but if can, here’s the .blend… 20th Century Sheep.blend While your trying to solve it, see if you can make the light look a bit more like your one.
You’ve got some serious problems with alpha channels though. Look at where the spot light passes behind the 2 and you’ll see what I mean. That can be a bitch to get rid of.
Edit:
To lower the spot’s intensity just lower the alpha on the tube and re-render the tube layer.
That looks really cool RamboBaby! Thanks for that! However I notice that you’ve moved the camera back slightly to line up the start of the light with the object. When I move the camera forward again, back to it’s original position, I find that the tube is actually rendering in front of the lamp object now. Any ideas why this is happening, and how I can get it to be rendering simply where I place it?
Click on the Tube render layer node. This will make it active in the render layers tab. On that tab click the “AllZ” button. That will more than likely solve your problem. If it doesn’t you may have to go to z-combine node. It really looks to me like you didn’t re-render the ntire scene though. If you don’t re-render the whole thing after moving the camera then objects shouldn’t line up due to the view shift.
Edit: look how out of place hte tube is when I re-rendered only it after a camera move:
Awesome! Thanks for that help RamboBaby. They look pretty much perfect now, as the AIIZ thing did the trick. I’m not really sure how to solve the alpha channels though. Any quick tips, or shall I just ignore them?
Hey guys thanks for helping Cuby and I out it is starting to look a lot better. Especially thanks to RamboBoy and Amusionist for their big contribution. Once this is done thats basically the end of our movie and we will probably post it on you tube or something, for you to have a look.
Well keep you posted, thanks again
Darth Sirrah1 and Cuby:):D:yes:
If your camera’s moving it may or may not be noticable. If it’s stationary it’s going to be very noticable unless you use a codec in which case everything will look like crap. I haven’t developed any tried and true methods for dealing with those type of alpha channel artifacts as they relate to halos. All I know is they give me a lot of grief when they decide to show up. Let me see what I can do about it and I’ll post back when I figure it out.
OK, this one was easy to correct but it’s not always so, or I could just be getting better at it. Anyway, what I did was to move all of your halo spot lights except for the one that we previously corrected to a layer of their own, enable an new render layer that has only this layer in it and enable only the Halo and AllZ options for the render layer. This allows us to cut holes into the halo spots in any areas where they pass behind other objects in order to avoid these nasty little alpha channel problems. In doing so this caused another little problem. You have 2 cylinders set up for your spotlights but only one of them is actually functioning in the manner that we set up previously. Because of this there is now a cylindrical hole slicing through the spotlights in the background where you don’t have the cylindricval light setup applied. Why? Because of the AllZ option that I enabled on the new render layer containing only the halo spots. So you need to make a set up for that cylinder just as we did the first or get rid of the cylinder all together.
The node setup isn’t really complex but your scene is becoming fairly so. It’s kind of difficult to navigate around it due to all of the elements involved and too much more complexity generally necessitates that I set up a new scene just to keep from driving myself mad. That’s a new set of problems though. Just keep it in mind for the future when your skill with the nodes reaches a higher rung of the ladder. I can tell it probably isn’t going to be as far into the future for you as it is for most folks just because of the things that you’re creating.
You also might want to try adjusting the intensity of some of the halo spots with the HaloInt slider because some of them are disproportional to others in the background.
BTW, this is a very cool little scene!
Don’t use this .blend because the camera is still in the wrong position, I think. Just open it and get some practice matching your file to this one. Good luck.
Thanks Ammusionist! Ok, I’ve moved it over to the Finished Projects now! Thanks again for all your help here everyone! Especially RamboBaby + Ammusionist!
Hello Everyone,
Hoping those of you have had some experience with cylindrical lighting can help. I read all the posts above and I have a question with both techniques from Ranbowbaby and Ammunsionist.
Well I’m working on a project that needs to involve cylindrical lighting these post have been very helpful. My question is… how would I be able to achieve volumetric shadowing as in my project the cylindrical light will be pointing toward an object and I would like the volumetric shadowing to be produced as a result of introducing an object to the path of the light…is this achievable with Randowbaby’s technique? I’ve tried that anmusionist technique but since this is not technically a light source no shadowing can be produced…I’ve worked with blender for sometime now…but still consider myself a newbie…any info would be great.