Hey all, it’s time for a huge update on the dialogue system that just made 10 x better ![]()
First, I’ll explain the basic idea of how it works:
in the init() state of the script your text is divided between space and put in a list. In this list, lines are made with a certain amount of characters (this can be changed), each line then has a certain amount of characters with a "
" at the end to make a new line for a different line.
Now… All the lines can’t fit on one page so the lines are printed in groups of 4(this can also be changed).
ie:
line1
line2
line3
line4
(next page)
line5
etc
In this script, each time you press “T” the next group of lines pop up. When it gets to the end, it stops.
That is the basic idea, all that was created by Andrew-101.
It works very well and it very easy to use, but with some new features it is now much better.
###################
Updates from the old version:
1. Instead of having it so you need to move to stop the text, you actually need to finish it and your character isn’t able to move everything in the scene can be suspended easily, almost like a pause. (you can put this on the enemies also just by just broadcasting a message that changes them to an empty state, so it doesn’t move or attack you.)
2. Changing page on command. When ever there is a “\p” in your dialogue, everything after that is put on the next page. You’ll see where this useful by talking to the cubes in the .blend. These should be single words, the script won’t catch it if it’s attached to another word. All characters are separated with spaces, if "
" or “\p” are used in the same word, it will not work properly.
ie:
Hey!\p - WRONG
Hey! \p - Right
I know I didn’t need to do that… But just in case! ha ha
(Thanks to Andrew)
How to use it:
When ever you want a certain line to be on a different page just add a “\p” behind the line you want to be on the next page… Easy ![]()
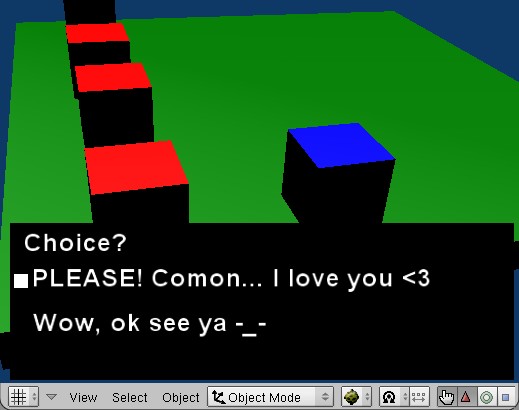
3. Choice system. This is actually very limited with options, you only have 2 options, but you can easily add more and if you know how to script you’ll be able to make it better, but this works good enough for me ![]()
How to use it:
This a little more difficult. Every NCP or person you want to talk to must have a certain property called choice. If you don’t want the user to have a choice while talking to the person then choice is equal to 0. If you do choice is equal to 3.
After that, if choice is equal to 3, you need to have 5 more properties… Go figure…
You need to have:
choice1 - This is what you want one of the options to say, it could be “Yes!” or “Sure!” or “Bye!” or “YEAH YOU SUCK!” Doesn’t matter, this will be what your character will say and you get choose.
choice2 - This is what you want another of the options to say, it could be “No!” or “NOPE!” or “Of course, why not?” or “I had fun last night ;)” This should be different from your first choice.
choice1_say - This what you want the NCP to say if you answer with choice1. You can change this, or add this in the “say” script very easily.
choice2_say - Same as choice1_say this answers to choice2. You again can change this in the “say” script.
repeat - These are 2 numbers separated by commas.
1 - means that it will keep on giving you a choice.
ie: Do you want me to repeat the instructions? This is if you change the first value
4 - means that it will not keep on giving a choice.
ie: See ya! Bye! This is if you change the second value
Those can be changed around however you want. ![]()
So, if I setup something like this on 1 character:
speech = “Hello, what’s your name?”
choice = 3
choice1 = “None of your beeswax!”
choice2 = “Joe :)”
choice1_say = “That’s not nice, please tell me your name?”
choice2_say = “I like your name”
repeat = 1,4
You talk to the NCP, he’ll say:
Hello, what’s your name? (Give you choice)
If you say, choice1 he’ll respond with choice1_say and repeat and ask again because the first value of repeat is 1
If you say, choice2 he’ll respond with choice2_say and will not repeat because the second value of repeat is 4
4. Typing effect. This is just for a nice visual and makes the text appearing really clean, 1 letter at a time. It sounds like it could get annoying, but if it goes fast enough, you should be fine and the person won’t get impatient with it. You can also change the speed with the delay sensor, right now it’s at full speed and if you want it to go faster, you’ll have to start making for characters appear every tic. Making it 2 times faster is easy, just add 2 characters at a time ![]()
How to use it:
You can change the delay on the delay sensor on the Empty called “choice_selector” on scene “Speech”
5. Camera change. This just places the camera where ever you want when talking you can make it better by going to the “camera_position” empty and messing around with it. ![]()
So, yeah, that’s all the cool features! I made everything expect for what I credited Andrew with, so I hope you enjoy it ![]()
Controls:
T to talk
Arrow keys to move
Up/Down arrows to choose a choice
#############
DOWNLOADS
#############
Attachment .blend (I hope it’s the right one):
dialogue_system1.blend (379 KB)
Bye everyone and have a great day ![]()
Linkxgl


 Instead of… Going to GIMP or Photoshop, rewriting the text and then changing your mistake, and you don’t need more then 2 textures (Background Texture and the font texture) So it’ll waste less space on the .blend!