Hello,
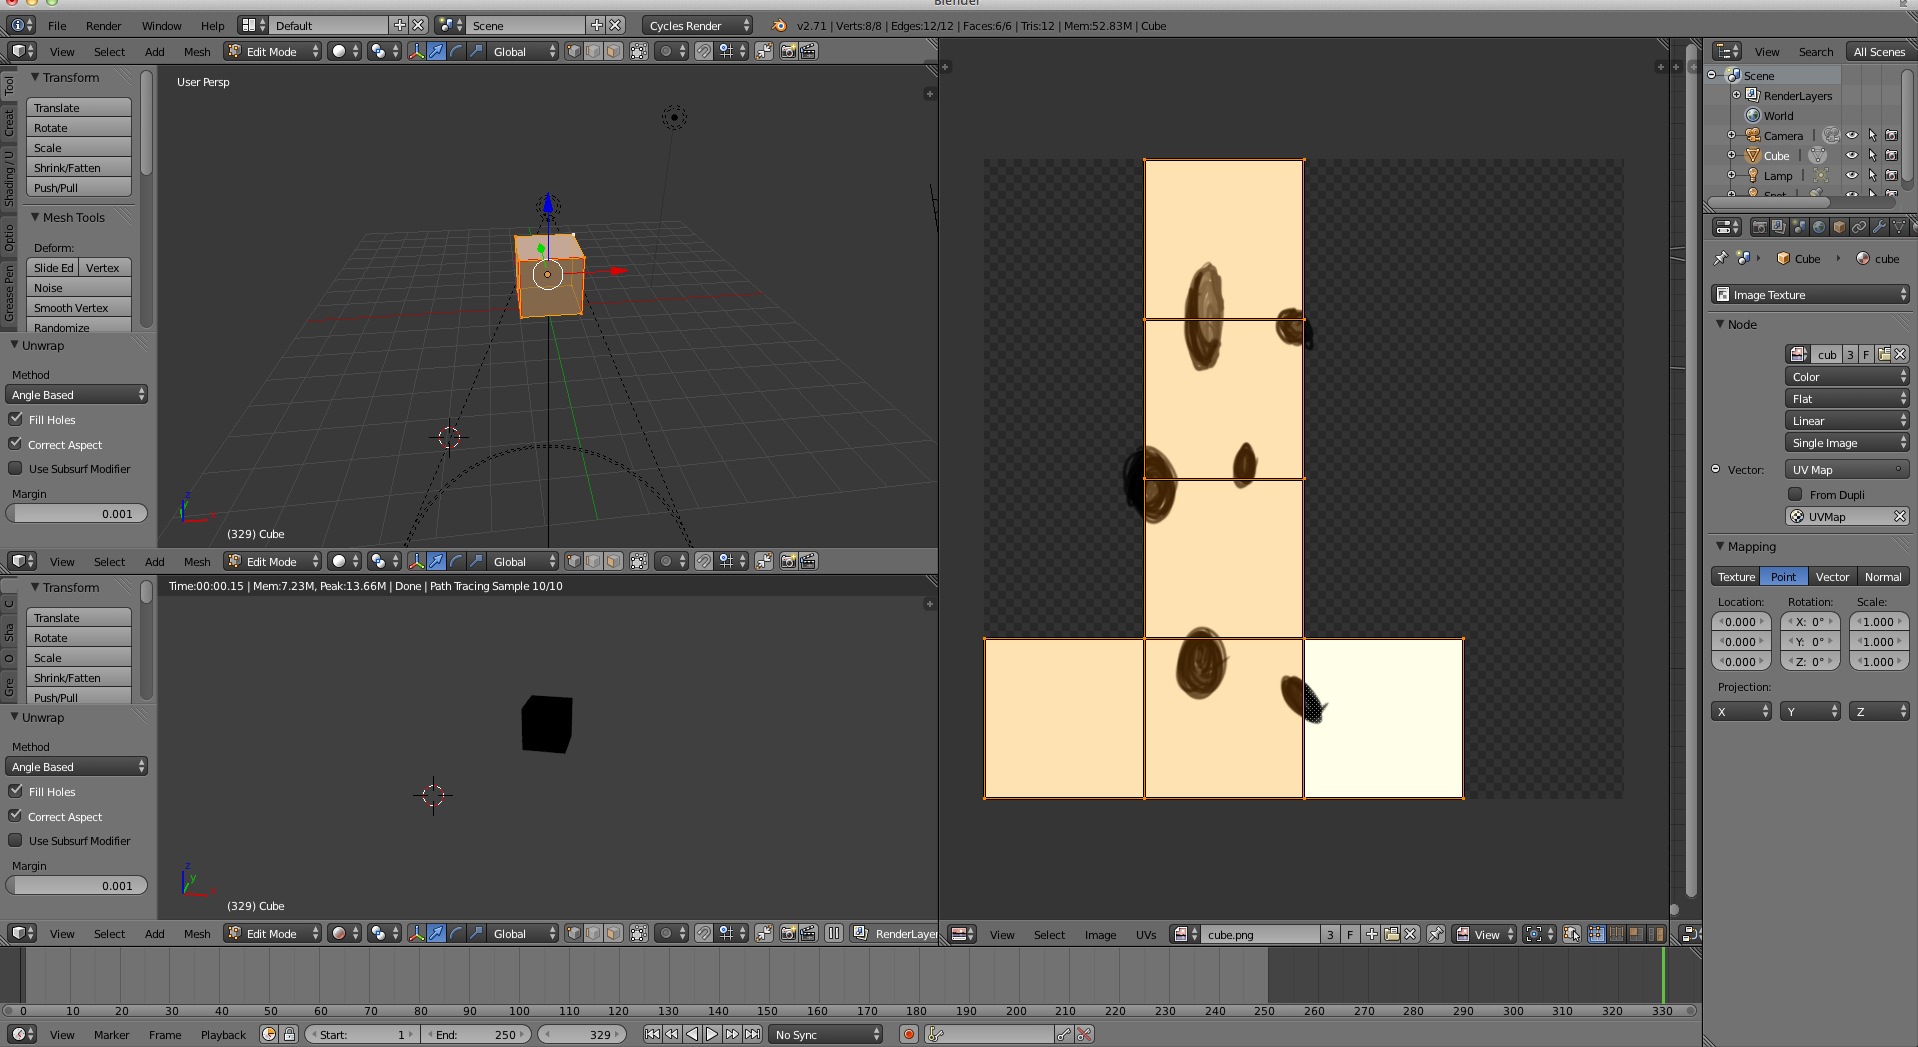
I am fairly new to Blender, and am trying basic tasks to find my way around the program. My most recent goal was to do a very basic uv unwrap and basic texture. I looked at 2 different tutorials to attempt this. Both gave similar advice for marking seams and unwrapping, and I was able to follow the action to that point. From there, however, I have gone astray. In one tutorial it mentioned creating an image texture node and linking that to the texture node, using an image-prepared in Photoshop- as the color for the object texture. I tried this and was unable to see the mapped texture, though nt nodes seemed to match the video’s pretty well.
So, I tried a different tutorial just in case there was some hidden step that the first failed to mention. This one was framed much the same way, except that instead of loading the image from the disk in the image texture node, they loaded it in the UV edit window, then unwrapped the object so the sections matched up with the prepared image. Again I got as far as the unwrapping, but then my results began to differ and I again failed to see the mapped texture.
I have included my main screens from Blender to show what my setup looks like.
-Also, these are the two tutorials I was endeavoring to follow.
I am sure that this is not a complex question, and that it is a small detail that has led me astray. Still, I am stumped. Any help I can get to cross this crucial bridge would be much appreciated!
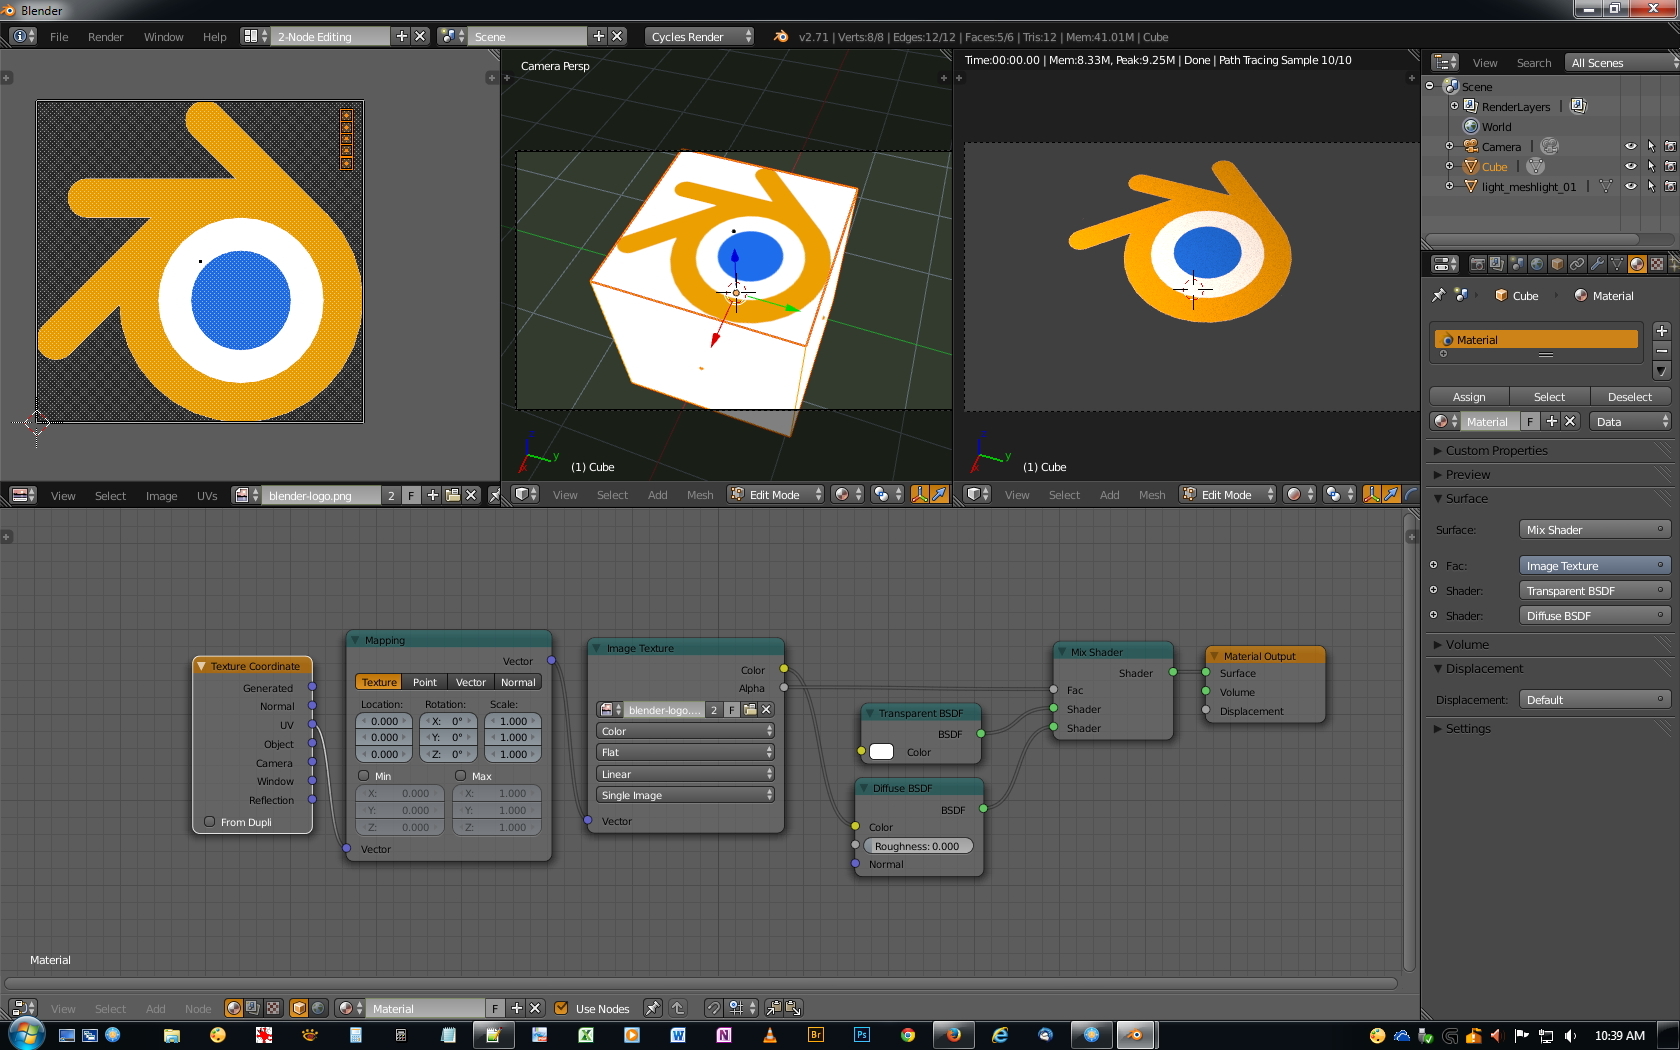
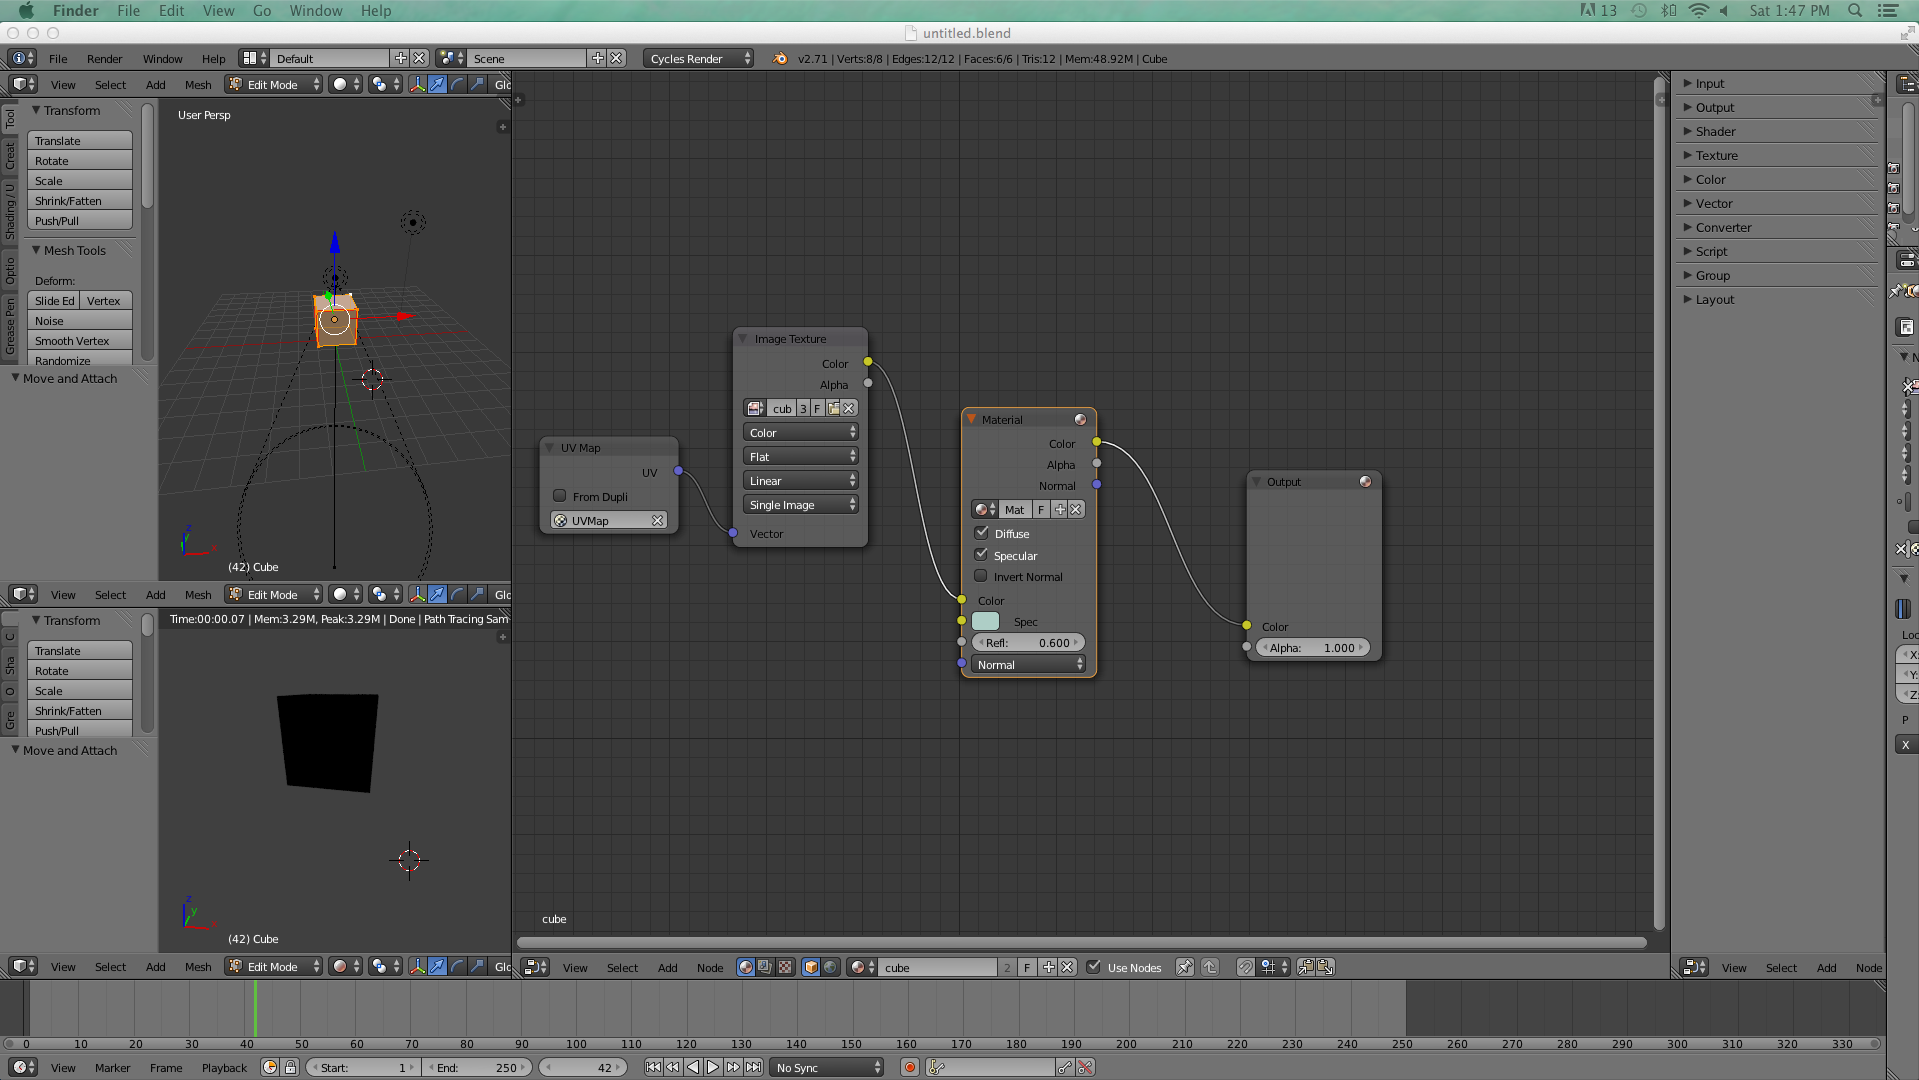
For some reason you’ve cropped your second image to cut out the rest of the blend er interface (please show all of it since you’ve cut off an important part of the screen)
In your top image you are using the cycles renderer.
In your bottom screen it looks like you are using a mix of some material nodes for the Blender Render engine and nodes for the cycles render engine (if you had not cropped your screenshot I would know for certain).
You need to use only cycles materials and nodes for the Cycles Renderer engine
You need to use only Blender Render materials and nodes for the Blender Render engine
Don’t mix them up, did you create a material and switch render engine half way through creating the material. Delete that material, ensure you are in cycles, then add a new material and set up its nodes.
Richard,
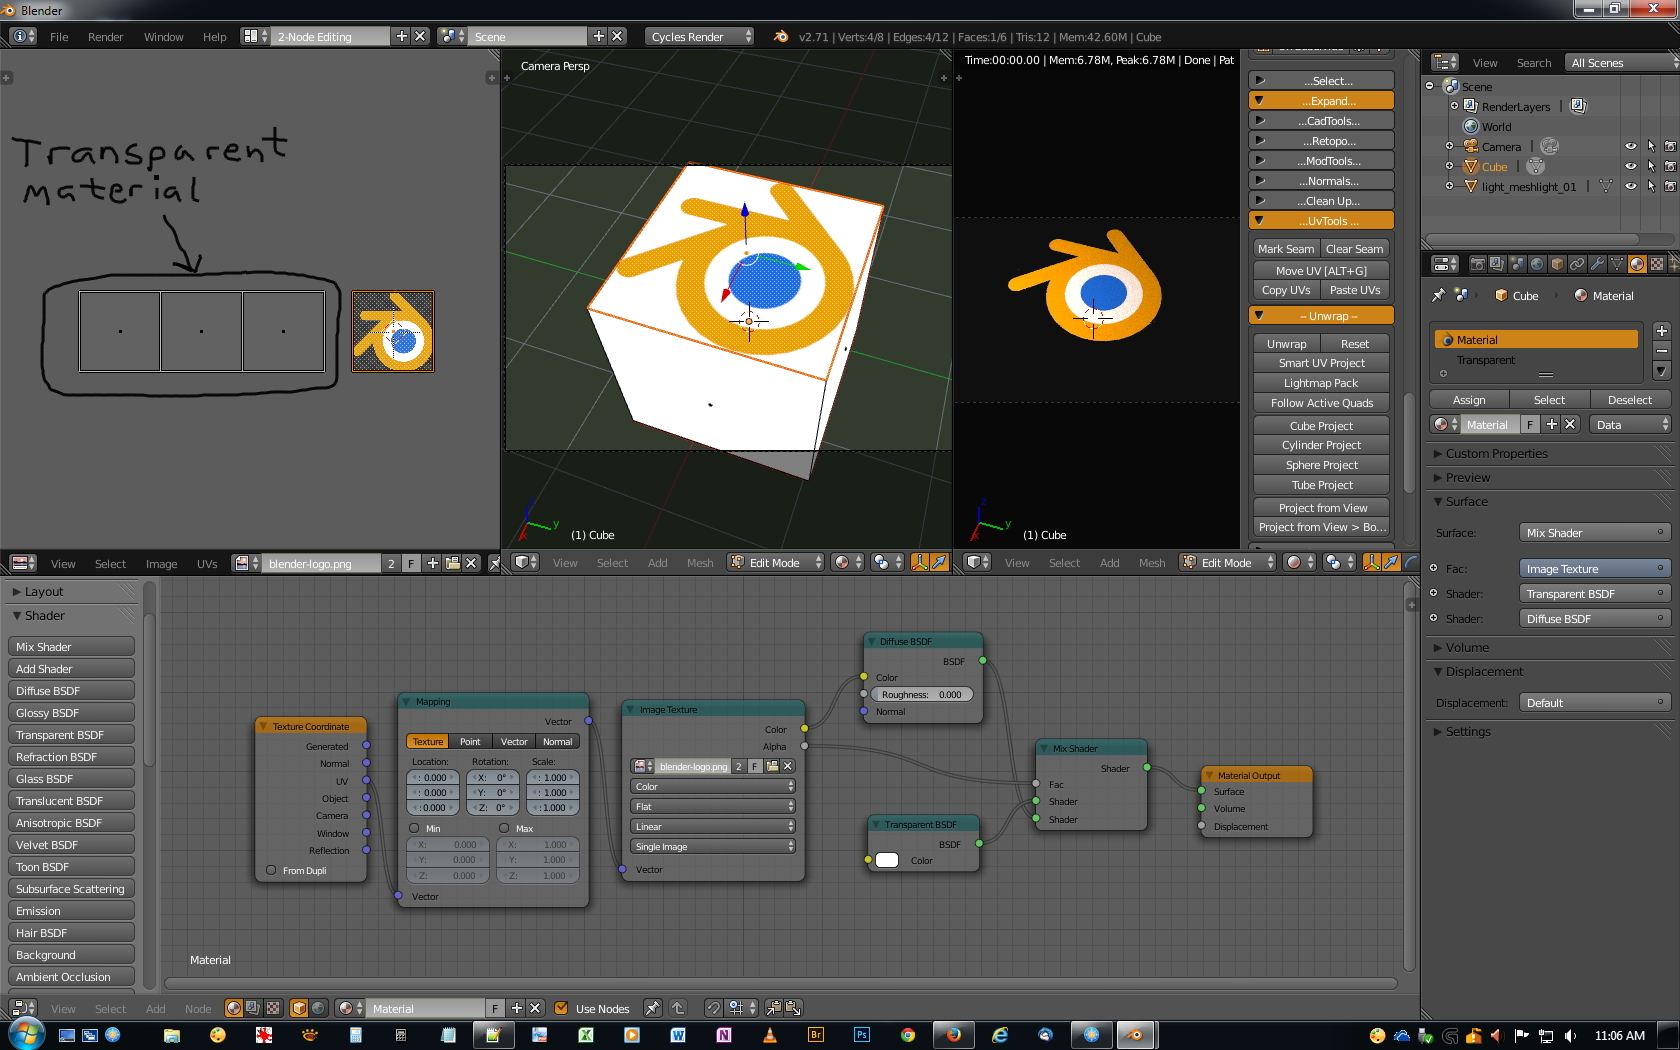
Here is the blend file and the texture I drew up. I was working in the Cycles renderer-though I don’t entirely know the difference between the two- on this example. I switched to this because I tried following the first tutorial which used the image texture node, and I was unable to find that in the Blender render pulldowns. I had begun by creating a material in Blender in the materials tab in the 3d viewer. So I just now tried deleting that one for consistency purposeds and creating a new one in Cycles. I still can’t get the image to show up.
I have attached the blend file, the texture, and a screenshot of the full uncropped window.
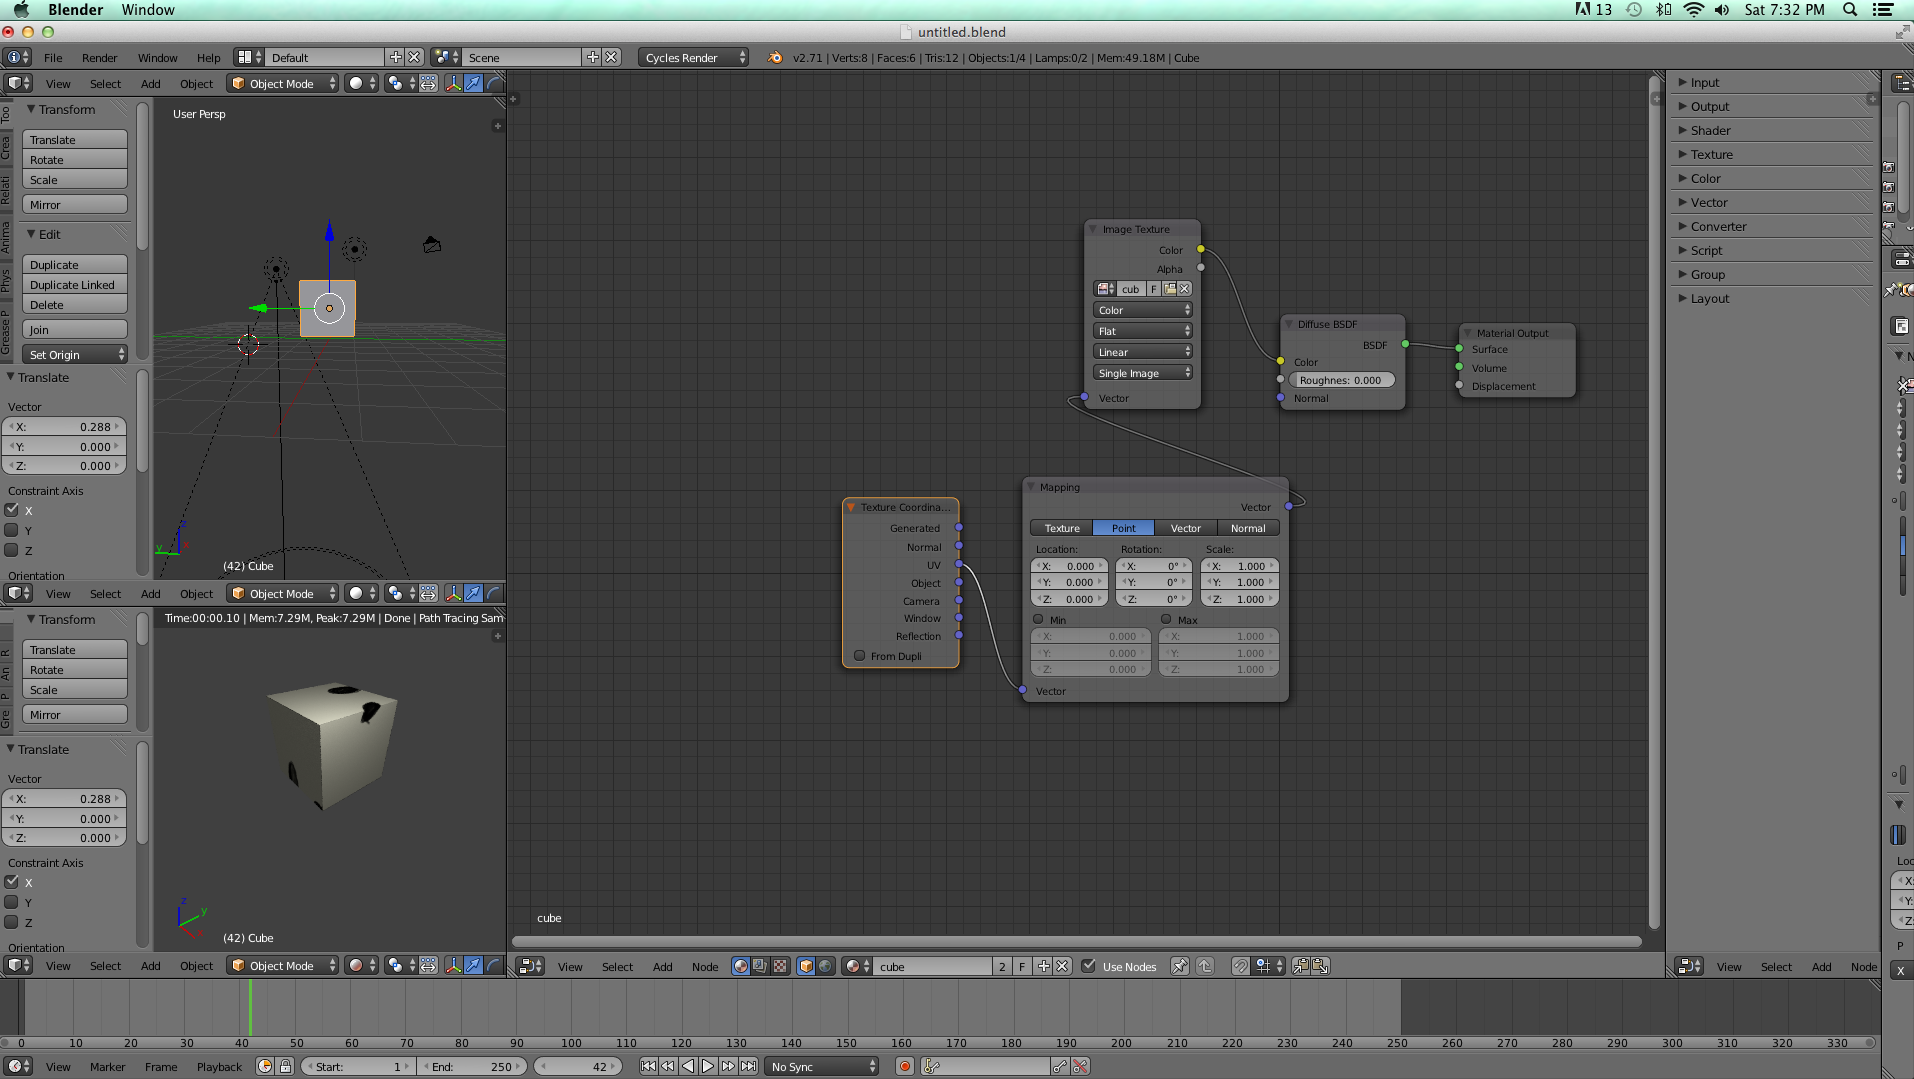
Thank you! That did the trick for me. So would that be the order for most every type of texturing situation? What kind of variations on this setup would commonly occur? Finally, is there a good description around for what the role of the individual sections is-, texture, shader, input, etc.? Again thank you very much for your help. This is what my final setup looked like.
One last question. I see that you used two materials to map the image onto a transparency. Thinking ahead, is that how one would also map out a normal texture to the object, while also maintaining an image texture?
The blender manual tells you what each node does. For tutorials look on the cgcookie site and search youtube for a gazillion videos
Thinking ahead, is that how one would also map out a normal texture to the object,
Normal maps connect to the shader Normal input (again search for the many tutorials)