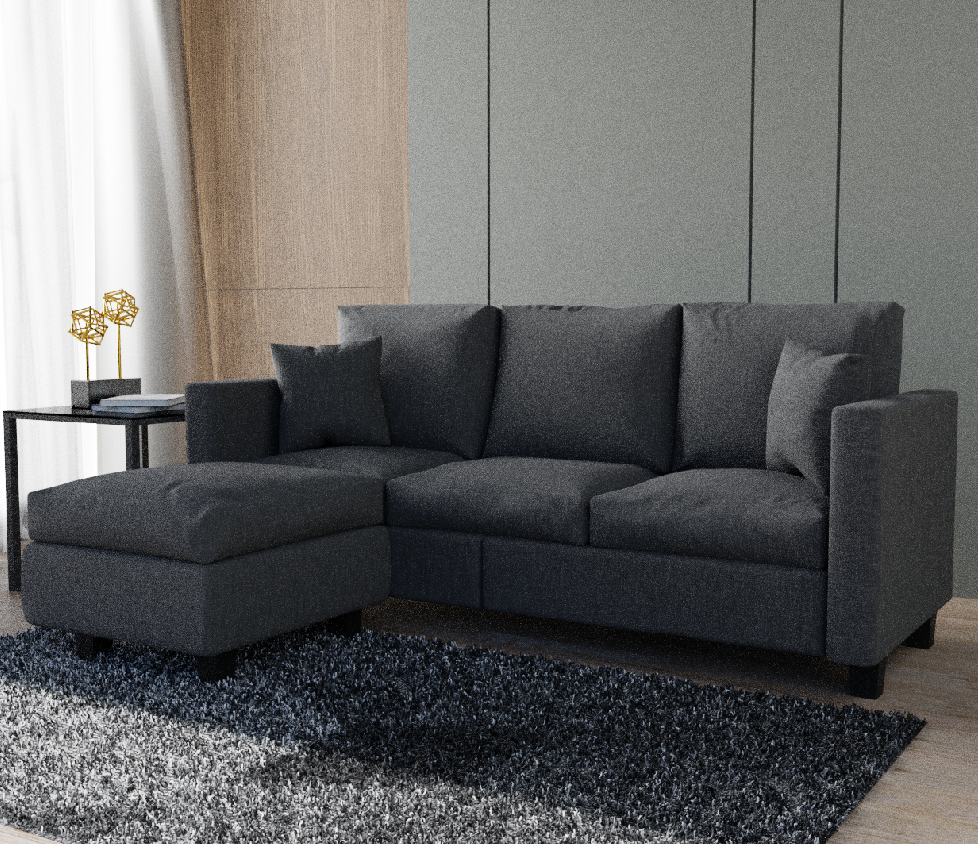
i have made this render in low sample. what feedback do i need to improve.
does my render look realistic?
8 Likes
Yeah, it’s pretty realistic but would’ve cleaned the noise from it in order to make it look even more realistic.
Also try zoom-out your camera a bit just to make your carpet to be seen all over the scene
4 Likes
Yeah it works !
Maybe some tweak on the final could be needed but it’s cool !
Now the next step is to focus on appeal, this image is cool but how can we make it more interesting ? Arch-viz artists manage to do that pretty well, it’s just some interiors but they manage to make it look really cool, like you really want to leave there or to buy that new couch…
How this could be achieved ?
2 Likes
Because it’s this noisy, it’s sort of hard to tell. Looks realistic enough as far as it goes; I like the folds on the sofa cushions.
Other things to improve: the composition. It looks cramped; pull the camera back to let that area “breathe”. And… add, well, “interest”. As sozap said, something should act to keep us here, instead of moving right on to the next sofa. That’ll be the hard part. ![]()
Good start though!
2 Likes
Cloth sim folds are nice, though personally slightly over exposed lighting and as previously mentioned general noise in your scene, is a distraction.
2 Likes
thank you so much for feedback.
i have rendered another one with 5000 samples.
but there are still some noises i think the curtain causes a lot of noise.


3 Likes
It looks a way better!
I don’t think the curtains could cause it. It may be that you forgot to turn on some option in Blender.
I have the similiar project with curtains and it has no noise in Cycles.
i dont really know about the options. can you please tell me about that
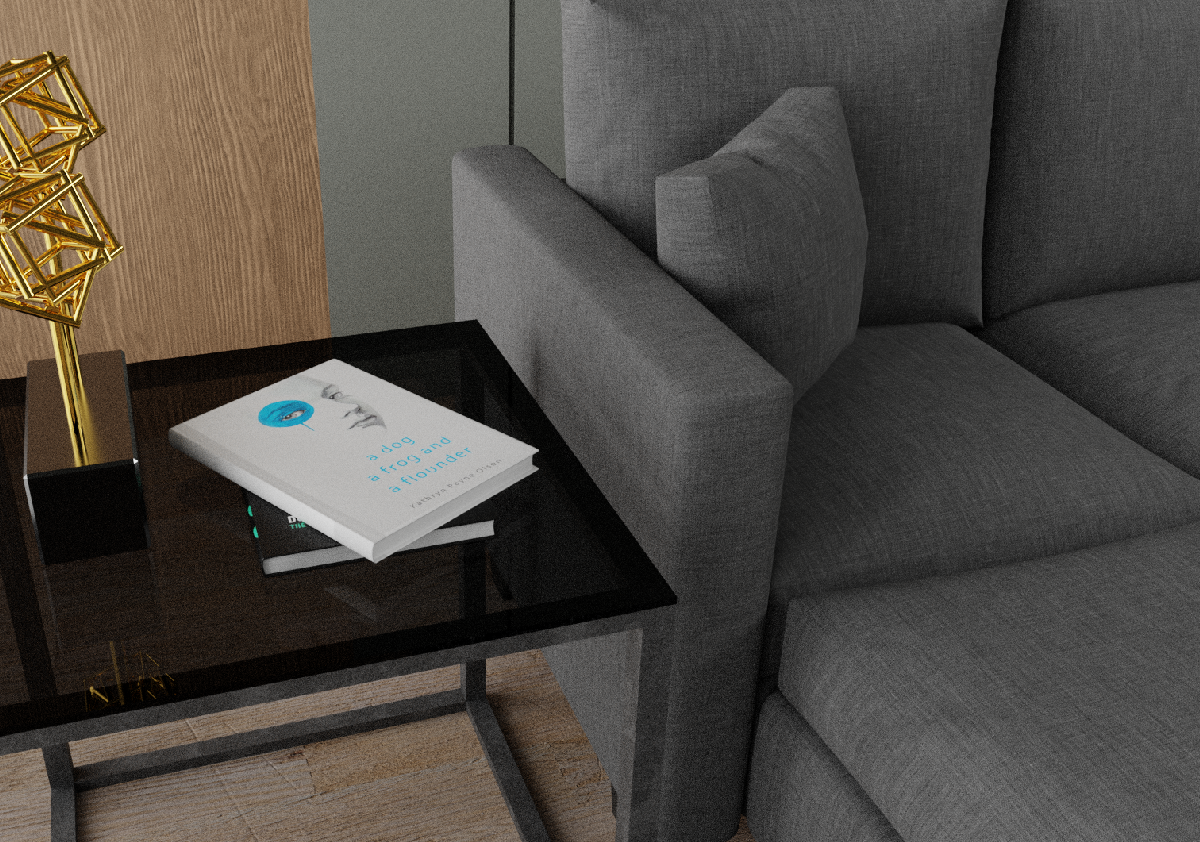
First of all, go to your render settings (see screenshot below) and make sure both of your Noise Threshold checkboxes in Viewport in Render tabs are turned off. The next step, you need to turn on the Denoise options, and in Denoiser field choose “OpenImageDenoise”.

The second thing you could is to add denoise node after your render is completed. For this one, you need to render your image at first, then go to Compositing tab.
- Check “Use Nodes” checkbox (shown below under number “1”). This will add default nodes such as Render Layers and Composite;
- In the bottom window you need to choose “Image Editor” (shown below under number “2”);
- The next step you need to choose “Render Result” in the dropdown menu (shown below under number “3”). This will show your render image.
- In the first window, press Shift+A and add “Denoise” node. Put it between Render Layers and Composite nodes;
- Connect Render Layers node to the Denoise node by putting “Noisy image” & “Image” together;
- Do the same, but now for Denoise and Composite nodes (image to image) ;
- Now, in the bottom window, you can click on “image” tab and choose “Save As” and save the final result as a image.

P.S. The Compositing tab is a very useful feature in Blender. That means, you can add nodes to your final render without rendering it again.
3 Likes
thank you very much Sergey.![]()
1 Like
You’re welcome!
1 Like