Hello, I am slightly new to blender, been working with it for about a month now.
I have a project containing about 100 obj files, each with their own UV map and some images that I will apply to the objects.
The problem is the objects are inverted along the x-axis so I need to flip them to the correct view.
My workflow so far has been:
- Duplicate object.
- mirror along x-axis.
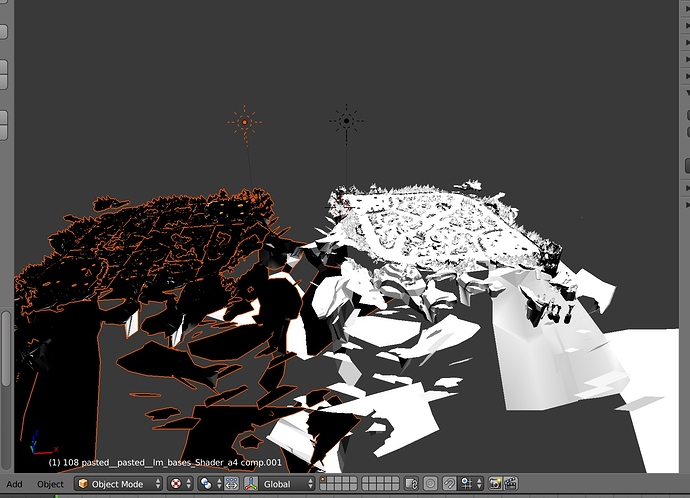
Up until this step everything seems fine. Except that whenever I export the file, it looks like the textures are partially lost or just incorrect/inverted on the mirrored object. Here is an image, the black one is the incorrect mirrored version:
Could anyone help me correctly flip the original object while keeping the UV maps and textures intact? Here is a link to a .blend file of the project on my google drive account. Any help or advice is much appreciated, Thank you!
https://drive.google.com/file/d/0B7GJ8LTBPlt5cTVPcDRyVm5KZ00/view?usp=sharing
Hi trickypatty,
I can easily see what going wrong.
In short the normals a flipping when you mirror the objects.
Unfortunately your objects seem to fragmented (did you apply an edge split?) so recalculating normal’s isn’t working
My solution is to use the mirror modifier rather than the mirror function.
If you want a true mirror then you can leave it without applying. The mirrored version will then update based on changes to the other AND you will have 100 objects not 200. A draw back to this is each object will need a common origin to mirror around. You can achieve this by selecting all objects, positioning the 3D cursor at the target position and hitting CTRL+SHIFT+ALT+C and selecting origin to 3D cursor.
Alternatively you can apply the mirror modifier, select the mirrored objects in Edit Mode and hit CTRL+P then ‘selection’ to seperate the objects.
Because you have so many objects, to apply a mirror modifier to all 100+: First apply a mirror modifier to one object. Select all objects, selecting the object with the mirror modifier last so that it is the active object. Hit CTRL+L and then ‘modifier’ to apply the active objects modifiers to all of the selected objects.
