I’ve got two render layers - one is a city, the other, fog. I’m overlaying the fog over the city, but applying a depth of field only over the city. In the fog render, I’ve got the city masked out:
The problem that I can’t figure out - how would I blur or blend out the edge on this mask?
Make 2 masks. The first is a mask of the large area. apply a blur node and create a grey mask (semi-transparency). Next apply an erode node to the original size mask to make the solid interior for the second mask. Use a Math node to add the two together with maximum for the function.
ps. There is a double edged mask that will be available in 2.62. Wait a week or download the release candidate. I’m not sure that this is anything much more than an automated version of what I talked about above. The difference will be that the two edges can be offset with the new mask. (I suppose that could be done with a displacement or translate node). I’m no expert but there you go.
I understand what you mean by a semi-transparent grey mask, but have no idea how to do it. I’m very new to the compositor, and to compositing, period.
As far as the new matte node, I downloaded the latest build, and it does do what it promises - but I think it’s still glitchy - none of the parameters change anything and the result leaves strange artifacts.
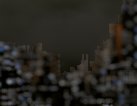
edit: the compression is too high to see them - but they are visible in normal resolution - see those two lines on the edge of the building?
If you are blurring just a small amount of edge blurring you can pass your mask (make sure with a viewer you have a pure black and white mask) through a blur node. It will automatically blur (basically smearing out the edge by the specified amount of pixels) to a semitransparent grey. The description I gave previously is used when you do a lot of blurring (the number of pixels is a similar size to your mask) and you want to preserve a solid white center using 2 (or more) mattes. Blurring gives a smooth function from center to edge depending on the type of blur you select in the node. You can left mouse button in the viewer to see the white values of the rolloff from 1.0 to 0 at the edge.
For manual “greying” you can just do that with a math function and take a black and white mask and put it through a multiply by some value (e.g. 0.5). If you are generating smoke in blender (for your fog) you should be getting alpha values that are already providing some level of transparency.
I understand what you mean about black and white masks - but Blender seems to give me the image with already the map applied with the background being an alpha channel - and I don’t know how to blur that mask and re-apply that to the image.