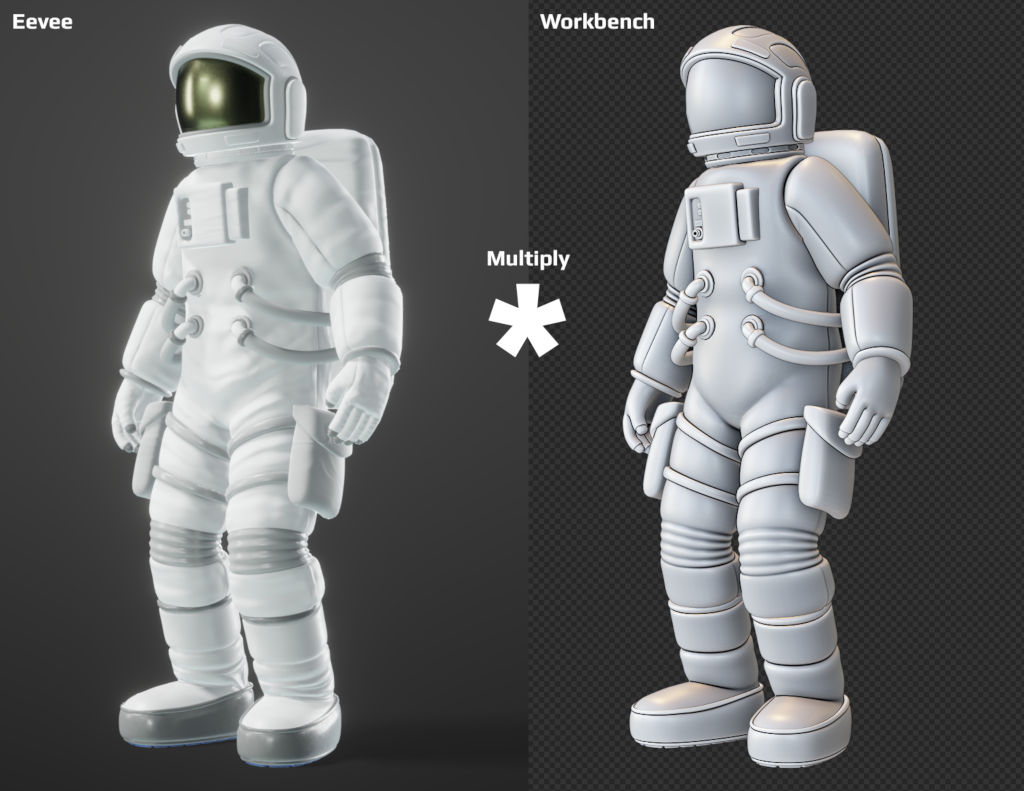
The passes are multiplied and tweaked a bit in compositor nodes and the Eevee pass is quite bright to compensate the Workbench pass. Workbench pass uses matcaps and heavy cavity shading with both viewport and world enabled.
View layer render engine is currently tied to scene but you can have multiple linked scenes with their corresponding rendering engines as input layers in compositing nodes.
In this example I simply created a new linked copy of my scene and changed and tuned it for Workbench and combined both scenes in main compositor so everything renders at once.
Being new to Blender I dIdn’t notice that F12 basically re-renders all Render Layers used in Compositing, that’s pretty cool!
I was looking for a way to use the Workbench’s cavity overlay with my EEVEE renders (as a kind of fake bevel effect), and this setup makes me do that. For that I’m setting the workbench settings to 0.5/0.5/0.5 flat grey shading (single color) and turn on the cavity overlay on top of that. That layer can now be put over the original EEVEE rendering (using the Mix node set to “Overlay”).