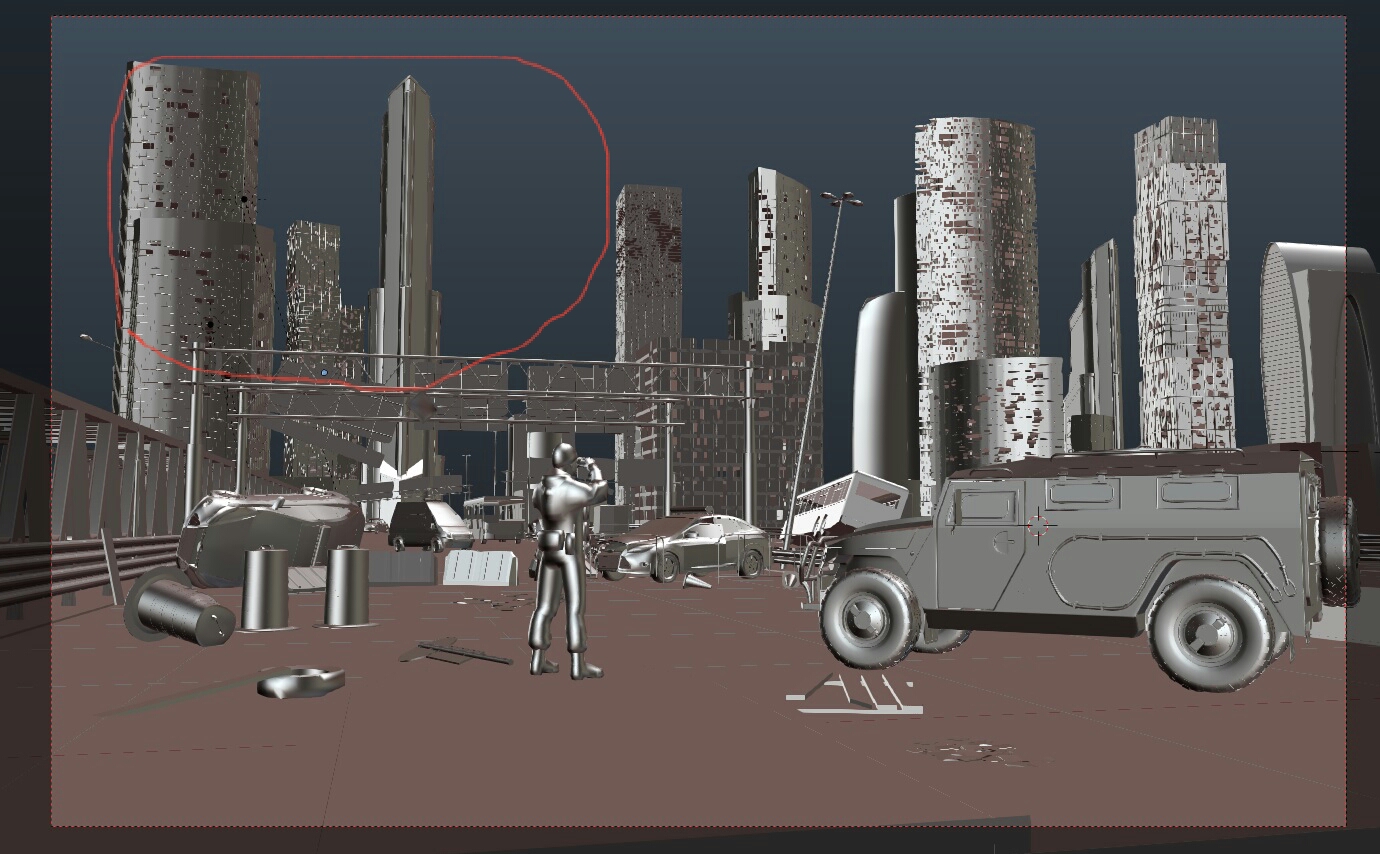
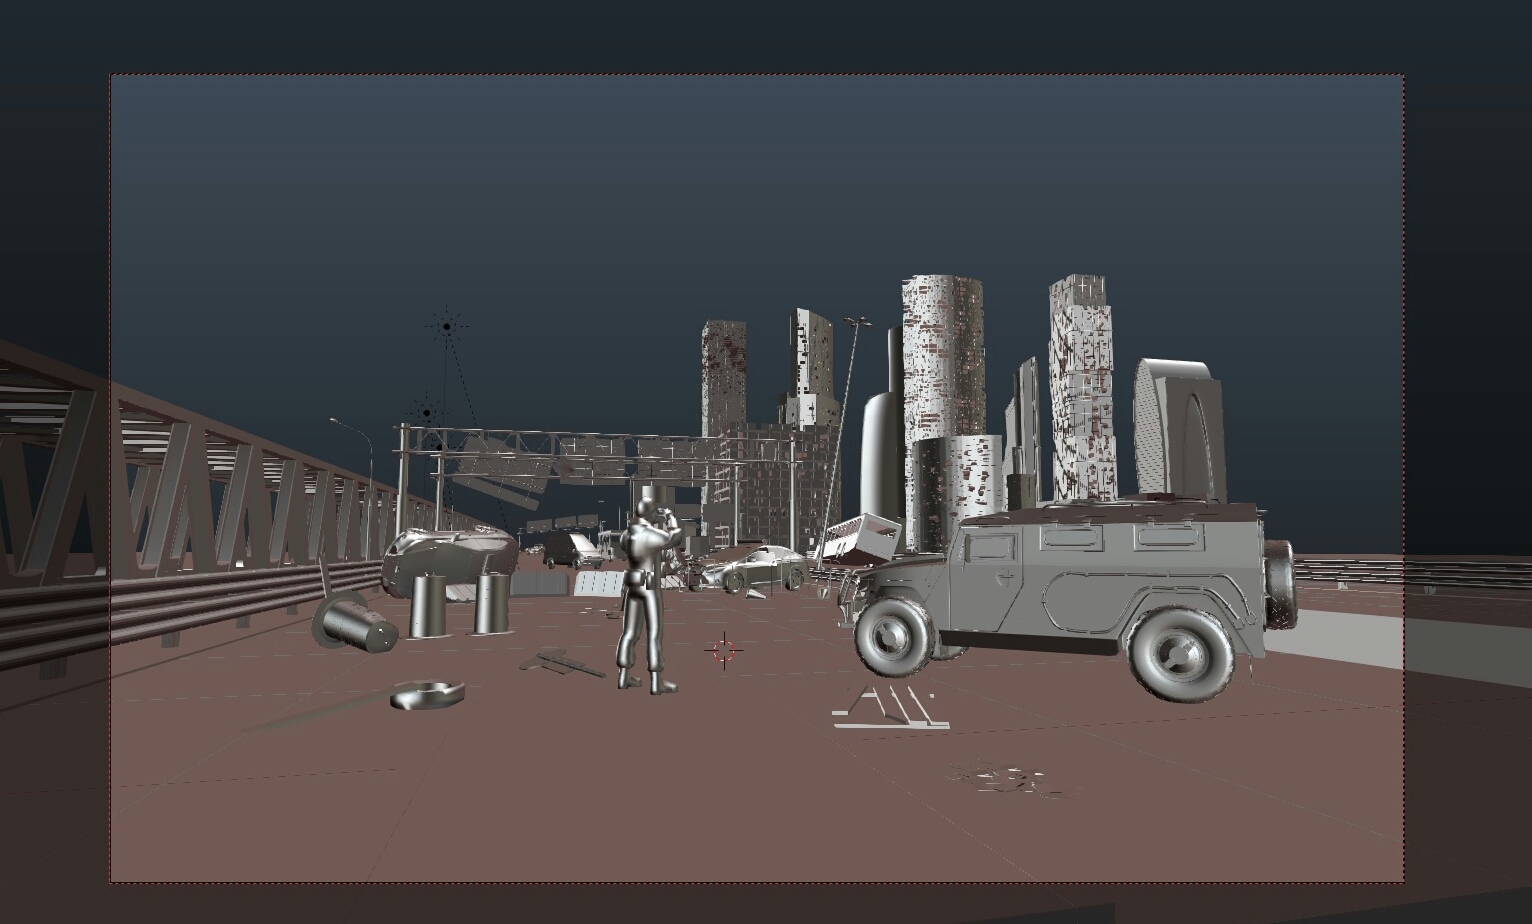
Clean render:

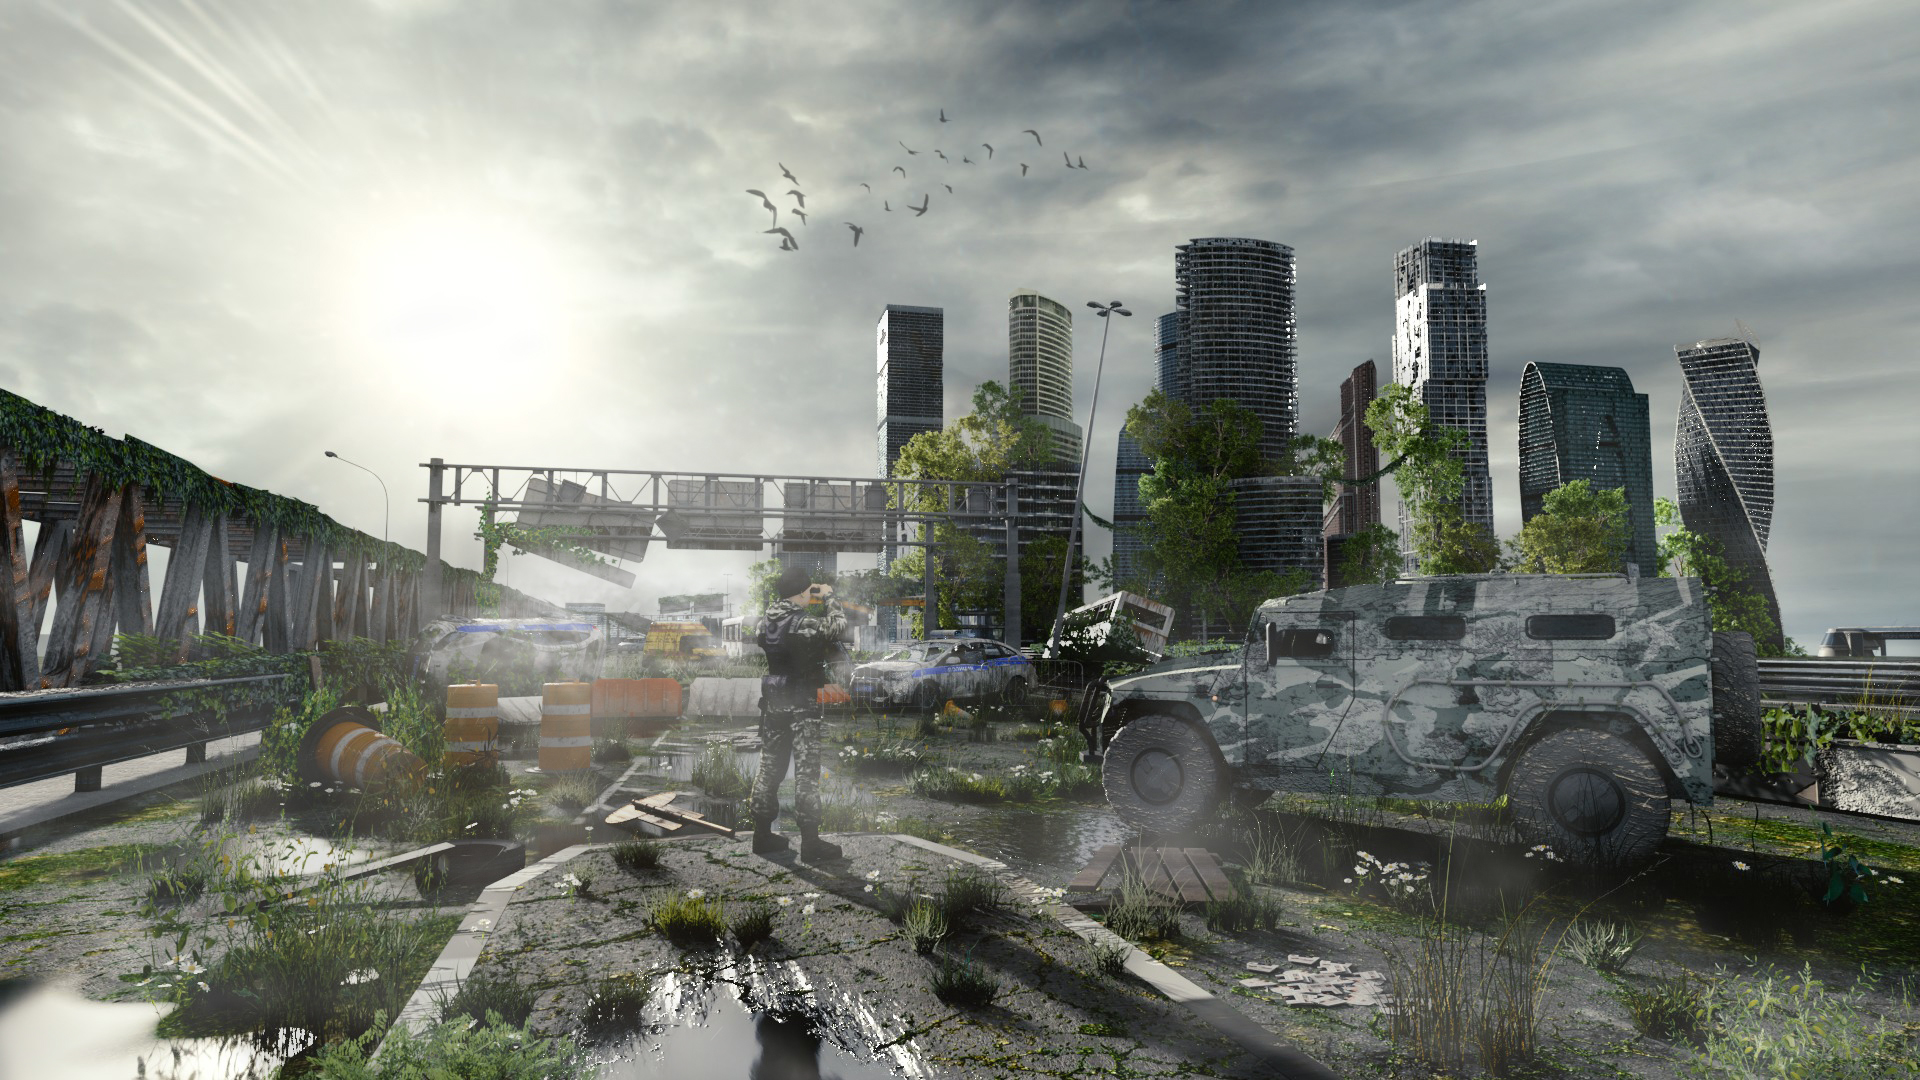
Post processing in photoshop:

That’s was made for one challenge on render.ru site.
Thats dope man !
Please note that all my Criticism is on a very high level.
The Colors are good and the Modeling is also very good. But i sew a Problem. The Horizon. You can just see where it ends and the Skyline dosnt help there. Something is missing. Maybe a bright or something like that.
I agree, really cool render! Lots of complex details. The horizon stuck out to me as well, it needs something. Perhaps some level of atmosphere, fog, something to fill to space without looking like it’s trying to be hidden.
The Photoshop pass adds this, but it still looks off at the far end of the highway.
@Mr_Science
@Discopears Thanks for your constructive critique, that’s really cheers me.About the horizon, you’re meaning, that I need to do something like that?
Yes. The Main Problem is that you can just see where the map ends. Thats partly because your Skyline is very small. If you want to go this small Skyline way, i would suggest that you take a look at Citys like Den Haag or Vancouver and look why those small Skylines look so good.
I think some Mountains would do the Trick.
Actually I tried to follow the original
Yeah but lets take a look at the scene or the picture.
The Clouds show where the Sky is and the Brighter parts show where the Horizon Line is.
Also the Buildings are not as far apart as in your Render.
And just Take a look at the Photo. The Focal Leinght and sensor size are really different than in you Render. Change them a bit so the scene looks bigger.
Place the Buildings closer together and change the Camera settings.
i think the problem is that you didnt add an atmosphyr , the more the object are far the more misty thy become,
i like the details by the way, alot ,
but something about the lighting makes it off,
did you use HDRI imgs or did you just placed that gackground as a plane ?
Thanks for your feedback.I combined two images, one for lighting and shadows(I tried to use Greg Zaal’s method)
will alot of people now use hdri imgs becuse it fill the whole scene with a direct light and an environment light .
thy say its more detaild
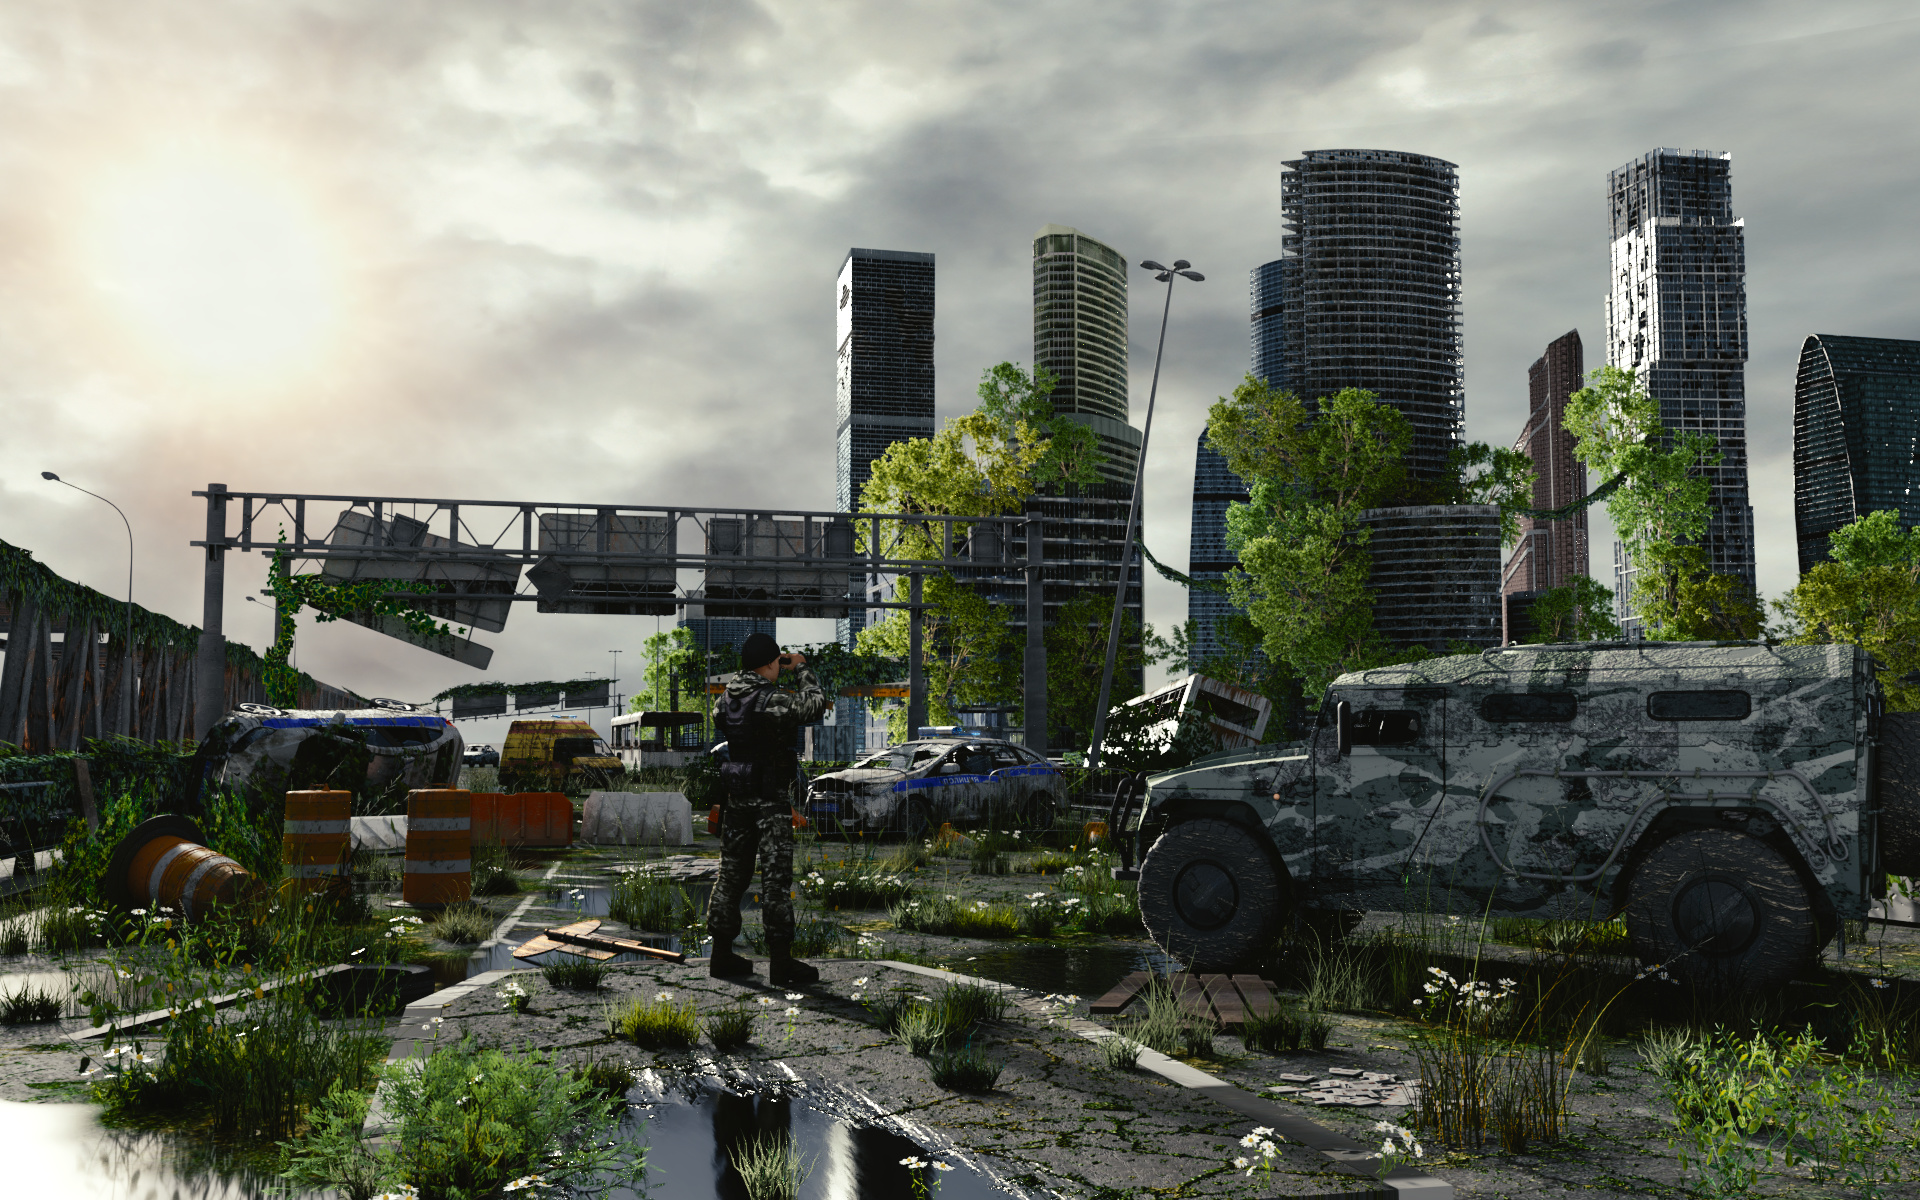
Much better. The Scene looks way bigger and more Epic. Give that a Render !
Get it:
What else can you advice to add?
Its important how you see it. I think it looks way better.
So now lets talk about the Horizon. Your scene was build for a different FL and Sensor size so there are some spots you need to improve.
I think that the Skyline has now reached the point where you dont need to improve that. The only two porblems i see are in the two red cricels. The one at the Highway looks a bit empty but if you dont know what to put there you can leave it as it is.
The Red Circel on the right side shows that you need to add something there. Maybe a Landscape or a river or you just block the view with a car or something like that. Other than that. It looks pretty good !
Also, i think the Render looks better than the Photoshop version in this case.
This has really improved from the first render. One thing that kinda seems off to me though, is the fog really close to the camera. Like what Mr_science said, The render actually looks better. I think some composition with blender’s default compositor will result in a much better looking scene.
Hi,have you rendered with volumetric scatter?as said before.mist haze fog to the scene bring more depth and a sence of scale to the scene.
now it seems to me, that in your last post , you just added some mist/light rays in post.thats fine,but here it gives the opposite effect what you want (at least i would want).because now ,you have some fog effect at the front of your scene,but the backround with the buildings ,have not depth scatter effect.
sure , it could be a artistic choice,but if you go for realism,then depth with atmopheric haze ,gives you are better result.
you dont need very high density for this.if would start with 0.01 - 0.02 scatter density.and anisotropy 0.7-0.8(this gives the scatter are more atmospheric direction)you can use of course anisotropy of 0 for a more foggy look.for haze i would try a color of 0.35.and set the for volumetric rendering to 5 in the render tab.
you should make a simple cube object and scale it untill your whole scene fit in it,then give the cube a new material,adding a scatter shader to the material (of course connect to the volume input) and nothing into the surface.
this cube method, works better for lights in your scene,as if it would do, to the world settings.
No, I’m used simple fog brushes in photoshop, because volumetric are eating my computer))
It did improve a lot !
It looks really good and the horizon problem is gone. So good job !