Ok, I lied. Did you paint that in Gimp or Blender, the curb, and do you have a tablet yet. Damn that is looking pretty decent, guy. You’re moving right along.
Well it was just something I wanted to try out after you said something about it.
It will not be flat planes for the final animation.
I do have a small tablet but I am not that proficient with it.
I used it a bit in GIMP to paint the textures and Blender for sculpting the curb.
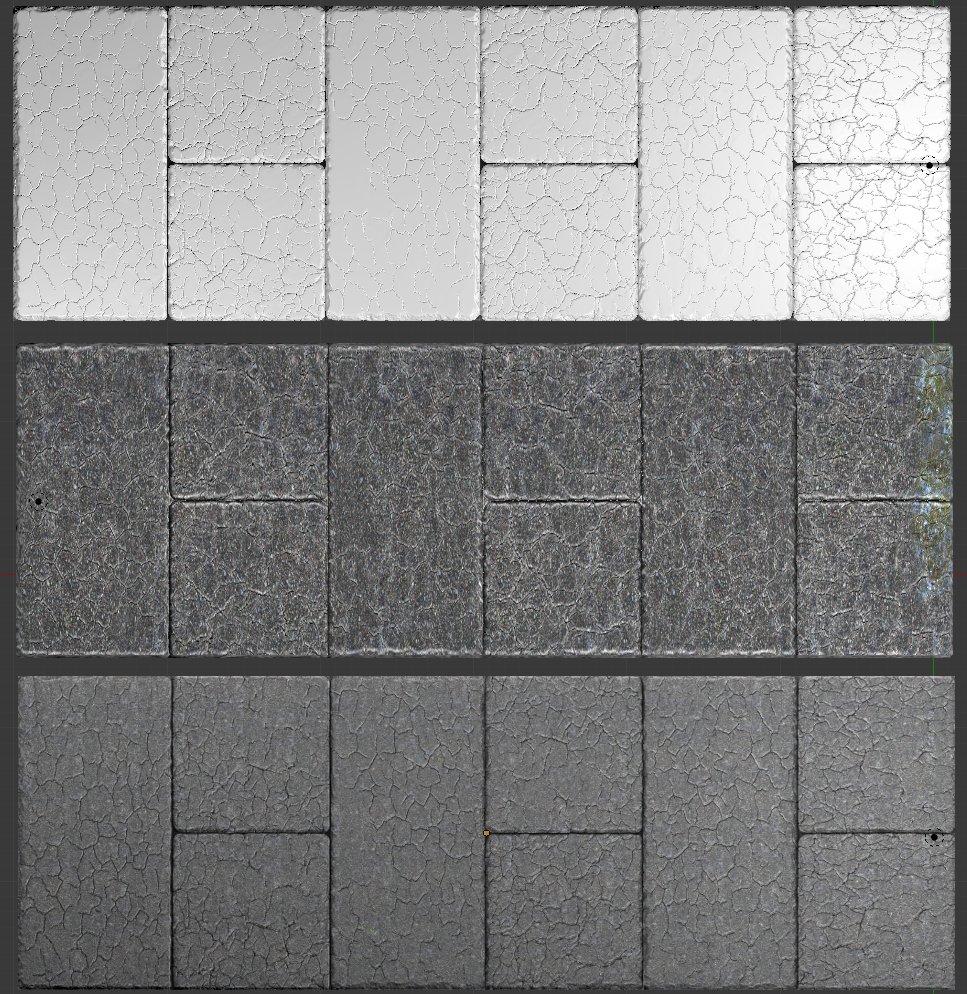
The flat image is five planes left to right then rendered in Blender.
Starting on the next piece as soon as I get a beer.
Not as much as I would have like to have gotten done tonight but progress none the less.
I am trying to follow the prescribed workflow without use of the series at this point and it is slowing me down a bit.
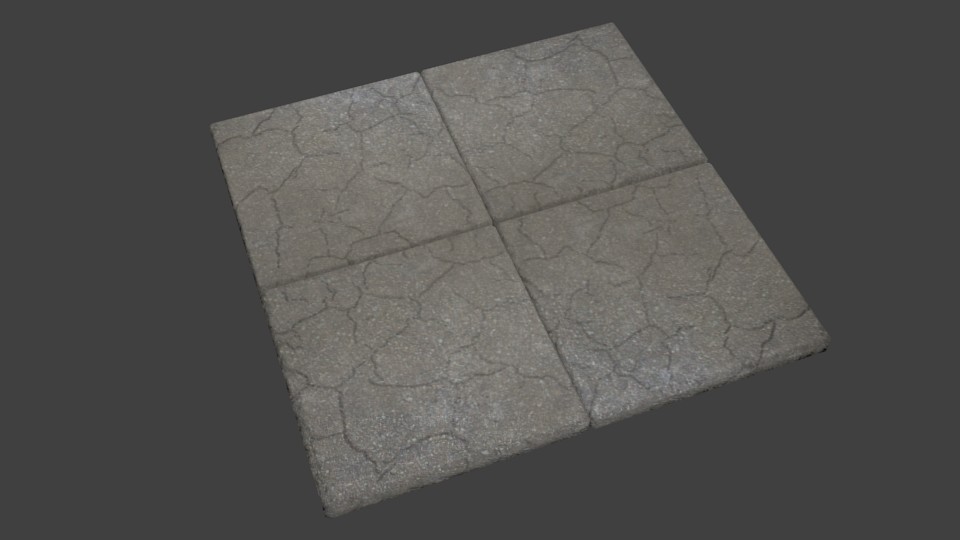
Anyway, these are the first pass on the pavers. I spend some time roughing them up tomorrow.
Nice pavers, Anthony  Is this a sculpted version or is this already the baked one?
These have already been baked. I just finished sculpting the rectangular paver and am about to bake it out.

Pretty much settled on the second paver pattern.
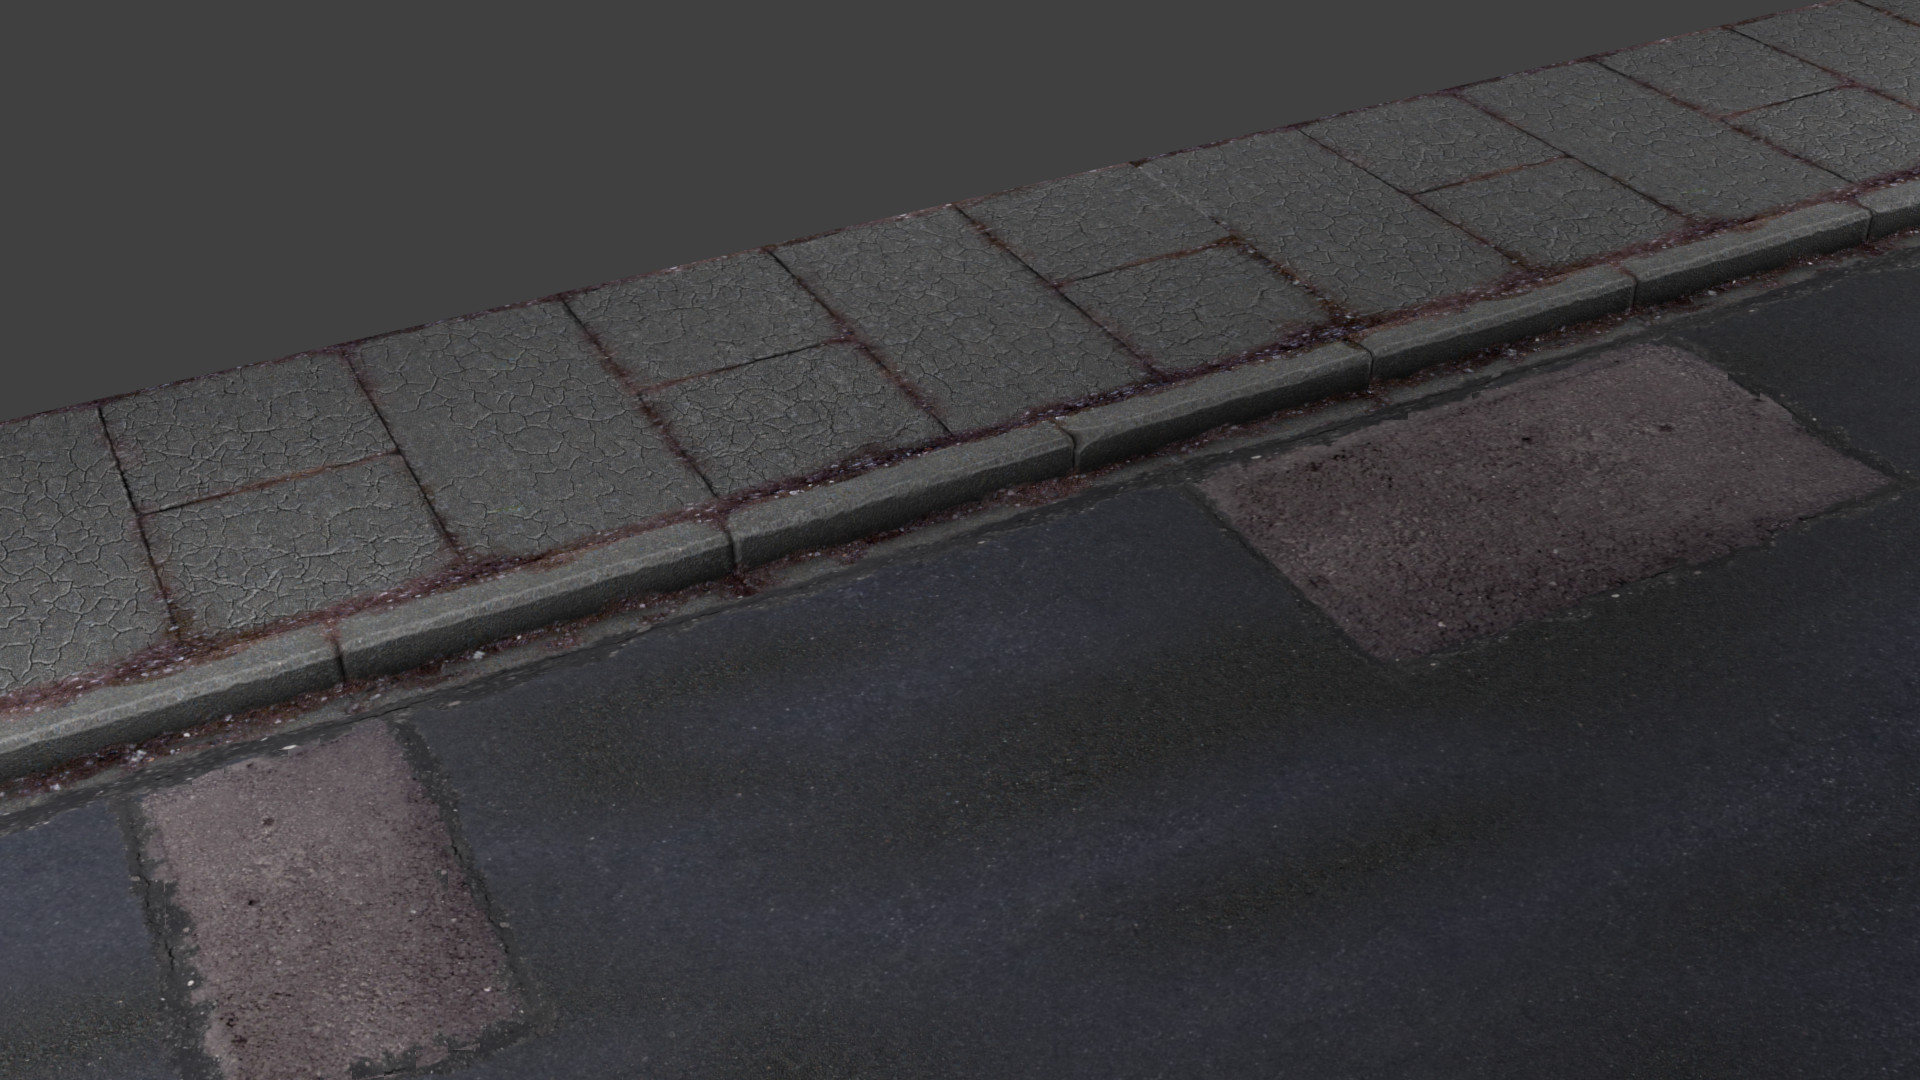
Here is a full bake pass with some dirt painted in to match the curbs.
Going to require a bit more clean up but I am digging the direction it is heading.

Looking good Anthony.
I’m wondering about the resolution of these textures. The textures look a little blurry and fragmented. Just wondering.
Keep it coming.
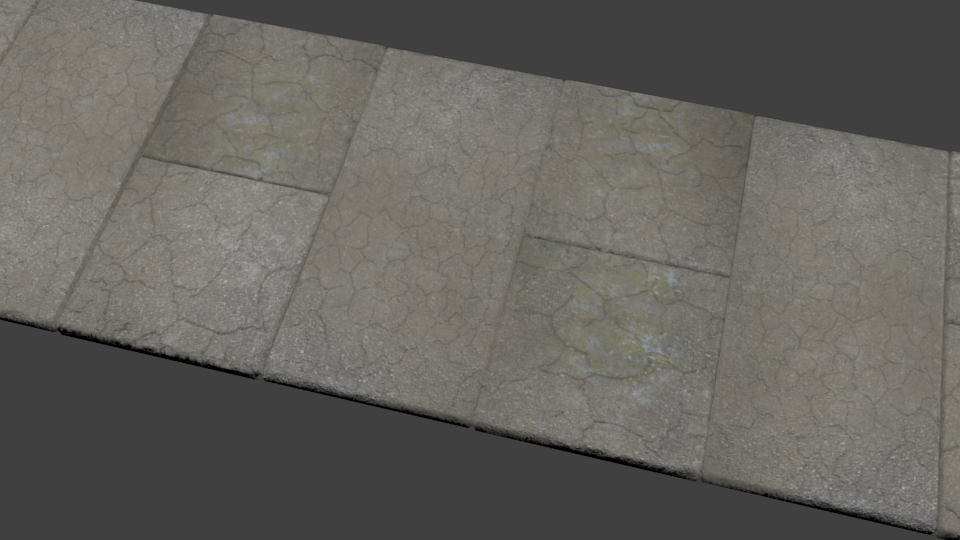
Textures for the base material are rendered out at 1024x1024 on the center objects the 2048x512 for the flat plane.
I am guessing you are referring mainly to the dirt pass on the right side? That was me forgetting to scale down the dirt texture.
As for the rest of the base material I think I used the wrong concrete texture, I’ll have to verify.
I did not follow the video for this set so I could see if I had picked up the work flow correctly from the previous two assets.
That means I probably selected all the wrong textures from the resources provided.
I hope that makes some sort of sense, been at the drink a bit this evening. ![]()
Hey, big guy forget the Budweiser right now and concentrate on what’s at hand. Send me all you have laying around in care of ghost, Shipyard, Virginia. I will handle it like it’s my own. ‘It will be safe with me’.
Man you’re throwing texture sizes around like the boss on some damn oil rig. See you’re already smarter then our former governor and shooting for the big boy now. Hang in there Anthony. With anything like this they’ll be down times. Just hang in there guy. Looking Good!
Having a problem baking.
It started in the same session I had already run a few bakes in.
select object to bake from>select object to bake to>create new image for bake to live on>press bake>watch image delete itself
or
select object to bake from>select object to bake to>create new image for bake to live on>press bake>watch bake render white while overwriting the assigned material to be baked
any thought?
Yeah go back to 2.69 which is my SOP for any problem.
I was being an idiot! ![]()
Somehow the plane I was baking to had lost it’s UVs???
Anyway I am much happier with the resulting bake progression than I was before.
Now to make it dirty and move on finally.
Got the dirt layer in then went back and reworked the dirt for the curbs to bring all together a bit more.

I think I may be starting to get the hang of this.
The animation is the same as before, just needed to see the materials in motion.
I was starting to second guess some of the detail decisions I had made.
The baking process continues to mystify me, when you end up finalizing the pavers, I would welcome taking a look at your node tree.
So far the only things I have seen tutorial wise on cycles baking is your basic cube and plane with a 1 material baking example.
I may be wrong, but it seems like your incorporating multiple maps (spec, reflection, ect) adding dirt ect… not that I am asking you to do it, but I would love to see a tutorial that really shows this process from start to end with someone using complex material setups such as your using.
Are you then baking this from highpoly to lowpoy?
To your first point, I am not using Cycles so there is not a Node Tree to share.
This leads to your second to which the answer is yes I am using three materials. (Diffuse, Normal, Speculatity)
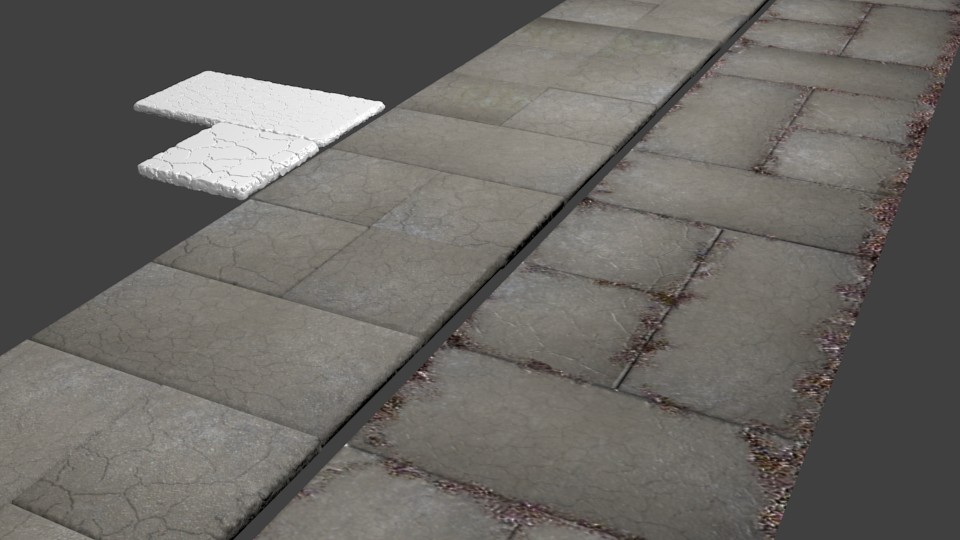
Yes, high to low:
The top pavers are a combination of displacement mapping and sculpting.
The center pavers are a single cube with beveled edges.
The bottom pavers is just a UV mapped plane.
Most of the magic happens in GIMP.
Attachments
Harley, the man is not using Cycles yet. Evidently the purpose of the course is to introduce him to several render methods. And, yes that even includes the old out of date so yesterday Blender Internal or a scanline renderer. Which will probably be around for years in one form or the other. And, even with that inherent speed for animation they have him baking. So I’m not knocking you but simply trying to follow along myself. And, just as confused even through I might be on the same page.
And, if I’m not mistaken they have him texturing from front to back. Anthony does he have you texturing with respect to the distance from the camera? Or, maybe I should have said texturing and baking with respect to the camera. Anyway the Gimp work looks great. You’re on to something here.
I am not sure if it is to teach BI as a render method so much as it is to illustrate how it can be used for fast realtime previewing as you work up to the point of your final render or animation. The baking is because the materials will be converted to cycles for the final run. As for your question about LoD, I just don’t know yet. I’m sure there will be some extra detail for the camera to chew on up close but I don’t really know what that will be yet or how it will be implemented.
Finally got some work done on the road textures.
Still need to rough up the asphalt a bit more and make the mesh a bit denser so I have a bit more control over the vertex color blending that is happening but I really like how the decals for the patches came out.