I am preparing my next work for my website (Lisbon on pixelstravel.com), and since I will be integrating a locomotive in the final scene, I might as well make it in higher detail than usual. (my work for the website is usually done in a few hours → like this 2D logo that started with a DB185 and I had to get rid of the door so I can integrate the name of the future channel 5210:)
So my first ever high detail locomotive will be:
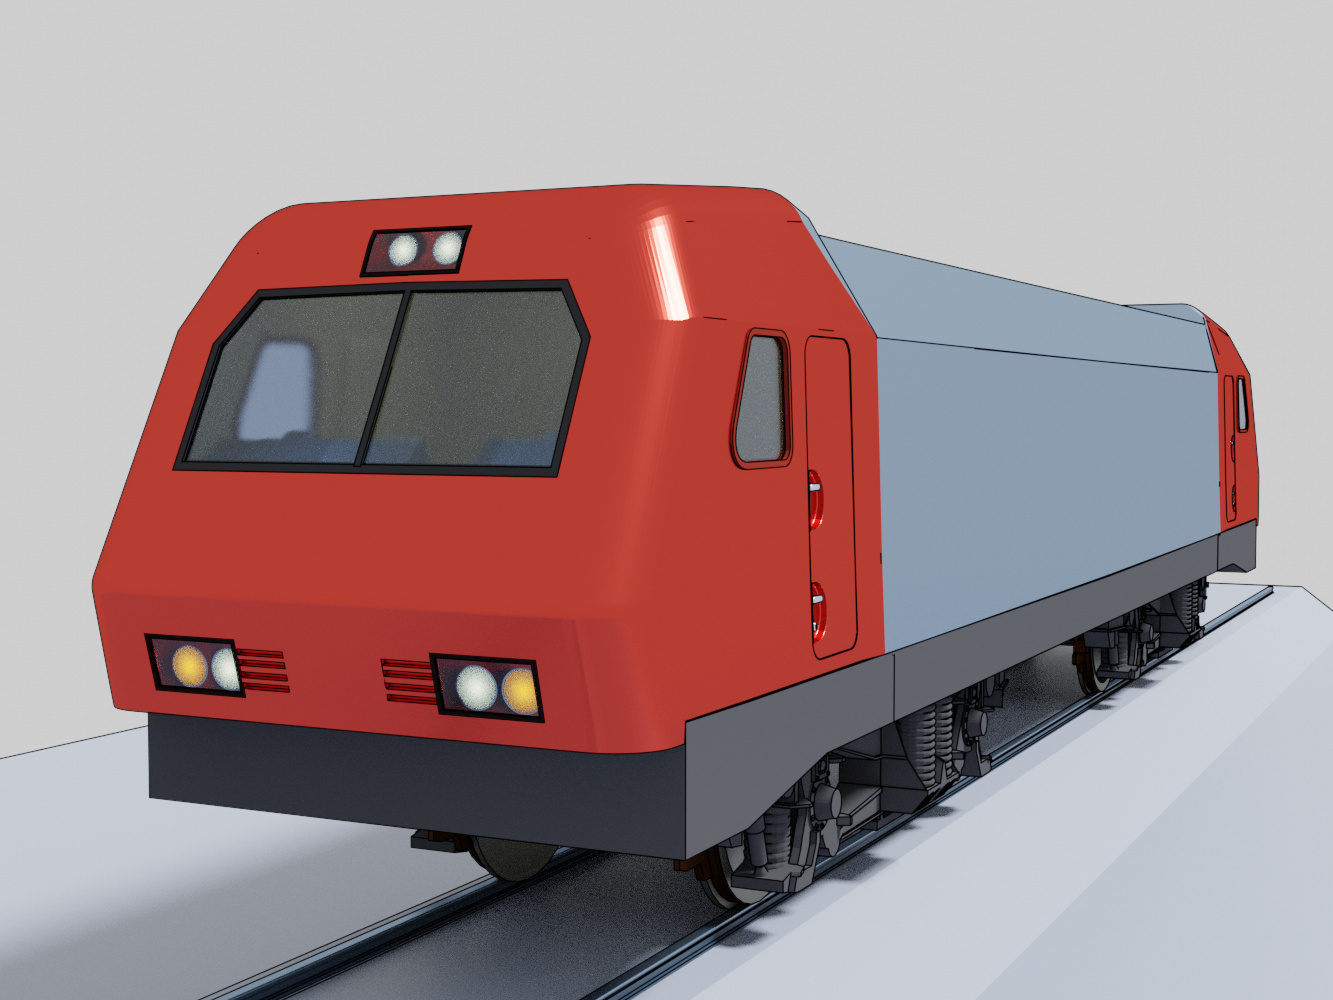
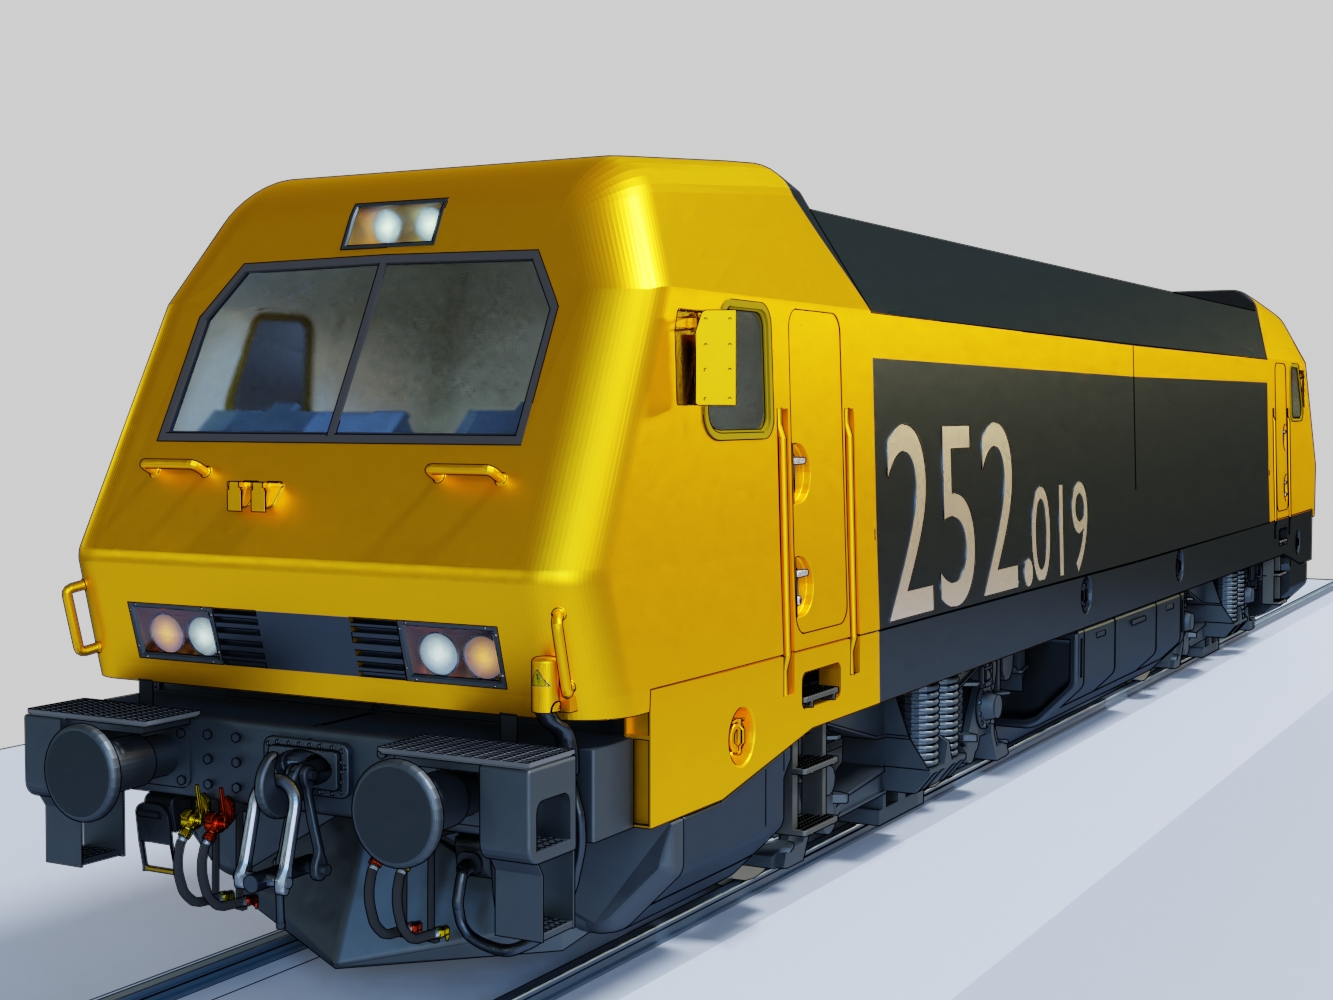
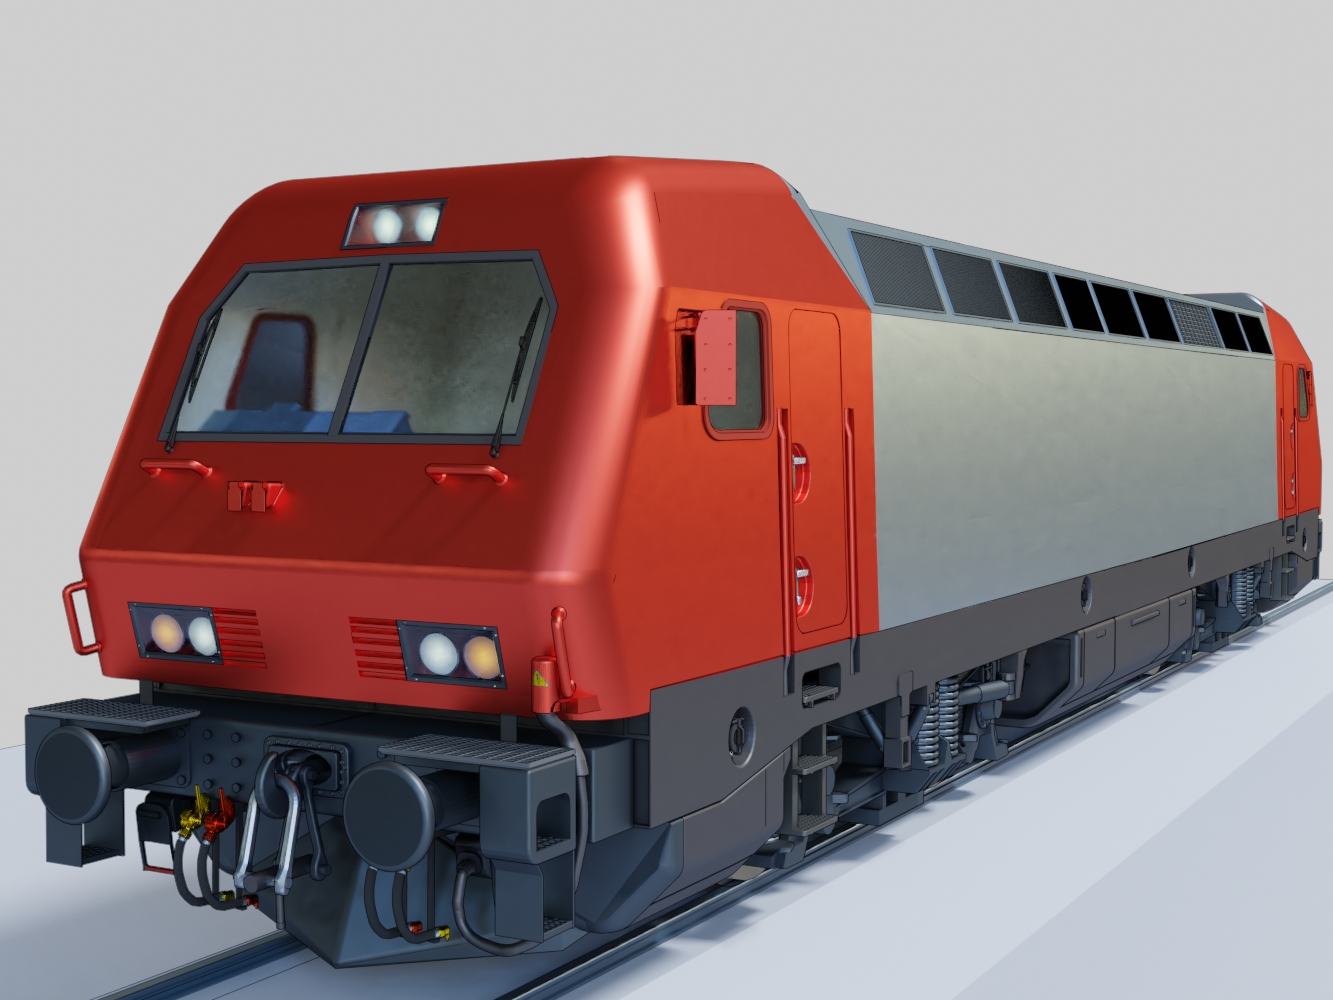
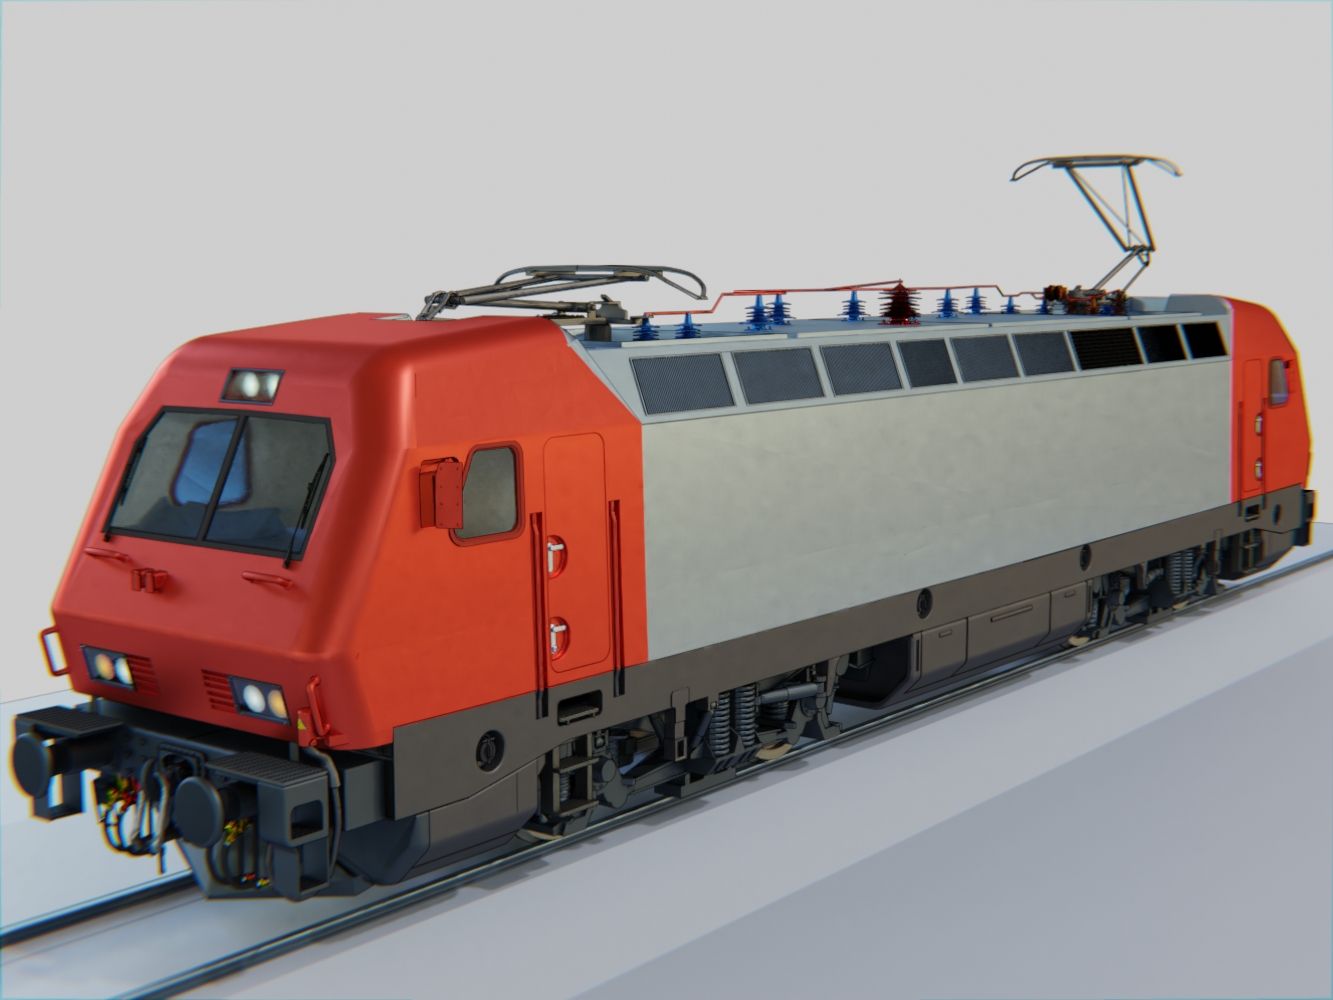
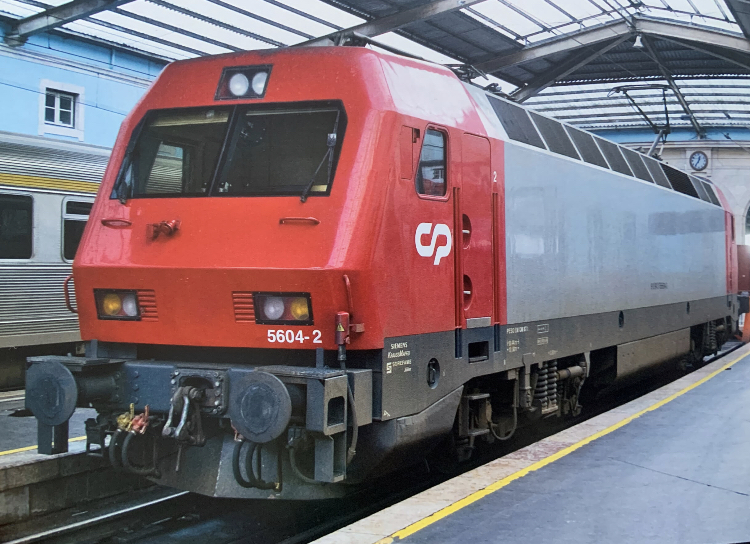
The EUROSPRINTER (first generation) but not the prototype, but the Portuguese livery: CP 6500 (6511.7) in classic red and grey → I actually took a train pulled by this loco, I also have it on a keychain logo. And also I am a fan of Eurosprinter series.
Part one - bogie
I am starting this topic with the bogie and any help is very appreciated:
Thank you very much for your input → the wheel cannot really be seen so I will add more poly when I will make a video (I still need to finish 5 more projects before that + this one) so I will see how my computer will work with all my assets and then I will add more details to models (loco included because it will be seen the whole time of the video)
Yes, I saw the D-E Loco and it is wow. I wish I could texture the windows and the chrome elements like that. Plus it is in super Hi-res and wow.
I saw the work of strapazieBernhard K. yesterday and I like this one better:
Hey Blender Artists, I made an update on my project
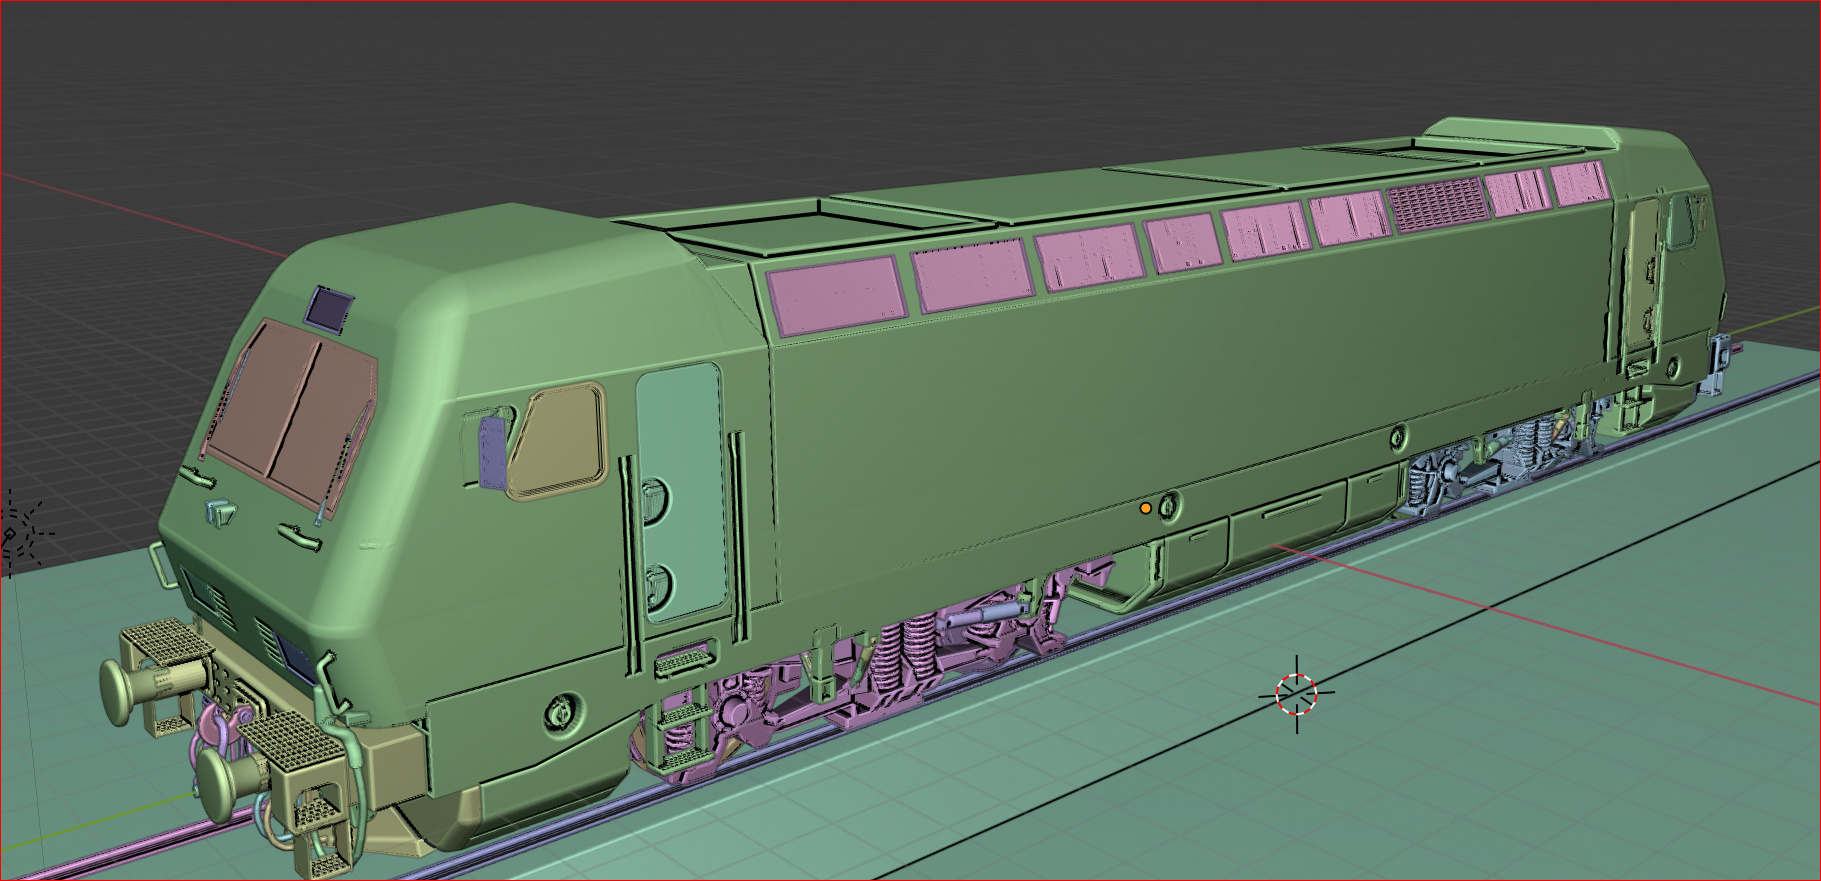
→ finally added the Structure (respecting proportions), some stuff inside the loco (still WIP, because maybe I want to make it into an animation), worked a bit on the front of the loco and the lateral sides → still a lot to go.
Day 4 on the Eurosprinter first gen:
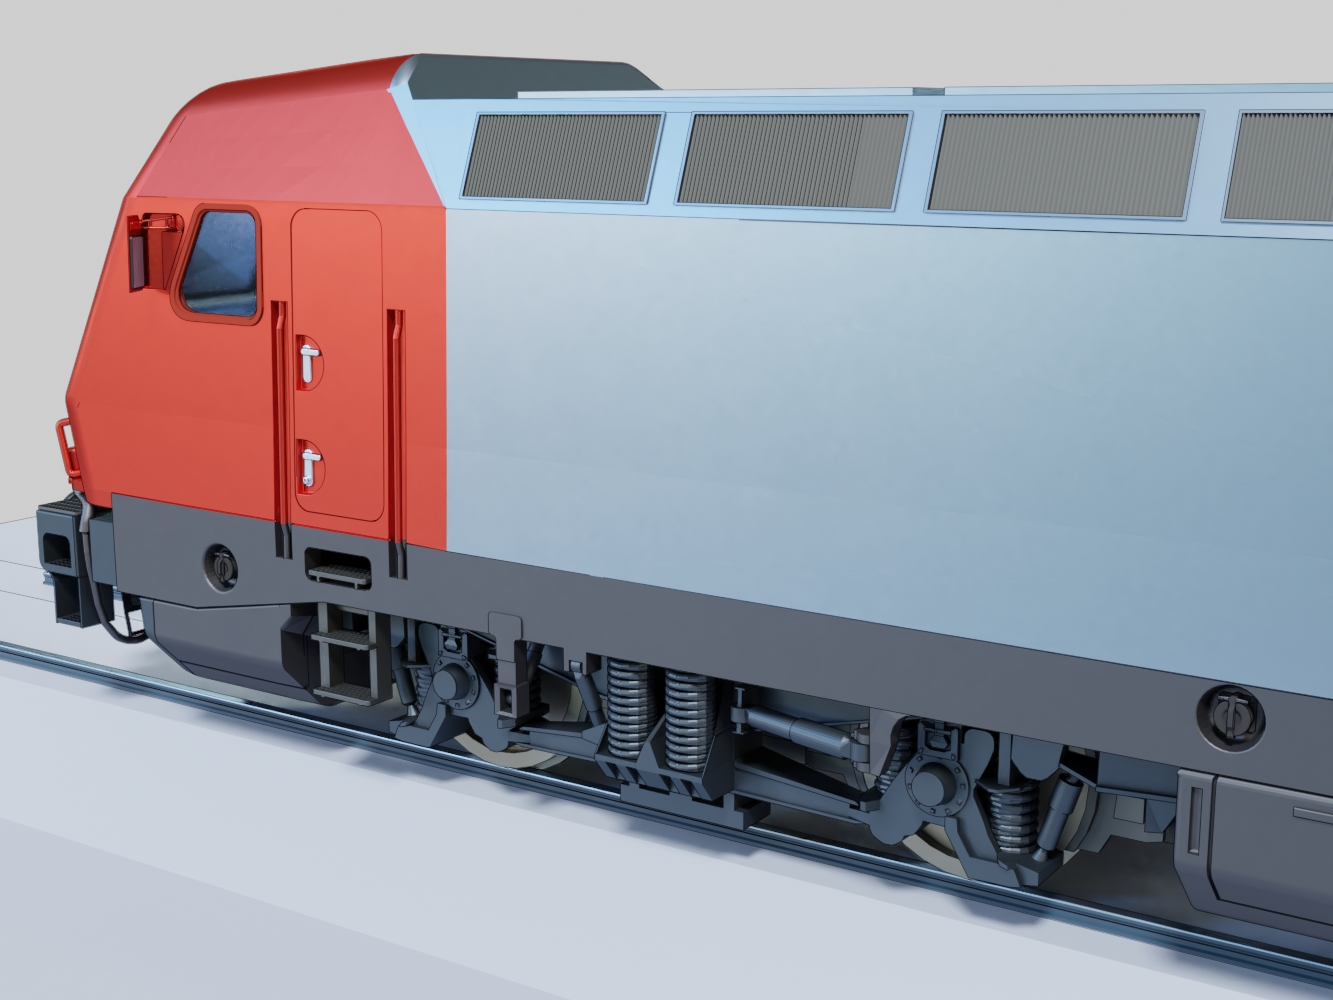
I have made better the doors, added the handrails, the stairs, electric blocks in the lower portion of the loco, re-did the grill in front of the loco, and fixed a bit the interior.
I still don’t know the purpose of those cylinders to the side of the locomotive → since it is electrical, it does not need fuel so what could it be? There are 4 of them on each side and can be seen on all modern locos.
I hope tomorrow I will finish the front lower part with the couplings, buffers, wheel guard, jumper cables and additional beams.
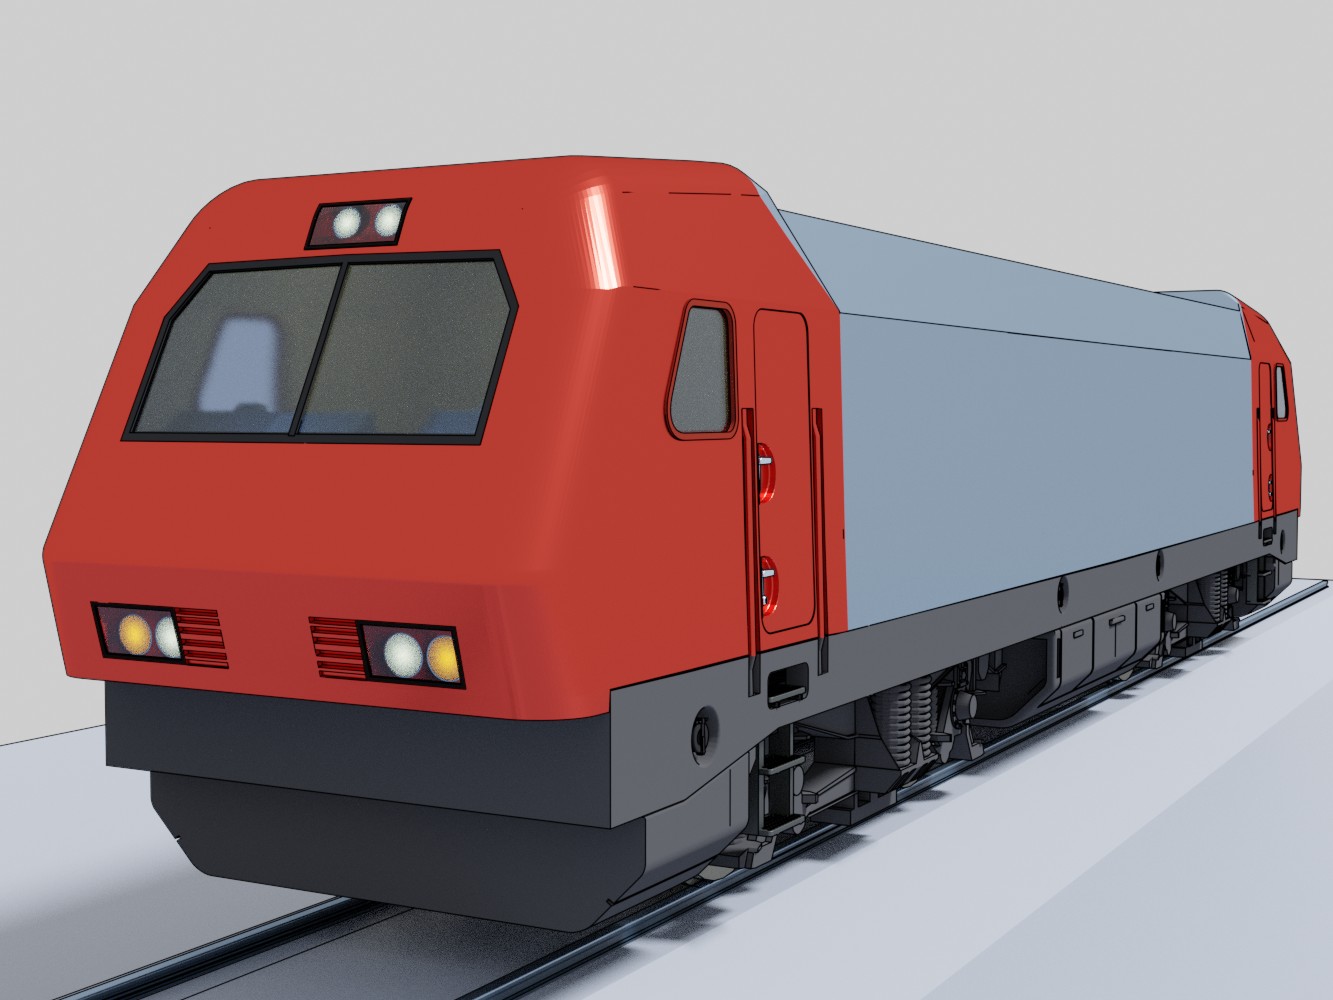
Day 6 on the loco.
Took me too much time to make the rearview mirror, and then to make the buffers. Also added many other small details, colours, proportions. (twerking in freestyle module took me 2 hours alone)
Petite update on the Eurosprinter E64 project: Day 7
Did the front of the loco, more specifically the lower portion with all the cables and coupling elements, but still missing the wipers. Have to dig in more on how they are in reality because in the pictures I got its all pixels But they look a lot like those on trucks.
Also, I am trying out the Spanish version of the same locomotive, so let me know what you guys think.
Will do also the german variants (privates) and the very prototype, once the main loco is done.
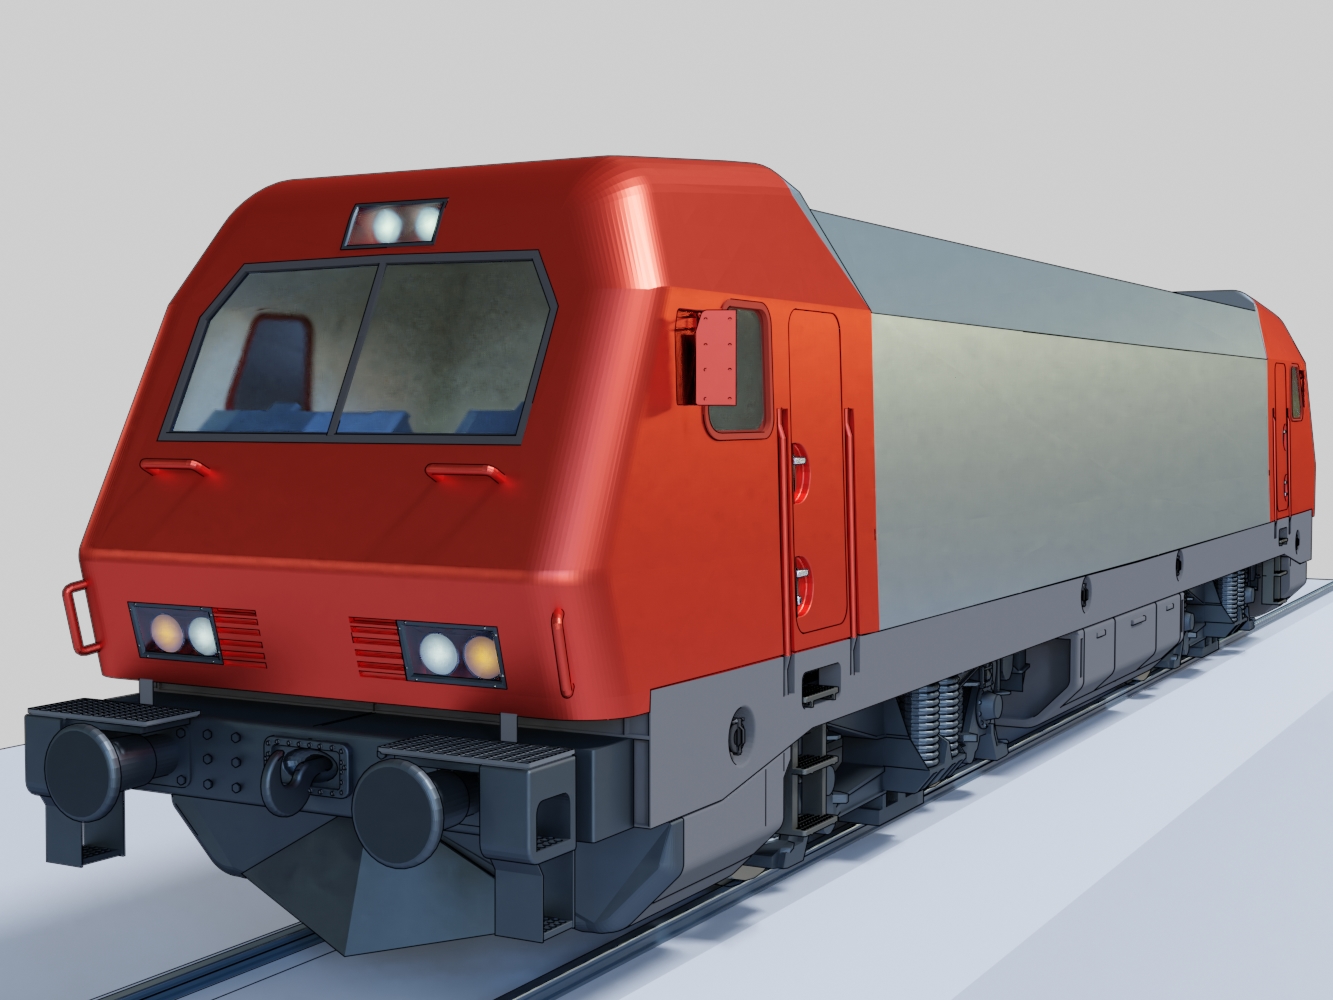
8th day on the EuroSprinter.
Finished the front of the locomotive, added stuff to the bogies (100% done), added smooth faces to the Body of the Loco. Also added the Grills/Vents in the upper area.
Next is the Upper area and the Interior.
I still have a hard time with FreeStyle. Sometimes it renders stuff correctly, other times not so much…
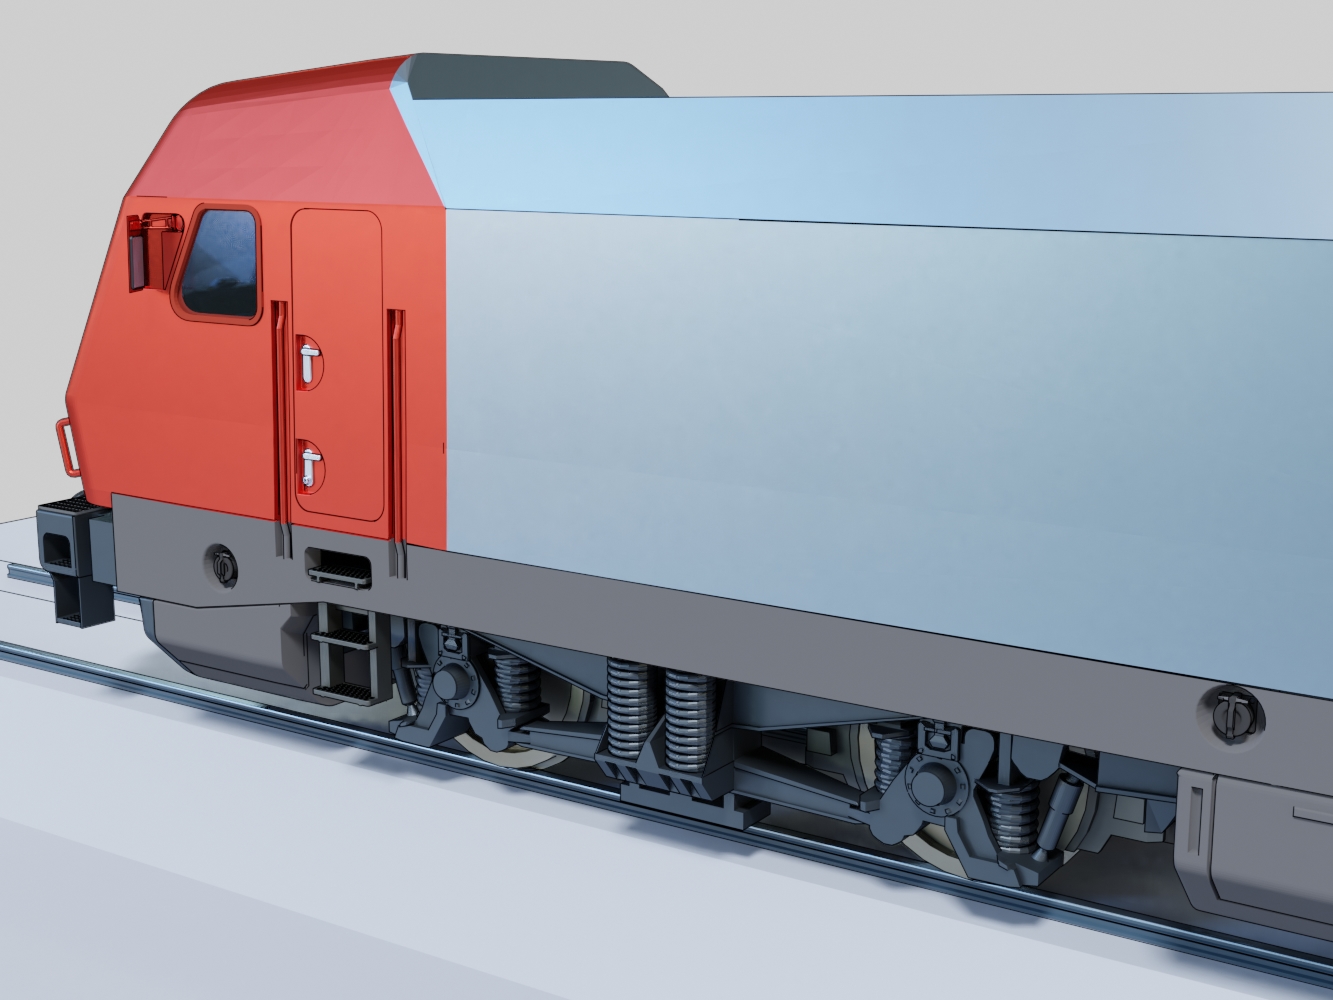
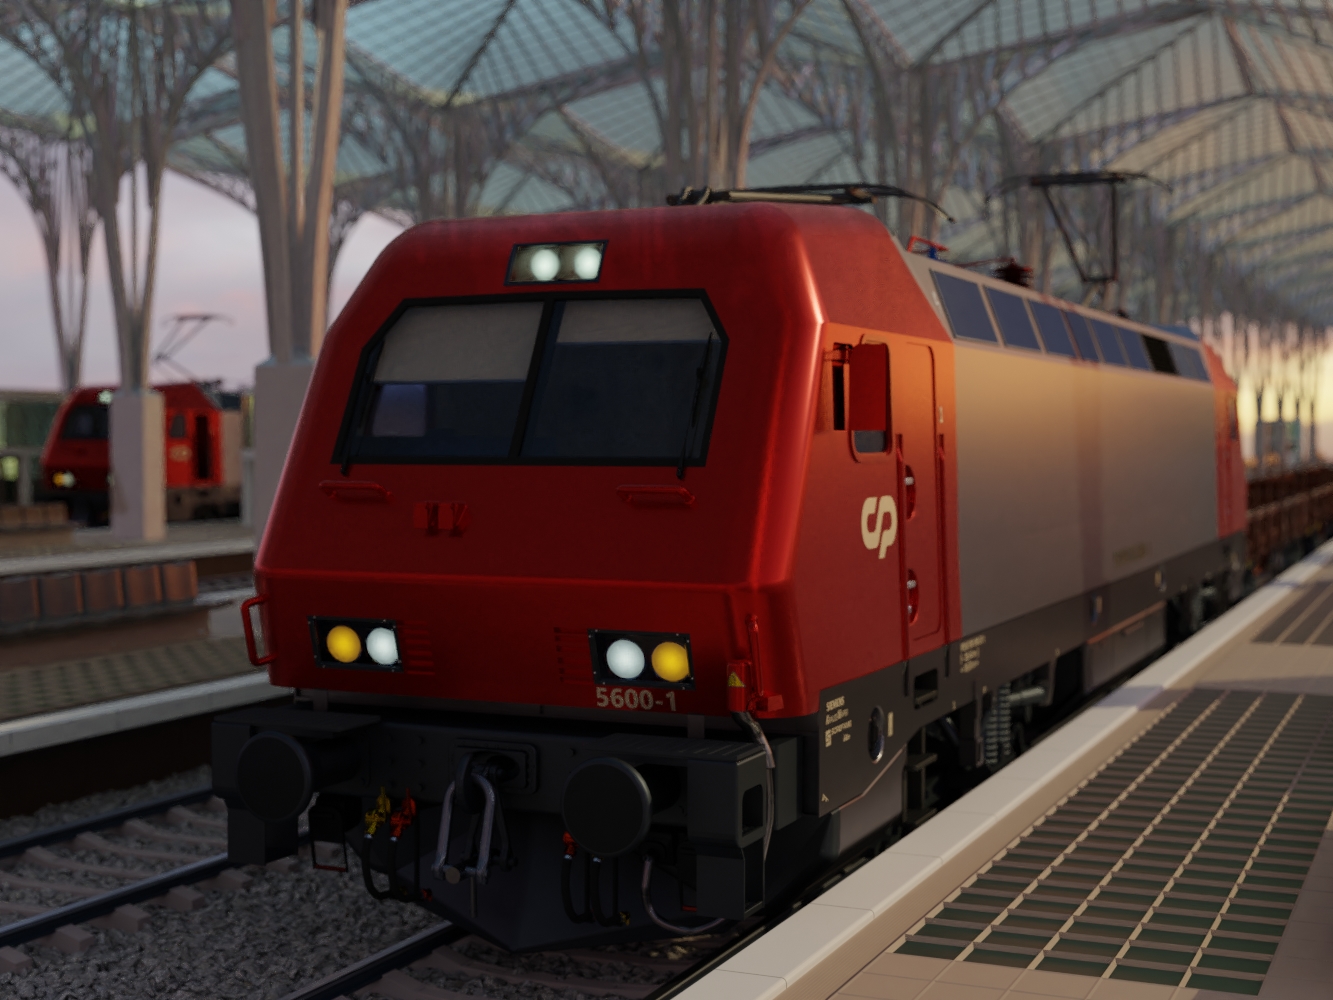
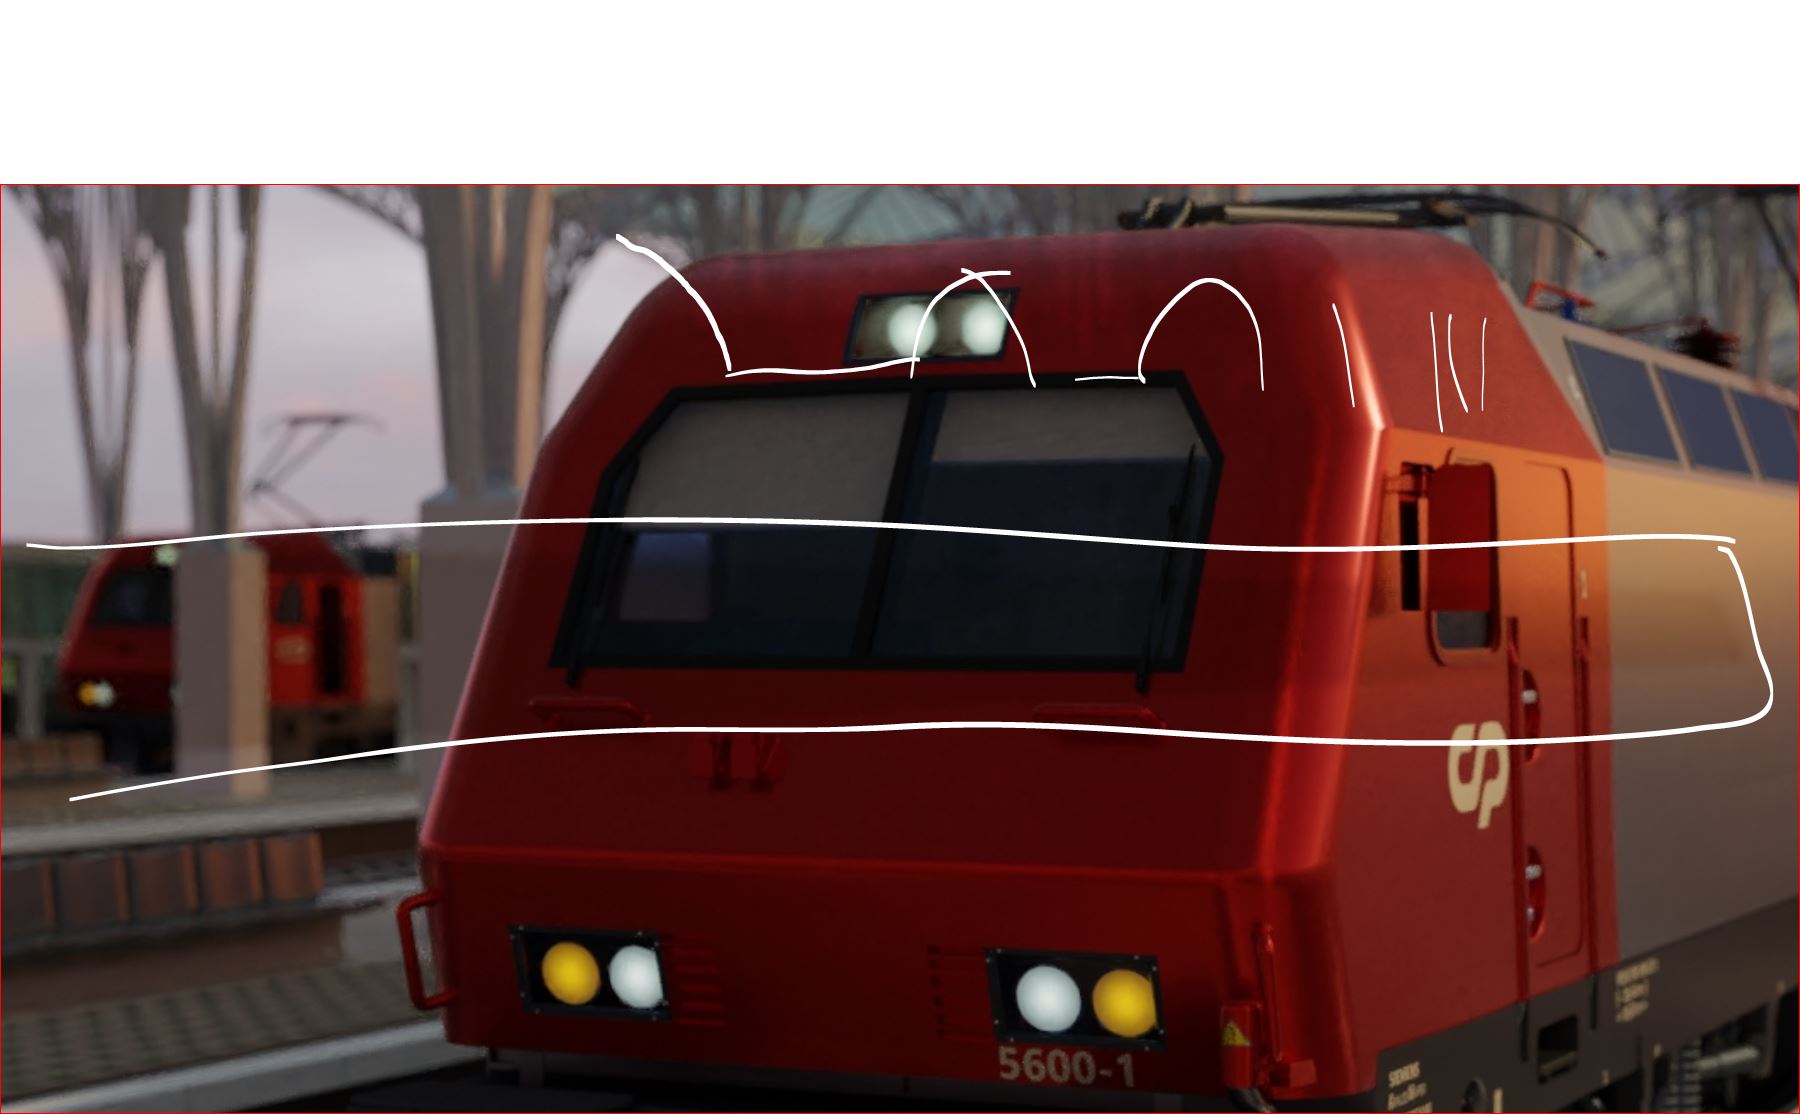
Here is another update. Added the decals, took many way to many hours searching every photo on Ecosia and Google for what is written on the side of the Locomotive.
There are 2 tables that are missing from my model, because I have no idea what the pixels mean.
Other than that, all are in.
Looks like presentation of real locomotive producer. I like the style. The middle part looks a bit empty(well, but thats the way it is), but the ends of locomotive are great.
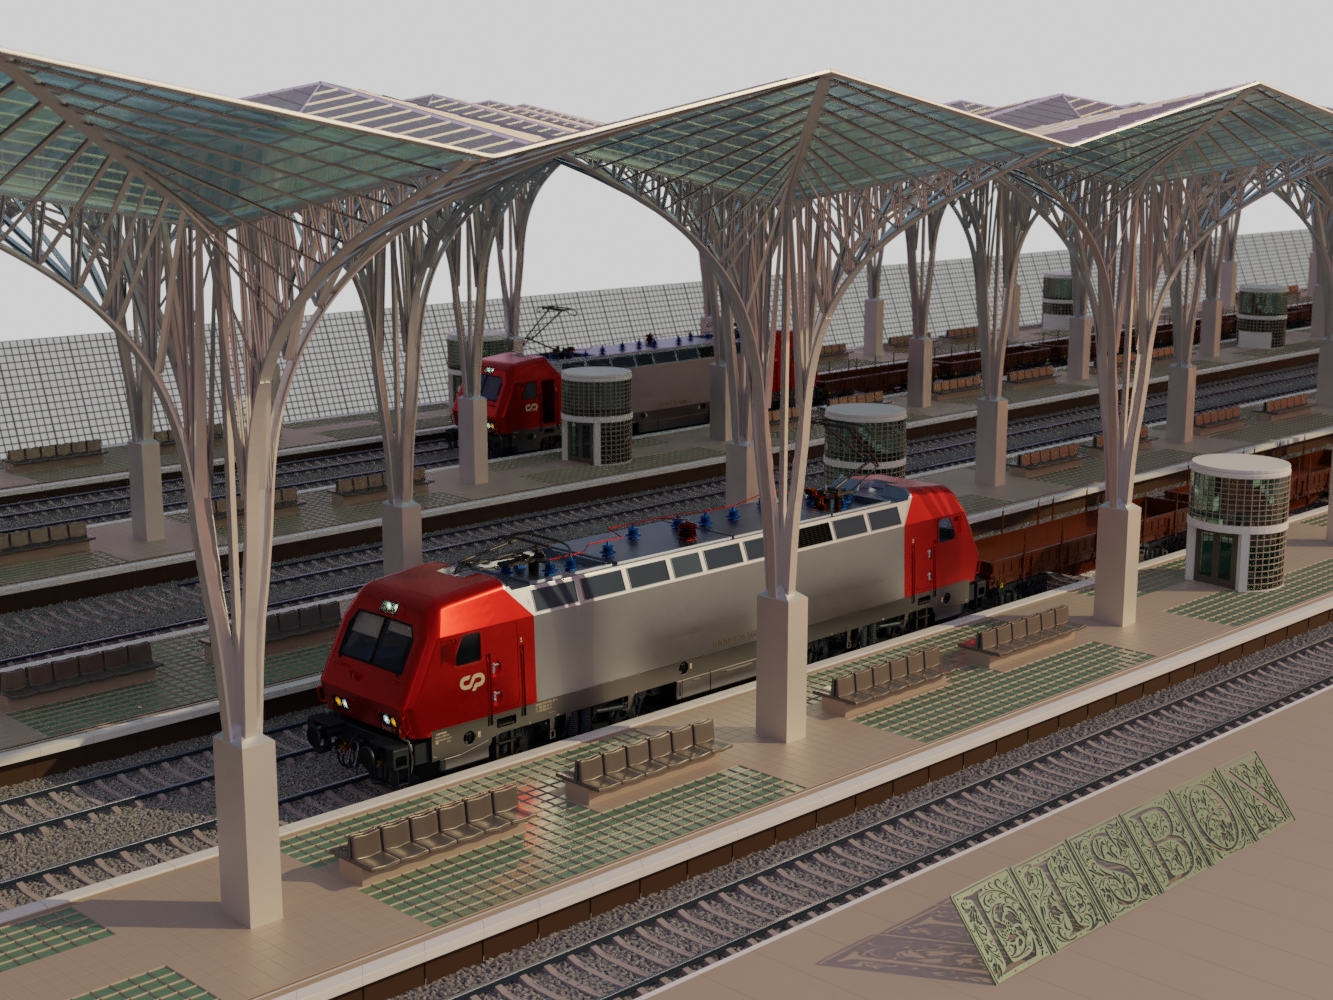
Wow, today I made a huge update today, been working all day, but not on making the Lisbon Oriente train station, but in a problem, I will show in a bit.
So yeah, I finished the Train Station to go with this iconic locomotive.
For me, the EuroSprinter first series is like the iPhone of locomotives since is truly modern, fast, and European, for Europe.