I have a texture mapped material with additional bump maps, etc. It looks fine. I have created a shape animation where one end of the object becomes cratered (concave). Inside the crater the material needs to gradually change to another color. I have assigned the vertex group (inside of crater) the new material, but I can’t figure out how to ‘fade’ it in while the object changes shape. This is using cycles.
I’d upload the file but the client is sensitive about his IP.
Thanks for anyone’s time
You don’t mix materials in Cycles but it’s possible to mix shaders and colors with mix shader or mixrgb nodes. Those have a factor slider and you can keyframe that, as well as color fields. Rright click -> insert keyframe, or press i while hovering mouse cursor on it. For isolating the change on one area you could use a texture or vertex paint.
Can always create a separate file that communicates the main points of the problem.
The two easiest ways are to use vertex paint, or a black and white mask. You would use, as JA mentions, just a single material. You wire up your nodes for “material 1” and then wire up “material 2” and the last noddle on both goes into a mix shader. As the mix factor you would have painted a black and white mask (either a jpeg/png or a vertex color map) with gray values as fade. What is white on the mask will be the bottom input on the mix shader, what is black becomes the top material. If you use an image, of course it would need to unwrapped.
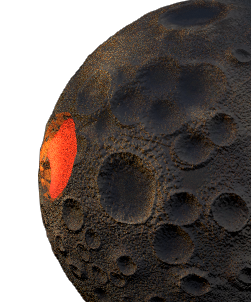
Thank you for the suggestions. I will experiment with the linear key signal (black and white mask). That’s something I understand better then most Blender tech. My particular need is that the 2nd color needs to fade in to ‘cover’ the original texture map, not a similar material to the 2nd color. Below is a crude test of applying an emitter shader to tagged faces inside a crater.
Here’s another possibility, using another object to map the crater interior.
.gif http://www.pasteall.org/pic/show.php?id=87853
.blend crater_ja12.blend (226 KB)
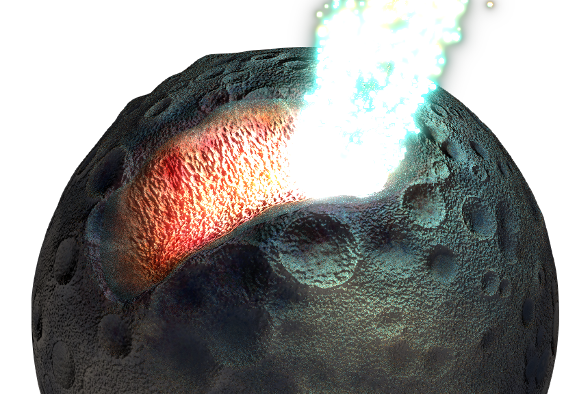
It looks like the ja12 crater setup is exactly what I need. I’ll need to appropriate the node network to my textured model, which I don’t think will be a problem. This is great because I wanted something that worked more procedurally, so that when clients change their mind I’m not having to recreate texture maps, etc. Below is what I came up with yesterday. I ‘filled’ the crater with an additional surface (geometry), and you can see there are some issues where it fades into the asteroid. I played with the ja12 nodes and got the crater edge to have color graduation that looks just fine.
I’m just not as technically competent as you are. I’ve dropped my object into your scene and tried to apply your nodes (to understand your process). It’s not going well. If you could spare the time, I would really appreciate you looking at this and telling me what I’m doing wrong. However, do this at your leisure. I have to move ahead with another technique for now. The file I’m sending back is a bigger because of texture maps, which I need to see when evaluating the effect.
crater_ja12_combine.blend (1.23 MB)
I think the problem will be evident enough. The effect is not confined to the crater. I can only get it to the top half of the asteroid. When I first connected the node it was affecting the bottom half.
I did do one thing that helps the current version I’m using. I used ‘shrinkwrap’ to apply the crater overlaying geometry (it was cut from a duplicated mesh to begin with). The shrinkwrap follows the shape key of the target object better I expected. Hurray Blender.
