good work so far :), like oscar said, always make your face similar in size.
Hello,
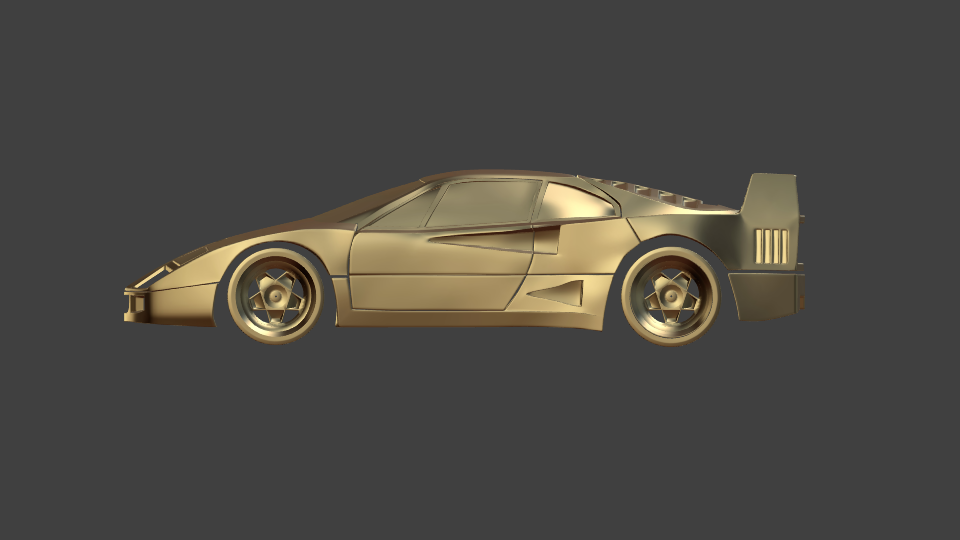
today i focused a bit on removing dents, making faces more even and… wheels ! Tire tread is modelled out of head, probably much too big profile. And heavy usage of modifiers. What do you think about the body and the wheels ? I think there are still too many bumps visible, if i eliminate one, 2 others seem to appear… 
@Oscar J, Ghilas Hardgeek
Thank you for visiting my thread and glad you like my work so far 
Update:
Ok, as i cant get the body right in the first run, i started another attempt with better matching blueprints, spent some hours tracing them vert by vert. Need still some door details. Then i hope to fill this with faces in a better way than before…

Glad you gave the edge modeling method a try , if you need some help don’t hesitate ![]() (cause i use it a lot when i model).
(cause i use it a lot when i model).
it will be better, as your first mesh was still bumpy in some areas :). peace
BTW: your thread tire is not so sport like (in my opinion), but i like the rims
Ok, building the faces now, panel by panel. Started with the worst parts, where most bumps have been before. Fingers crossed it gets better now…

@Ghilas Hardgeek
Yep, i saw your timelapse video and your bump-free start of your BMW i8, so i thought i might give it a try. I am also using grid fill where possible, or where not i fill face by face. Thanks for your help offer. When i get stuck somewhere, i know whom to ask about the method now.
And about the rims: i forgot to enable subsurf for viewport render, they look even a bit better then Guess the tire tread pattern has to be smaller, will get back to it when the body is done.
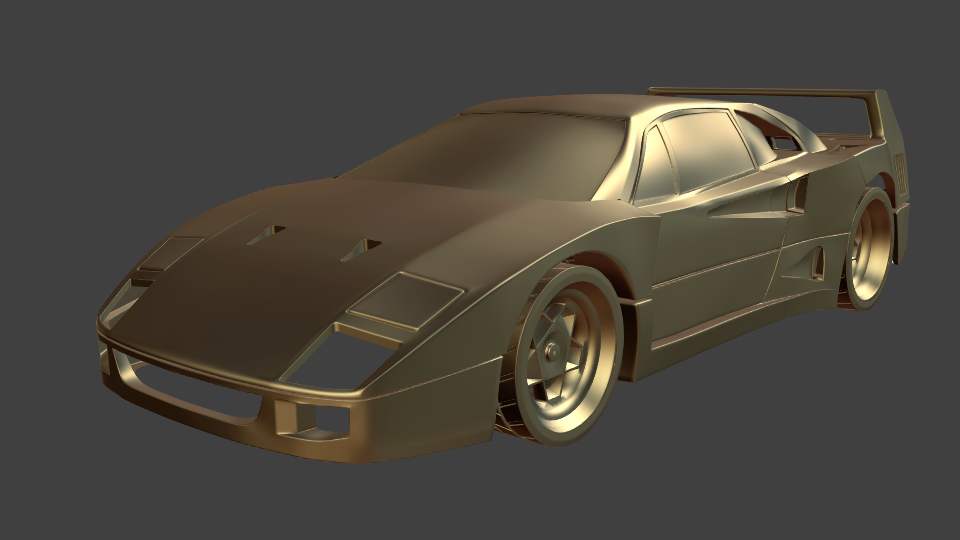
So… have only something to fill at the back still, but meh, i spotted bumps or shading discontinuities again, especially with that golden matcap, seems i cant get it right… but i wont start a 3rd attempt, this time i stick with this mesh. I simply dont get how you get those bumpfree models… I tried my very best but i still can see shading errors… They are subtle but they are there. And i even used grid fill to get perfectly interpolated quads, where possible… Any suggestions ? Moving around single edges or verts makes it only worse…
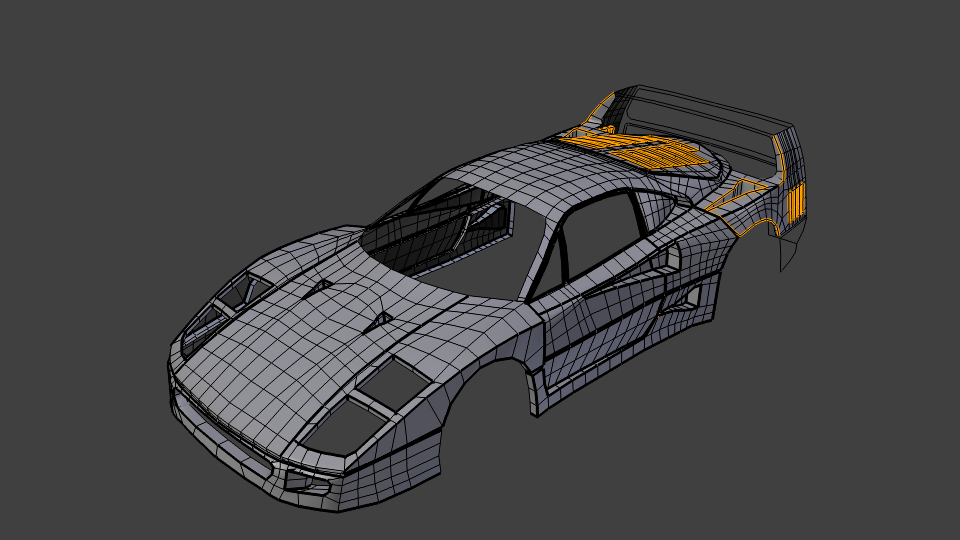
the thing is that you need to see how your edges flows in every view and make your best to align them or curve them (depends on the shape ), and avoid dense a mesh.
this may help :
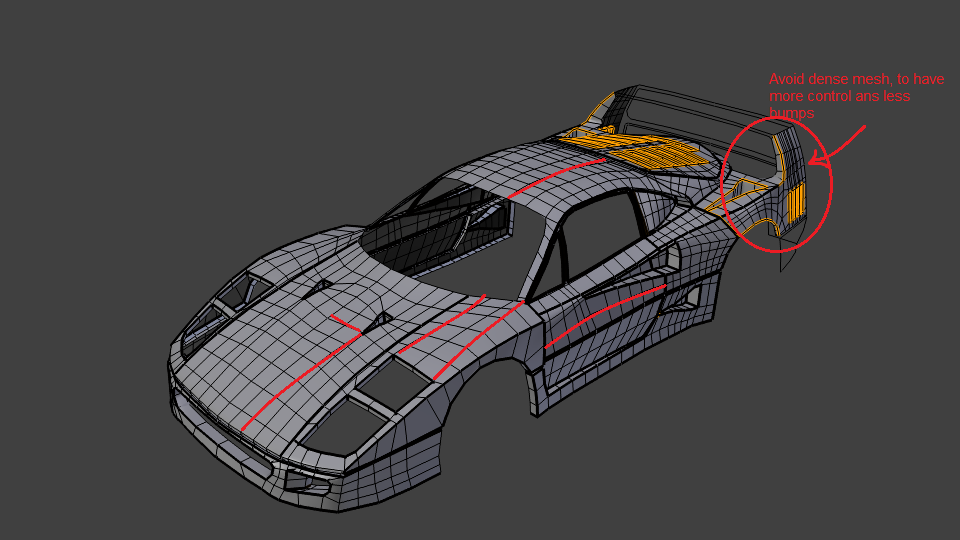
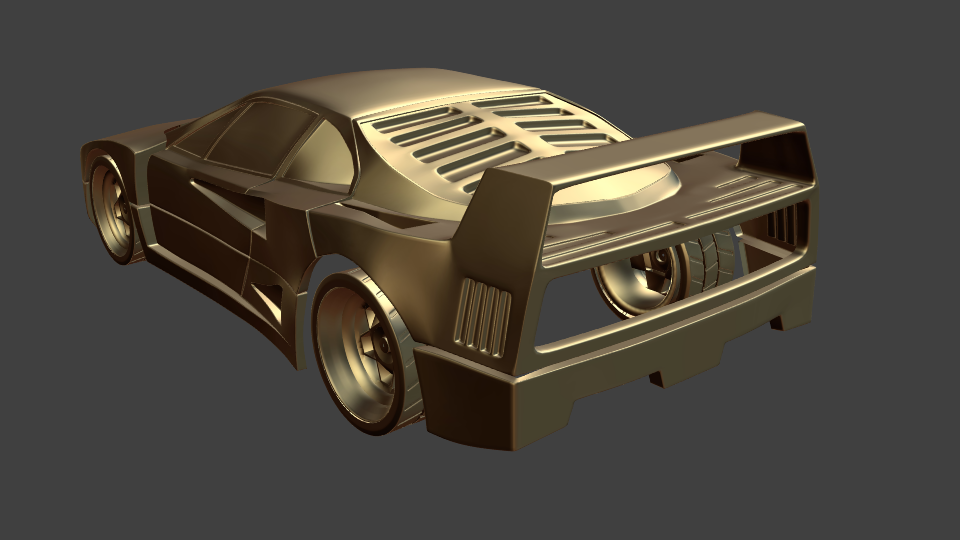
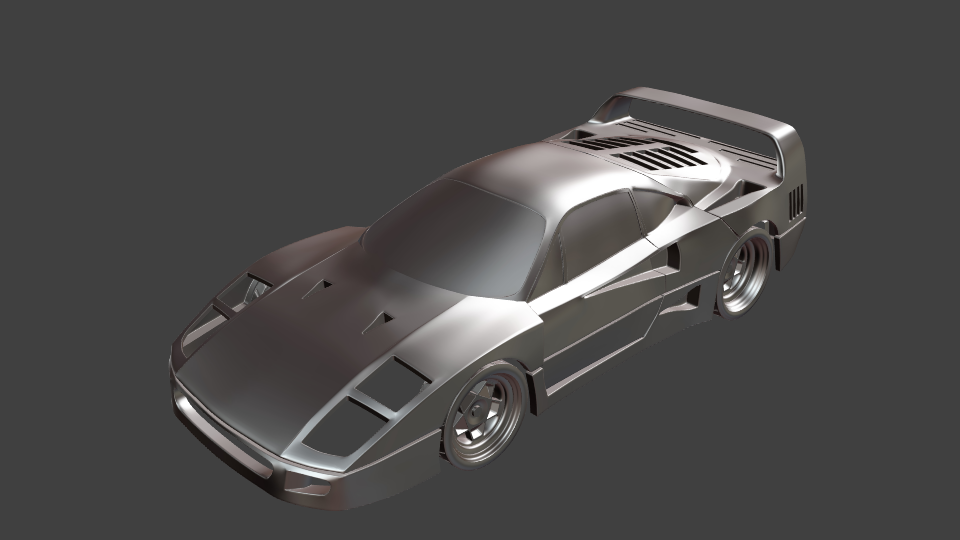
So, 2nd modeling attempt is done, except for details. Added the wheels of the 1st attempt here. But still bumps, sigh… will try to align the edges more, but that aint so easy on this shape with all its holes in the middle. And the dense geometry at the back is necessary to cut the vents into the body, otherwise i would have to use ngons which can cause trouble too.
Hmm. Maybe i chose myself a too hard car…
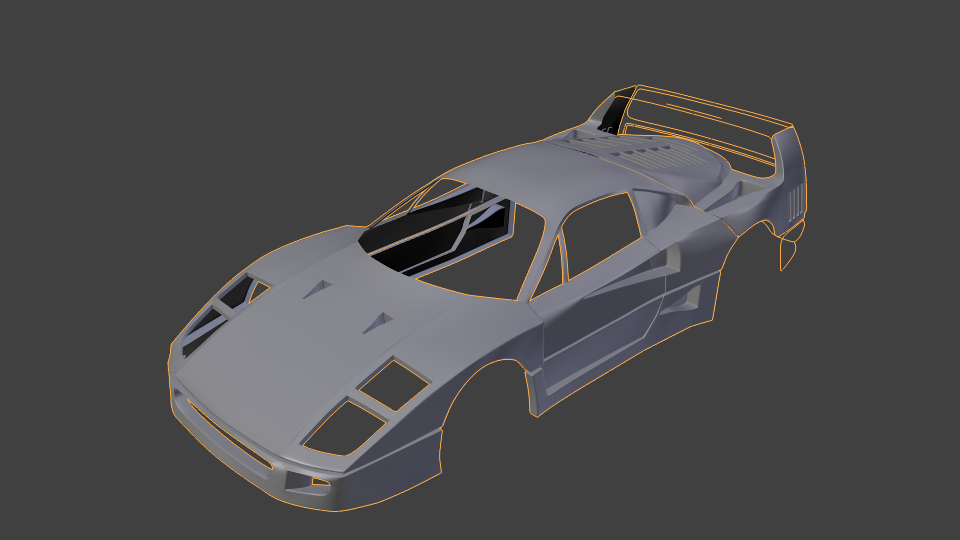
What do you think about the 2nd mesh ? Better than the 1st ? Its not perfect yet but in my opinion a step forward.
Great progress so far 
Thank you ![]() I really appreciate each visitor and comment.
I really appreciate each visitor and comment.
Update: Back engine “railings” and taillights, simple as can be.

Hi,
lot of work here, don’t give up and it will come! And yeah it’s clearly a difficult car.
To avoid bump sometimes, it is possible to use bezier curve.
Imagine you’re in edit mode with your car mesh. You have the outside shape of a particular part you’re modeling and want to fill it without bump.
example:

you want to complete this piece. It needs a row of vertices in the middle but you didn’t draw any line to guide you. Instead of doing it “by hand”, you can:
- Put the snap tool on vertex mode. Go to object mode.
- Add a bezier curve. Go in edit mode. N, right panel, disable normal curve display.
- Now, using the snap tool, you can place the 2 points of the curve at the end of the line you wish to create. Then, V, Vector and with the handles, you can draw a really smooth line and adjust it in each view (at this moment, it’s nice to take a look at some real pictures to be as accurate as possible).
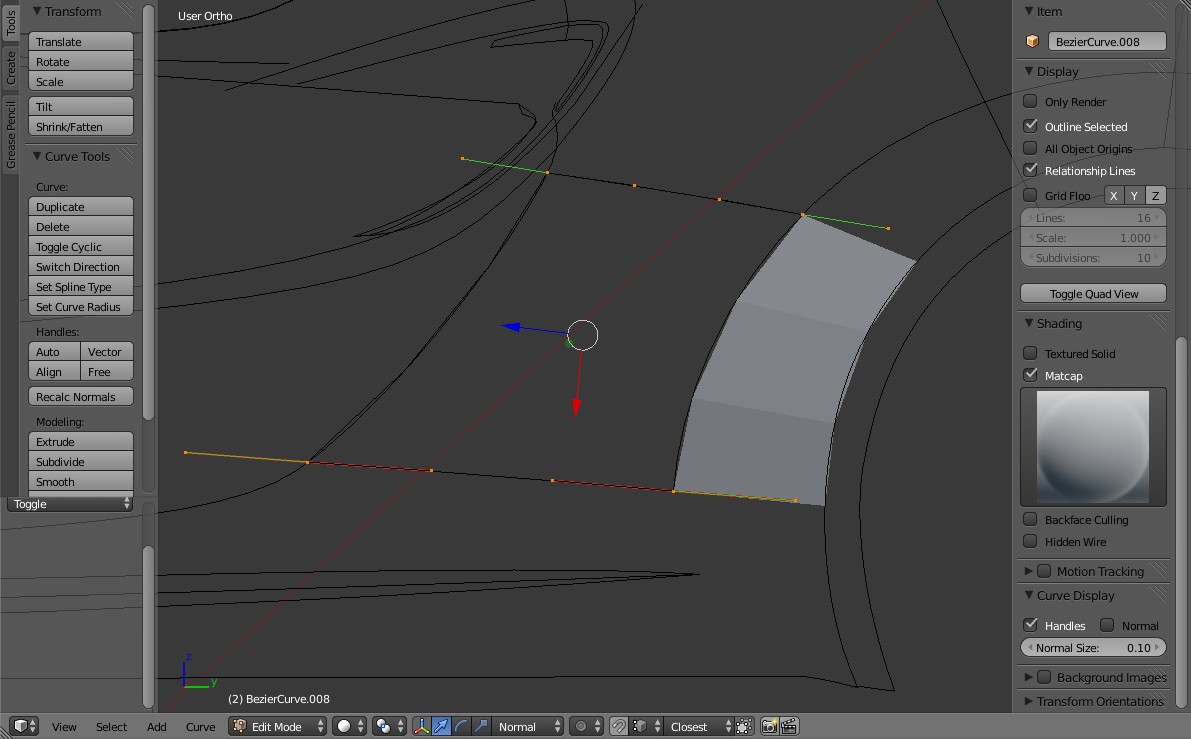
- Once you’re happy with the shape, object mode, Alt+C, Mesh from curve. Return in edit mode in your car mesh and with the snap tool (in edge mode), you can put a range of vertices along the curve and be sure it will be smooth and without bumps. Then grid fill. Et voilà.
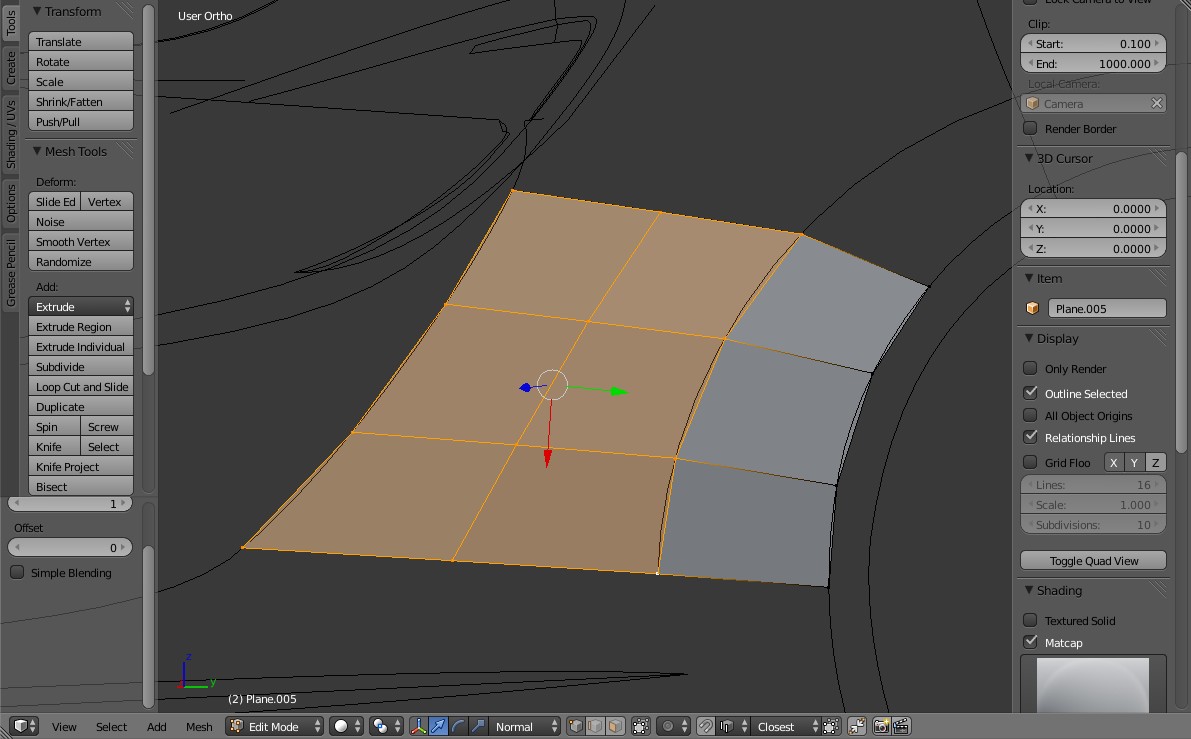
In this example, it was quite simple with only one row of vertices. But you have the idea…
this one is obviously better than the first, i forgot that there were air vents in the back ;). just keep up.
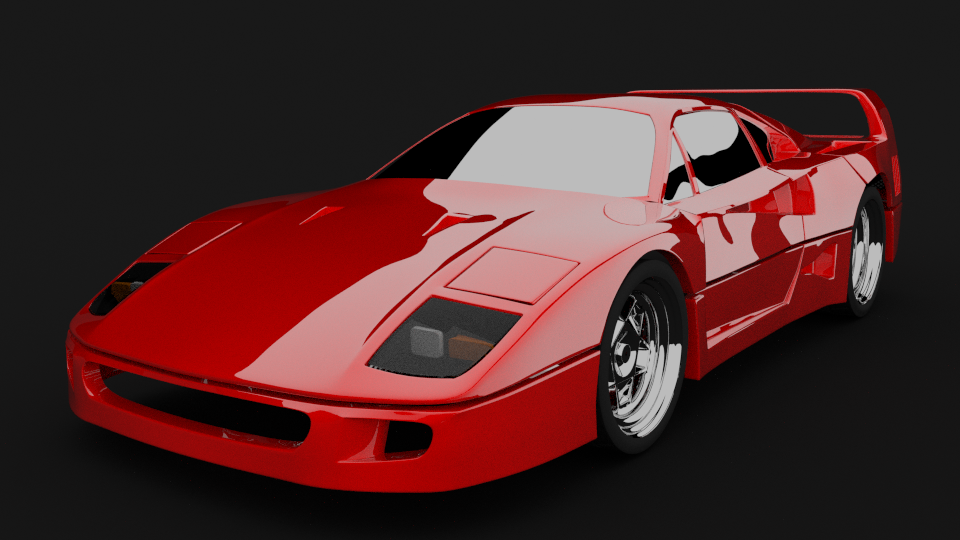
Ok, got a first (awful) render here, simplest car paint and light setup and background object was too small for this angle. Was able to spot some serious bumps at the windows and on the hood for example. When it comes to rendering, i still have much to learn.

@Curvemaster
Thank you for your help, think i will try this method in certain bumpy areas of my model.
@Ghilas Hardgeek
Thanks again for your support ! This really motivates me to continue
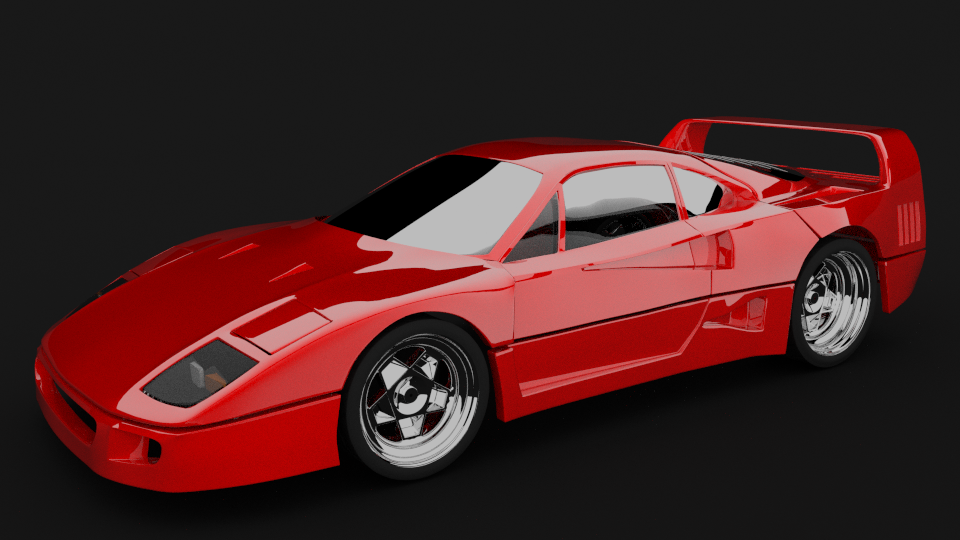
Ok, i was playing around with geometry (a little) but i also did play around more with the size of the mesh lights (planes) which also have a dramatic effect on how “bumpy” some reflections may look like from certain angles. Its almost impossible to tweak this with geometry alone, because in certainly bump free areas some odd reflections may occur due to the lighting setup. So i dont need to start a third modelling attempt… phew I know those render setups are simple, but what do you think ? Do you like them as starting points ?

Wow. The second attempt looks definitely better and sharper than your first one!
Car paint needs work though.
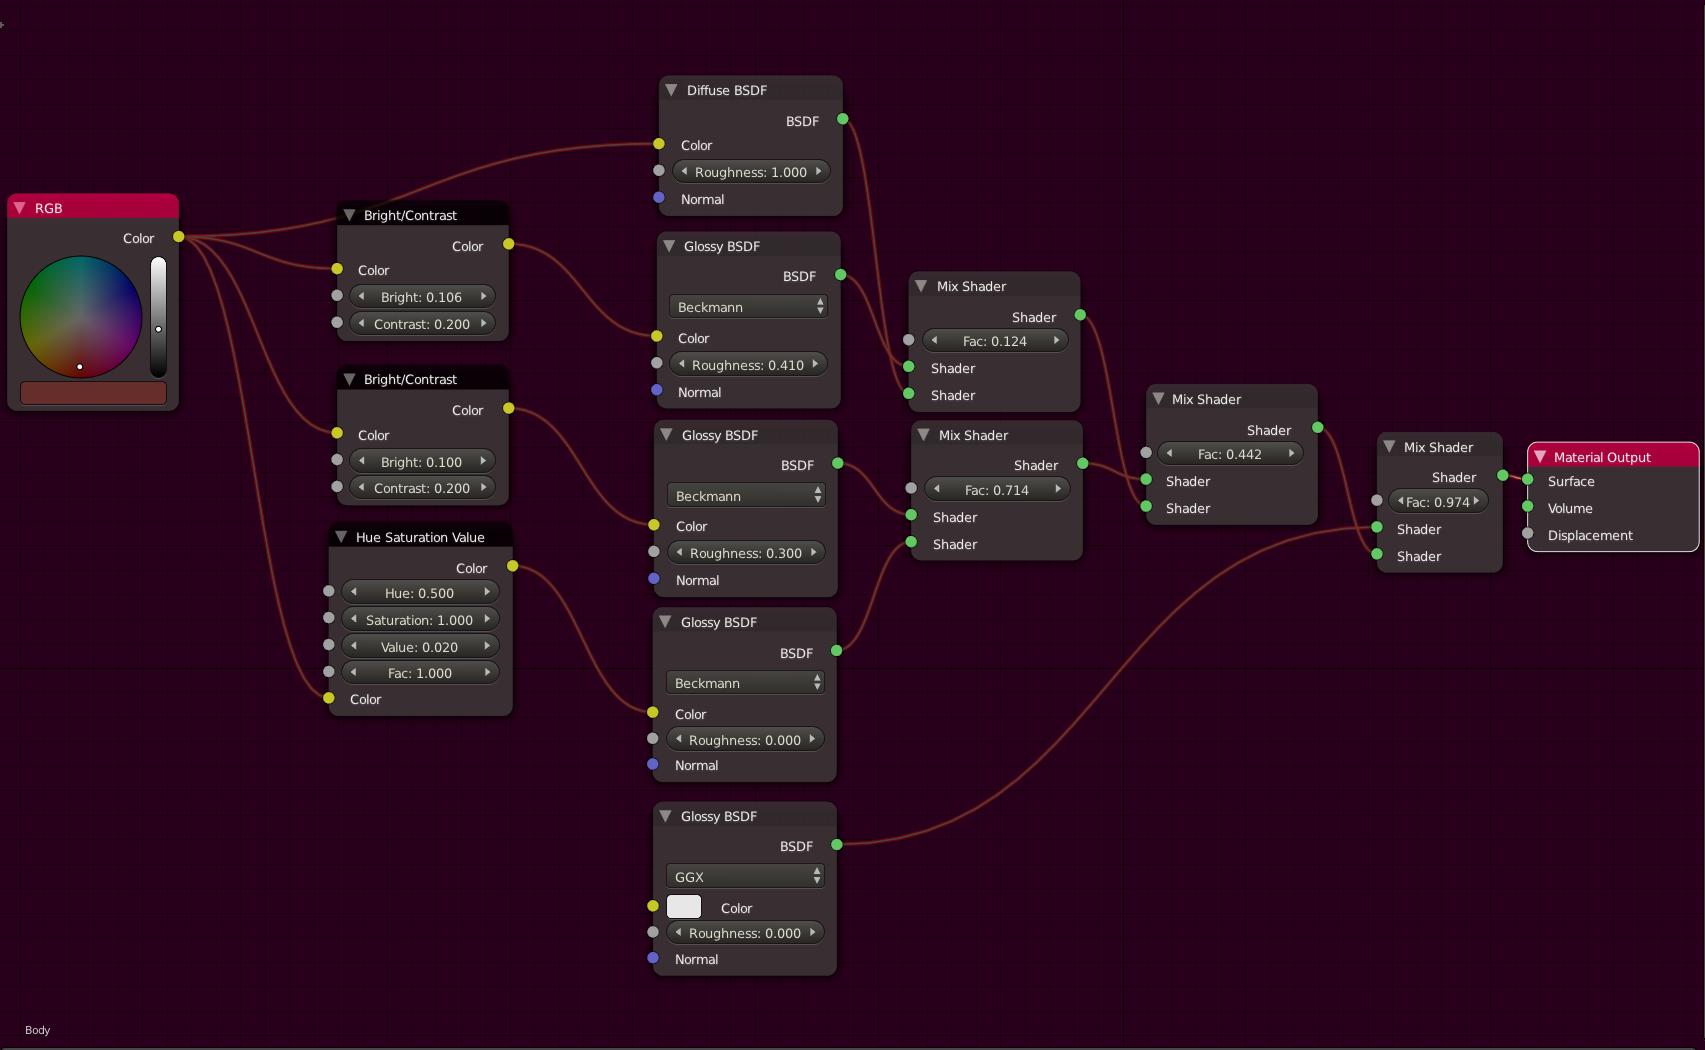
Looks great! Here’s a screenshot of the node setup for my latest car-paint shader, in case you want to try it.
I agree, I think your car looks smoother and sharper with this second attempt! The wheels also look great, keep up with terrific work, scorpion!
Thank you guys for your kind words and support  I surely will give Goldenfrogs car paint shader a try, since mine is just glossy mixed with diffuse basically still.
Material update: I just tested my model with the shader from here: http://www.blendernation.com/2012/03/30/car-paint-shader-with-flakes-for-cycles/ and got following result, (light rig is maybe too poor still, just 2 meshlights):
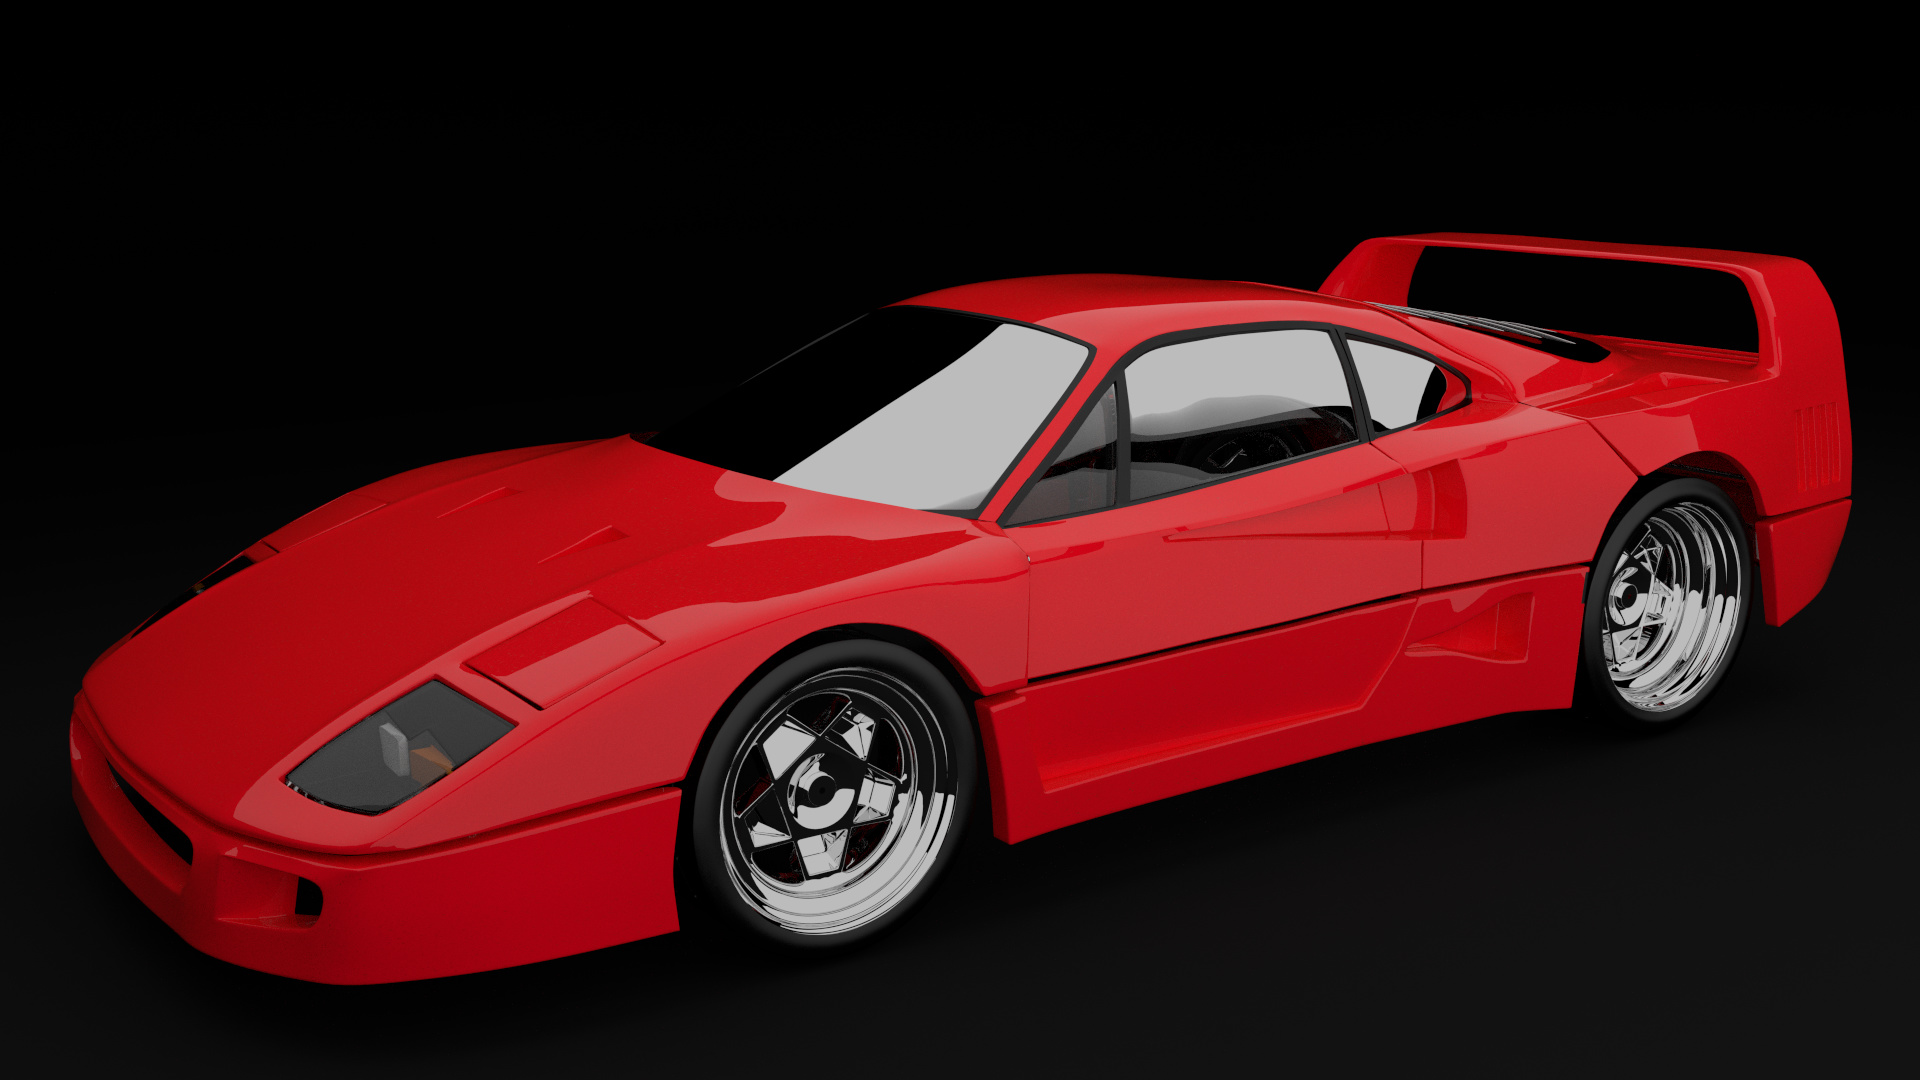
Before that i tested Goldenfrogs Shader, but i didnt get it looking right for my model, maybe too because of the poor lighting setups.
Got to model some things still like mirrors, an interior, and maybe even (parts of) the engine. So its all not finished yet.
And i have to fix some topology / shading errors as well.