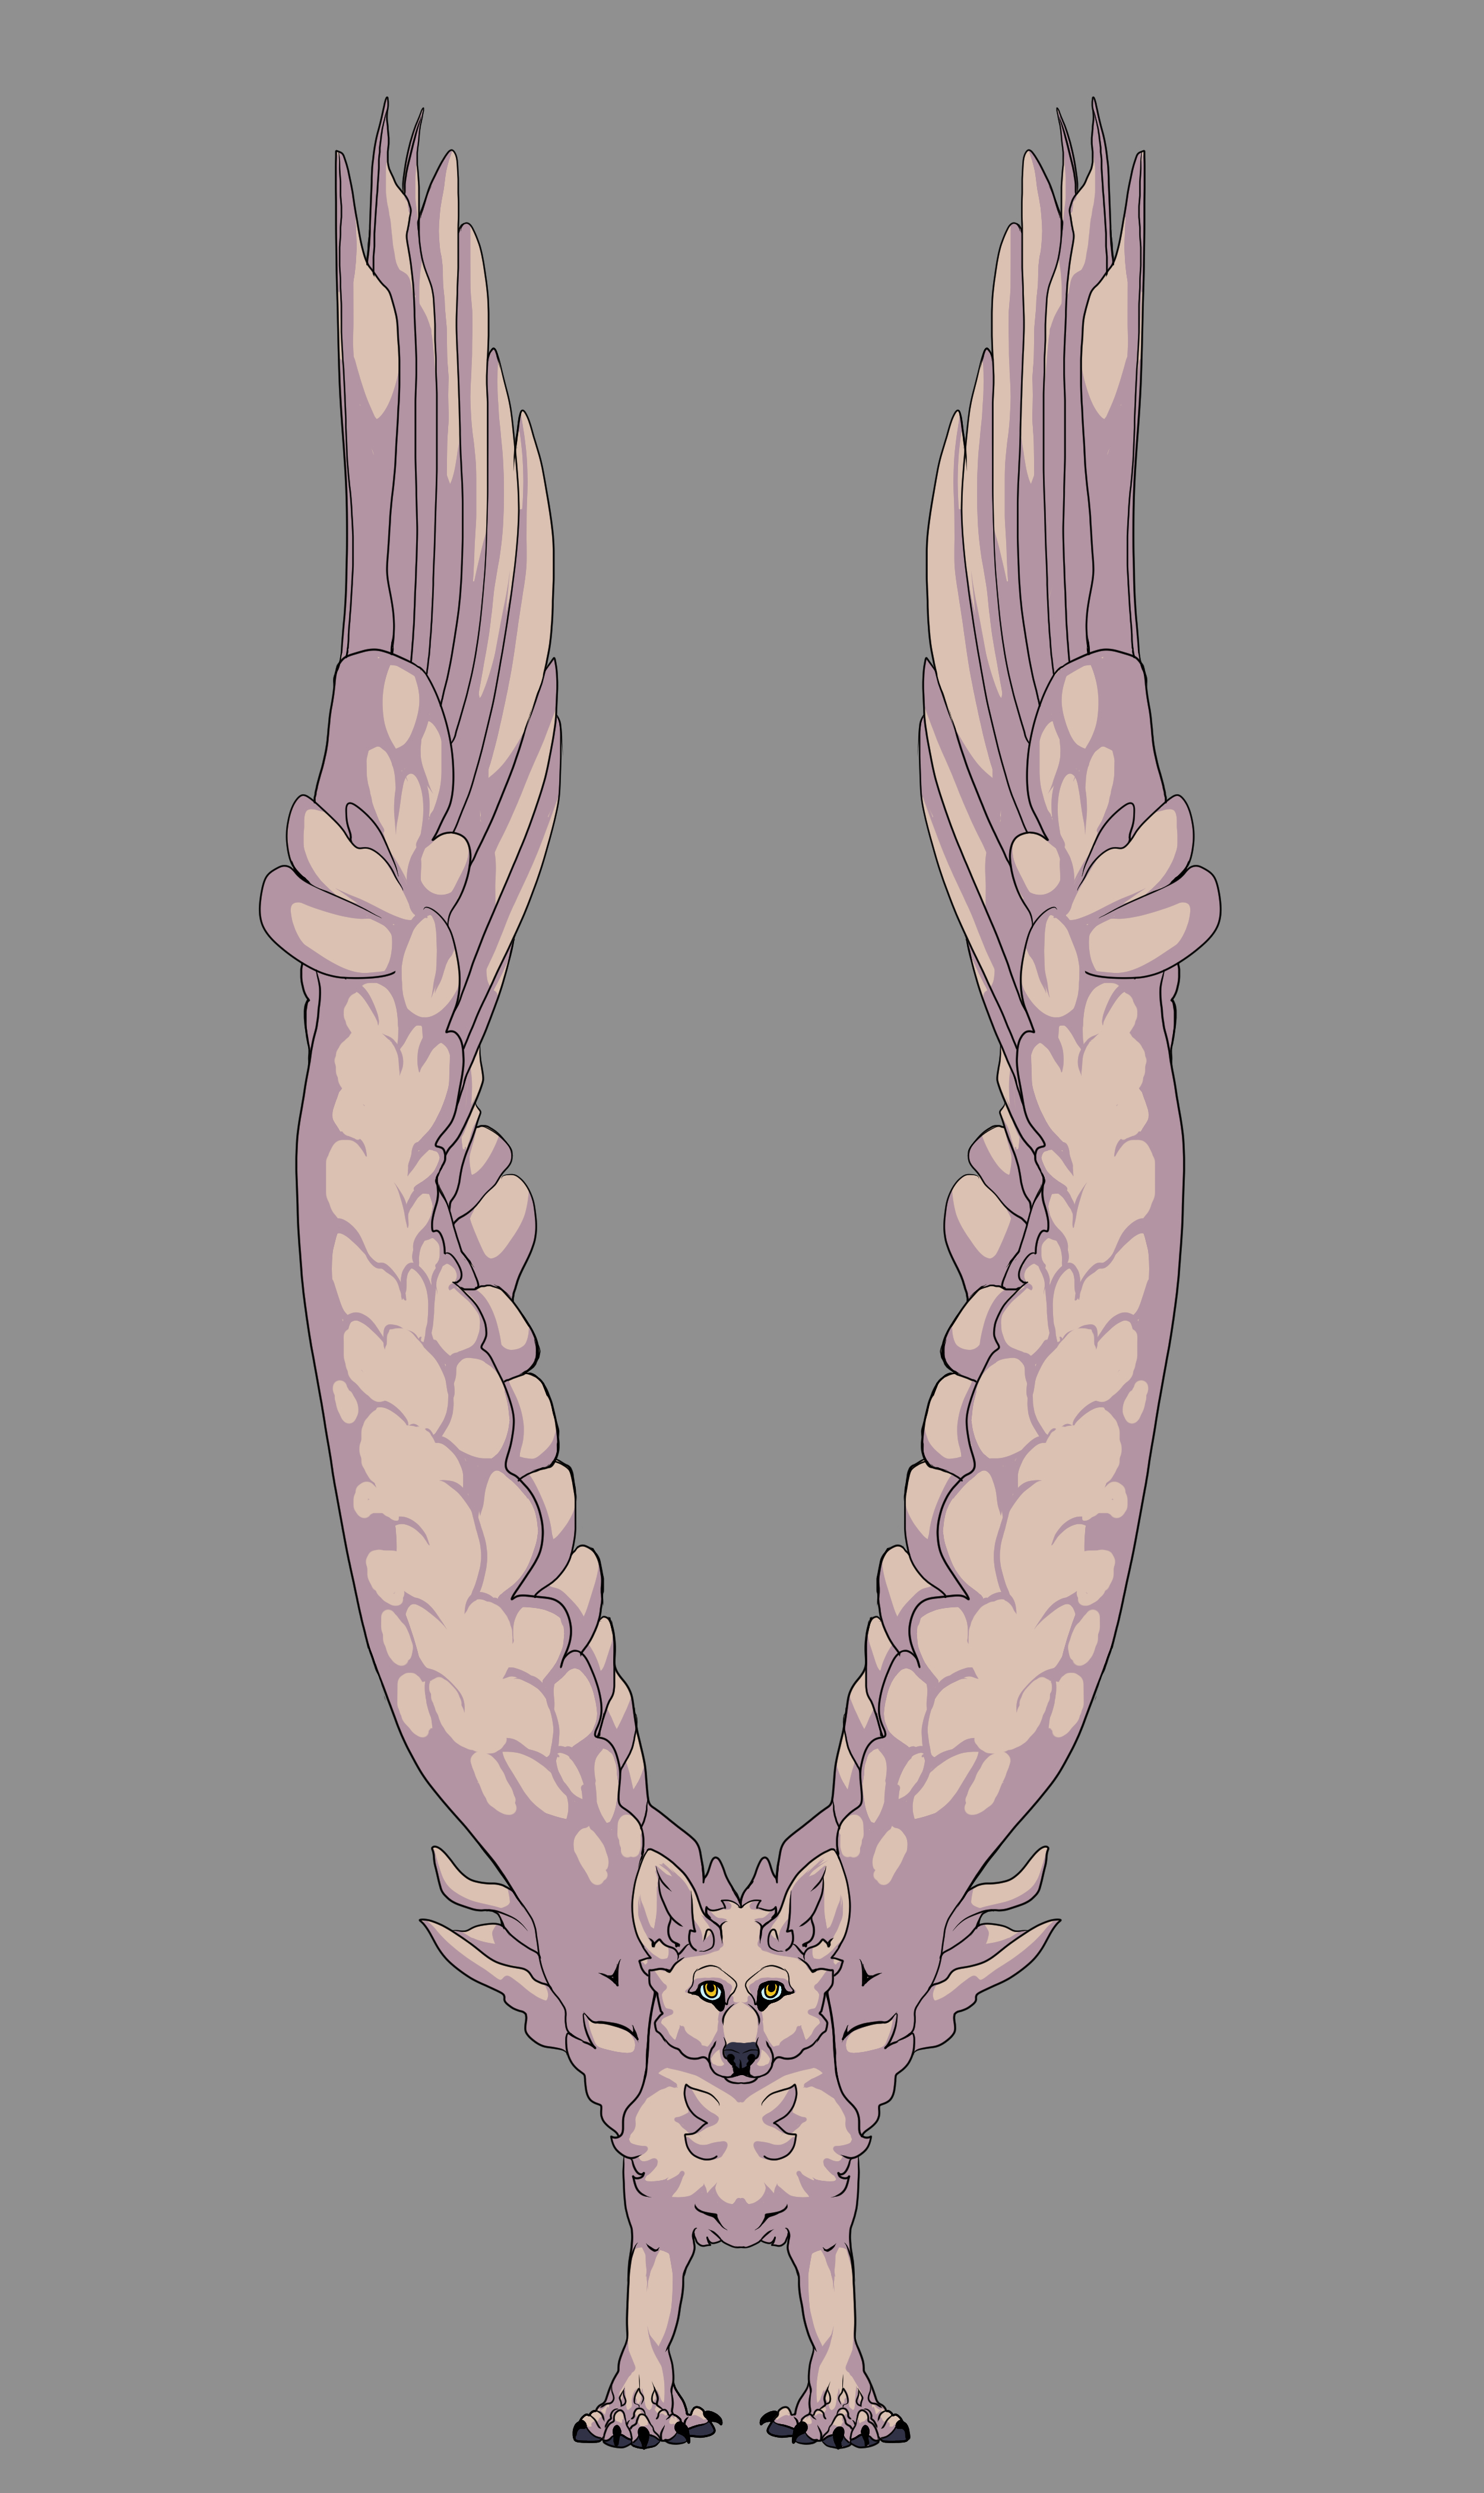
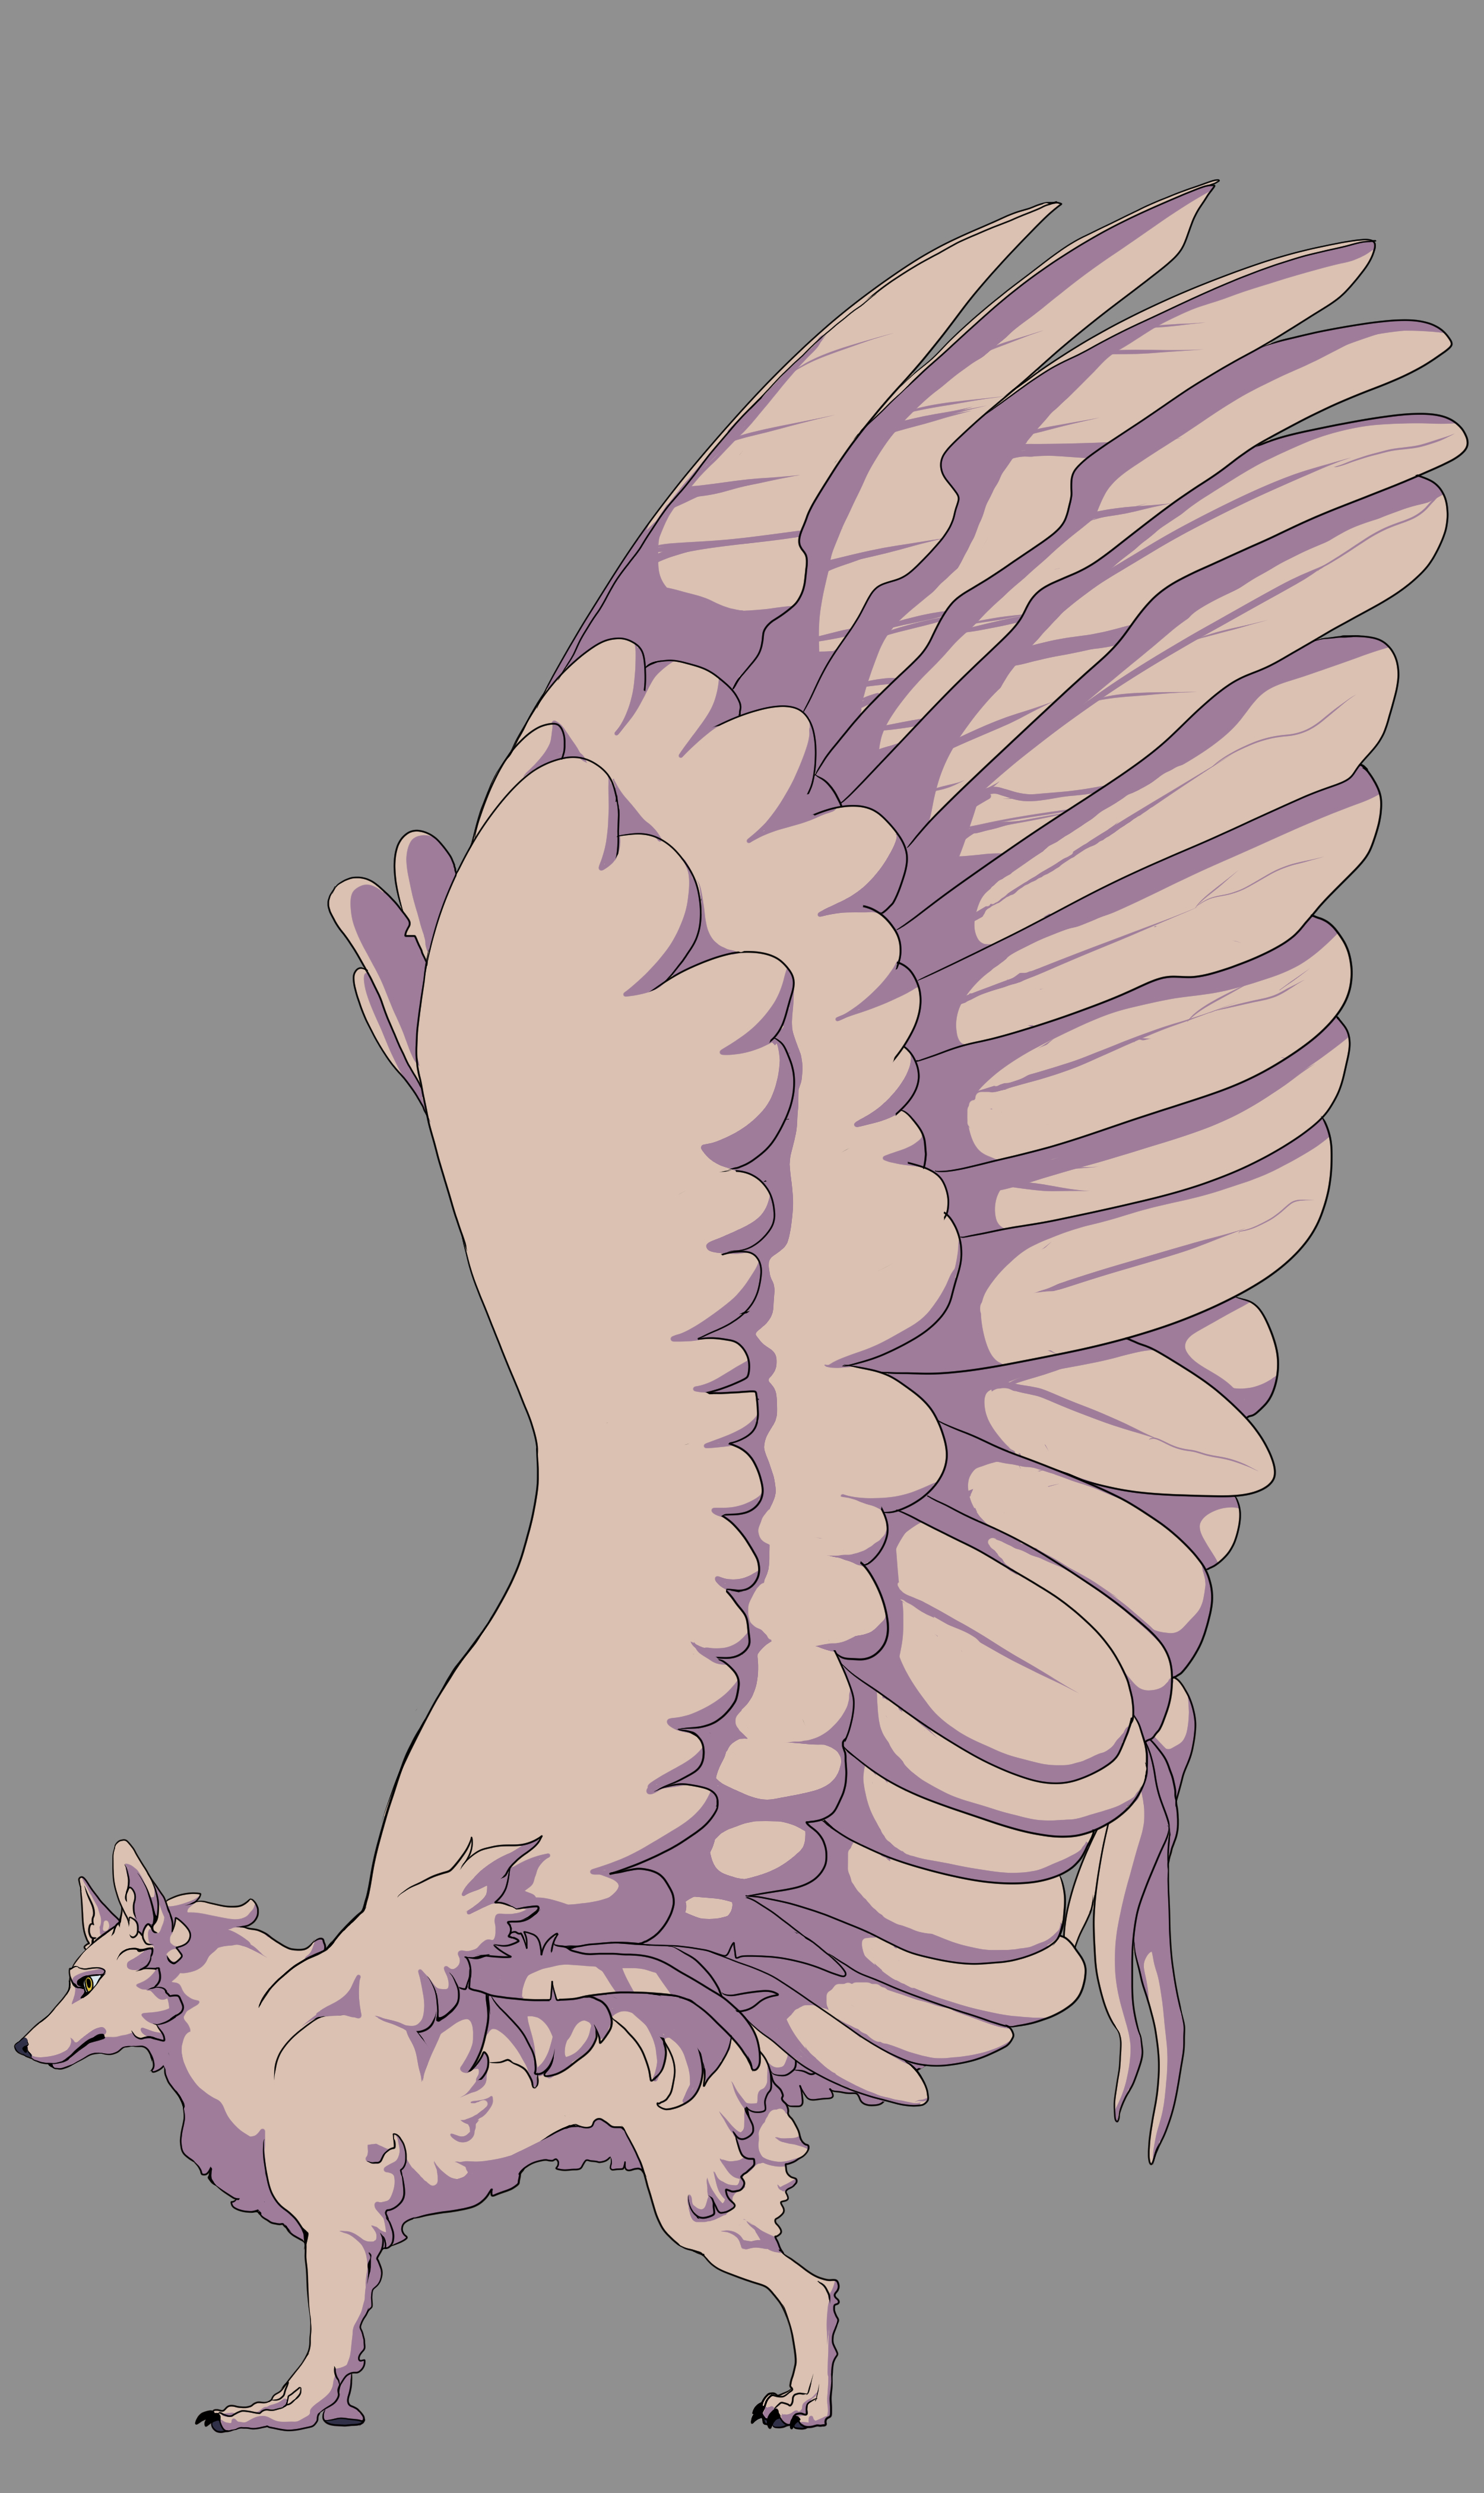
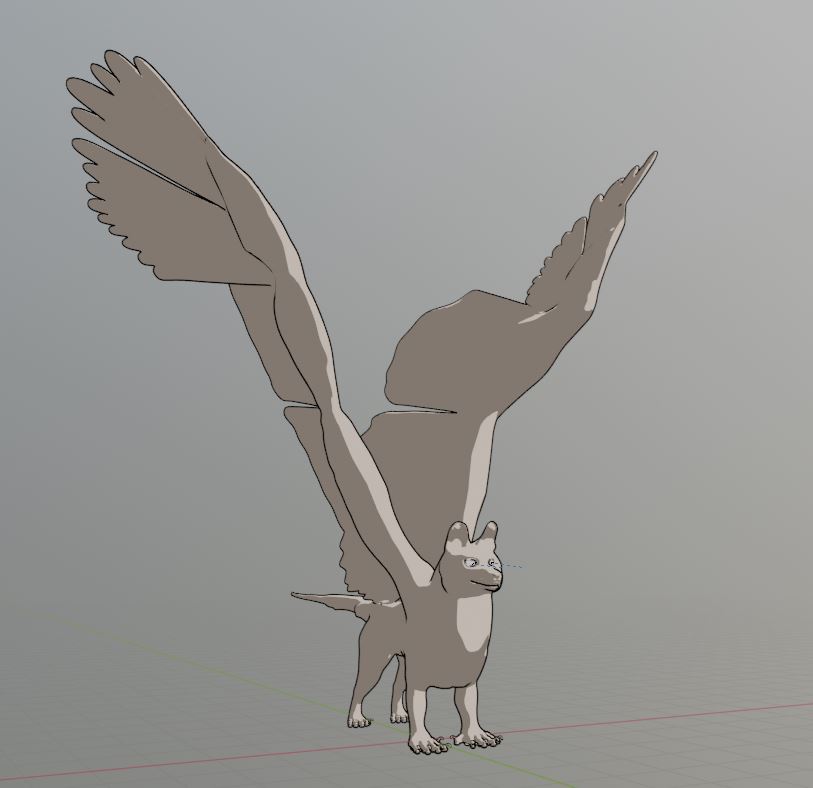
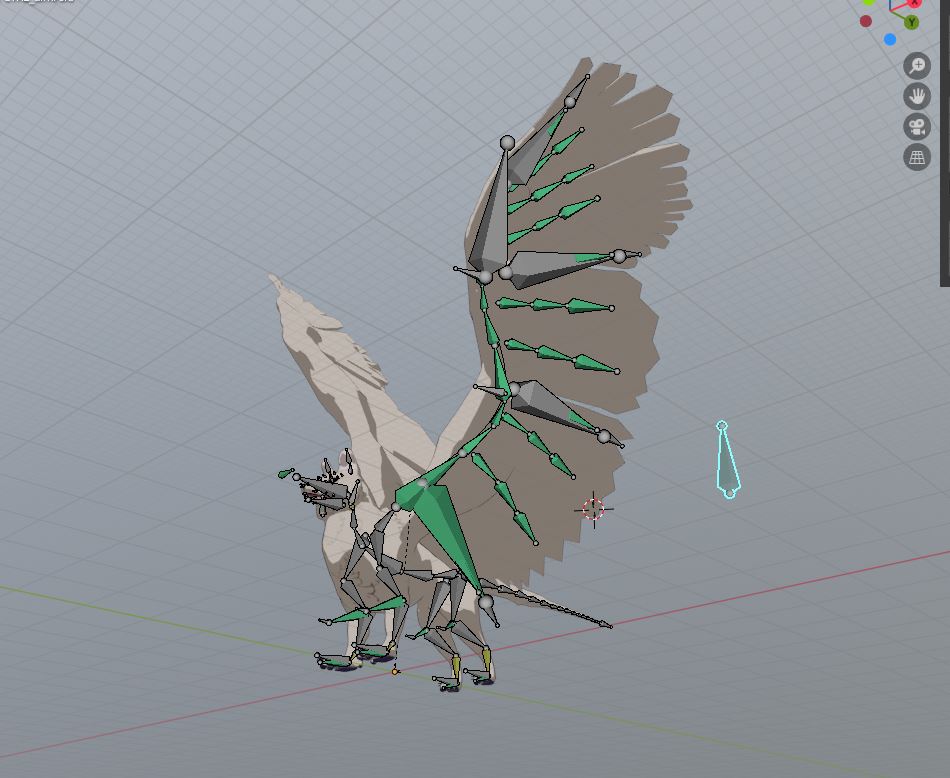
I just spent about 7 months making this monstrosity… Basically a crash course in learning 3D and Blender. I drew the character, sculpted, retopo’ed, rigged, textured, lit, animated, and rendered it…
I know there are problems and I learned a lot. This is almost my second 3D animation, so I’m sure it’s super jerky and gross. I’d love any feedback or thoughts on it, if you have the time.
That’s really impressive and I know this probalby has been quite the nightare to make, becuase I actually tried to make a quadrupedal winged creature … and didn’t manage to make the wings fold properly. So yeah. My first advice would be:
try making something smaller next time to better familiarize yourself with fundamentals…
But getting back to your work. The main areas you might want to take a look at:
Animation Reference: look up some reference before animating a walk cycle. Yours looks kind of unnatural, because dogs simply don’t walk like this https://www.youtube.com/watch?v=8qV5pdO_X8U
make your motions more fluid by animating with more focus… try to break your movement down into some basic understandable parts and make them work in seperation, before combining them into a larger motion.
From what I can tell it pretty much looks, like you’ve just “winged it”.
I hope this video get’s across my point: https://www.youtube.com/watch?v=INQx-Lzs8mU
The shading in your concept art had dope colors. I would also use that for the final model. You can use the shaderToRgb node combined with color ramps to get cool results.
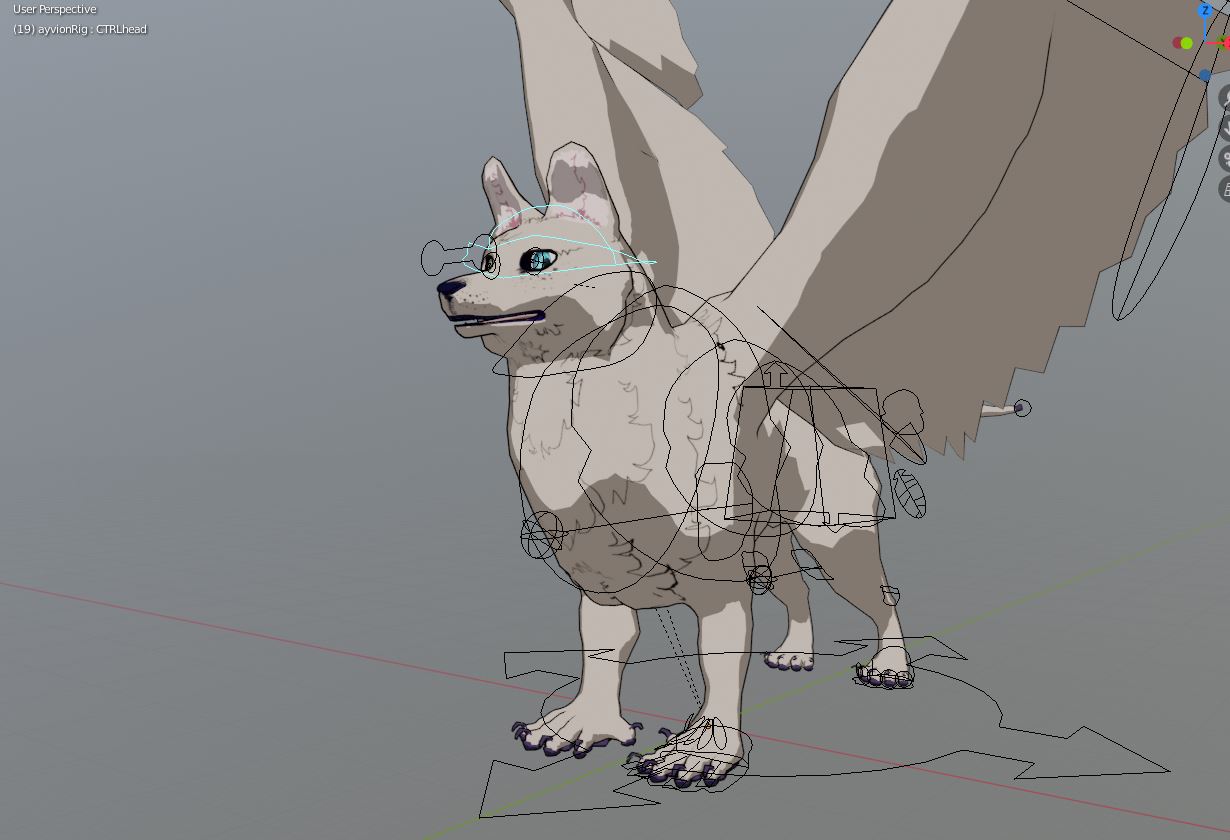
Organize your controllers using Bone Groups and Layers. Having some Color Coding makes the rig easyer to read.
if you don’t need to, you don’t have to actually make the wings properly fold. “Cheaping out” and having a version of your model with manually modeled tucked wings and one with open wings will give you better results with less work … you just can’t open the wings on the fly as good, but swapping a model mid-animation is totally okay and if it looks better, than what you could do by having a “proper” transition … go for it!
Even nintendo cheaps out in this regard sometimes! https://www.youtube.com/watch?v=-oMTHqC5GxI
try to have more evenly distributed geometry …
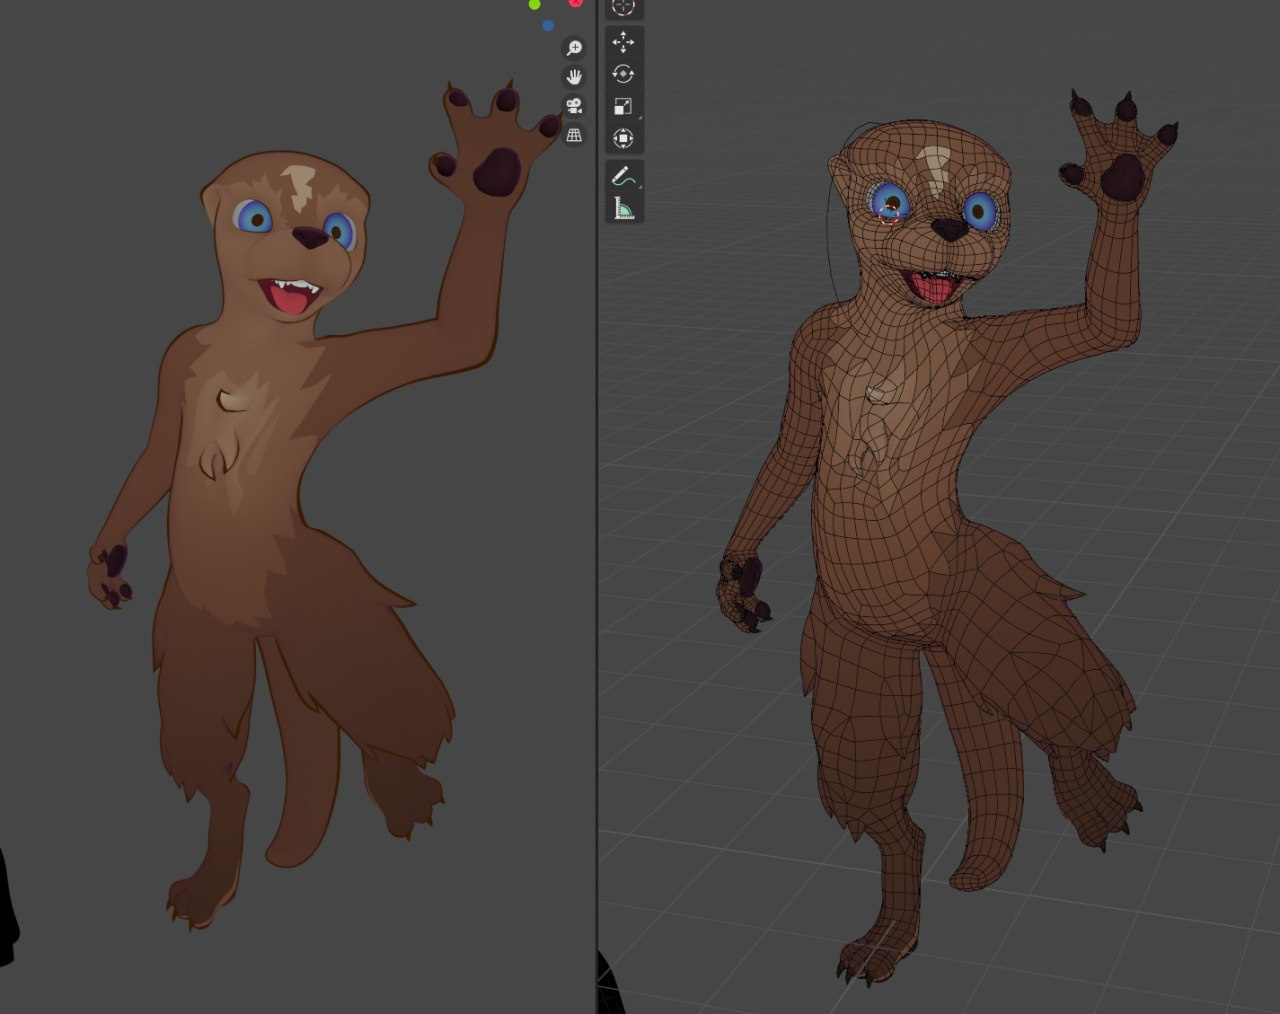
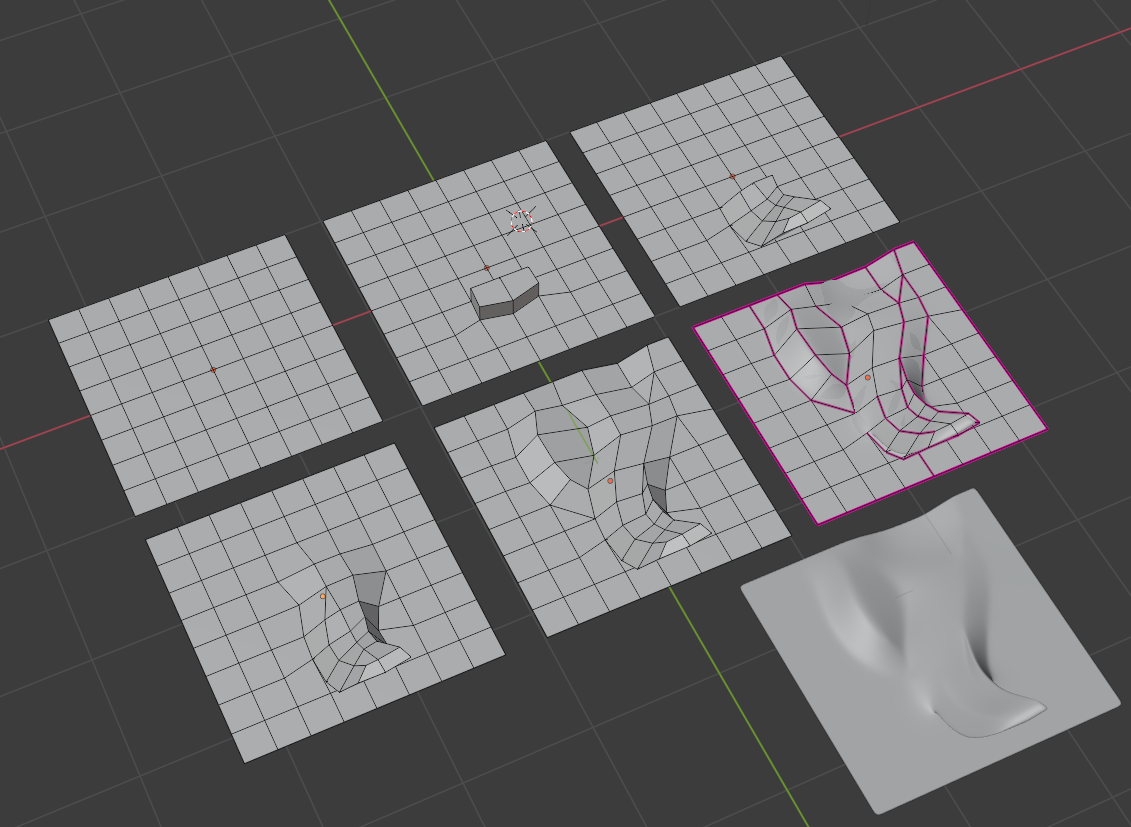
here’s a thing I’m currently working on for you to mabye get some inspiration:
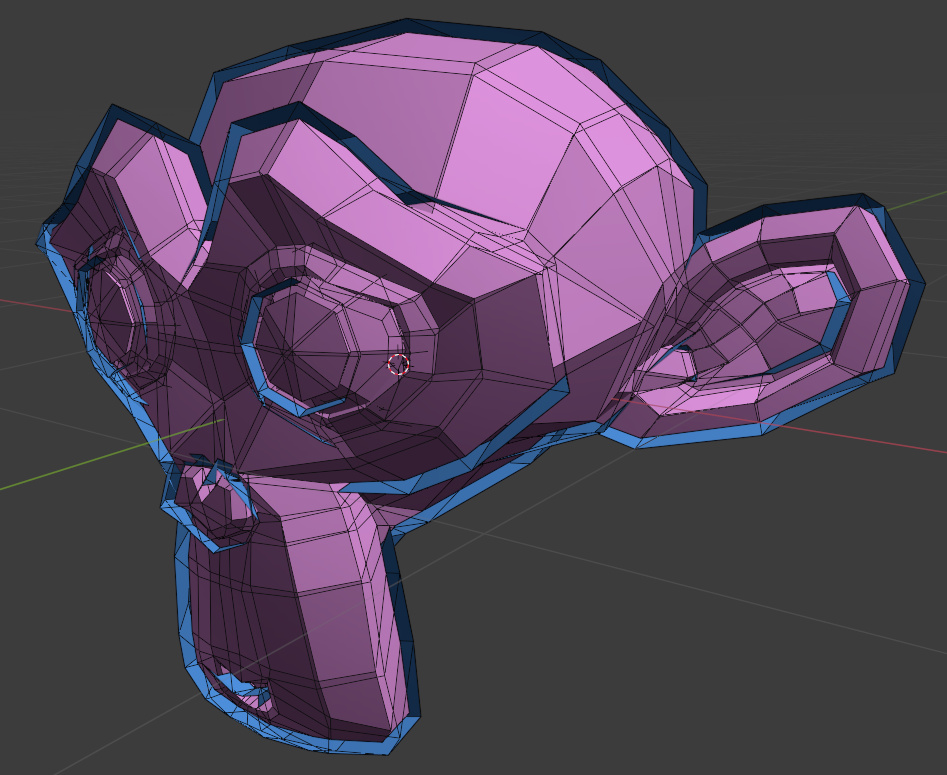
In case you’re curious: I got the outlines by making a copy of my base mesh, inflating it a bit (you can use a displacement modifier for that), flipping the normals so you only see the “wrong side” of the inflated mesh and then checking the “backface culling” option inside the material editor … I hope this suzanne get’s it across…
Sorry it took me so long to respond! I didn’t turn on my email notifs, agh.
This is so incredibly helpful. I can’t thank you enough for taking the time to look at this creature and give me some feedback!
And you are right; I did vastly wing this model, from the first cube to animation. Learning this way might have cost me 3 of my 9 human lives.
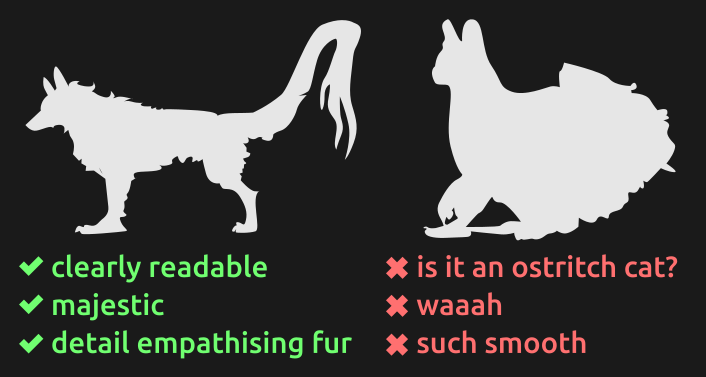
I loled about the silhouette. Ostrich cat! Now I want to make one of those…
The tips on shading; excellent. I’m 100% self taught and these notes are gold to me <3
I love your otter character; thank you for including him! That fur texture was exactly what I was trying to achieve, but alas, I tried 6 times and just couldn’t get what I wanted. But your mesh looks so clean and elegant. You might find me lurking in your artwork one day…
Totally cool use of the outline effect as well; there are so many ways to achieve it… I used the solidify modifier, and I’d love to see how your method works. Packing it in my noodle for the future.
This is such a helpful response. I give it 10,000 bells. You have saved my life, friend.
Yeah about my fur technique … I can’t really give you that many useful tips on it in particular, because it’s really more an art than a science for me.
I kind of start with a clean quad mesh, then extrude out some tips, reconnect the topology and … yeah I kind of wing it by shifting the “clean topology”, deleting polygons, reconnecting them so diffrent edges flow into onanother and … It’s really hard to describe this process, because I kind of only make decisions on a micro-levels and the chatoc fur is almost an emerging pattern… I really try not to think about it, when I’m making this kind of fur pattern
This being said … there’s tons of diffrent approaches when it comes to fur and I don’t know many good approaches for creating good stilized fur shading. So experimentating and thinkling outside the box is advised.
I’m going to provide the final model somewhere for people to inspect it and can notify you about it, if you’d like that.
It works kind of similar:
I make a copy of the mesh
I flip it’s noirmals
and then I just use the shrink/fatten command in edit mode in conjunction with proportional editing to displace the flipped mesh … this way, I am able to art-direct the thickness of the lines and even make some topology-adjustments in areas, where I need it. (the eyes for example.)
This method is more time consuming, but you have a lot more fine control over the end result, so I think it’s worth it. (Plus it let’s you hide some artefacts…)