Hi all,
this is an HD render of an animated array I made of the MTV logo ( it was originally for a motion graphics contest).
The fat M has has two array modifiers applied. The arrays are Object oriented to two contoller Empty objects, one of which has had its axes rotated and applied. For some reason, and its proximity to the other empty seems to be a factor, the arrayed objects are totally distorted, but conform to the spacing units entered in the array modifiers.
Trying to get a nice glint of pure white on the edges without using Edge - I want to use Toon as I saw a nice ‘glinting jewel’ npr shader in Maya’s visor panel I’d like to emulate.
Sorry, I should have explained myself better…this is a frame from the middle of the animation, it gets lighter! The arrays disappear and the camera pops through the ‘legs’ of the M. My question regards the material - how do I make something look like coloured glass or a jewel?
I want to use the ‘refl’ button in render to generate a specularity map to use in mat nodes…but cannot get the caustics I would like.
For colored glass the settings should be something along the following lines:
Enable ‘Ray’ in the render settings - F10.
Go to the material enable ray mirror and ray transparency.
Set the mirror value to 90% under the RayMirror. The base color for the object should start showing through.
Just do a search on caustics on the web. You should be able to find something.
As far as I know you have to use Yafray to do caustics. And photons.
Oh yes… if you are planning on using caustics… be prepared to wait!! It increases render times dramatically. try to get away with only specularity settings that are set high. But if you must use caustics… well… then you must!
Okay okay… I just had to do it myself Blender has that effect on me
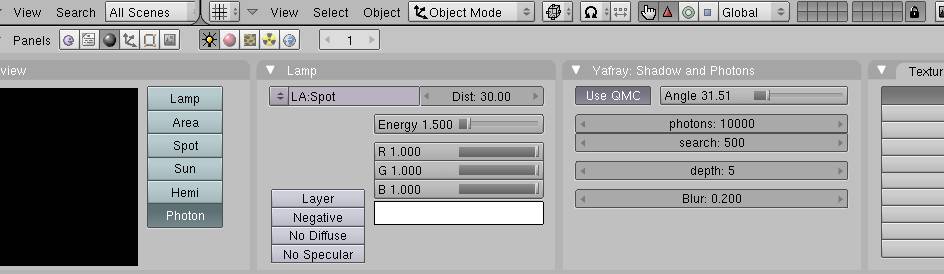
Enable yafray.
Create a photon lamp by adding a normal lamp and setting the type to photon in the lamp buttons.
Set the amount of photons to shoot…typically about 10k - 100k depeding on your needs.
setup the material to be ray transparent. Set the refractions to acceptable value (you’ll have to play around with this)
Render. Voila.
PS - you can use more than one photon lamp source… but I don’t recommend it unless you have lots of free time to wait for the render!
I didn’t light up the scene too brightly so that you can see the photons clearly. needless to say my settings won’t necessarily suit your project, but you are more than welcome to ask if it doesn’t work out.
I used the blur and seek also. In layman’s terms:
Seek - takes a percentage of the photons emitted and ‘sends’ it to the blur function
Blur - blurs a percentage of the photons ‘submitted’ via the seek function.