I have been trying to develop more expertise with detailed animal images that I might use for medical illustration purposes. I have run into an issue that perhaps others have dealt with. I would like to be able to render different particle systems with different Cycles modes (for example, short hair with true normal and long hair with smooth curves) and cannot figure how to do it…if it is at all possible.
Any suggestions on how to improve this image quality is greatly appreciated.
I think this is very well done, well within the scope of naturalism needed for medical illos. The only place it seems more attention might be needed is in the tissues that occupy the space between eye socket and eyeball, and the tear duct area, things seem a little thin there.
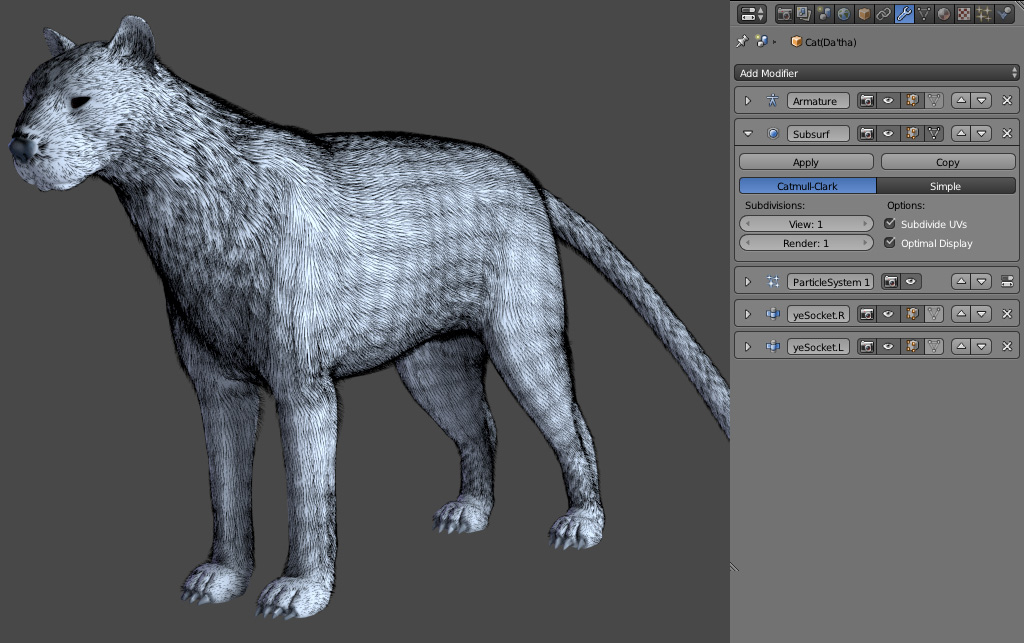
I’d be very interested in knowing your specs for the short fur hair system, as I’m doing a big cat model and having major issues with particle systems control. My model is full-figure so it requires a massive hair count compared to a bust, but any pointers (pun intended) would be helpful.
My current scene uses a couple of hair systems, both humanoid and animal – I’ll look into options for using the different modes as you mention.
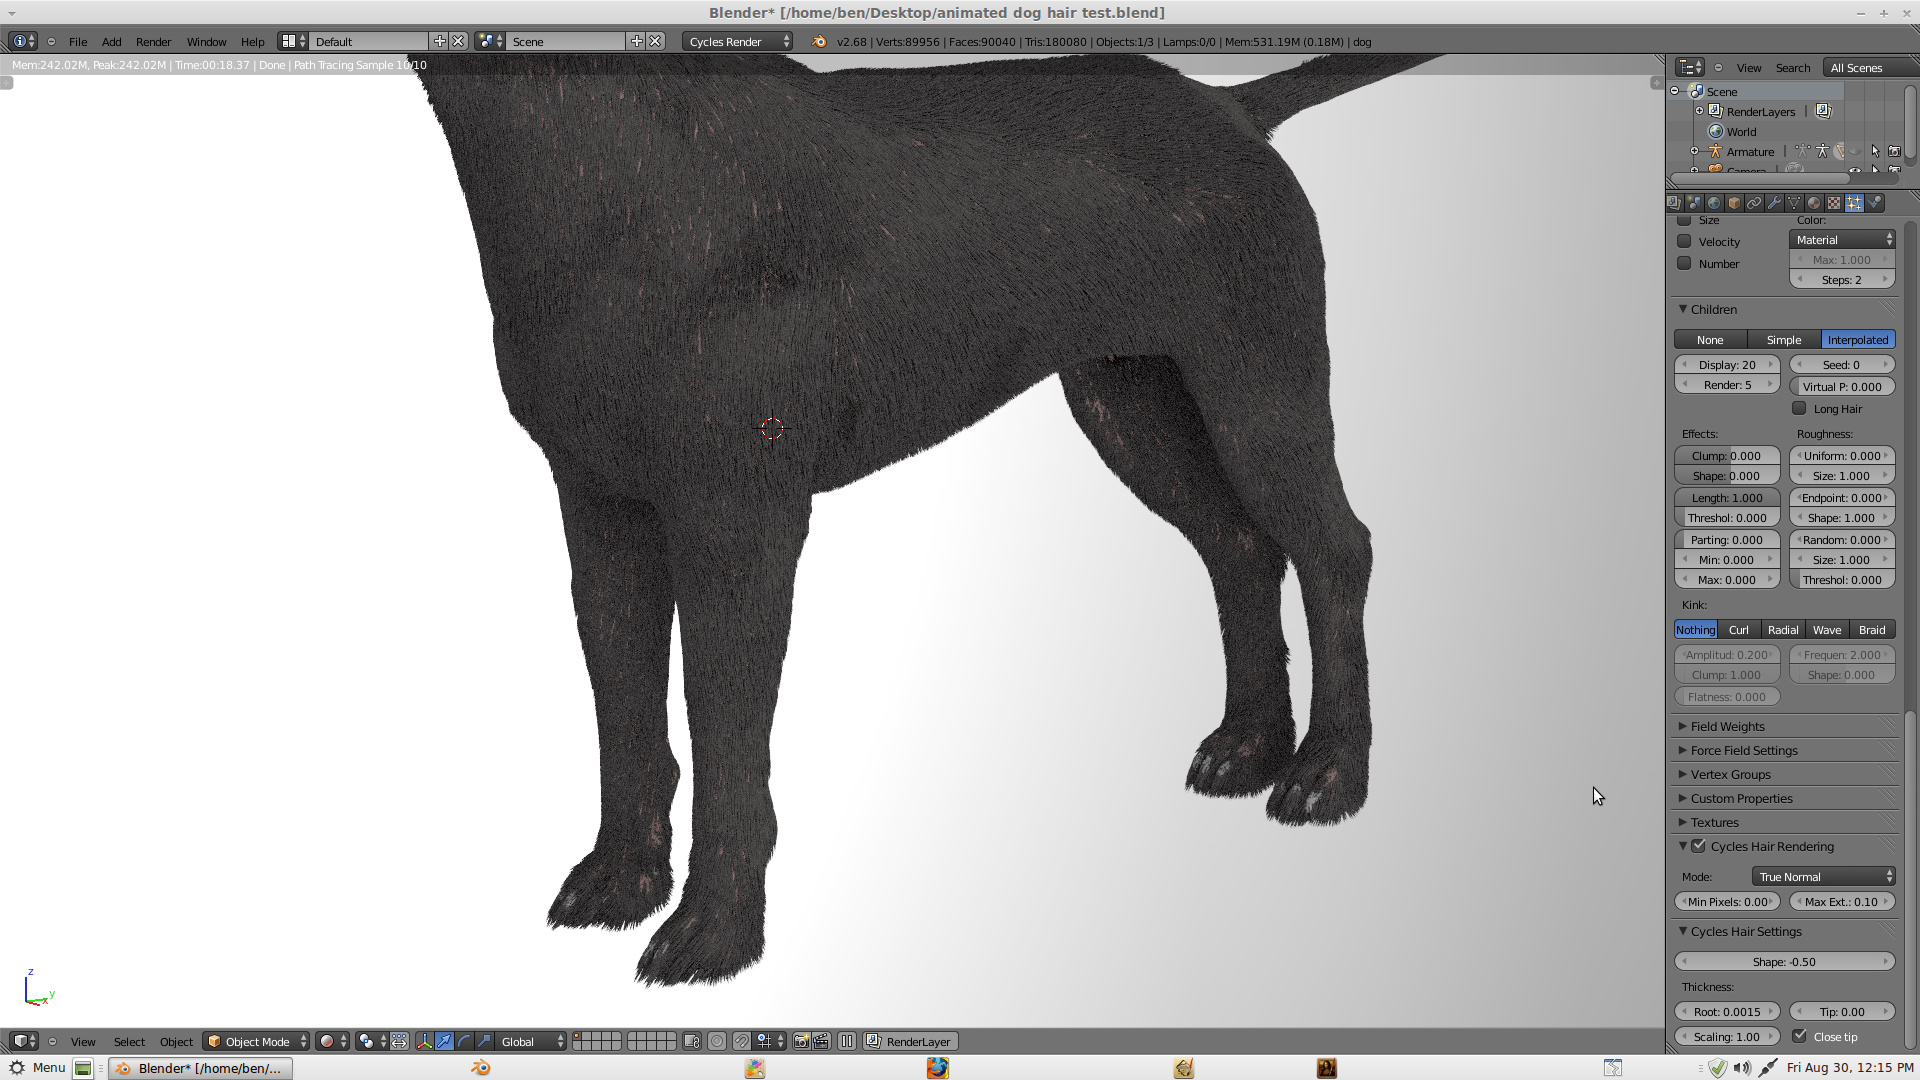
EDIT: The Cycles Hair Settings that determine strand dimensions are apparently system-specific, but the Cycles Hair Rendering (mode) seems to be global. I guess the different modes cannot be used concurrently.
Thanks for the critique Chipmasque. I agree with your comments and will see if I can punch up the eye adnexa geometry some…as it is now, I am not convinced those lids could ever meet in apposition over those globes.
Here are the basic particle settings used in this image:
particle#: 100k
normal: 0.004
children: 30
no effects
weight painting to alter distribution and hair length
Cycles specific settings:
true normal
shape: -0.50
root: 0.0005
tip: 0.00
scaling: 1.0
I originally did not use children and instead had a particle count of 1,000,000. This seemed to set up to render faster…which did not make sense. That version was ungroomed and did offer some nice transparency and highlight effects. In order to groom the hair I reduced the number down to 100k and added children. I am using Andrew Price’s hair shader with modifications and compositing some color variations in the diffuse and transmission nodes.
Good luck with your image. Perhaps a composited Blender Internal with Cycles will allow longer, smoother hair renders for mixed short and long hair projects?
Thanks for the links to your cat project. The only thing I have experienced that is close to what you describe is a scenario in which I have too many children particles associated with too few main particles. In those cases if I did not watch things closely during grooming I would wind up with rogue fly-away hair patches.
Do you have the same issue if no effects are added to the children? It looks as if there is a clumping effect added in your system. Perhaps that is contributing to reducing the predictability of the groomed system.
I am at a loss when it comes to the patchiness issue as I have done nothing with an animated particle system. What you describe is not encouraging. I think I need to run a test to see if I can learn something about this issue.
Good suggestions, benk, I’ll see if varying the child parameters has any beneficial effects. I’m not using any hair effects like wave or curl, but had a heck of a time finding usable parameters for Radius, Clump, Shape, etc, those affecting the basic child particle distribution. Your dog’s fur looks so perfectly well-distributed, I’m quite envious
I did try early on in the cat model development to use more parent and fewer children strands, but it didn’t seem to make any difference in terms of the artifacts related to the mesh structure – those I can see even when editing in Particle Mode with children hidden. It almost seems as if the parent strands don’t propagate from the surface immediately adjacent to mesh lines, leading to the linear glitches. I haven’t done much fur-coat systems work, mostly human(oid) wigs and facial hair, where I often place strands manually, so the problem wouldn’t arise as it seems to with automatic distribution methods. I did do a fox a while back, I should check to see if that shows the problem, it was done in a much earlier version of Blender, early 2.6x.
I think the animation issues are inherent in the particle hair implementation. Hair Dynamics responds to motion and external forces, but there seems to be no provision for keeping the hair laying properly on the mesh surface under flex or other deformation, leading to “stick-outs” or patchiness.
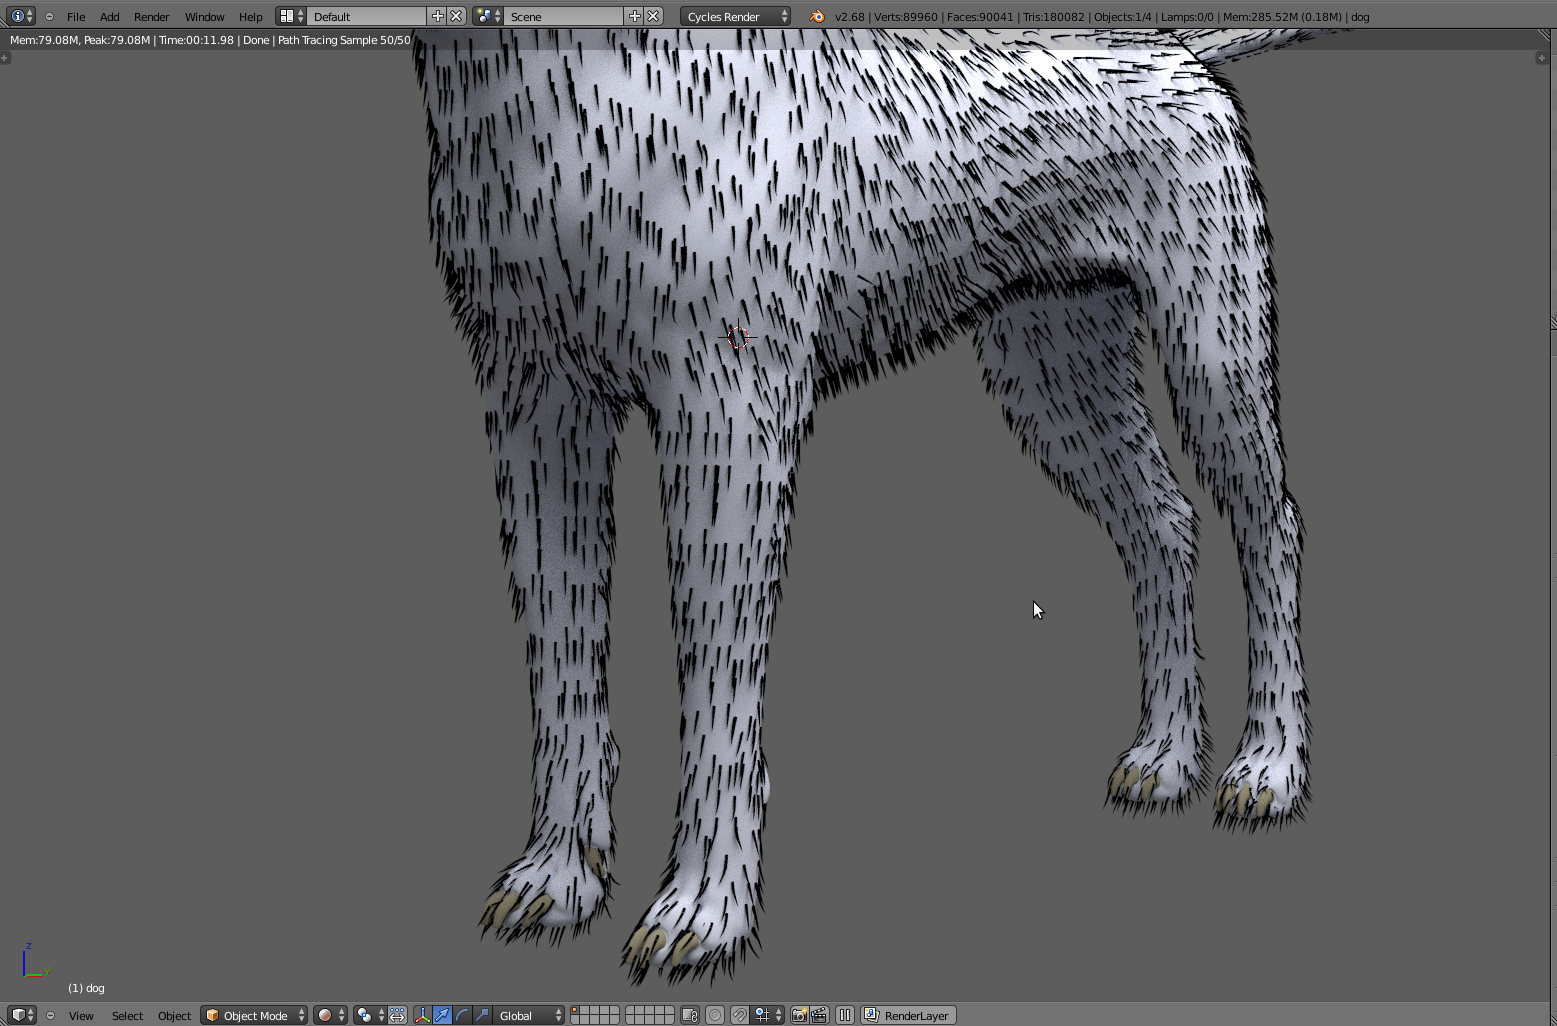
Cipmasque: For what it is worth here are a couple of screenshots of a test I did. I am not sure if this test demostrates the problem you are having. What do you think?
Thanks for this screen grabs. They don’t seem to show the kind of mesh-structure dependency that causes the artifacts I see in my model, which is a clue, though a puzzling one. Can you get a similar pic of the model in Particle Mode, where only the parent strands are visible with no material? I’ll do the same with my cat & we can compare notes.
EDIT: Here’s some pics of the forelegs where it is very obvious, though it also shows elsewhere:
This is as rendered without children, using a thick root value. Not that there is a “bare” channel running down the closest foreleg where no strands are generated – this is how the strands were initially propagated before grooming.
Same thing in Particle mode, where the parent strands length shows the problem even more clearly. For rendering the length is modulated by a vertex group, as with your dog model.
This is a UI shot – hair length is modulated, and the polygon cage wires made visible. Note that the “bare” channel correpsonds exactly to an edge loop. There is another one less clearly seen in the other foreleg.
It is nearly impossible to disguise this artifact with grooming and it’s made even more noticeable by rendering with children. I’d have to do another test with a new particle system to see if an increase in parent strand count helps, but iirc, it did not.
It persists even when Vertex Groups modifying density & length are disabled. It persists even through the grooming, which can also be seen. It seems to be a matter of how the strands are originally propagated in the particle system, which has few controlling parameters in terms of modulating the strand distribution.
Note that the pattern shown corresponds to the base mesh cage, and is not related to the Subsurf level.
The modifier stack is also shown for additional info. The bottom two modifiers are Shrinkwrap limited with vertex groups to the inner eye socket area – part of my method of blink implementation.
Third image is strand render without system affiliated with modifier stack.
Does these images offer any clues? If you would like I can email the .blend file for your investigation.
That’s OK, thanks, benk, though it would be nice to have such a fine dog model In terms of the hair system, I’ve found what I think is the major source of the “mesh-like” artifacts, which BTW I see to a smaller degree in your screen shots as well. It has to do with the initial particle system specs – I had forgotten there is an “advanced” option that opens up settings for distribution. This is a fairly new feature & I wasn’t used to it yet. There I found a number of setting to control parent strand distribution, otherwise hidden. I played with the settings & found away to virtually eliminate the mesh effect. I’ll post stuff later, right now I’m re-grooming the cat’s fur, quite a chore on my weak-arse comp


 In terms of the hair system, I’ve found what I think is the major source of the “mesh-like” artifacts, which BTW I see to a smaller degree in your screen shots as well. It has to do with the initial particle system specs – I had forgotten there is an “advanced” option that opens up settings for distribution. This is a fairly new feature & I wasn’t used to it yet. There I found a number of setting to control parent strand distribution, otherwise hidden. I played with the settings & found away to virtually eliminate the mesh effect. I’ll post stuff later, right now I’m re-grooming the cat’s fur, quite a chore on my weak-arse comp