Thanks, I haven’t tried it, but I think to make it work in 3 dimensions is to calculate Z vector using another profile curve(the same way as the p_normal attribute), but this one would go along Y axis(position of the second control point is 0,.1,0).
1 Like
Thanks for your clever method !
It works very well but it’s even better if you replace the profile curve with a primitive line with 2 points and a mesh to curve node.
1 Like
Yeah I lived in a cave for last two weeks and didn’t follow latest additions to GN, but yesterday I’ve actually tried what you suggested and yes it’s better as user has better control over it 
1 Like
I’ve been trying to achieve a density falloff for a few days and I’m not sure how to do it. What I would like is to have a point distribution node slowly increase the density the closer to the target. I used a point separate to create a distance cull but it’s a hard line that is very visible. Wondering if there is a way to make it more of a gradient to make the pop in less noticeable?
Example
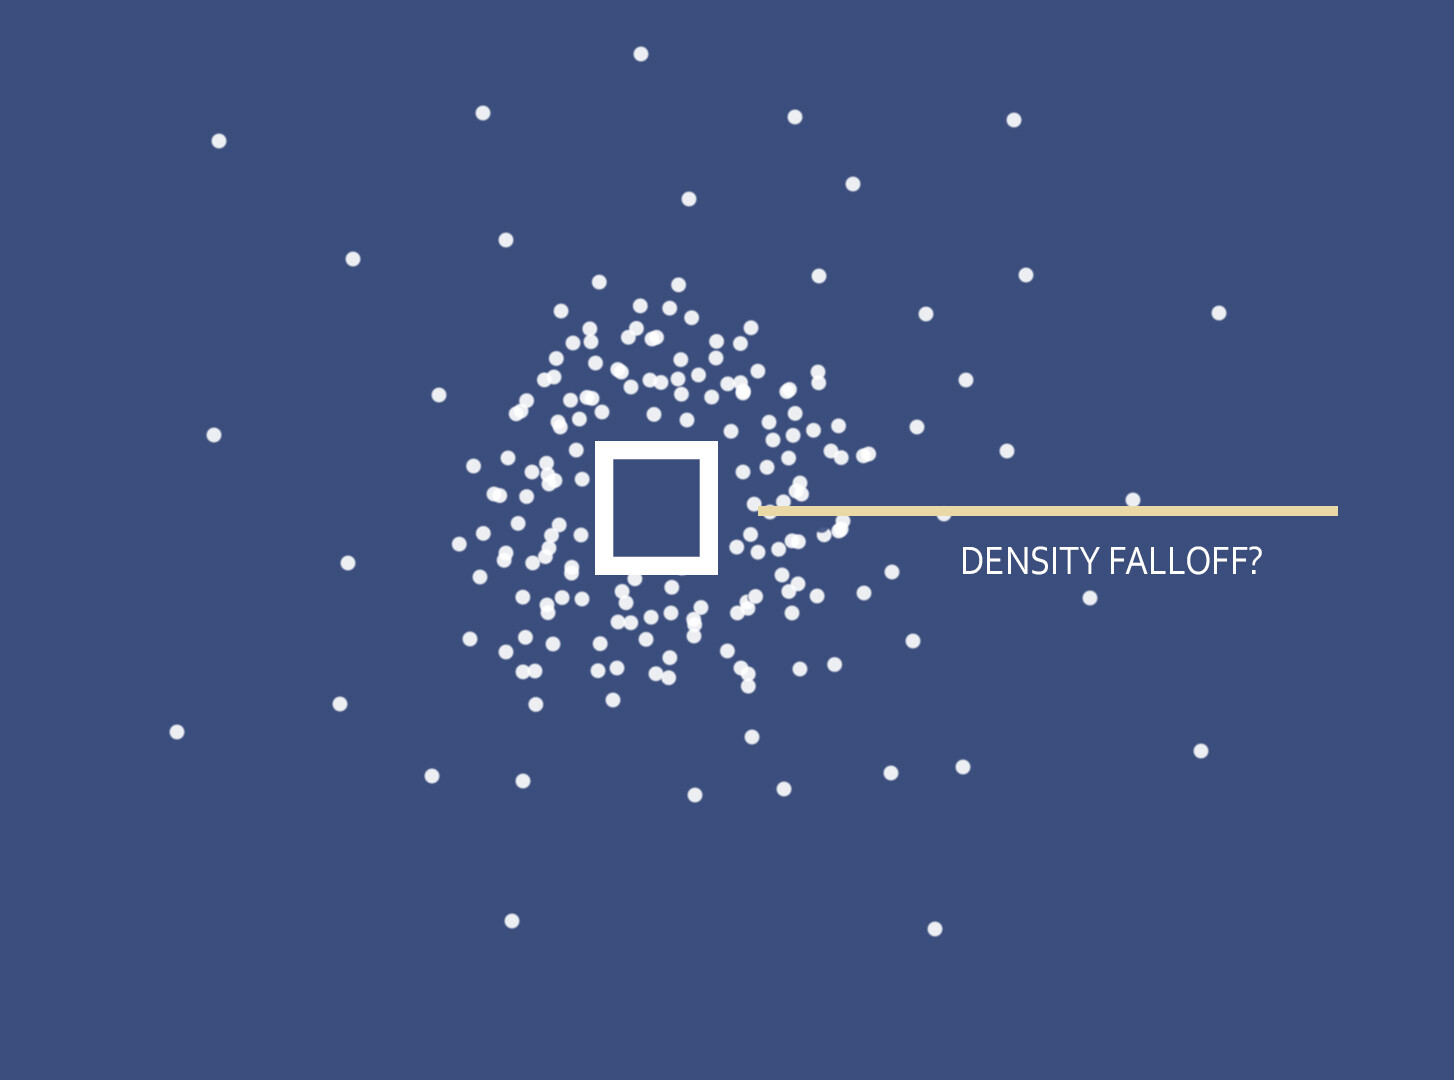
What you need, is the attribute proximity node.

Actually, rather than using the attribute color ramp, the attribute curve map gives you smoother fallof and better control.
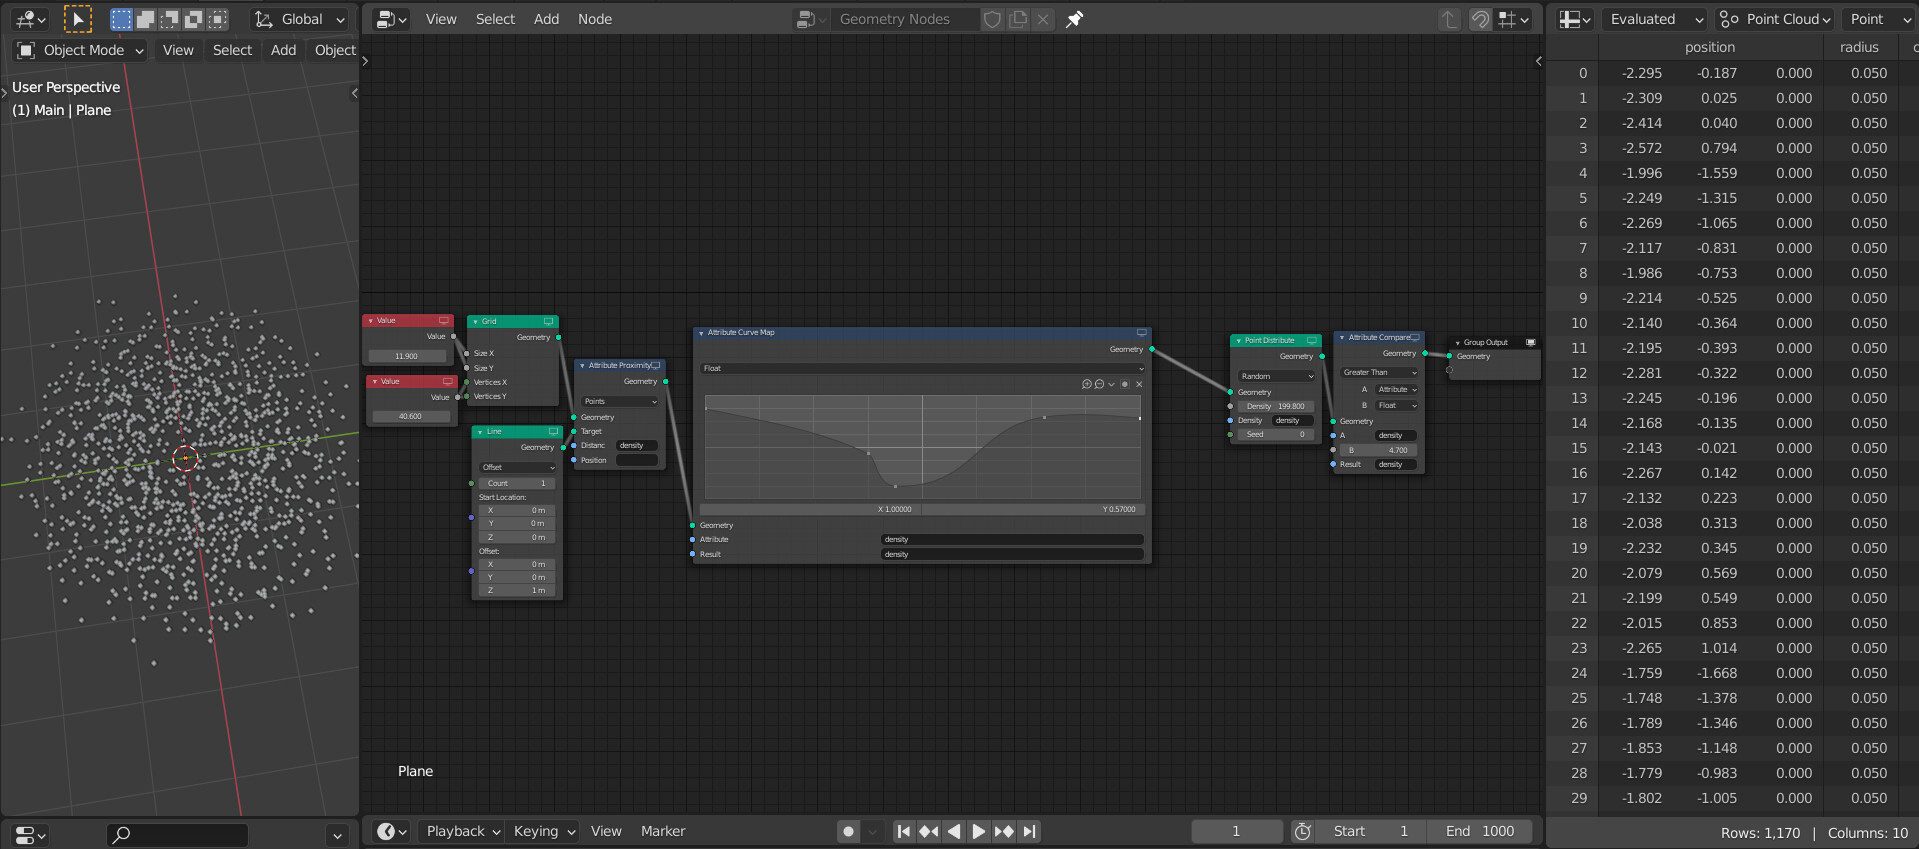
Edit: it works, but it is unnecessarily messy. You should use the attribute vector math like I mentioned below, instead of attribute proximity and line.
2 Likes
I’m interested to create a cam view dependent density geom node.
Is that similar setup good for my purpose?
1 Like
Most likely not. Remember, the attribute proximity node takes geometry, not an object. I would recommend using this setup instead:
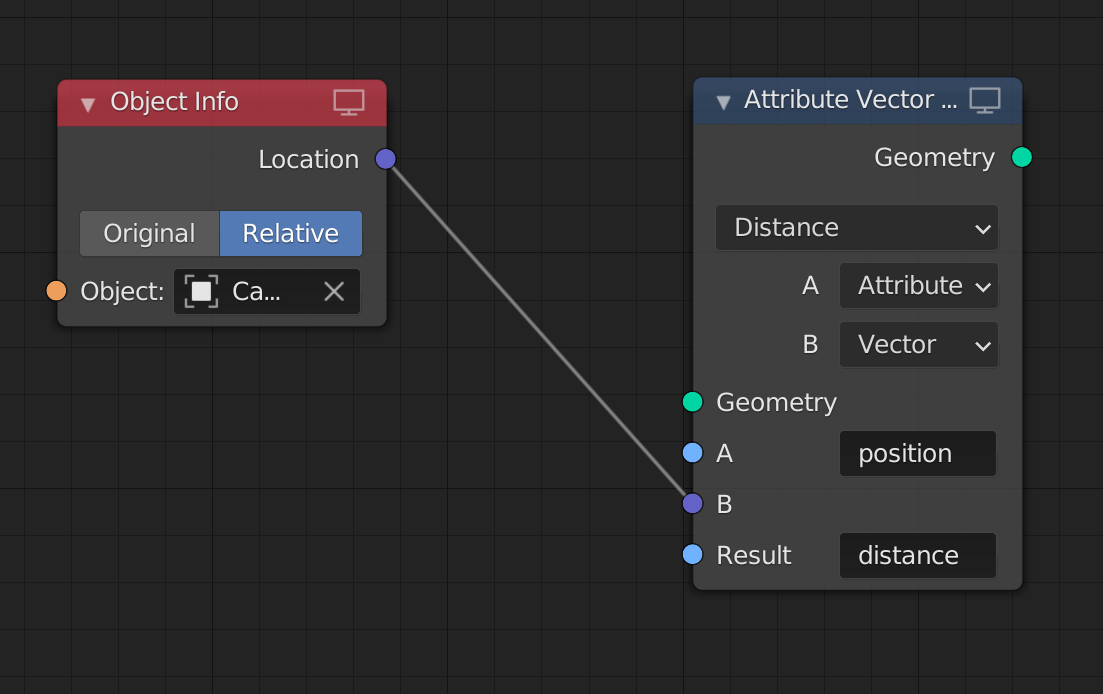
You could then use this to switch instances or density based on distance etc.
Actually, I don’t know why I didn’t do this in the first place. This would work even better for the density falloff, and even let you use an empty to control it.
4 Likes
thank you, i’ll try it.
If you are interested in camera culling, lod, and related matter, erindale has a tutorial on that.

1 Like
I’ve seen it but I can’t reduce the density when the grass is far from camera.
Brilliant! Thank you. If I wanted to understand geometry nodes better what should I learn? Other than practicing more with them? I’ve been thinking I should relearn some math as I haven’t touched that since high school but I am not sure which part would be most useful to learn.
I don’t know if I can really give you a fair answer as I am only learning it myself. I don’t think there is a better way to learn geometry nodes other than practicing. But instead of just practicing, find a process that you do often in your everyday scenes. Find a way to automate it. Improve it. Make it a node group. Make assets that you can reuse again and again. This is the power of geometry nodes.
As for the math, I am too awaiting @Gemn’s upcoming high school math in geometry nodes. I think it would be useful for everyone. I think vector math is the core of geometry nodes, and therefore is the most important. However, picking one part of math won’t get you anywhere, so it would still be useful to brush up on some simple arithmetic and algebra skills.
2 Likes
Inspired by @Charles_Weaver and his moths, I was thinking about the way that moths move around a light, kinda orbiting, but getting closer and further away on a kind of cycle. I started thinking about curves that do something similar, and I thought of the spirograph:
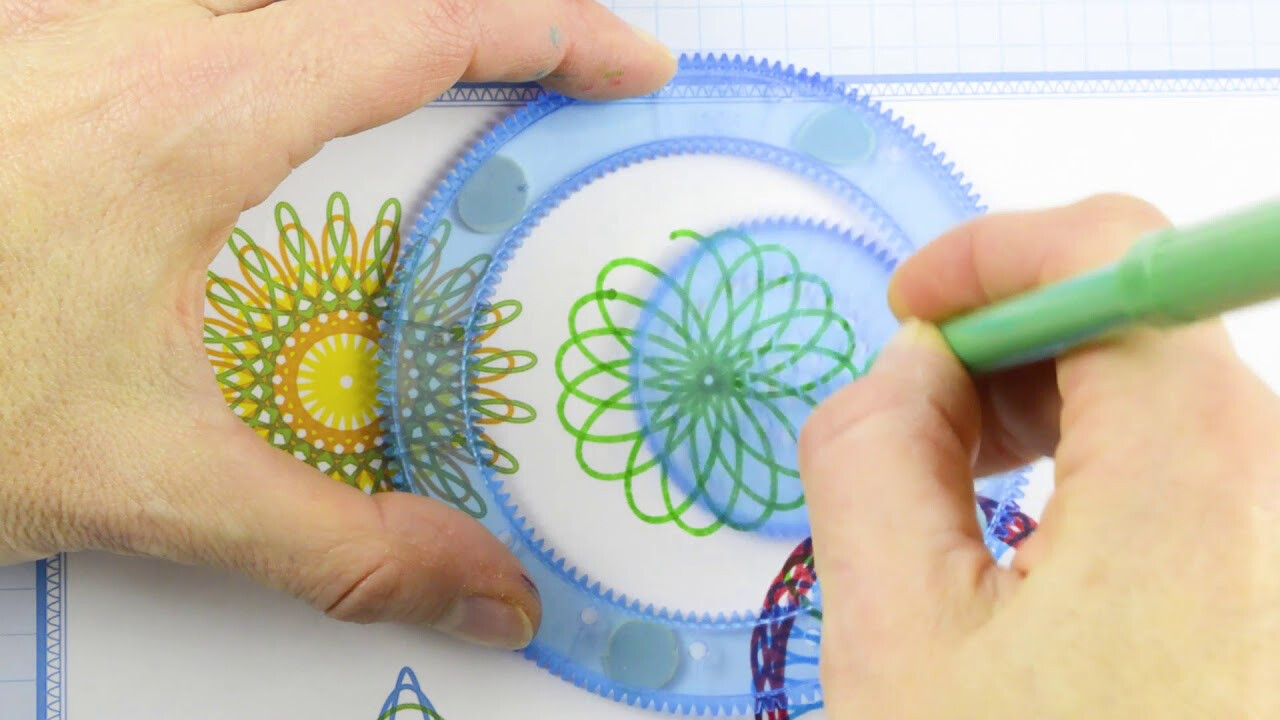
so after some time on wikipedia: https://en.wikipedia.org/wiki/Hypotrochoid
I came up with a digital spirograph:


gn-spirograph.blend (1.2 MB) - cc0 license
@Charles_Weaver - the offset loc output of the spiro helper nodegroup gives you the point location orbiting around, and could be a good place to start for moth movement.
21 Likes
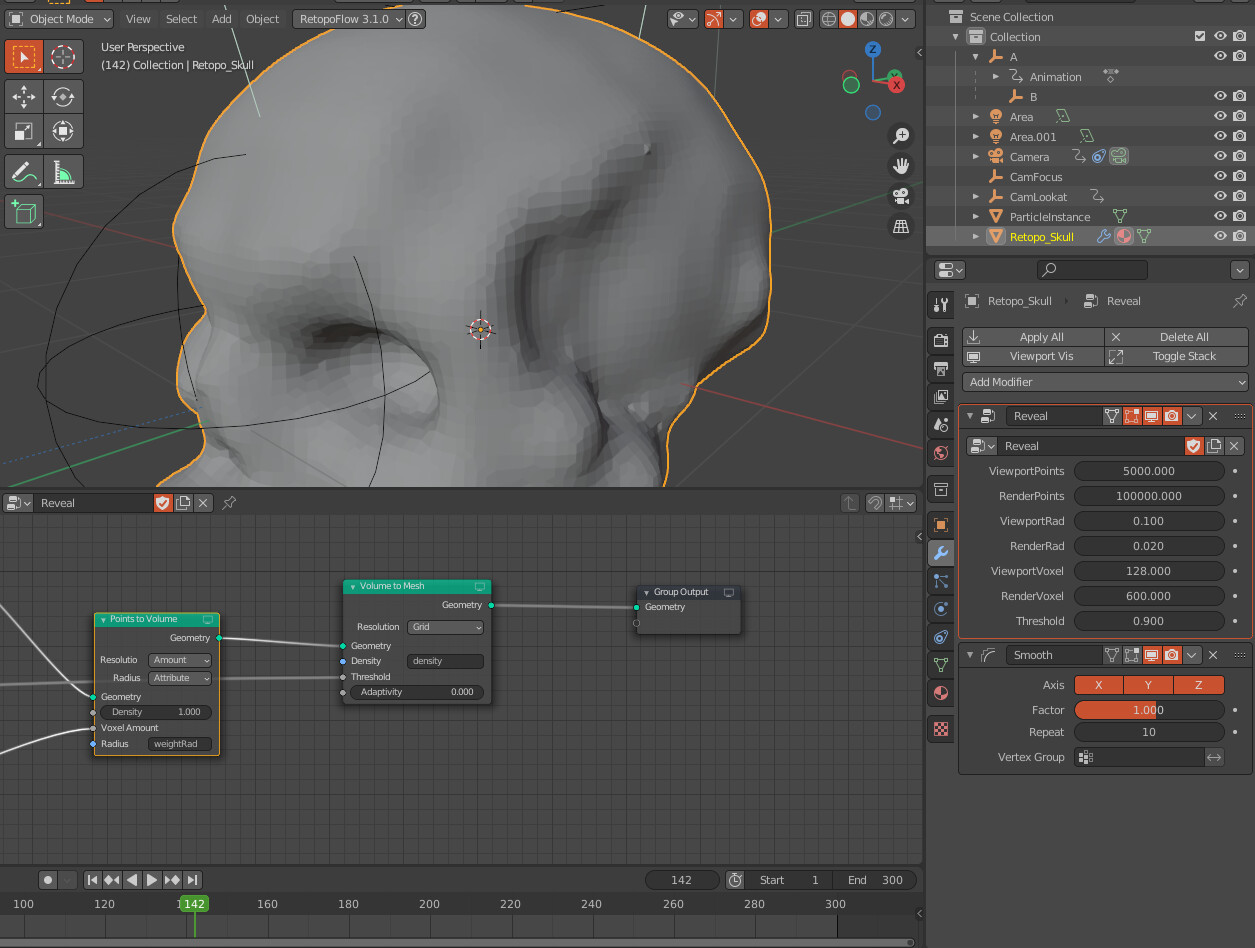
I’m testing a simple effect using Points to Volume and Volume to Mesh but the material of the original object is not used, does anyone know how can I keep the material of the original mesh or apply a new one?
The solution for 2.93 is to apply the material to the object instead of the original object data, which would override the lack of material on the generated mesh.
In 3.0 there is the material assign node that will make it much simpler.
3 Likes
Thanks Hans! It works now ![]()
Now I have another question, how can I set the mesh generated by the Volume to Mesh node to shade smooth? Adding a Smooth modifier after the GN modifier helps to disguise the flat shading a bit but it’s still flat shaded.

Oh I didn’t knew that was an attribute! Thanks!
Does anyone know how to do this effect ? Thx
https://twitter.com/Bbbn192/status/1401263211438088195
3 Likes
Who need MagicaCSG when you can just use Geometry Nodes @Metin_Seven ?

(ofc I am joking, this is so impractical)
7 Likes