@Musashidan, not at the moment, as @metamesh mentioned, blending or masking the regions is not supported yet. I am going to add that, but if enabled the Guide deformer will become slower.
“Curves to Guide” option can become part of the Guide deformer as well. At the moment it is located on the Generator, this is definitely unintuitive.
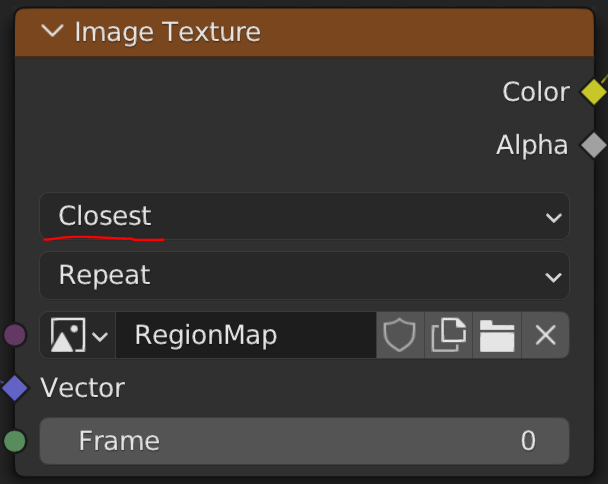
Also, I’ve failed to mention it in the beginning of the tutorial, but region maps should be always used with “Closest” type of interpolation in the image node:

I hope that will fix the region map issues for you guys.
@Inkino Thank you for the kind words! Regarding your question about the export to UE, I would suggest that you first have to make sure that the Geometry Nodes modifier on the Hair object is applied before exporting it in any kind of way.
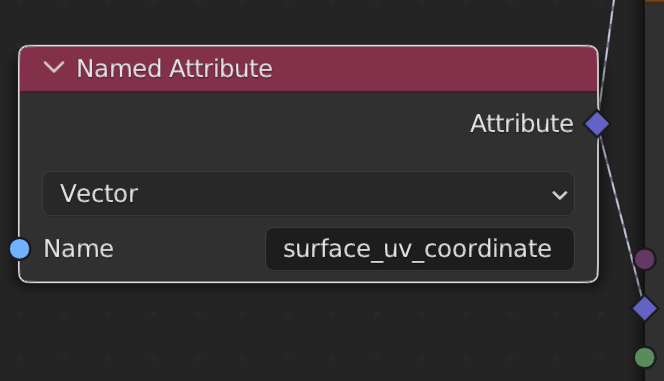
@metamesh, to layer the masks you can use the Edit Mode button ![]() on any Mask group and start working in the open node editor, that is where Blender really shows its strengths in my opinion. There you can start also mixing the noise as well, just don’t forget to use the mapping vector attribute surface_uv_coordinate.
on any Mask group and start working in the open node editor, that is where Blender really shows its strengths in my opinion. There you can start also mixing the noise as well, just don’t forget to use the mapping vector attribute surface_uv_coordinate.
 It is analogues to the regular UVMap just for the hair splines.
Bugs:
Hey @shaku_cg, and anybody who would like to help the development. Here is the GitHub project for bug submissions. Thank you!
@tallken I have just tested the Medusa Nodes on MacOS with freshly installed Blender. No issues there.
The bug you have encountered could be connected to some addon or user pref settings in your Blender.