In regards to the Control Points it makes sense. We can have different CP count on them, so you would see actual CPs of the guides and change them independently from the hair object’s CPs.
Yes, I thought about blending between the region areas for smoother transition. This option will be optional, because it will make the Guide deformer slower.
Okay. I somewhat overreacted as I had tired myself out trying to get this to work…
I guess I’ll wait until you find the time to produce a new tutorial…
In the meantime, here’s a potential bug: many times when I have clicked the “New Groom” button, a new hair object is created, but the Medusa Node Hierarchy window stays empty and it isn’t possible to create the Guide object on top of it…
HI! Thank you for this add on. I am trying this add-on and I feel very good about UX, that is very intuitive! Great
I would like to request a feature to control hair density more easily.
e.g., How about putting Named Attribute node used for Density Map socket of MN Generator into Medusa Nodes Hierarchy form in 3D View Port Editor, so that we can make the hair part without using Geometry Node Editor.
In the video, the hair area is taking a long time to separate because the Suzanne object and hair are clicked many times by me, going back and forth between Weight Paint mode and Object mode. It is hard to switch screens and click any more.
So it would be nice to be able to do this more easily.
Most of the parameters do not support vertex groups as an input, but the Density Map does support them.
If I understand you correctly, you can already do this kind of thing by adding any Mask Group and then entering its Edit Mode by clicking on this button.
After that you can define your input parameter and name it however you would like. Last step would be entering Vertex Group’s name into the text field.
Also, choosing the right data type in the attribute node is important as well. For the vertex groups, float type would probably make most sense.
I have just updated the addon. It should hopefully fix most of the issues tied to the hierarchy and the selection of the hair / guide objects.
Please make sure to uninstall the previous version of the addon first!
The new update includes bug and usability fixes:
v1.0.2 (29/01/23):
The bug where hierarchy would not update after the manual switch from sculpt or paint modes is now fixed. It was causing most of the hierarchy update issues.
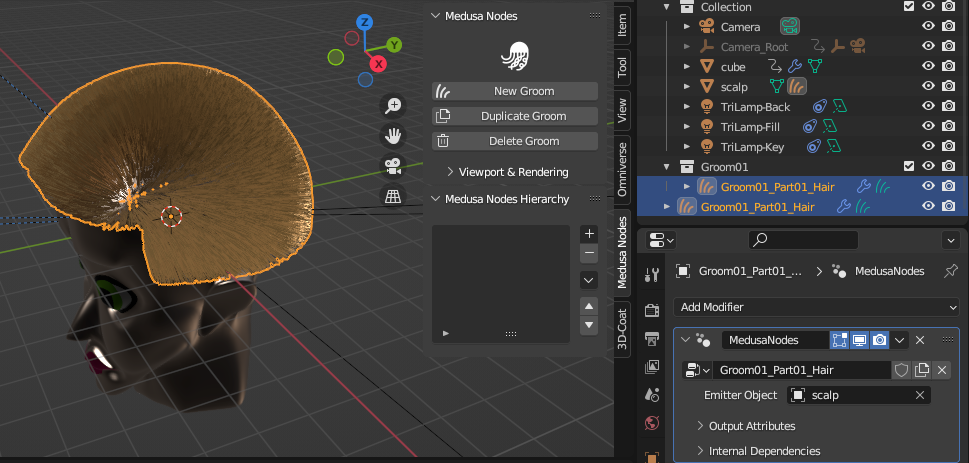
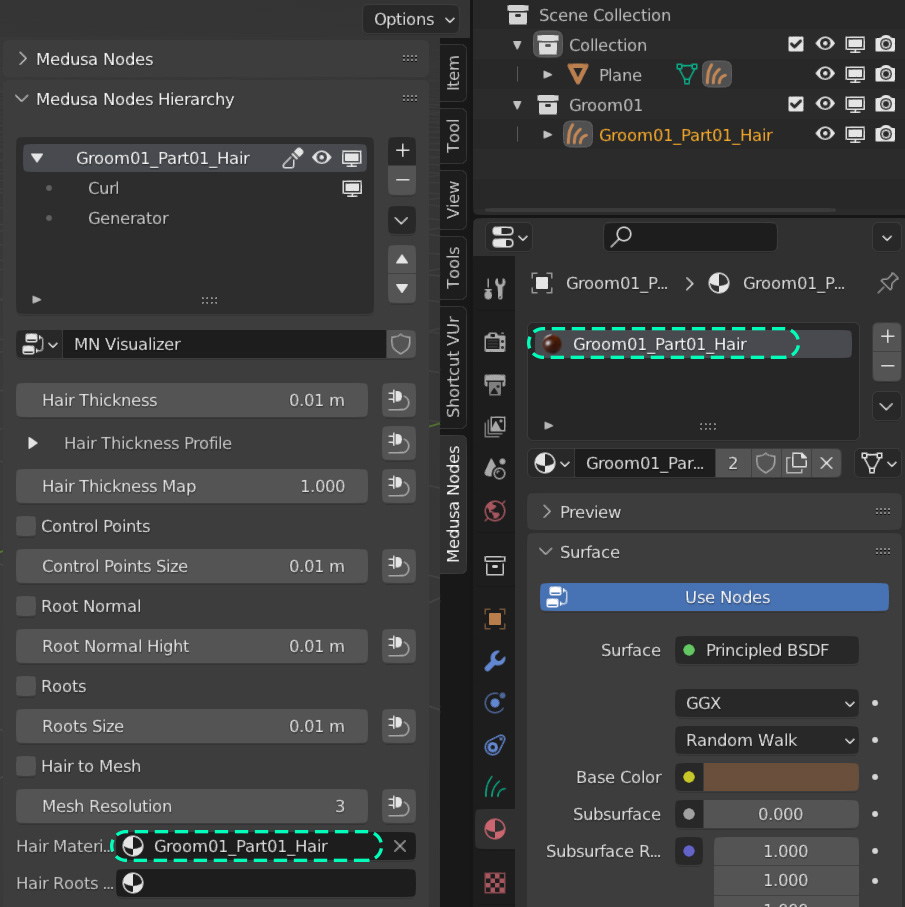
Materials are now also visible in the object’s material slot. This makes Shader Editor accessible for editing. Note: when switching the material, the new material should be added to both - the hair object’s material slot and the material slot of the Visualizer node.
Meuda 1.02 Beta, I can create hairs, but whenever i create a guide layer, I can’t add guides manually, for some reason it does not work since updated to 1.02, so I can’t really do anything at the moment, am I the only one?
@tallken thanks for showing that. I hope somebody else can confirm that the hierarchy is missing on MacOS entirely.
Alternatively, there is also a chance that the issue is caused by some different addon.
@metamesh
Does this happen in the completely new scene?
Are you able to enter the hair sculpt mode on your guide object?
The updated version works perfectly ! No more update problem when selecting objects in the Outliner, the Medusa Addon is updating properly. Thank you for that !
But I’ve found a new problem
Is there a way to map an image texture to the thickness map ? Apparently it’s not possible (just try on a simple scene with a simple generator on a sphere) but for fur, I would really love to be able to control this… Is this a limitation or a bug ?
@shaku_cg, thanks for showing the bug. I will look into that.
@matray, thank you for the feedback as well, pleased to hear that!
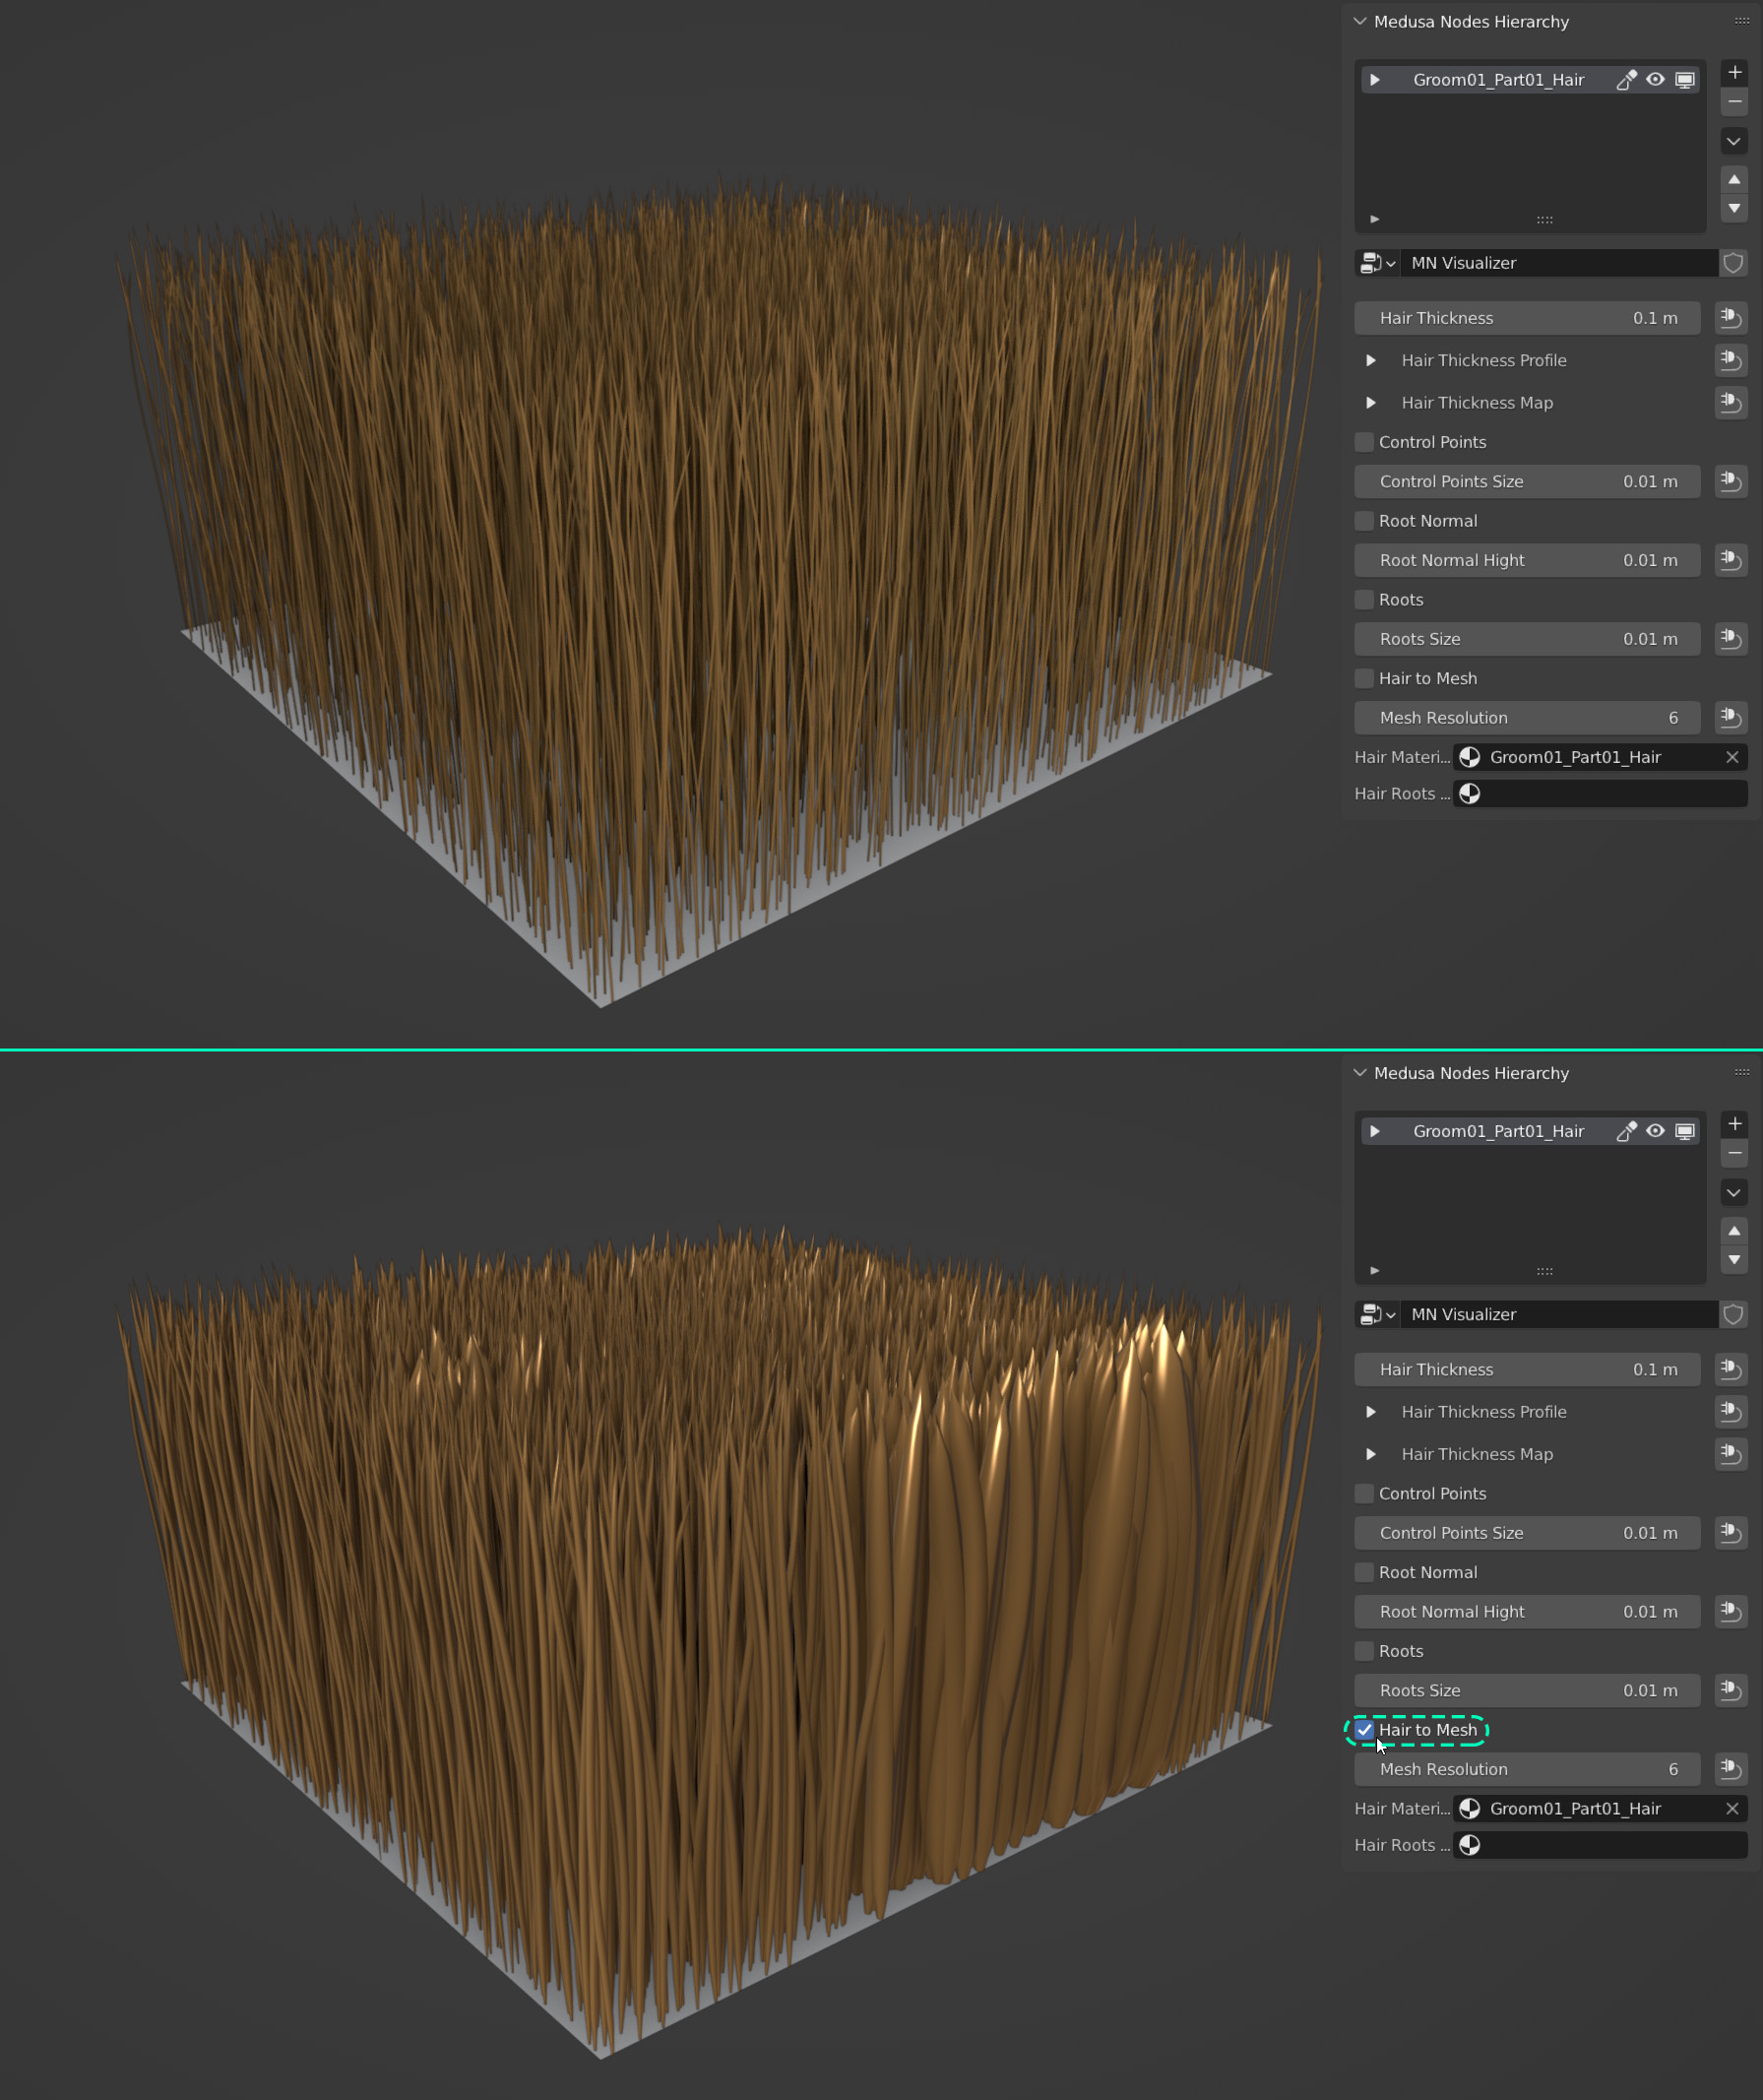
The thickness maps are only visible in Cycles render mode. Eevee and the Viewport doesn’t represent the actual thickness modulation of the new Hair object at the moment.
If you still would like to see the thickness and the actual profile of the hairs you could temporarily enable the “Hair to Mesh” option in the Visualizer Node. Keep in mind it will make the groom really slow.
Ikakupa, I restarted my computer and now is working fine…so weird
The tool is very promissing. I really like how the interpolation of the hairs, it does a very good job in that area… I think blender brushes etc are a bit underdeveloped still, but ur tool is actually really nice, hopefully it will evolve into something more developed too, and more production ready, keep up the good work man!
@matray, you are welcome! The documentation needs to have exactly this kind of information.
@metamesh thank you for the Feeback, I will continue working on the addon. Yes, at the moment main Focus lays on the making the addon as robust, bug free as possible and making it production ready is big part of it.
Hey Ikakupa
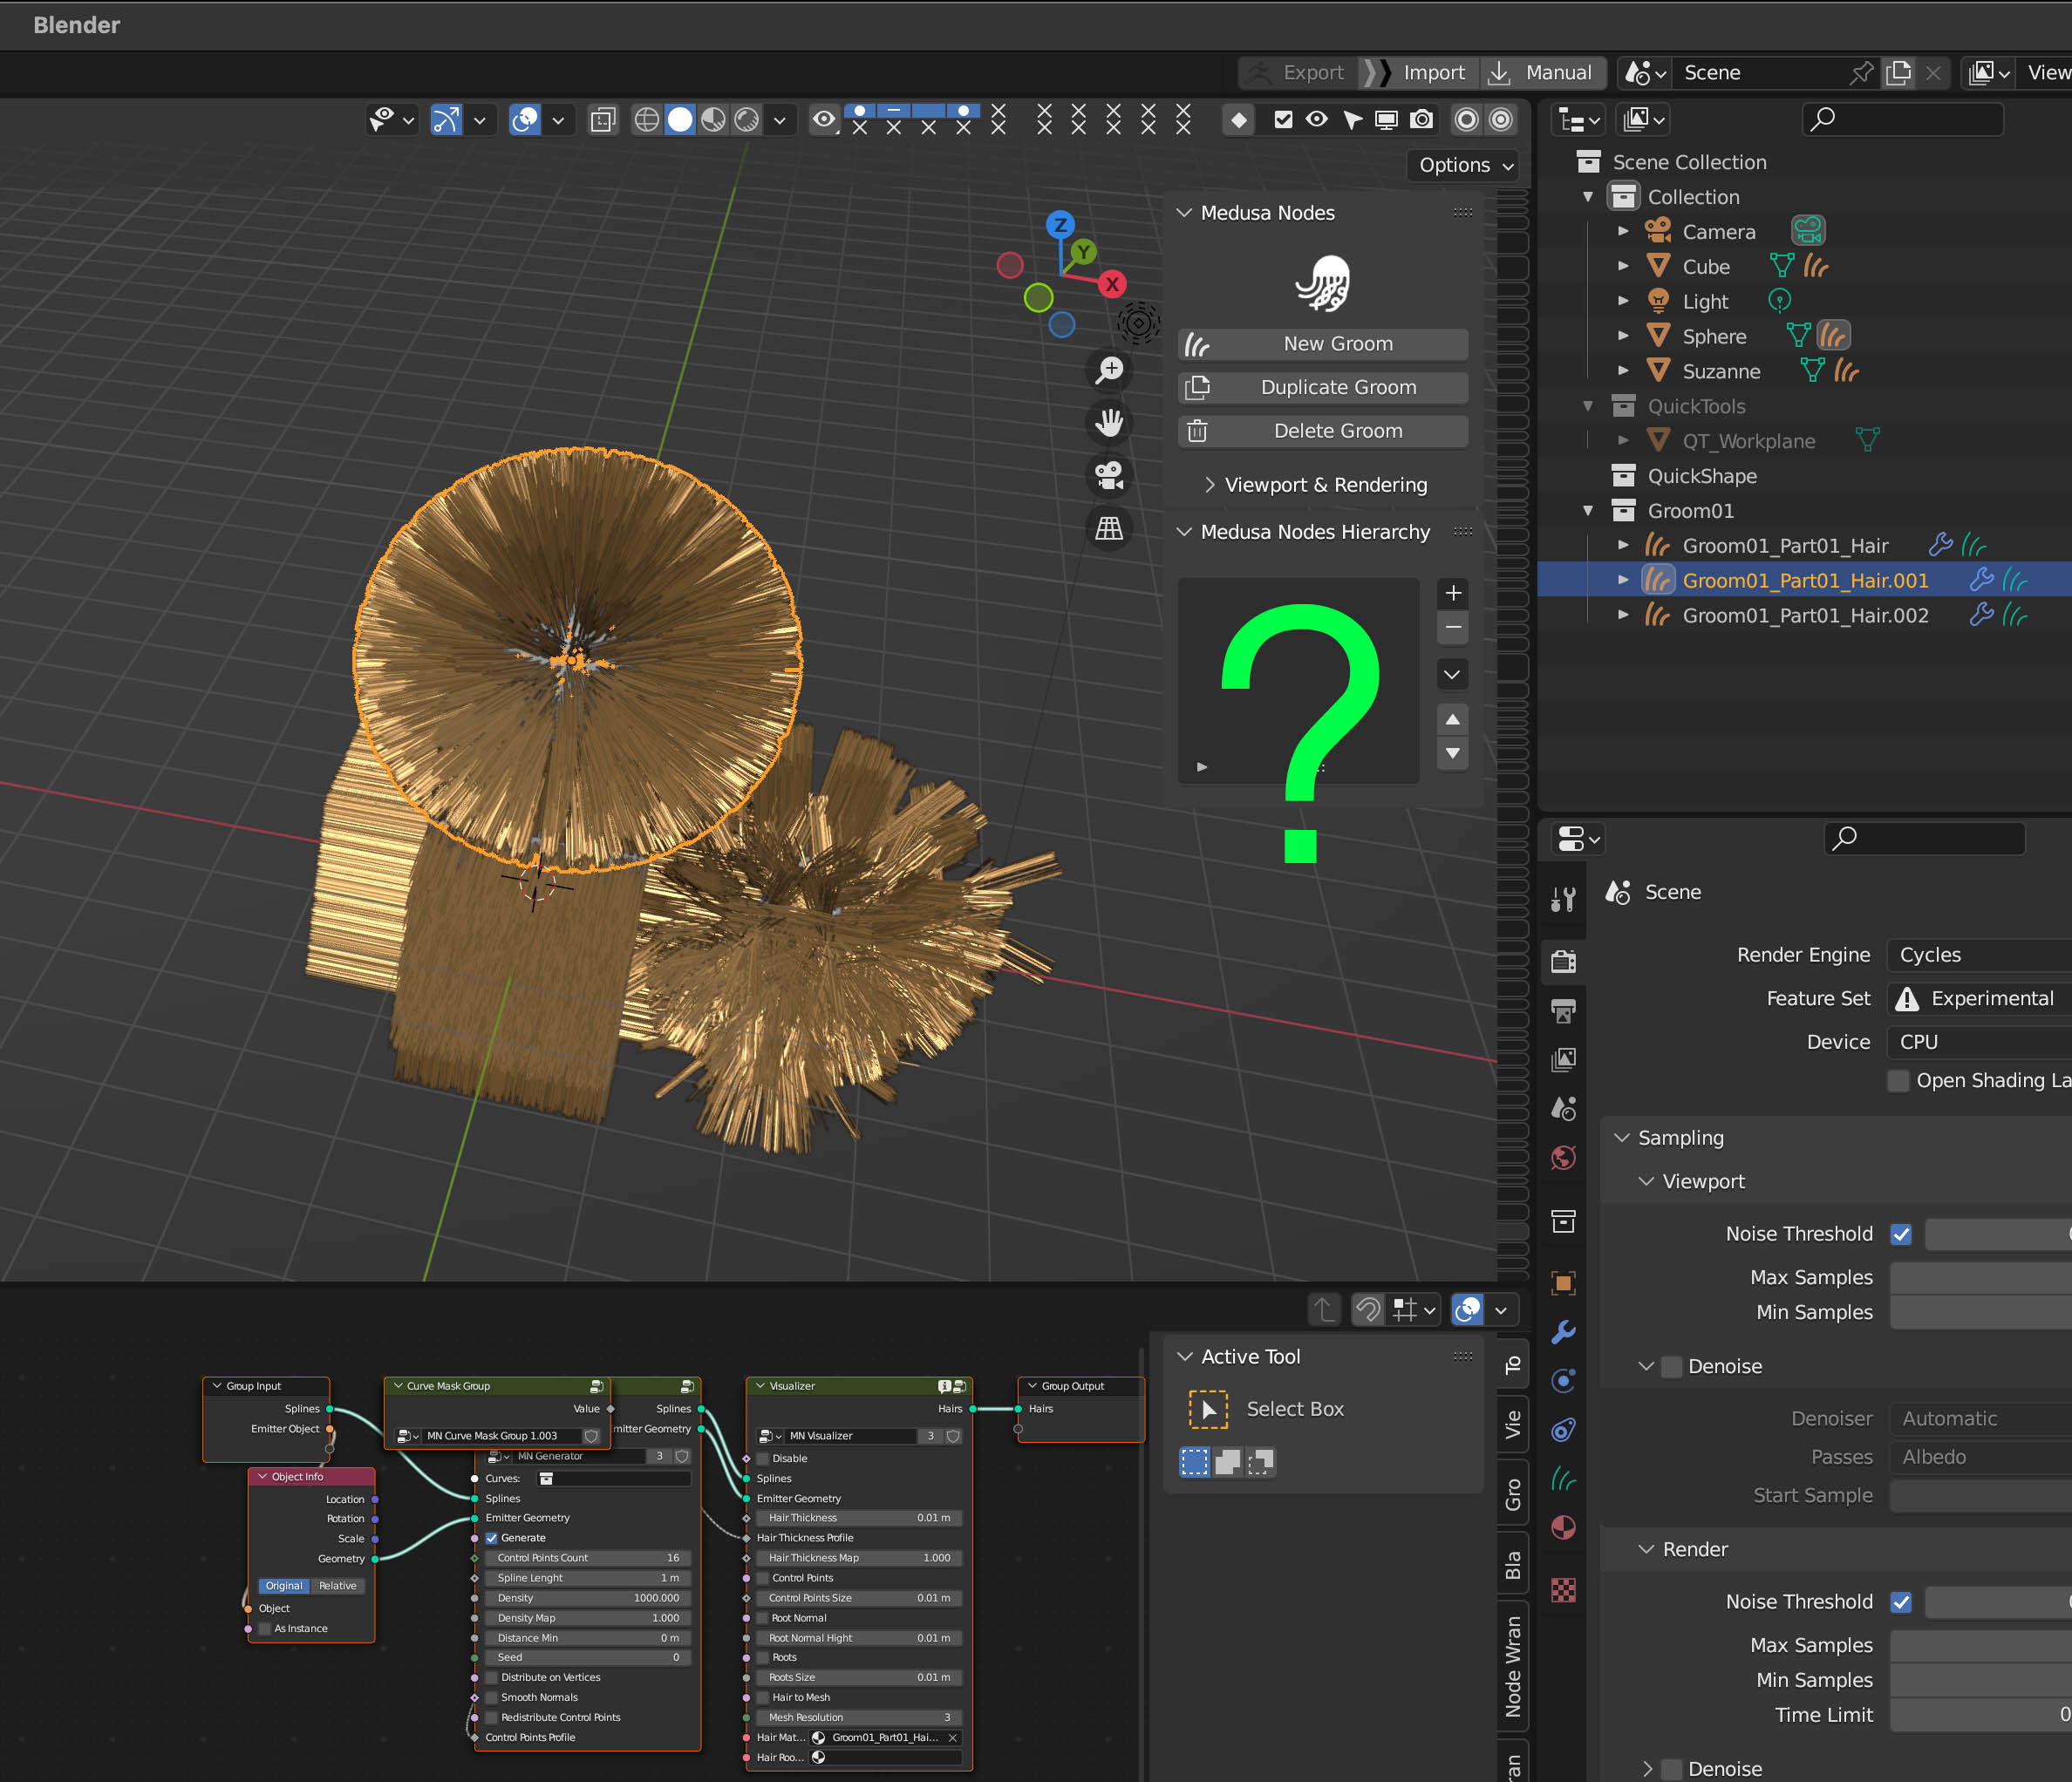
there is something fishy going on with 1.0.2 definitely. Twice has happened already that in the medusa Nodes Hierarchy, the main groom/generators disappear and I can’t tweak the values anymore. The only thing left in the list is the guided curves and its generator…i think both times has happened when i went into sculpt mode for the guides. I checked just to make sure i haven’t done anything wrong, and everything seems to be in order, no human error I believe, but still the hierarchy window only displays the guide layer…
Hey @metamesh, are you able to send me the blend file via DMs?
Where you able to undo the last last steps, to bring the groom into the state where the hierarchy was fine again?
@ikakupa , Is there good format to send information like bug reports or suggestions or requests?
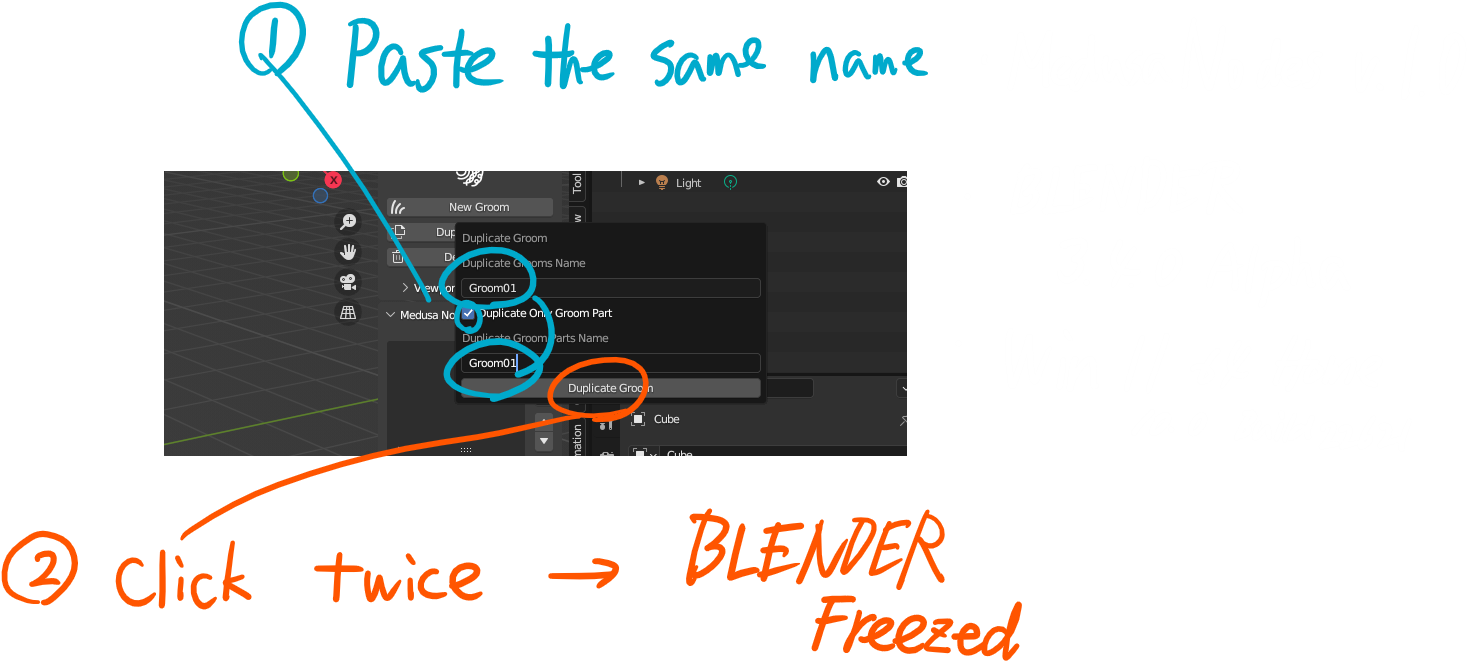
I am going to send you an accumulated information (like this image)so that you can organize and watch them in a short time