The File Output node’s purpose is to save a file to your hard drive. What you see in the render is what is directed to the Composite node. If you want to see what is going to your Output node, send the same information to the Composite node.
What Benu says is true. If you actually create a folder on your computer and browse to that folder from the fileoutput node, then render, you will see the file is created on the disk, but does not show up in the image viewer. Also remember that the render range of the fileoutput node is manual (it is not linked to the timeline). On creation it populates it’s start and end frame with the values from the timeline. But if you change the length of your animation, you must also re-visit each fileoutput node and set the StartFrame and EndFrame to the new animation range.
Right, it works! Now I have to use these nodes on my own scene and not the test scene provided her…, but my own scene already has node system, namely defocus, any smart ways to change one nodesytem to another?
You can group nodes in your test blend and then append them to your final blend file if you want (I haven’t been able to import them without grouping them first for some reason). Or, if the setup isn’t all that complex, it may just be faster to add the needed nodes to your current setup. (Plus redoing it helps to remember how you did it in the first place – or at least it helps me remember when I do it that way.)
There is a simple bit of maths that makes the map value node clear:
the z channel internally in blender starts at zero and progresses out with floating point values in blender units… so when you look at this raw value you only get grayscale values for the first meter… beyond which it’s “too bright” to display…
for after effects we want to change to remap from the camera near clip plane to the far clip plane to get an output range 0-1 (black to white)
so if the near clip plane is at 0.1 blender units and the far clip plane at 100 then we want the black point to be values at 0.1 and the white point to be values at 100
using the “map value” node first we subtract the near clip plane so in teh above example set offset to -0.1
the “range” is from the near to the far clip plane 100 - 0.1 = 99.9 so to map our range 0-1 we scale by 1/range (in this case 1/99.9) = 0.01001001 so in practice you can just divide by far clip… it’s probably close enough!
so to sum up:
offset is -1 * near clip plane
scale =1/(far clip - near clip)
luckily you can use the entry fields in the map value node as a calculator!
Don’t forget, these near and far clip planes are properties of the camera, not the viewport!
Thanks Mike. That’s very useful information!
thanks for the blend Atom, very useful.
I did some testing with this today and I may have missed something. When using this in AE with the “lens blur” it blurs the fill “image” but not the transparency/alpha. Giving it an unrealistic appearance, at least on heavy DOF shots.
By the way I grouped the node setup using 2.57 and named the node group which will allow people to append this group directly into their projects… hope you don’t mind:)
Attachments
Hey comeinandburn,
I’ve run into the exact same difficulty I believe you have, with the inside of the beauty render being blurred but not the silhouette. Did you ever find a solution?
Hey guys
After all this time, I am once again trying to find a good depth of field method, and BENU´s instructions are really good! although the EXR files are horribly big!
However I had months ago beginners luck, everything worked out perfectly! but now that I am trying to do it again, it doesnt work!! Perhaps someone can help?
Included you will find an after effects file (152 kb) with an image - the method by Burn included as a quote below has been used, but the blur effect does not use the z-depth info of the EXR file. What is wrong?
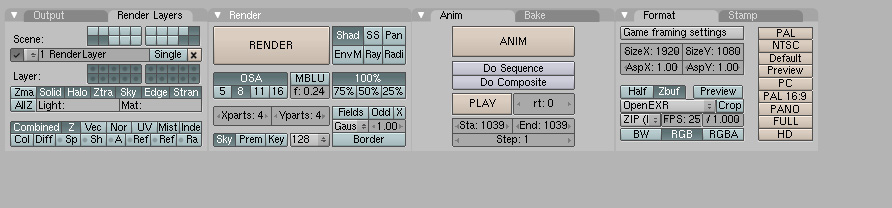
I include a screenshot of my blender settings, a thought the problem was RGB, but choosing RGBA doesnt fix the problem. The picture included in the AE file is RGB.
Attachments
EXR_AE_issue.zip (10.7 KB)Hey guys
After all this time, I am once again trying to find a good depth of field method, and BENU´s instructions are really good! although the EXR files are horribly big!
However I had months ago beginners luck, everything worked out perfectly! but now that I am trying to do it again, it doesnt work!! Perhaps someone can help?
Included you will find an after effects file (152 kb) with an image - the method by Burn included as a quote below has been used, but the compound blur effect does not use the z-depth info of the EXR file,so no depth of field effect is achieved although the EXR files should provide the necessary information. What is wrong? Please help me ![]()
I include a screenshot of my blender settings, I thought the problem was RGB, but choosing RGBA doesnt fix the problem. The picture included in the AE file is RGB.
Attachments
- You didn’t include the exr file, but just aep, so it’s not that easy to see what you are doing, but that’s not a big problem.
- Why is your AE project set to 8bpc?
- If you upload your exr, I could take a look at it and determine if there are any other issues.
- You applied blur effect that should use data from another layer - in this case - from exr file, but you have to remember that in such cases After Effects doesn’t see the effects applied to layer you get data from.
You have to first pre-compose your exr, apply “Extractor” to it in pre-composition and then use it as the source of the blur amount. - Because you didn’t attach your exr, I’m not sure about it, but I don’t think “extractor” can extract Z-buffer if you don’t save your render from blender as MultiLayer exr.
@Jacqueline: you need to apply the EXR extraction plugin inside the precomp (“Comp 1” in your AE project). In the project you posted, you have the effect applied to a layer inside the final comp. The Lens Blur filter (or the Compound Blur filter, if you prefer to use that one) references another layer, but these filters always look at the referenced layer BEFORE any filters are applied, which is why you need all the image-prep filters to go inside an earlier comp.